
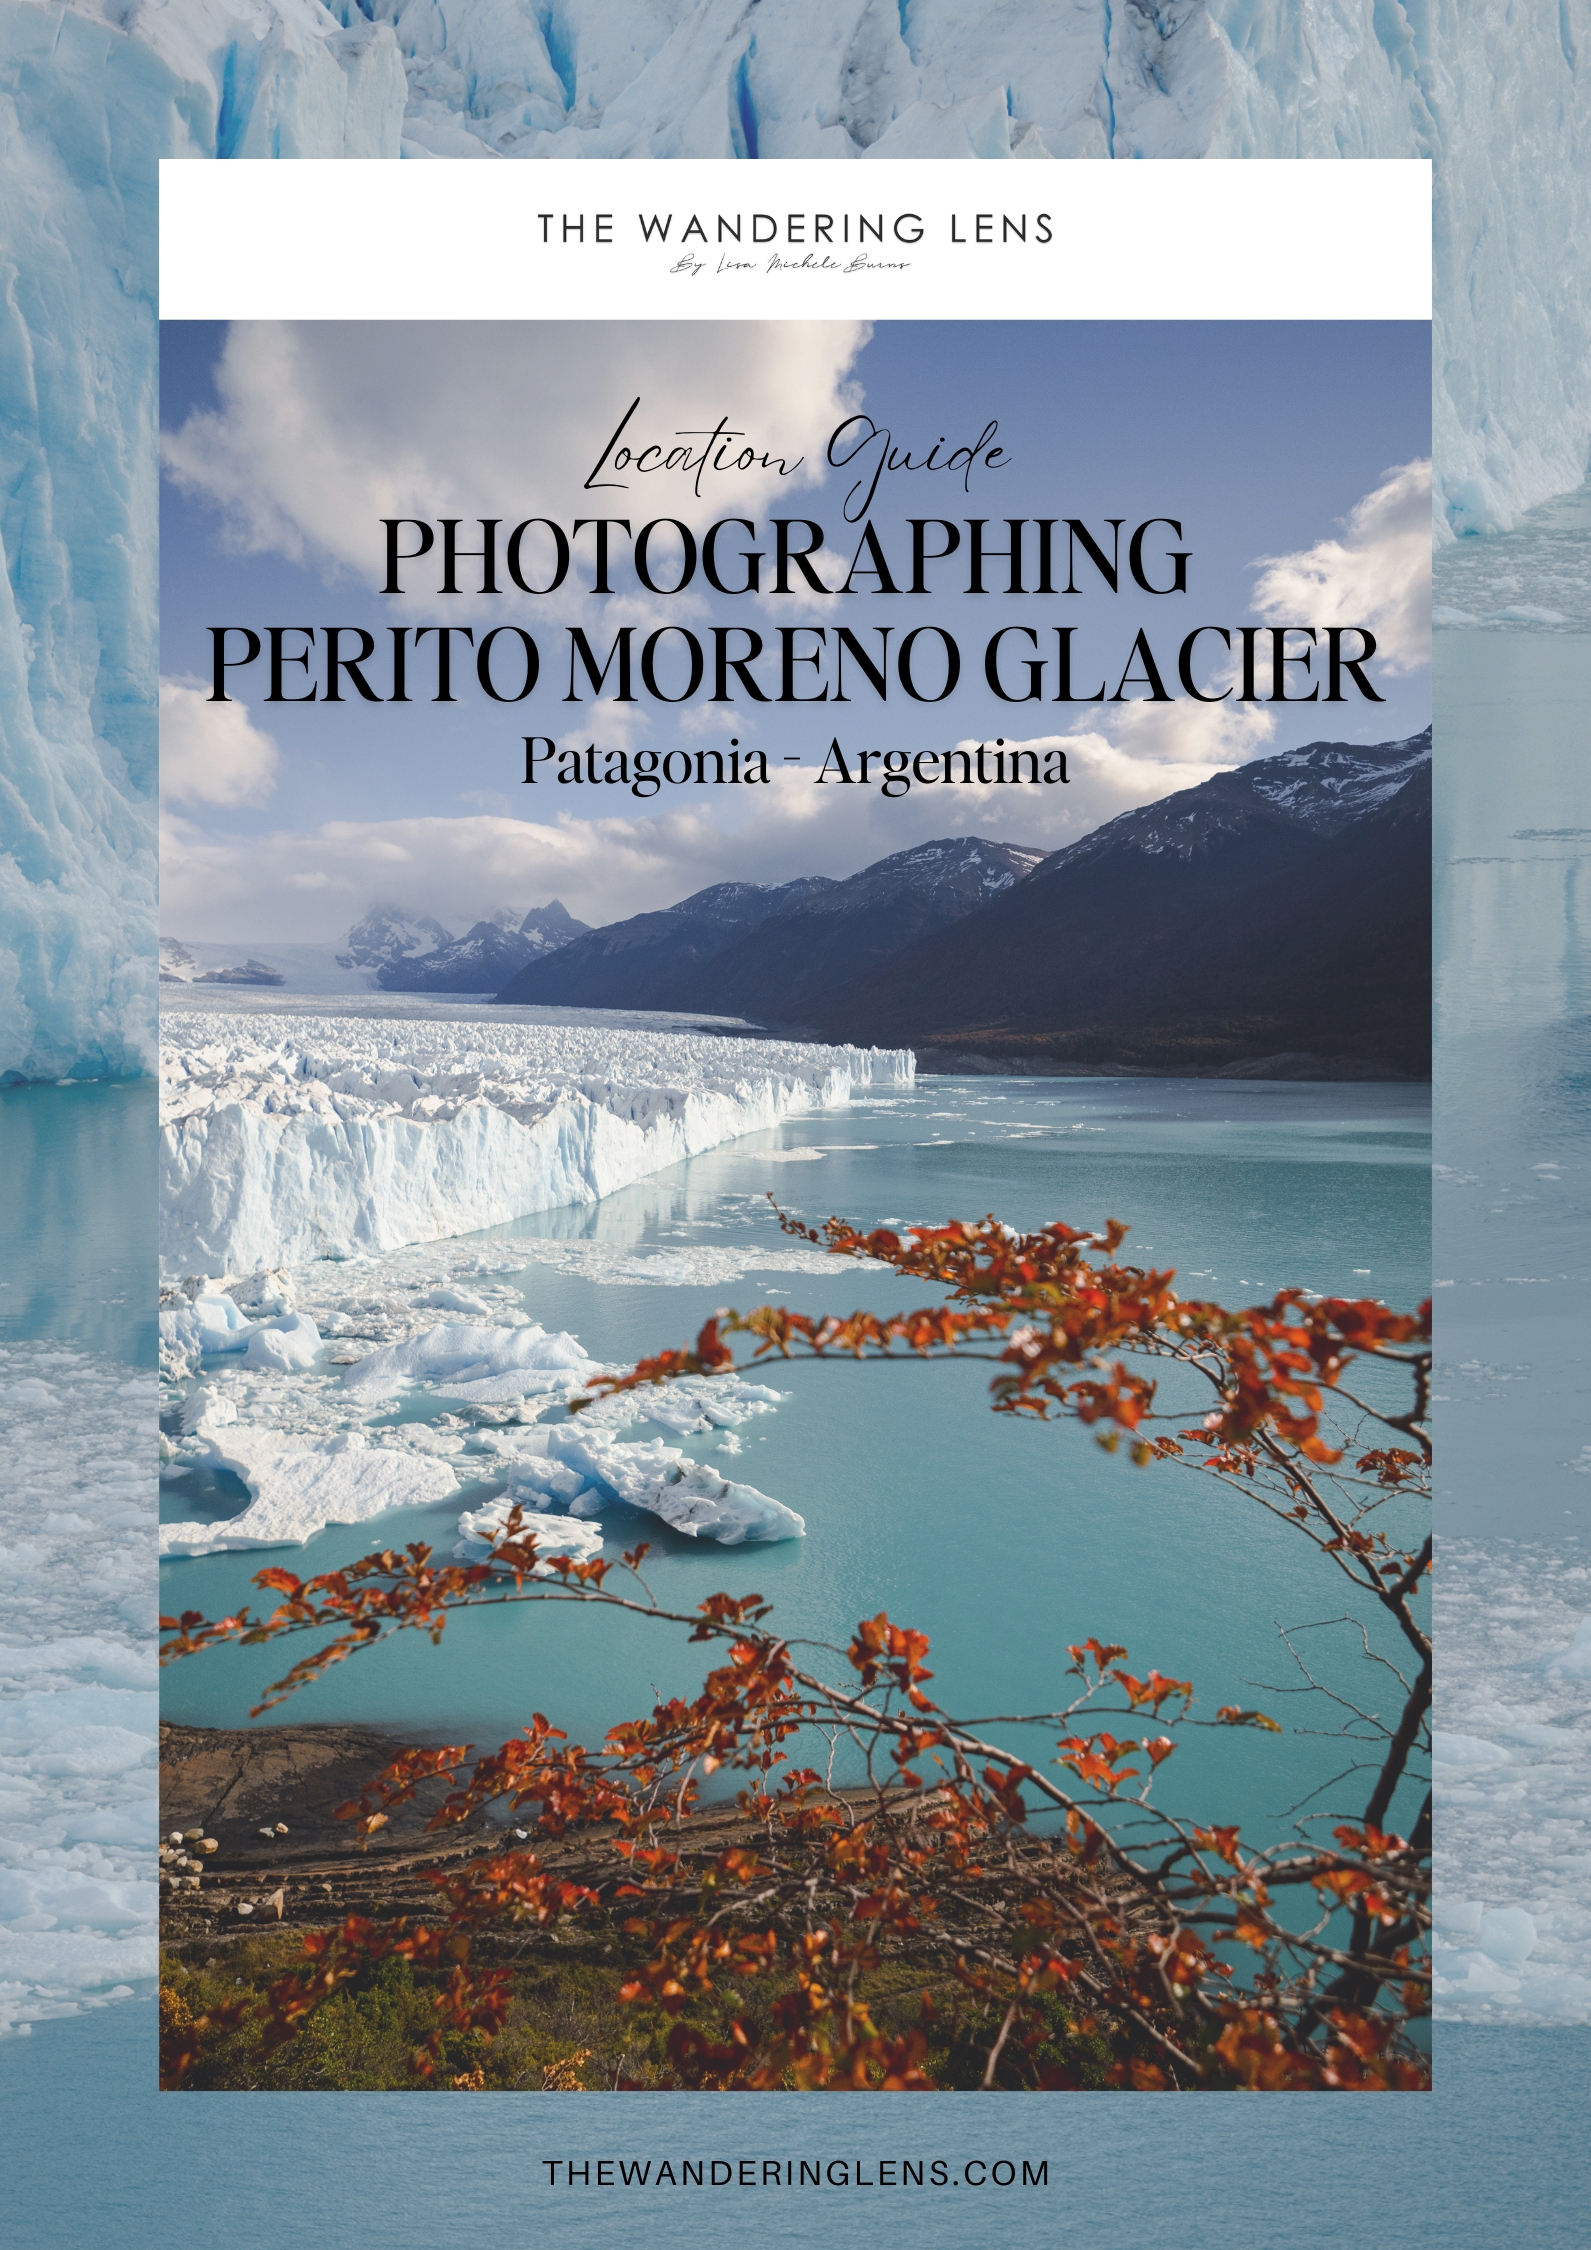
Let’s Photograph the Magnificent Perito Moreno Glacier in Patagonia!
I had seen the videos of glacial calvings crashing into the lake, of bubbling bergs popping up out of the watery blue abyss and knew that if I ever got to visit Patagonia, I needed to see Perito Moreno Glacier in all of its sparkling splendour.
Icy wonders are right at the top of my list of favourite things to photograph and having spent a lot of time in the Arctic photographing glaciers and icebergs, I wasn’t sure what to expect with this beauty.
Spoiler – it’s well worth a visit…or multiple!
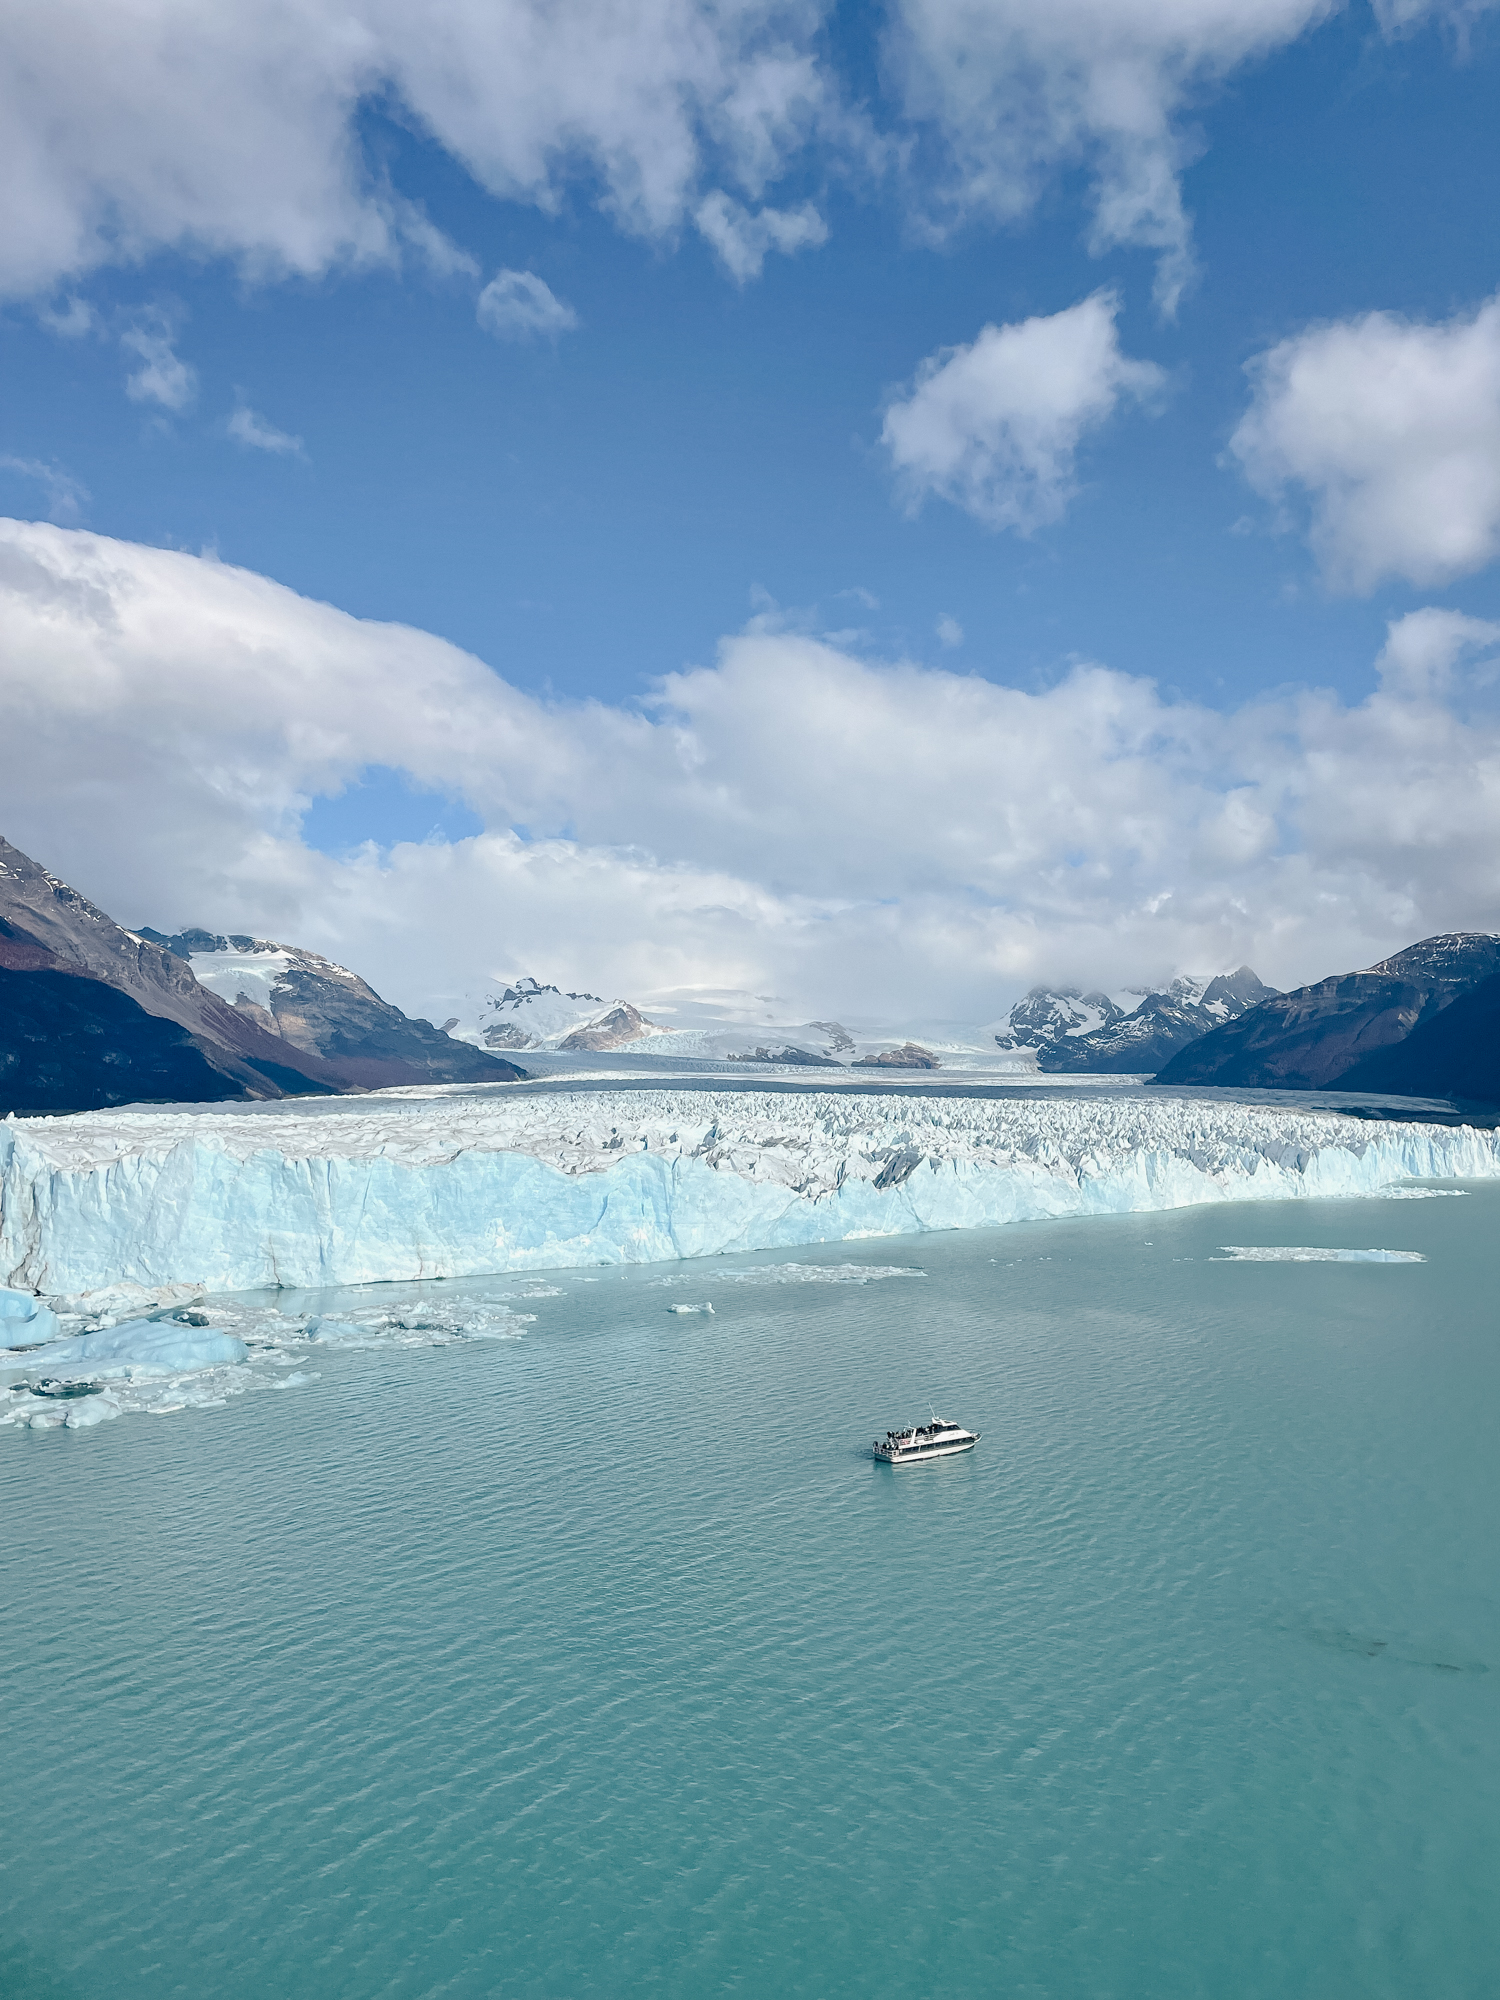
What makes Perito Moreno Glacier different is the ease of access and how close you can get to the glacial face or terminus. Once you’ve reached El Calafate, it’s easy to hire a car, take a bus or book a day tour and find yourself staring at this natural wonder within two hours of having breakfast.
Perito Moreno Glacier is located within Los Glaciares National Park, about a 90-minute drive from El Calafate in Argentina. Unlike the majority of glaciers around the world, this one differs in that the glacier is growing, rather than retreating and you can get up close to witness the patterns, ice and hopefully, crashing calving events.
What you can photograph at Perito Moreno Glacier?
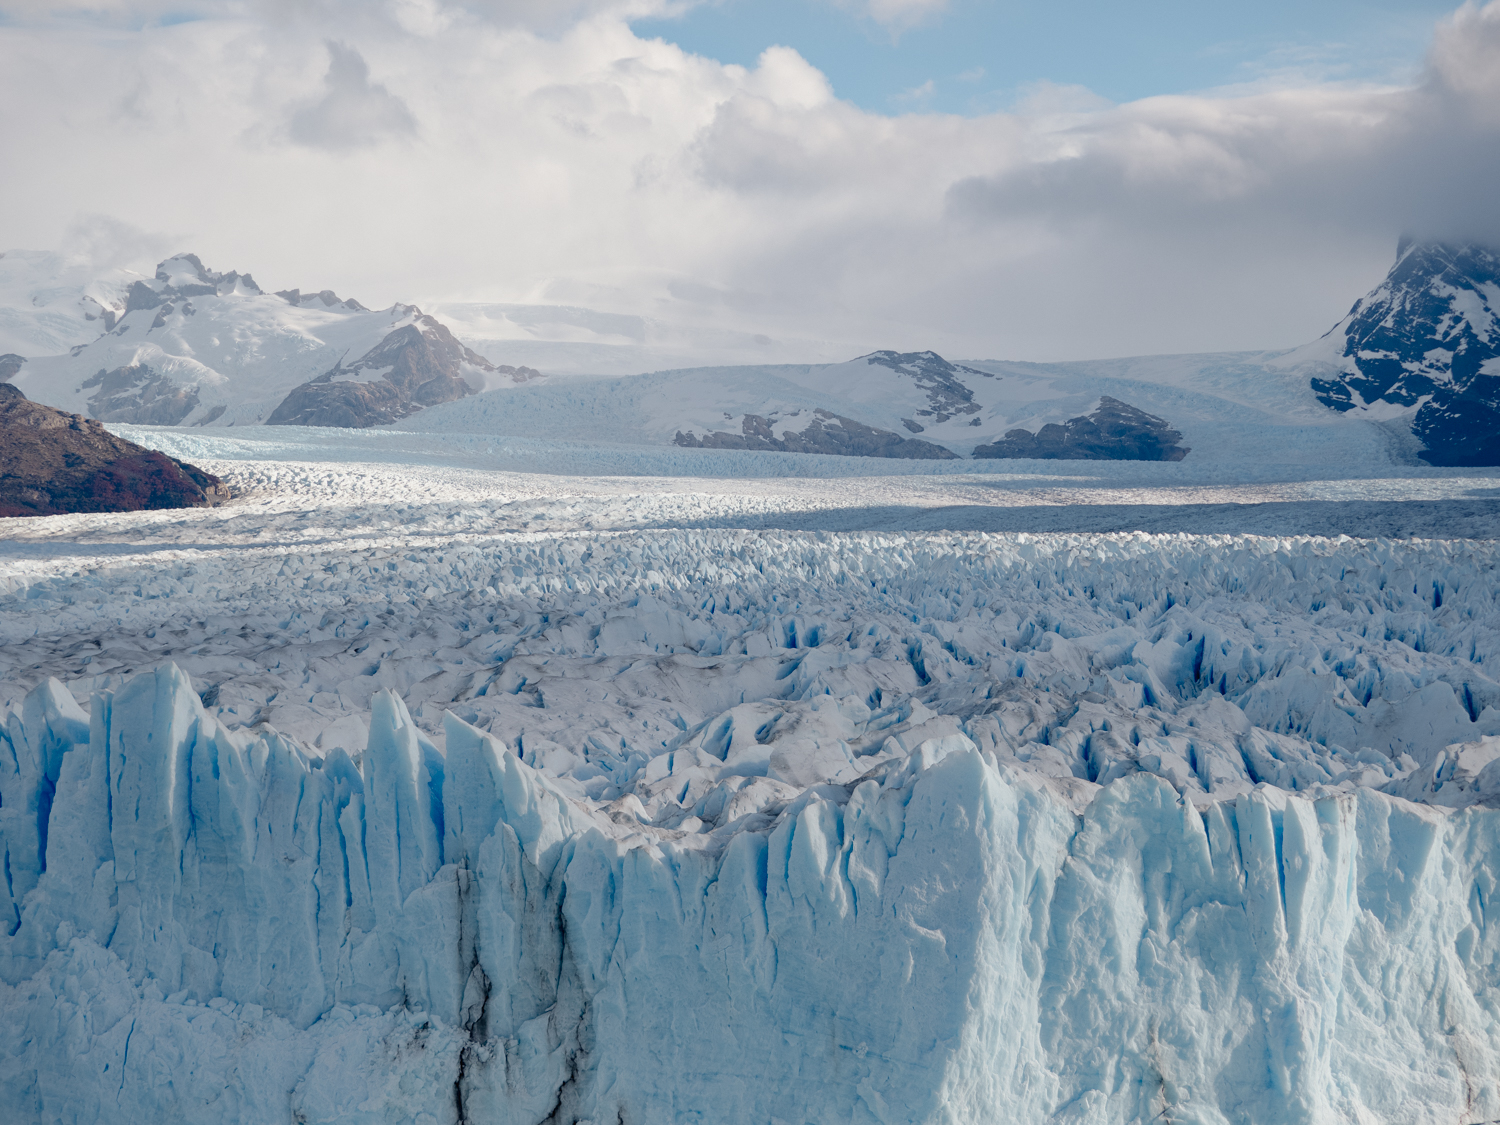
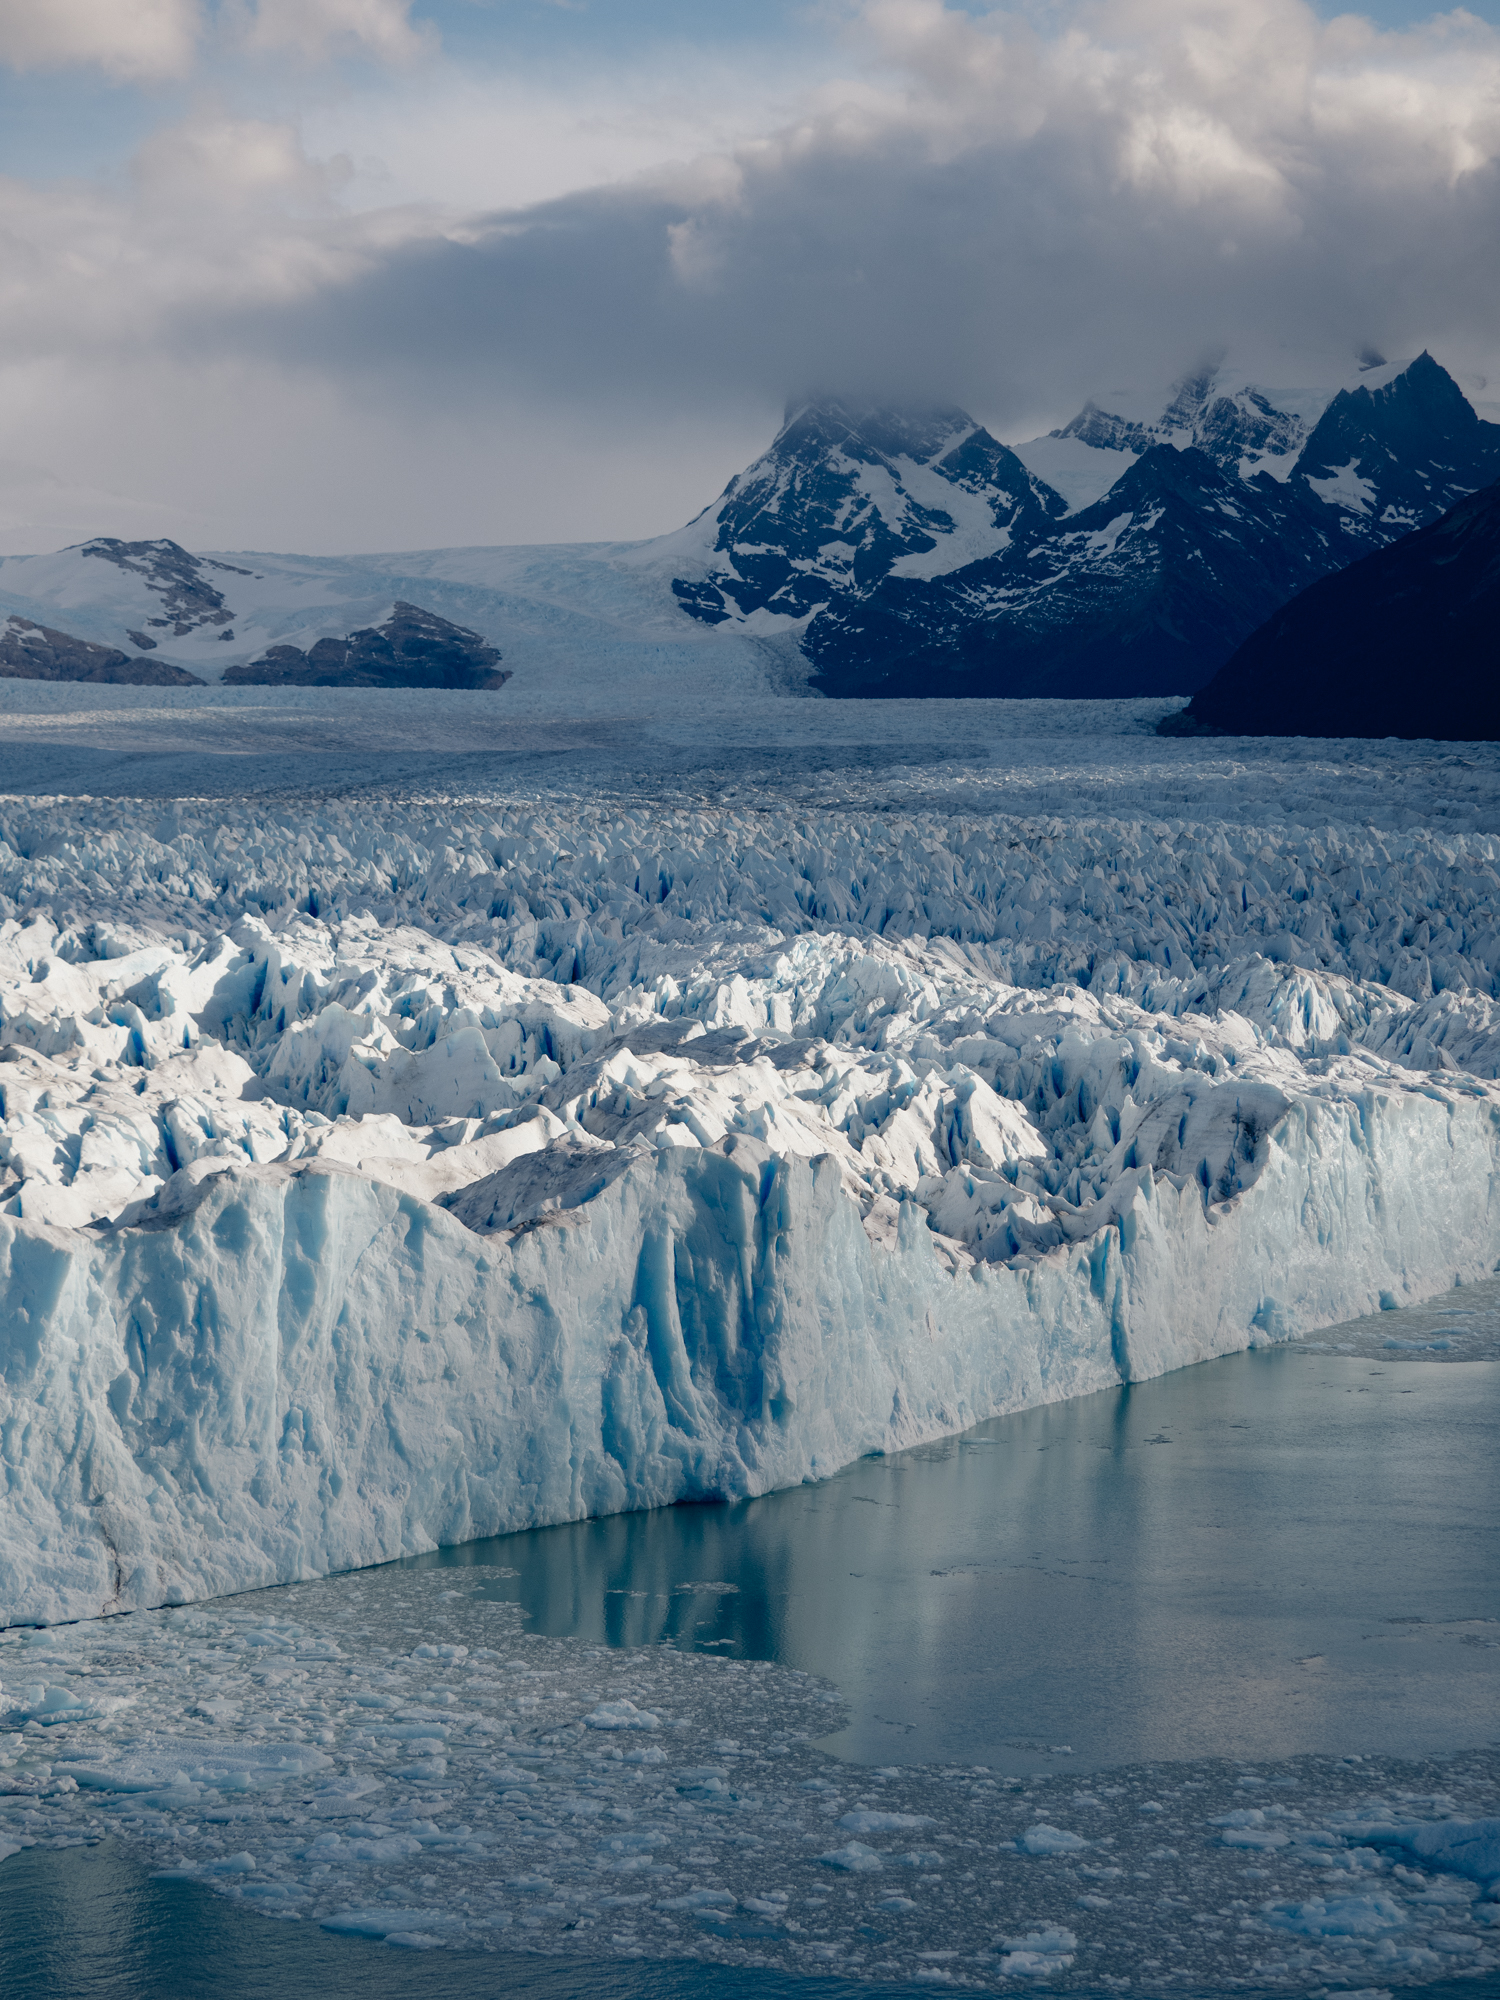
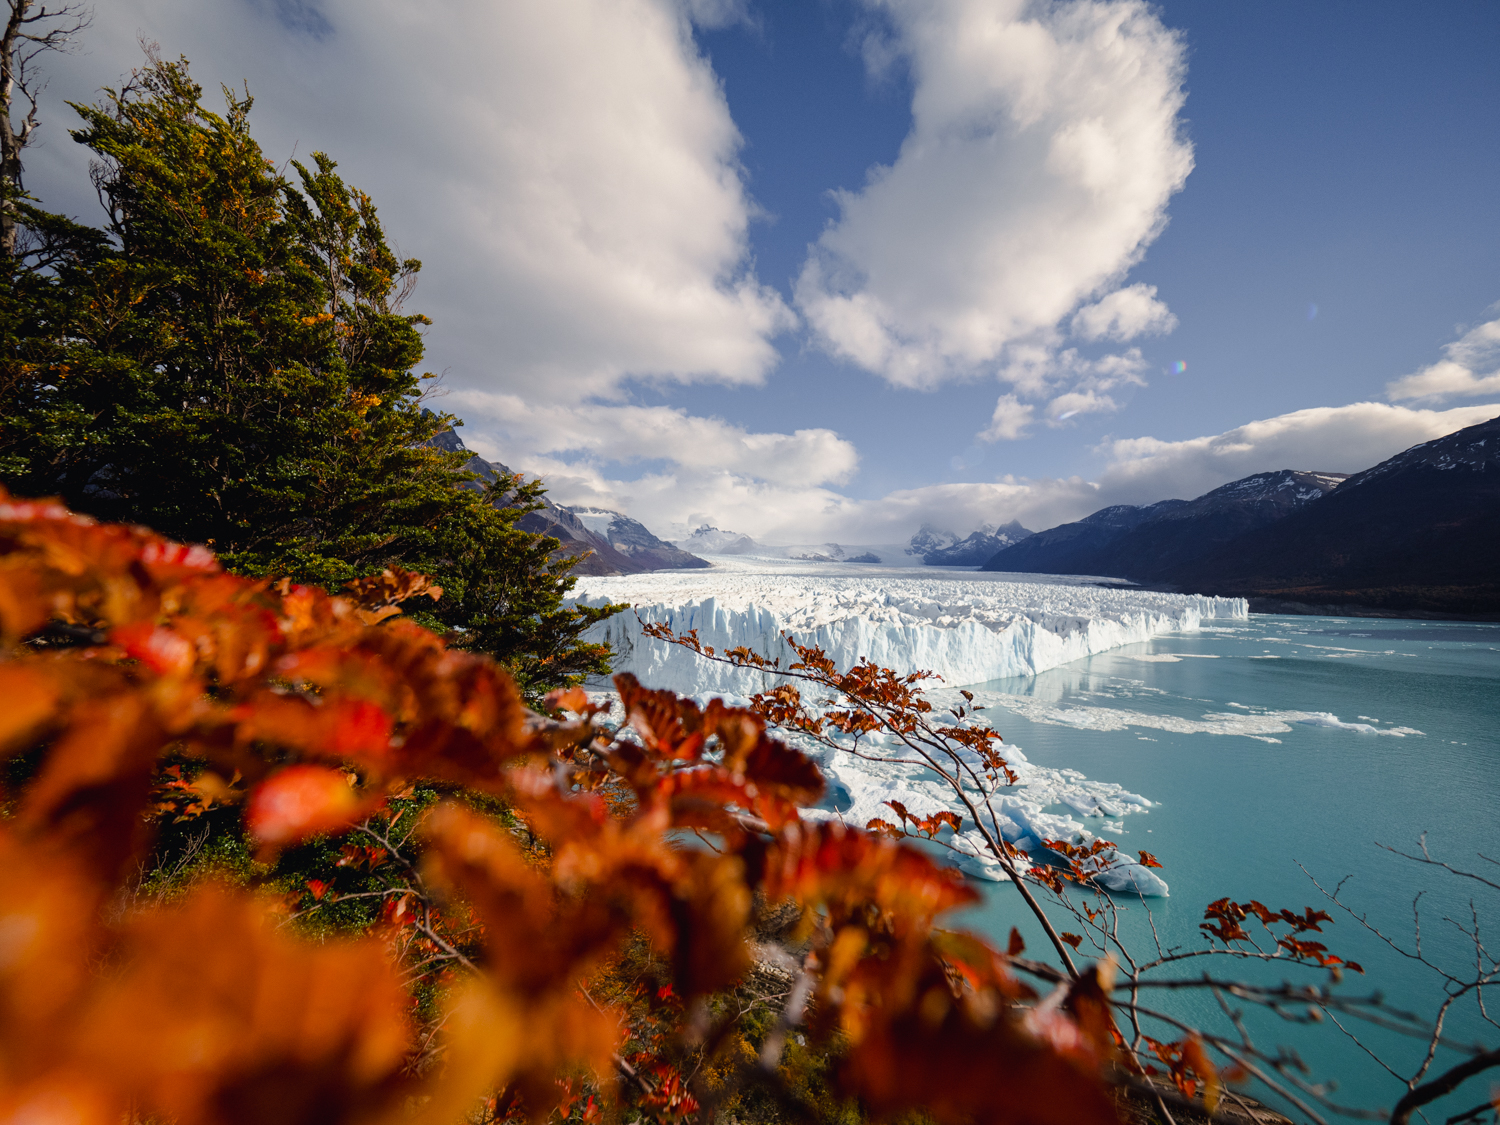
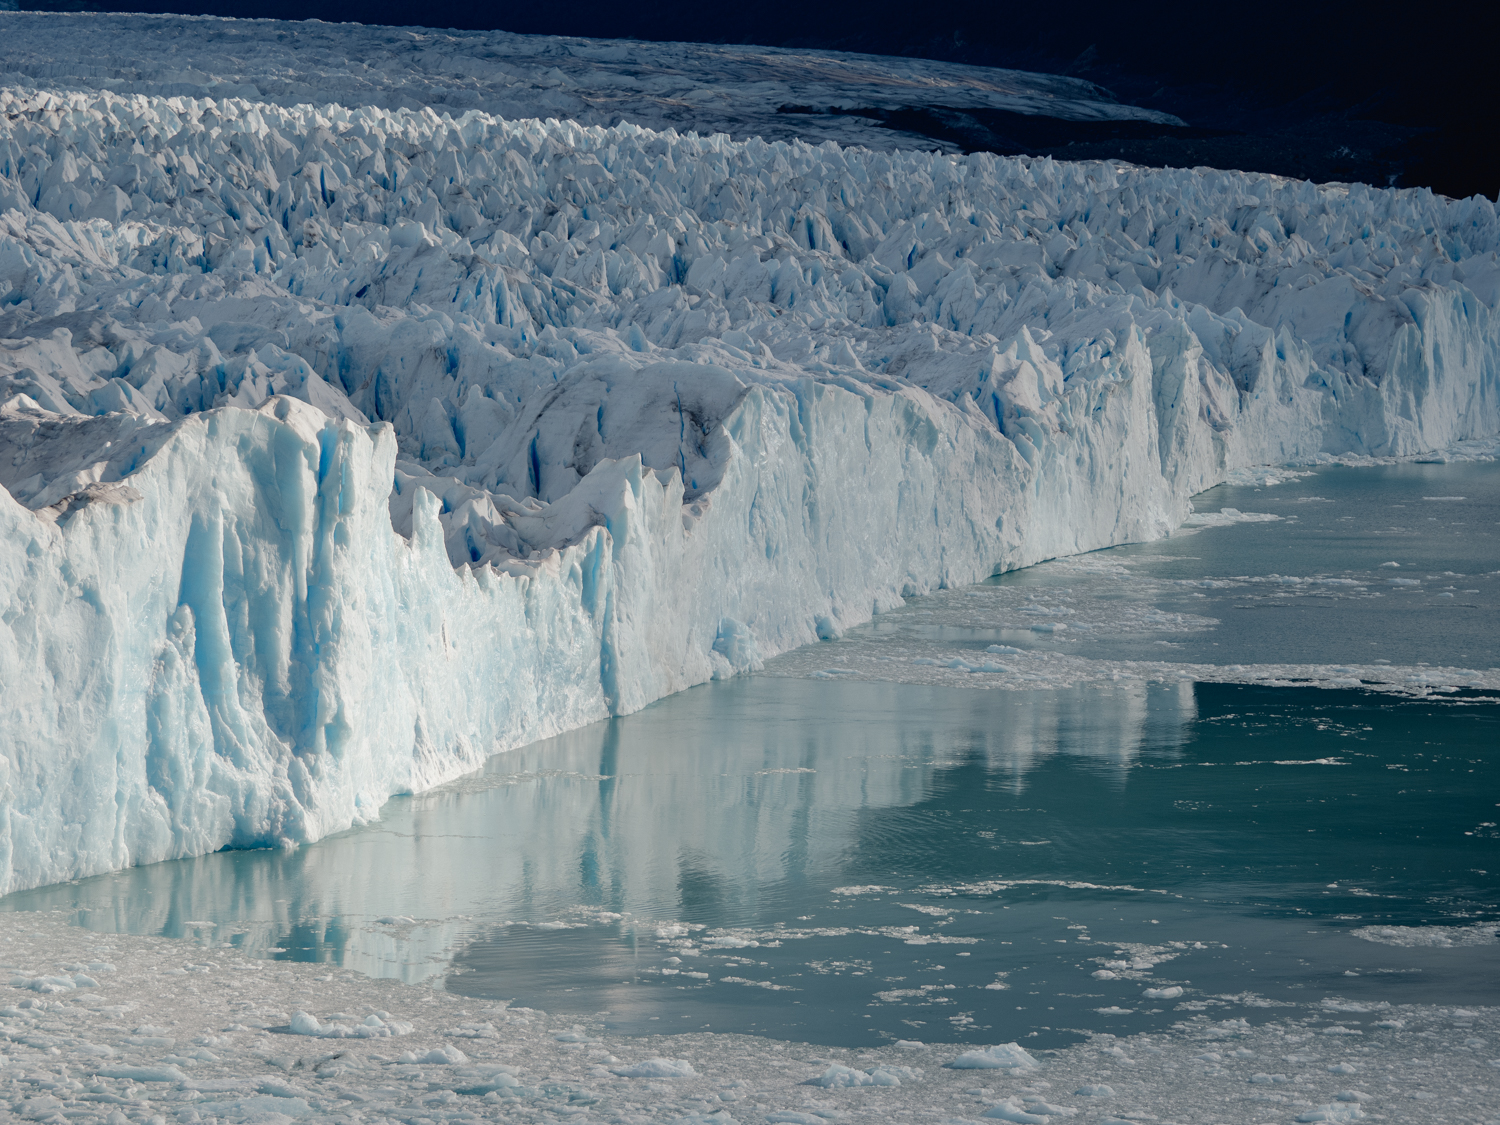
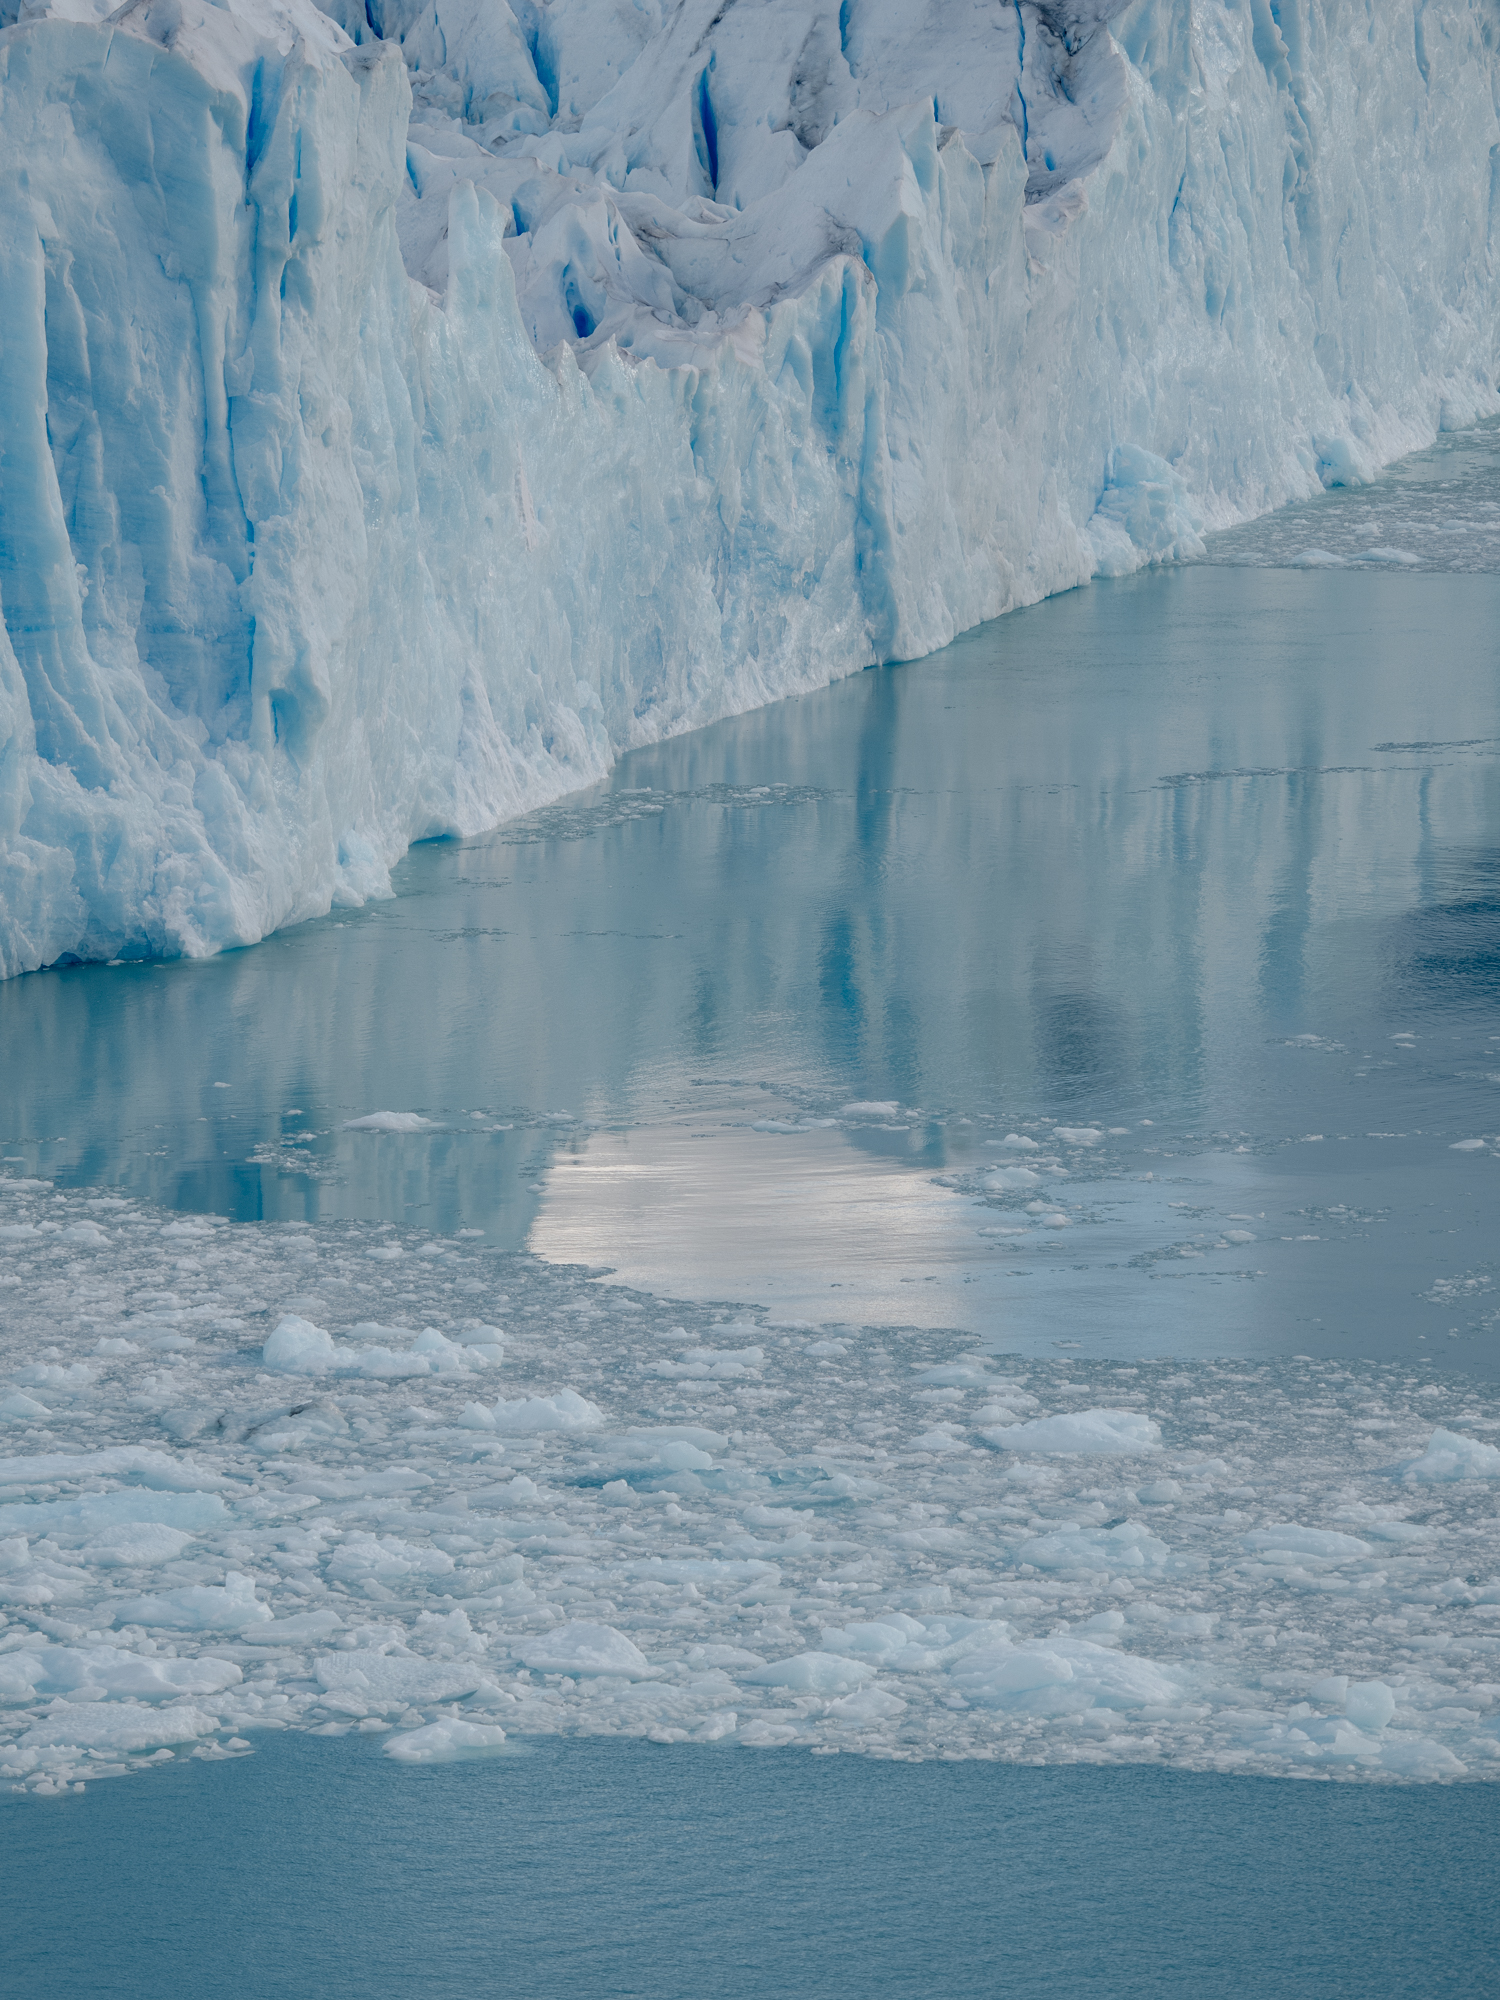
Ice, ice and more ice! The glacier extends for 250 km² and is 30 km long, meaning you’re working with layers upon layers of ice chunks and glacial formations that have shifted and existed throughout history.
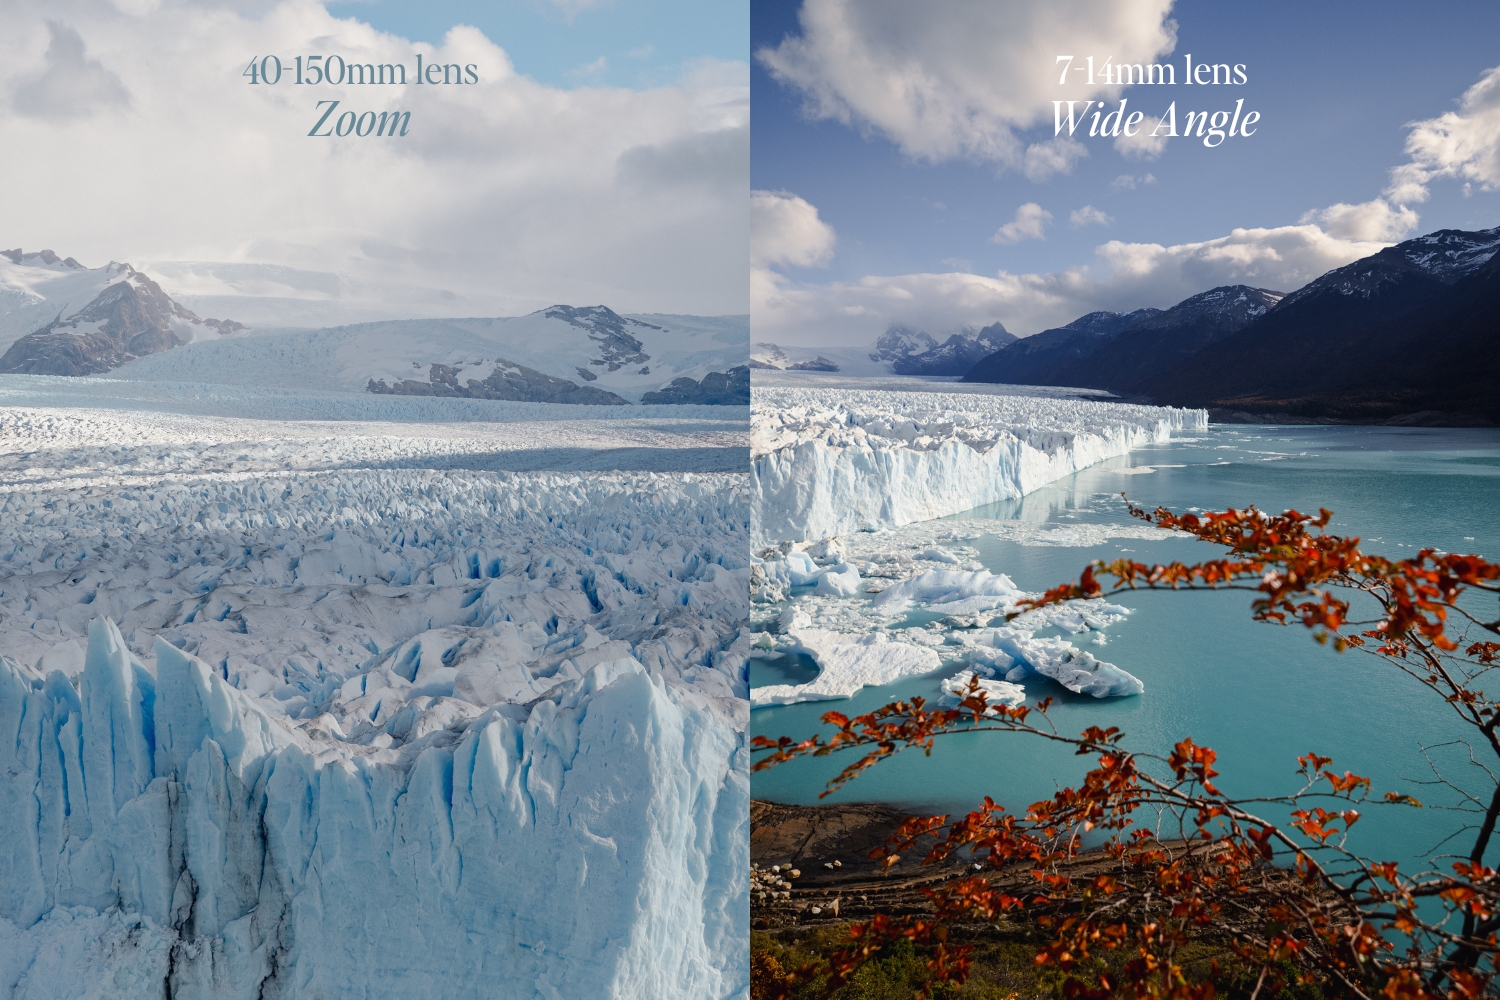
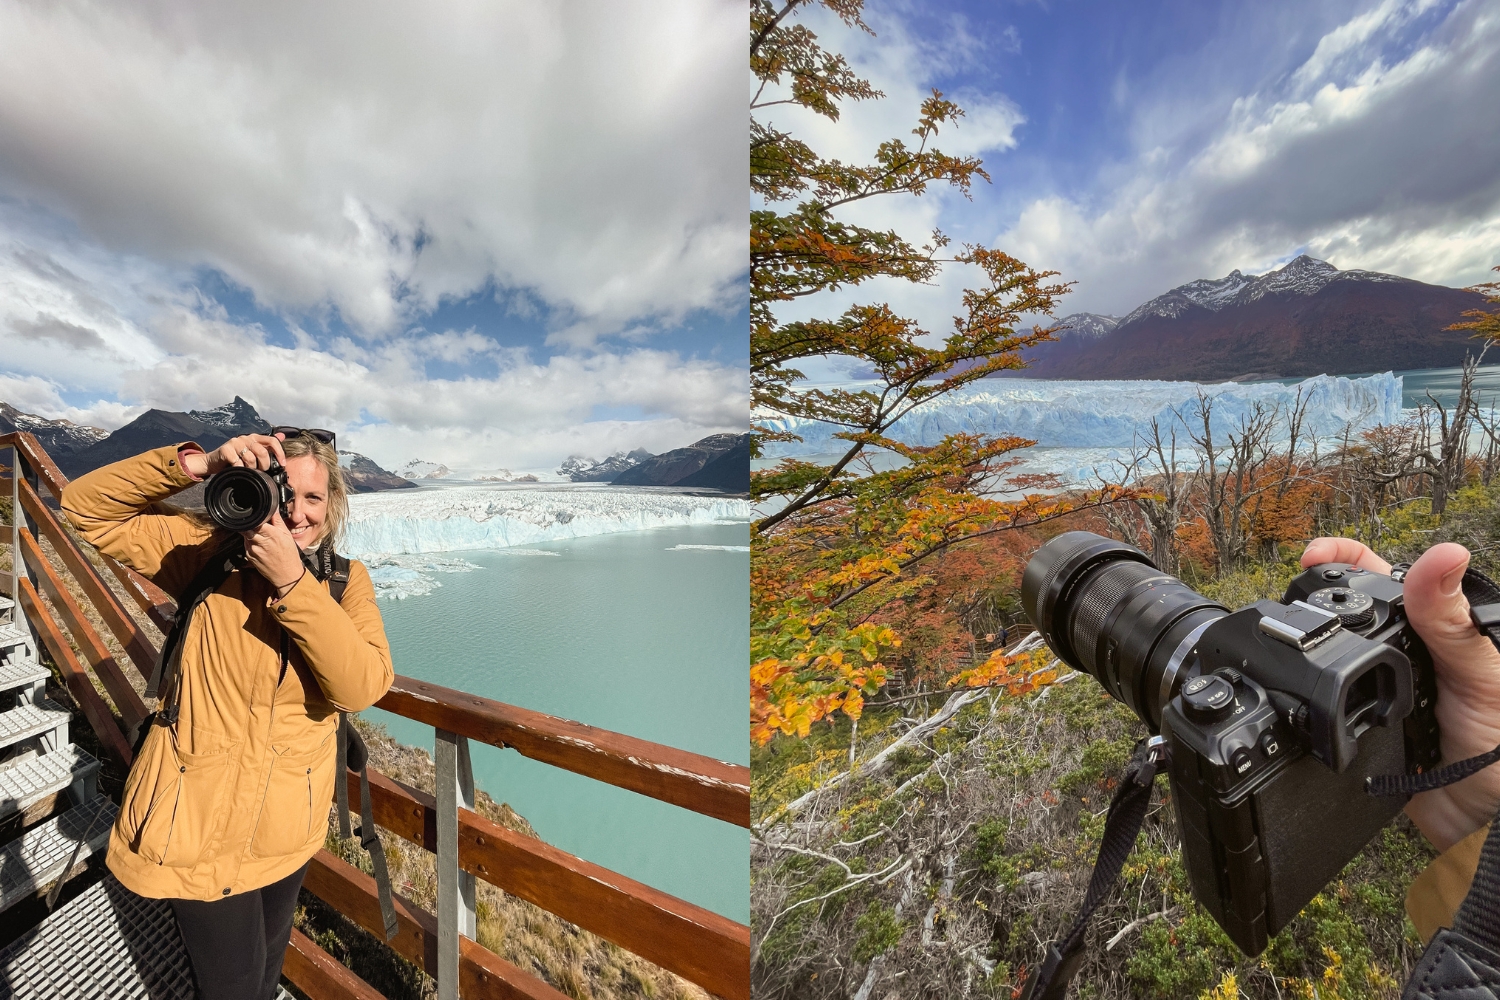
Pack a versatile zoom lens because you’ll want to have the reach available to capture the crashing ice, but also take wider shots to showcase the entire scene as it’s so vast and impressive. I had the OM SYSTEM 40-150mm f2.8 lens on the OM-1 for most of my time at the glacier but also switched out to use the 7-14mm f2.8 lens and the 12-40mm f2.8 lens too.
If you’ve got all day, you’ll find that the various viewpoints and walkways offer the chance to experiment and play with various composition ideas.
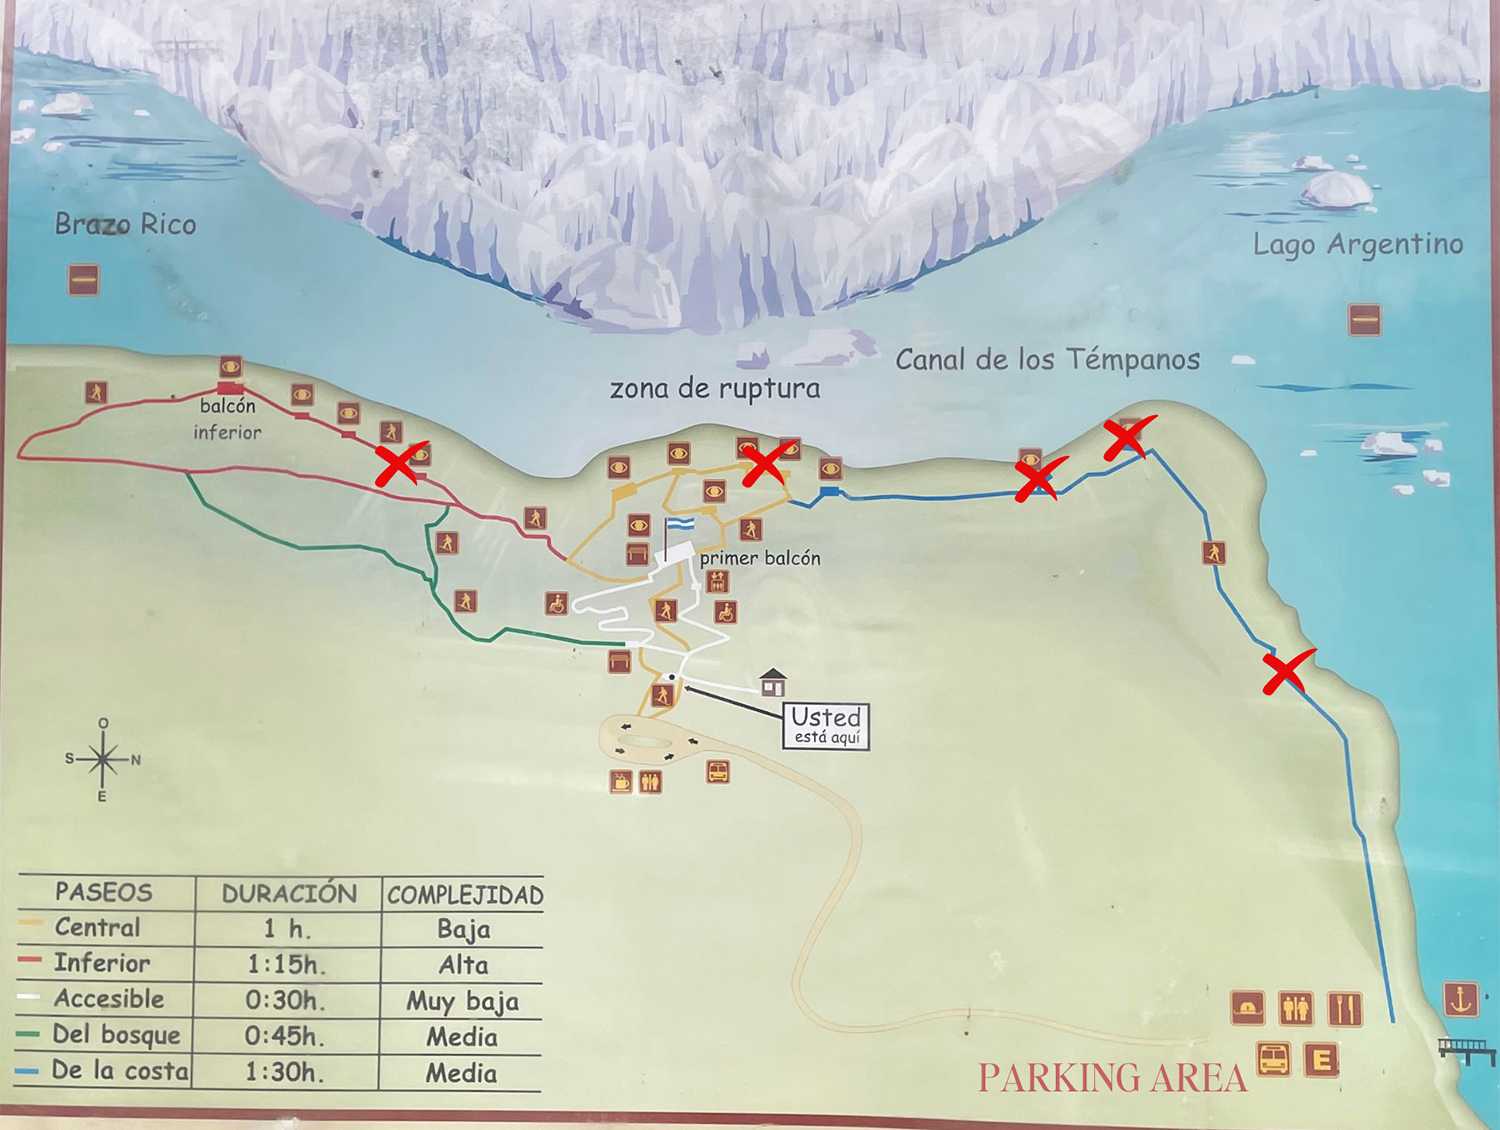
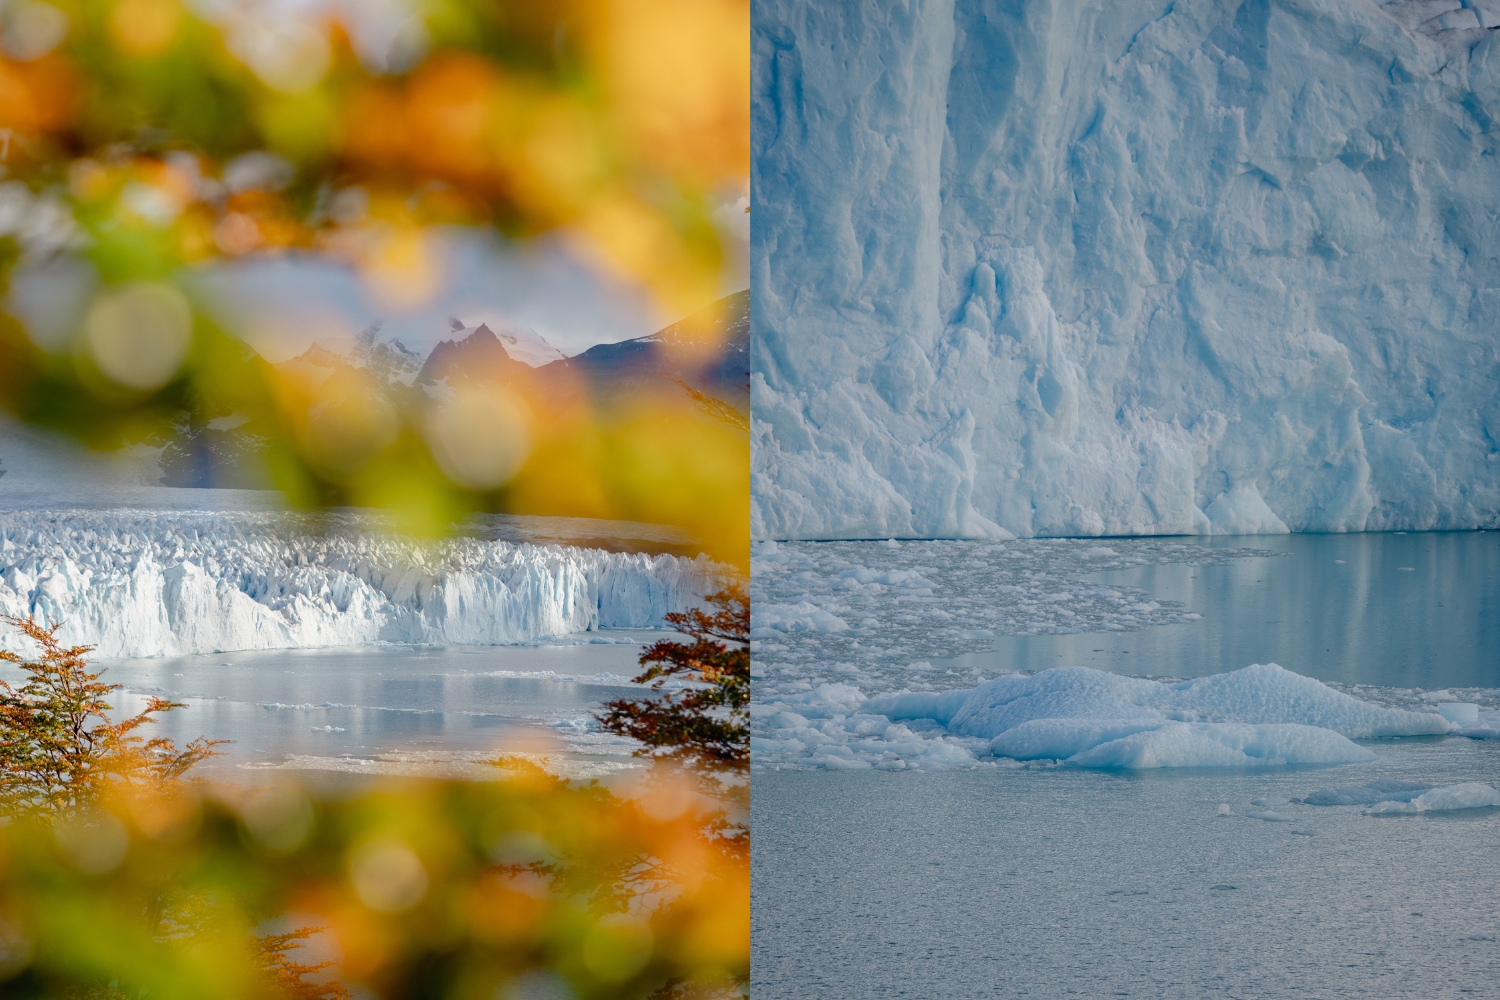
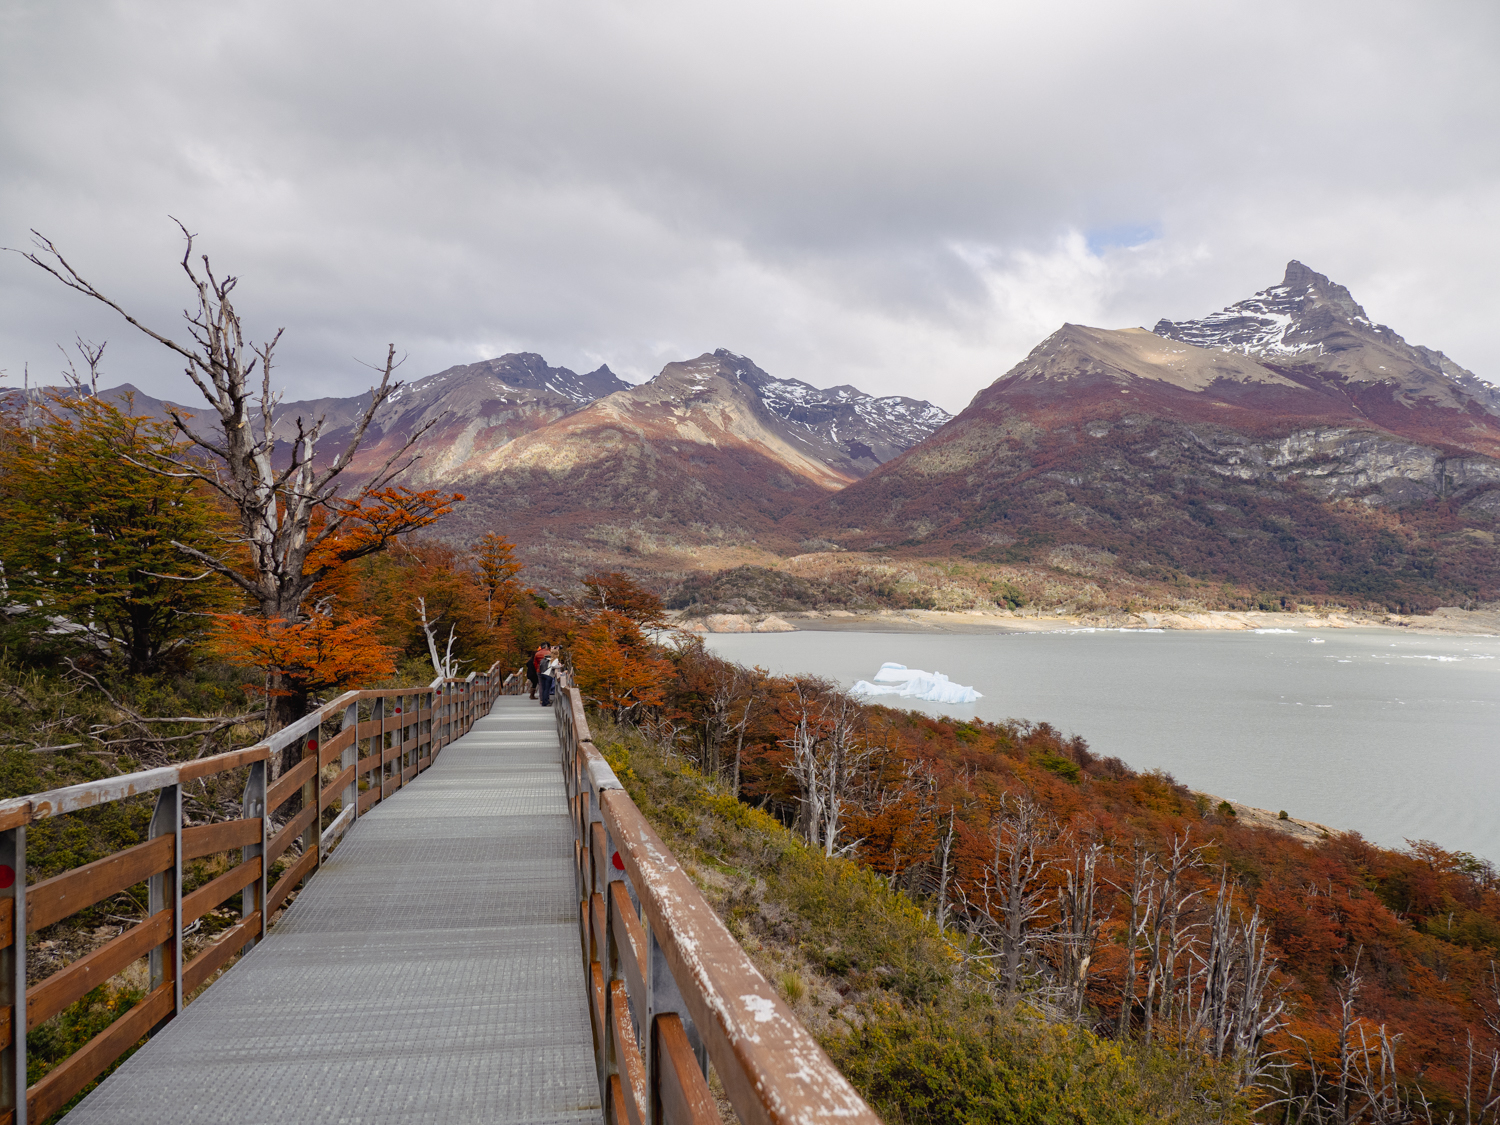
Visiting in Autumn? Get ready to hunt for the perfect leaves to use and frame the glacier. The vibrant reds, yellows and oranges work so beautifully with the blue and white colour palette of the glacier! There are numerous spots along the walkways that have colourful trees, I’ll mark them with an X in the image below.
Composition Tips
Spend some time assessing the scene and focus on the details that stand out to you most. The landscape is so vast and intricate at the same time, so let it all soak in and really look around to assess what you might want to capture first!
Also, move around and don’t spend all of your time in the first photogenic spot you come to, there are a lot of walkways to explore!
I’d highly recommend the lower yellow route, and the blue route, both offer stunning viewpoints that are close to the calving area and felt less busy than the red and upper yellow walkways.
- Because the scene is so vast, it works best to find a subject within the landscape to use as a focal point for your image. It could be the distant peaks, the closer jagged icy chunks, or the sections where the ice meets the water.
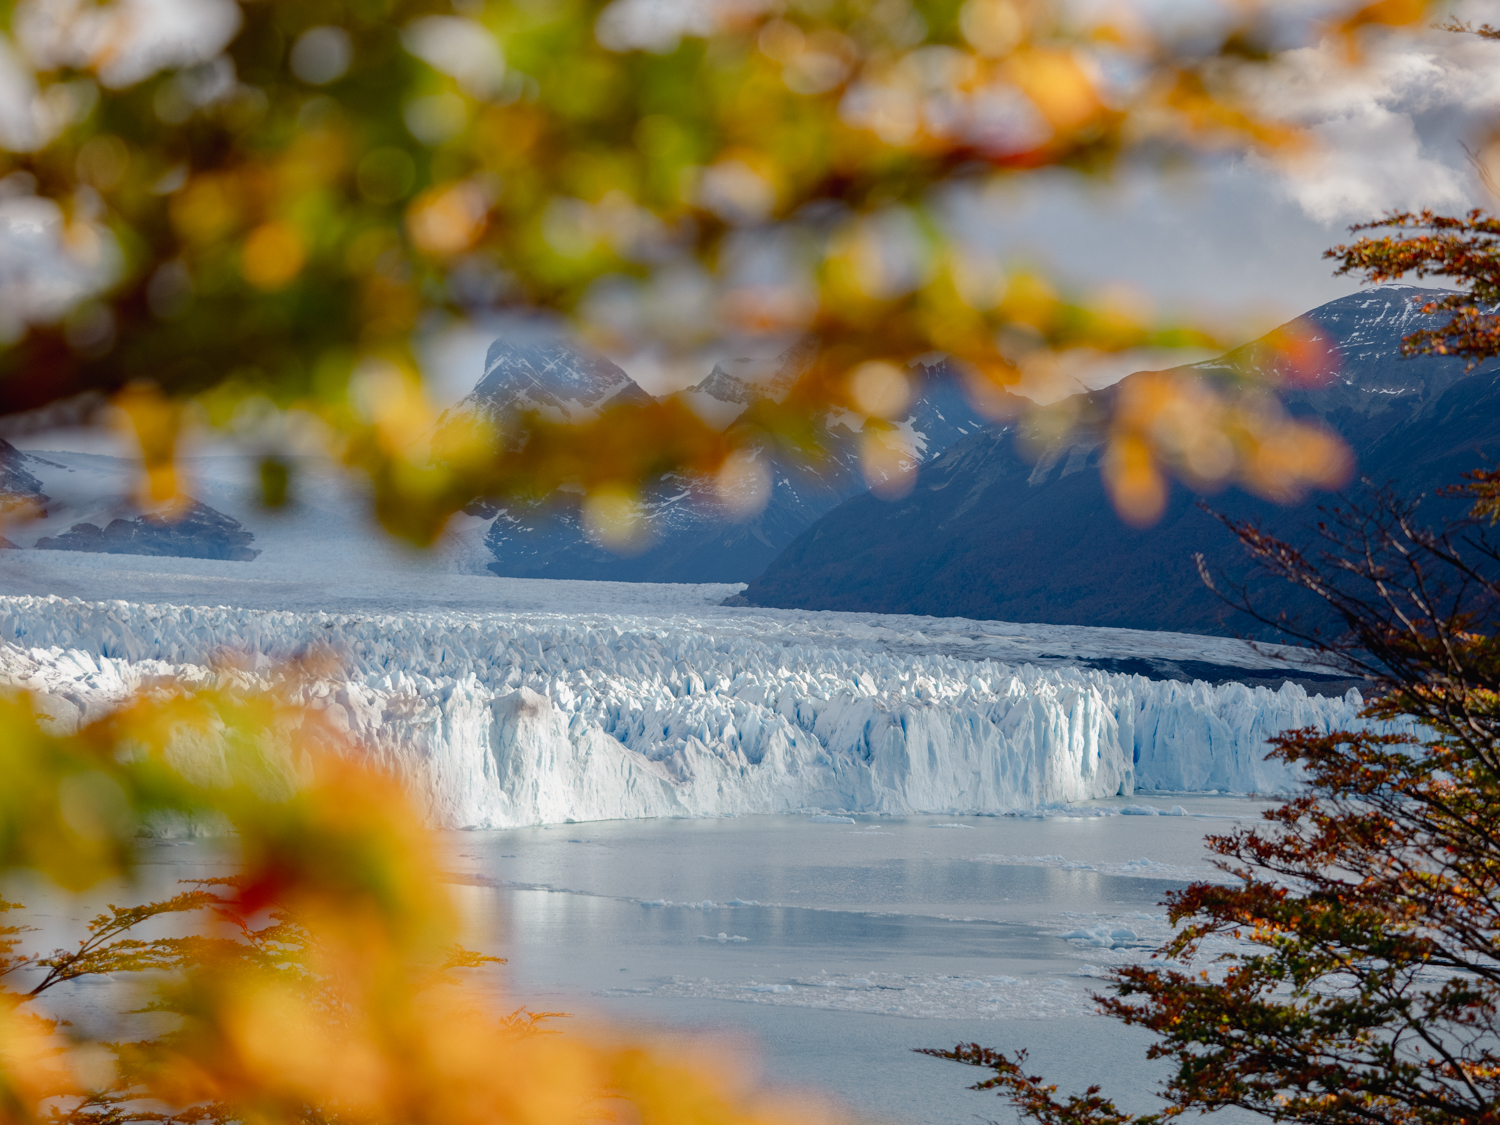
- Use the surrounding foliage to frame your shots, getting nice and close to the leaves to create a colourful pop of bokeh.
- The blue and white tones allow for the possibility of minimal landscape images, find an interesting section of the glacier and then compose your shot just using two colours to fill the frame.
- If you’ve got a zoom or telephoto lens, get in nice and close and use it like binoculars to scout patterns and interesting features of the ice.
- The icebergs floating in the water can be fun to photograph as the contrast against the deeper blue of the water means you can play around with the angle and composition.
- Aim to spend the day photographing the varying conditions and light. In the afternoon, the glow can fall upon the glacier and highlight sections, or illuminate the entire scene with a softer colour palette.
Travelling soon? Boost your creative composition skills with the 3-Week Composition Reset, all online + self-paced.
Timing and the Thunderous Roar
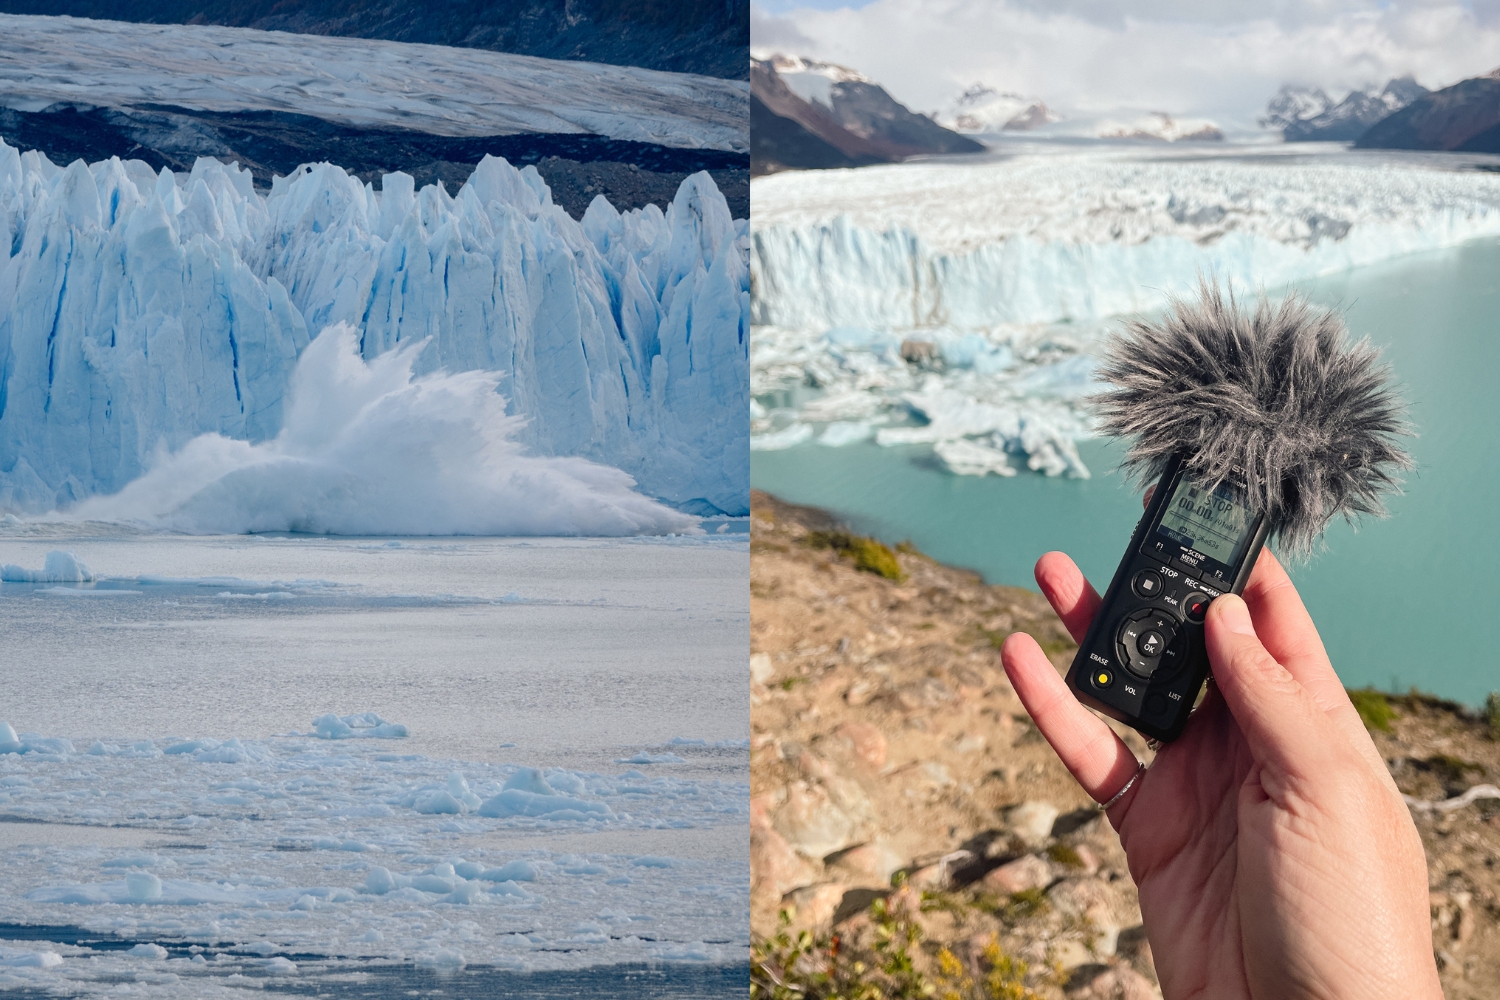
If you’re hearing the sound of cracking followed by raging thunder (ice rumbling) and splashes, it’s likely that you’ve actually missed a calving. Due to the size of the glacier, and the distance from the viewpoints, sound echoes across the water, and once you’ve heard it, the calvings have probably already happened!
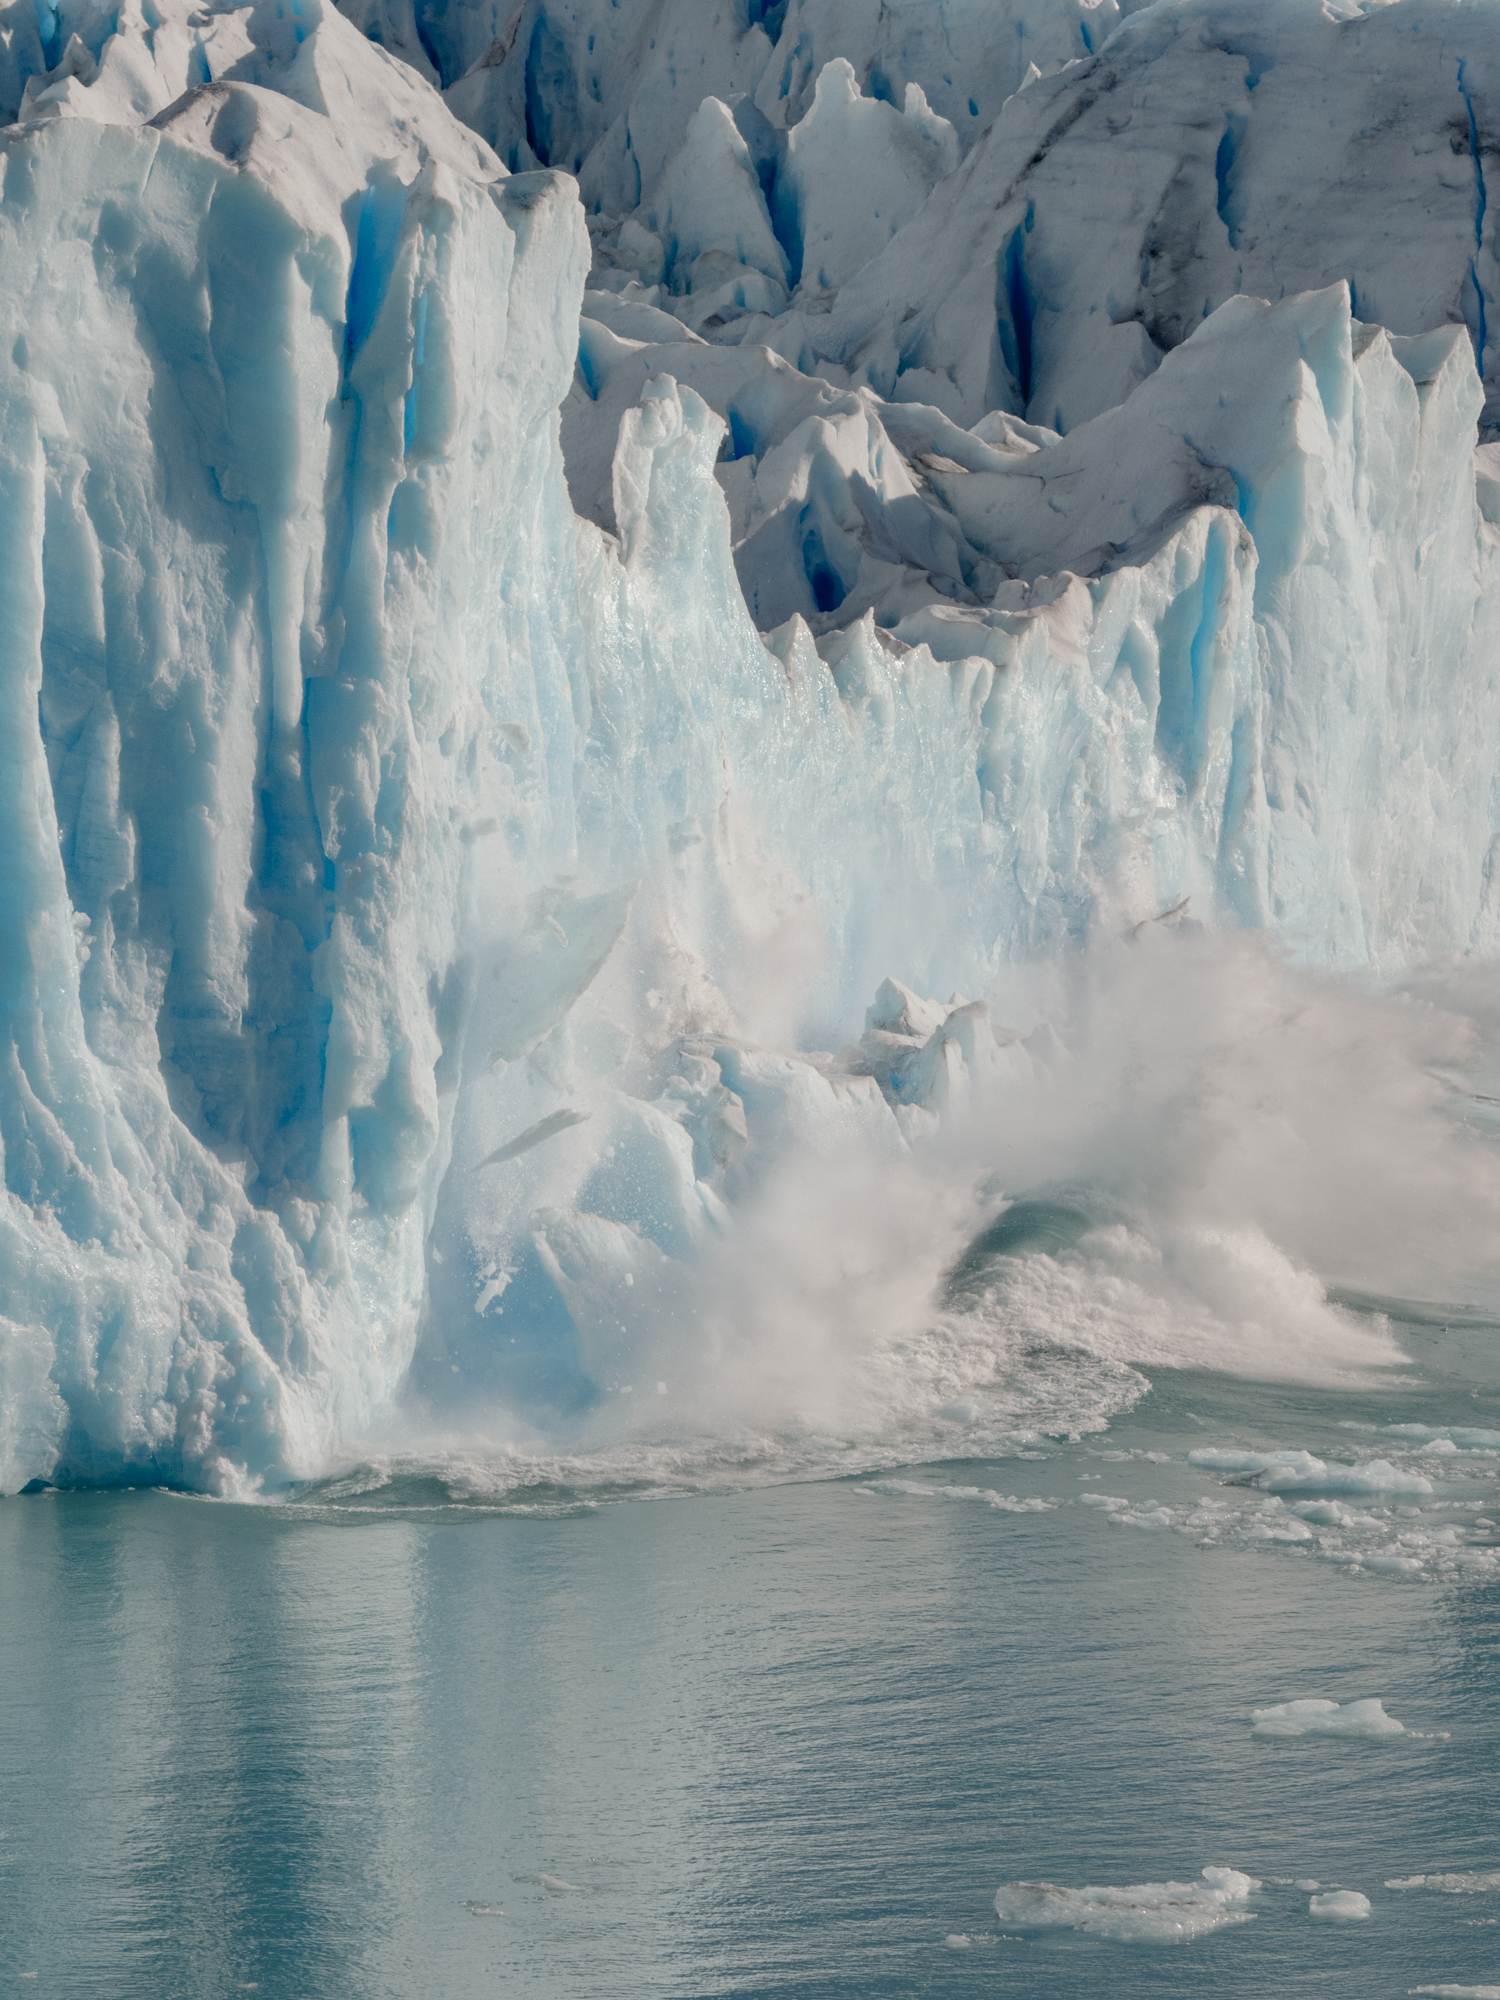
The best way to photograph the calvings is to find a spot on the walkways and wait it out. Look for chunky sections that may be a little ready to break off, and then wait, watch and get ready to snap away once the movement starts happening. It happens fast! During the afternoon you’ve got a better chance of seeing the calvings as the front of the glacier has been warming up in the sunshine throughout the day, forming a looser grip and eventually crashing into the lake. If you head over to @the_wanderinglens you’ll find a reel in which I’ve recorded the sound of the calvings with the LS-P5 OM SYSTEM recorder.
Photo Tip – Once the ice has calved into the water, keep watching because it can break into a lot of smaller icebergs, or keep its shape and bob back to the surface like a creature from the deep, complete with waves and bubbly motion.
The Best time to Visit Perito Moreno Glacier
Patagonia has four distinct seasons so it’s essential to research when might be the best time to visit the glacier to capture the images you’re hoping for. The park is open all year, however opening hours will differ, closing at 4pm in winter (more on this later in the guide).
In terms of the glacier itself, the warmer months can mean more calvings occur due to the heat of the sun, however, the formations won’t differ too much (except for some snow cover) between the seasons, just the surrounding landscapes and forests.
During April, you’ll be treated to a blend of autumn foliage in the surrounding forests that contrasts against the white and blue icy tones. I visited between April 18-20th and found the colours were at, or very close to their peak, so I’d suggest opting for mid-April to avoid missing any orange and red tones. The weather plays a big role in how long the leaves hang around, so if gusty winds hit the region, the season may end earlier…but could also last longer, if the conditions are stable throughout April, always a sprinkle of luck involved.
The summer months from December to February are peak season in Patagonia which brings warm sunny days, and along with great weather, a whole lot of crowds. Personally, I always rather opt for the shoulder seasons to ensure there are less people in the photogenic locations so you aren’t hustling to get a peek at the scene.
Winter can bring stunning opportunities for landscape photography at Perito Moreno Glacier and across Patagonia, however, the roads can be snowy and icy, meaning closures and the possibility that you may not be able to reach the glacier. It could be worth taking your chances though to photograph a totally difference scene to the rest of the visitors who cram the walkways during summer!
Photography Gear Advice
I used every lens within my camera bag while photographing Perito Moreno glacier, so I’d recommend taking everything if you can!
If you’re limited in lens selection, opt for a versatile zoom lens like the 40-150mm f2.8 pro lens, or the 12-100mm f4. I also had my MC-20 2x teleconverter on for a lot of images, particular those of the ice patterns and details of ripples or ice in the water. You’ll like use a zoom lens more than a wide-angle lens.
It’s possible to use a tripod at the viewpoints, but be aware that there can be a lot of people walking by, so you’ll want to ensure no one trips and not only hurts themselves, but your camera! As I’ve noted in previous articles, I rarely travel with a tripod due to the industry leading stabilisation available in the OM SYSTEM cameras, they’re game changing! Because the scene is quite bright too, you may not need a tripod if visiting in daylight hours.
Be prepared for all weather conditions too! When I left El Calafate in the morning it was brilliant sunshine, by the time I reached the glacier on the first day it was low cloud and cold winds. The following day was gorgeous sunshine, but the wind definitely picked up in the afternoon, so a wind/waterproof jacket, gloves etc are worth having tucked in your bag.
How to Access Perito Moreno Glacier
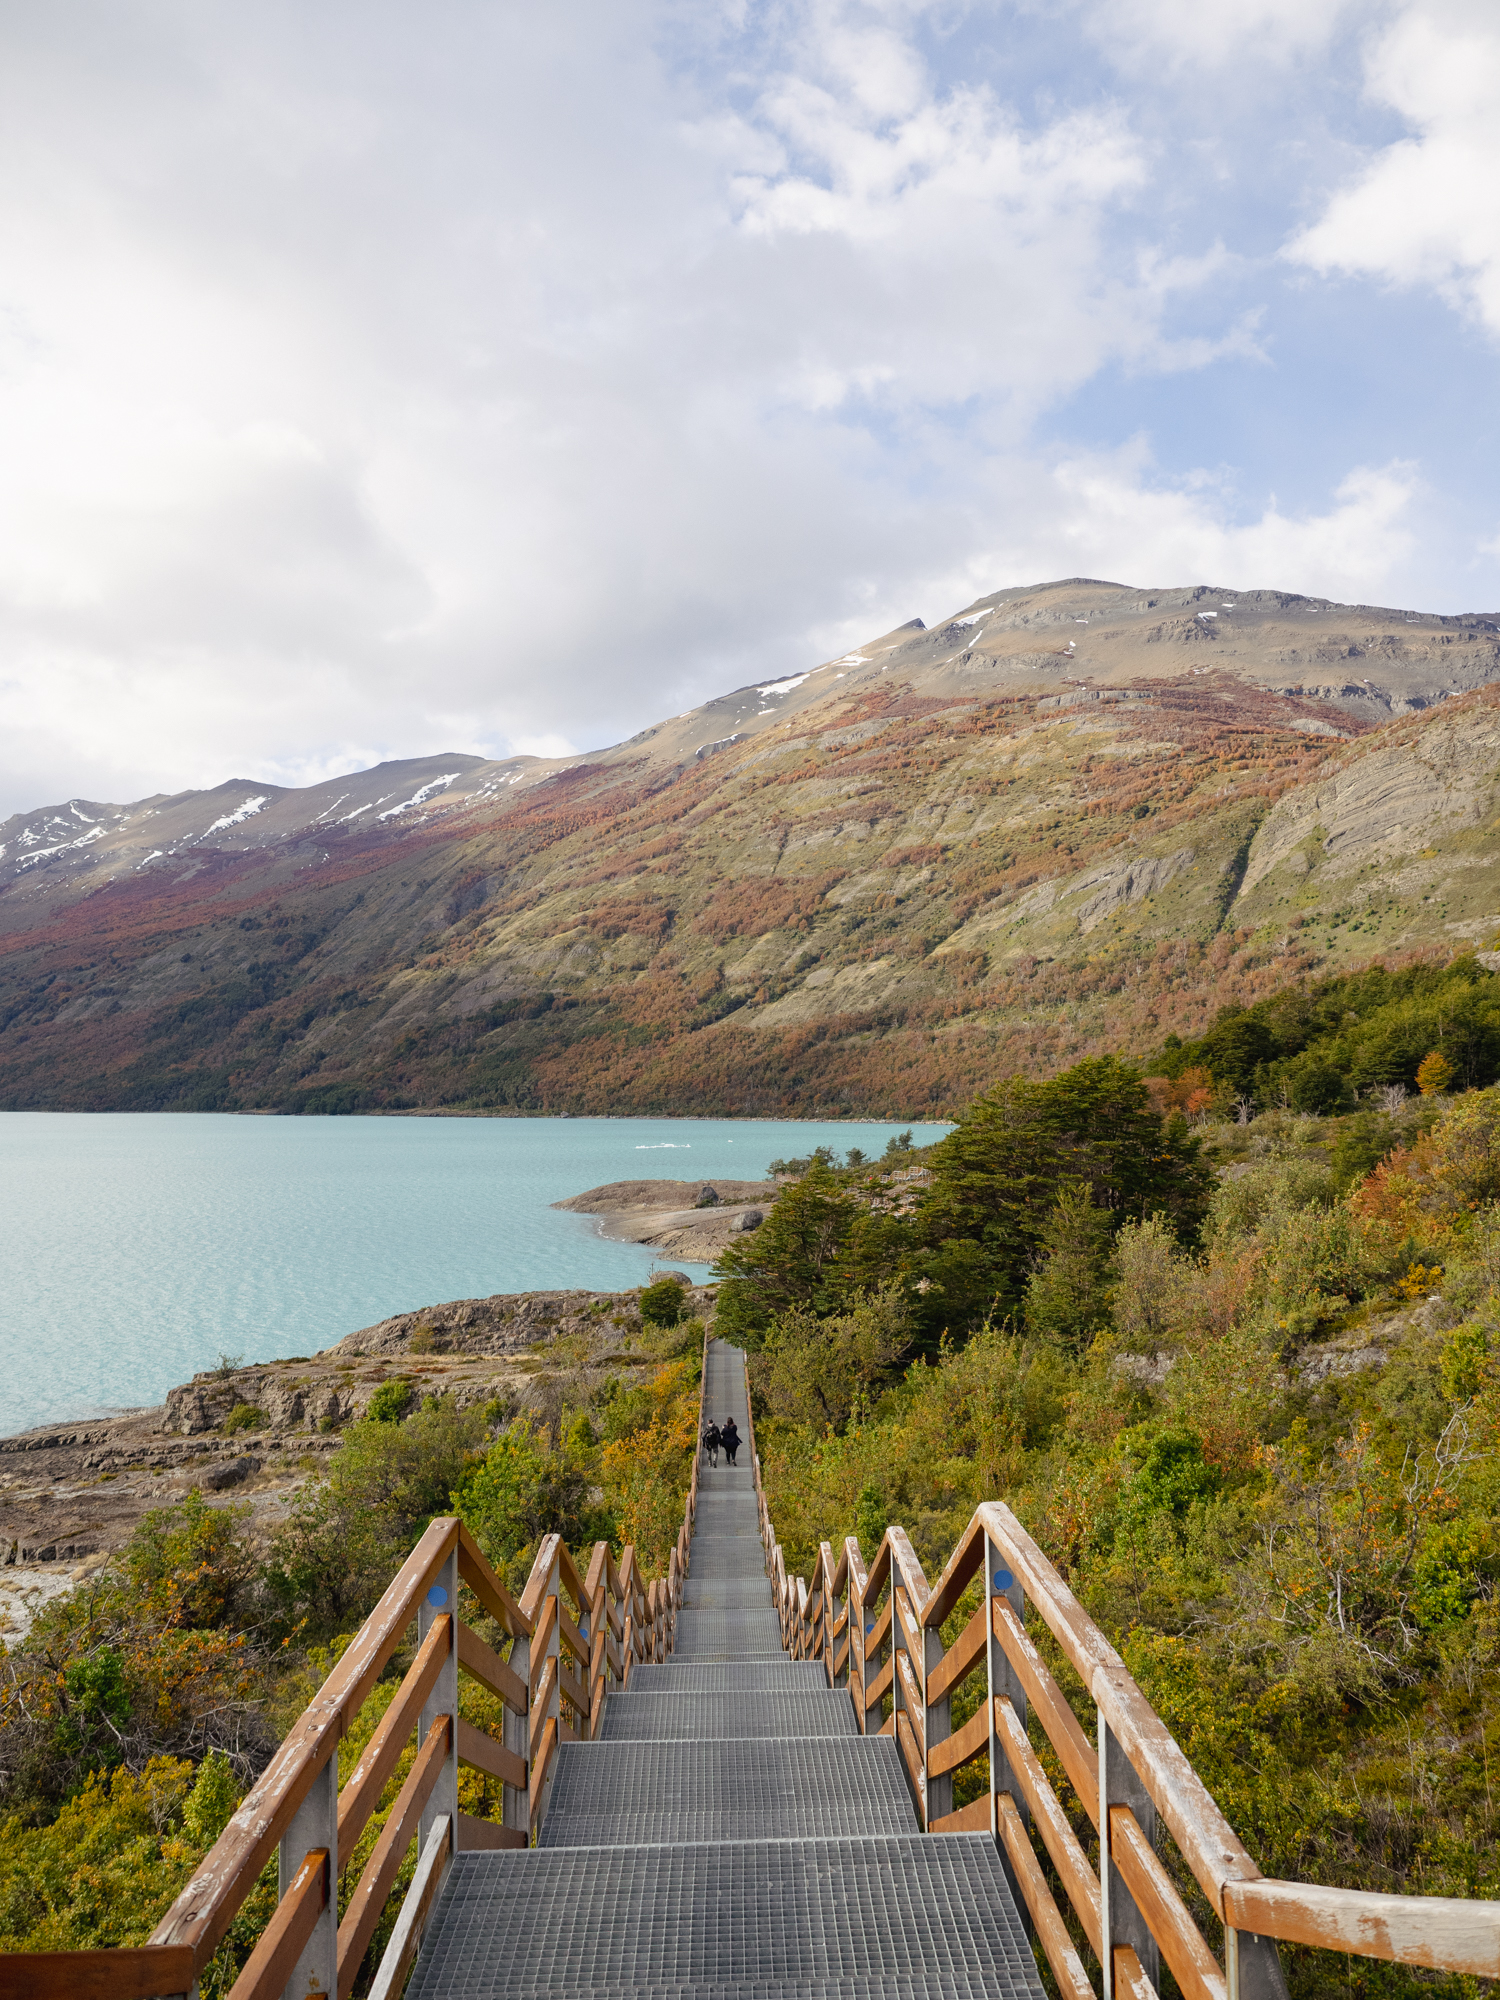
If you’re hiring a car, you can drive roughly 90 minutes from El Calafate to reach the park entry gate, show (or purchase) your ticket, then venture through to the parking area. From there, you can take the blue route walkway along the water toward the glacier. Alternatively, there’s a complimentary shuttle bus from the parking lot to the main entrance of the walkways.
The blue route (pictured below) means a longer walk to the glacier, but it also means you’ll arrive at the area that typically has a lot less people, so if you’re keen on a slower approach and a quieter experience, this is the route for you. I took the shuttle on the first day and actually felt really overwhelmed by how many people were jammed into the bus, and also how many people I was walking alongside on the walkways…I like having space in nature to soak it all in and take my time with photos, the other route offers that! *Or take the shuttle and hot foot it to the yellow and blue routes to get away from the main walkways.
Bus: You can take a shuttle bus out to the glacier, but this isn’t an organised tour, simply a drop off and pick up service to the walkways. The shuttles depart from the bus terminal in El Calafate, and times vary depending on the company. Generally though, they’ll be morning departures around 8 or 9 am, with a return time of 4pm, arriving back into El Calafate after 5pm. If you’re looking for flexibility and the chance to stop and take photos along the way, I’d opt for the self-drive option or a taxi, particularly if you’re a group of 2-4 people, it can work out similar in cost.
If you’re after a guided option, there a number of ways you can visit the glacier and get even closer than the walkways too!
Boat Tours: Boat tours offer a unique perspective of Perito Moreno Glacier, allowing visitors to get up close to the towering ice walls. These tours typically last around an hour and provide excellent opportunities for photography. I opted not to do this as I wanted to explore the walkways and spend time photographing from that angle, but I saw the boat approaching the glacial front and it gets quite close!
Ice Trekking: Walking on a glacier is such an incredible experience and I highly recommend it if you’ve never done it before. I have done it in Greenland, Iceland and also Canada, so on this occasion opted not to. However, it’s pretty special walking with crampons across the ice and Perito Moreno Glacier offers two options for doing this, most tour operators in El Calafate offer a version of these.
Two main ice trekking options are available:
- Mini-Trekking: Suitable for most visitors, this trek lasts about 1.5 hours and covers a smaller section of the glacier.
- Big Ice Trekking: A more challenging option, the Big Ice Trekking tour
The boat and ice trekking tours can include transfers from El Calafate if you’re not keen on driving. Alternatively, I believe you can also self-drive and meet them out there at a pre-arranged meeting point. From my understanding, you do still need to purchase the national park passes on top of the tour pricing, and they’ll stop to allow you to do this…some companies may include this, but it’s worth checking beforehand just so you don’t get sprung with an extra charge if you weren’t expecting it.
Kayaking: This is one activity I was hoping to do but ran out of time, however I witnessed a small group of 3 kayaks approaching the glacier and my goodness, they looked teeny tiny in comparison to the glacial wall. You can book kayaking tours with transfers included through the tour companies in El Calafate (or online in advance), but I’d recommend having kayaked before, or at the very least know you’ll be confident paddling, as I did watch the group have to paddle backward quickly when a calving happened.
Entry fee for Perito Moreno Glacier and Los Glaciares National Park
You’ll need to purchase a pass to access Parque Nacional Los Glacieres and it’s possible to do this at the entry gate, or online prior to arrival. You’ll find the up to date ticket prices and options to purchase online here – I used Google translate to read the website as I don’t speak Spanish (you can hold your phone up and Google translate can read videos/photos in live time).
The entry fee tends to change along with Argentina’s fluctuating inflation and as such, at the time of my visit in April 2024, the fees were $30,000AR for tourists (approx. $50 Australian/ $33USD), and $10,000AR for residents of Argentina for a one day pass.
I opted to purchase mine online and found that by doing so, was also given the option of a 50% discount for a second day, so I took a two-day pass which ended up being incredibly useful as the weather on the first day was quite cloudy and dull. The second day was stunning sunshine!
By having the pre-purchased pass, we didn’t have to exit the vehicle upon arriving and managed to skip quite a lengthy queue, felt a little like VIPs.
I’m not sure if the discounted two-day pass is offered at the gate, so if you’re self-driving and planning to visit, book your tickets in advance and be sure to print them out. On the second day, we were actually asked to also present our passports at the entry gate…I’m not sure if this is standard, but they were aligning our names on the ticket with the names noted in our passports, apparently a drivers licence wasn’t enough. Again, I’m not sure if this is standard procedure, just my experience.

Where to Stay in El Calafate
The town is about 90 minutes drive from Perito Moreno Glacier, but it’s also where you’ll likely fly into from Buenos Aires, or where you’ll arrive by bus if exploring other areas of Patagonia.
I took a bus from Puerto Natales to El Calafate and opted to base myself in town for 4 nights to have plenty of time to photograph the glacier.
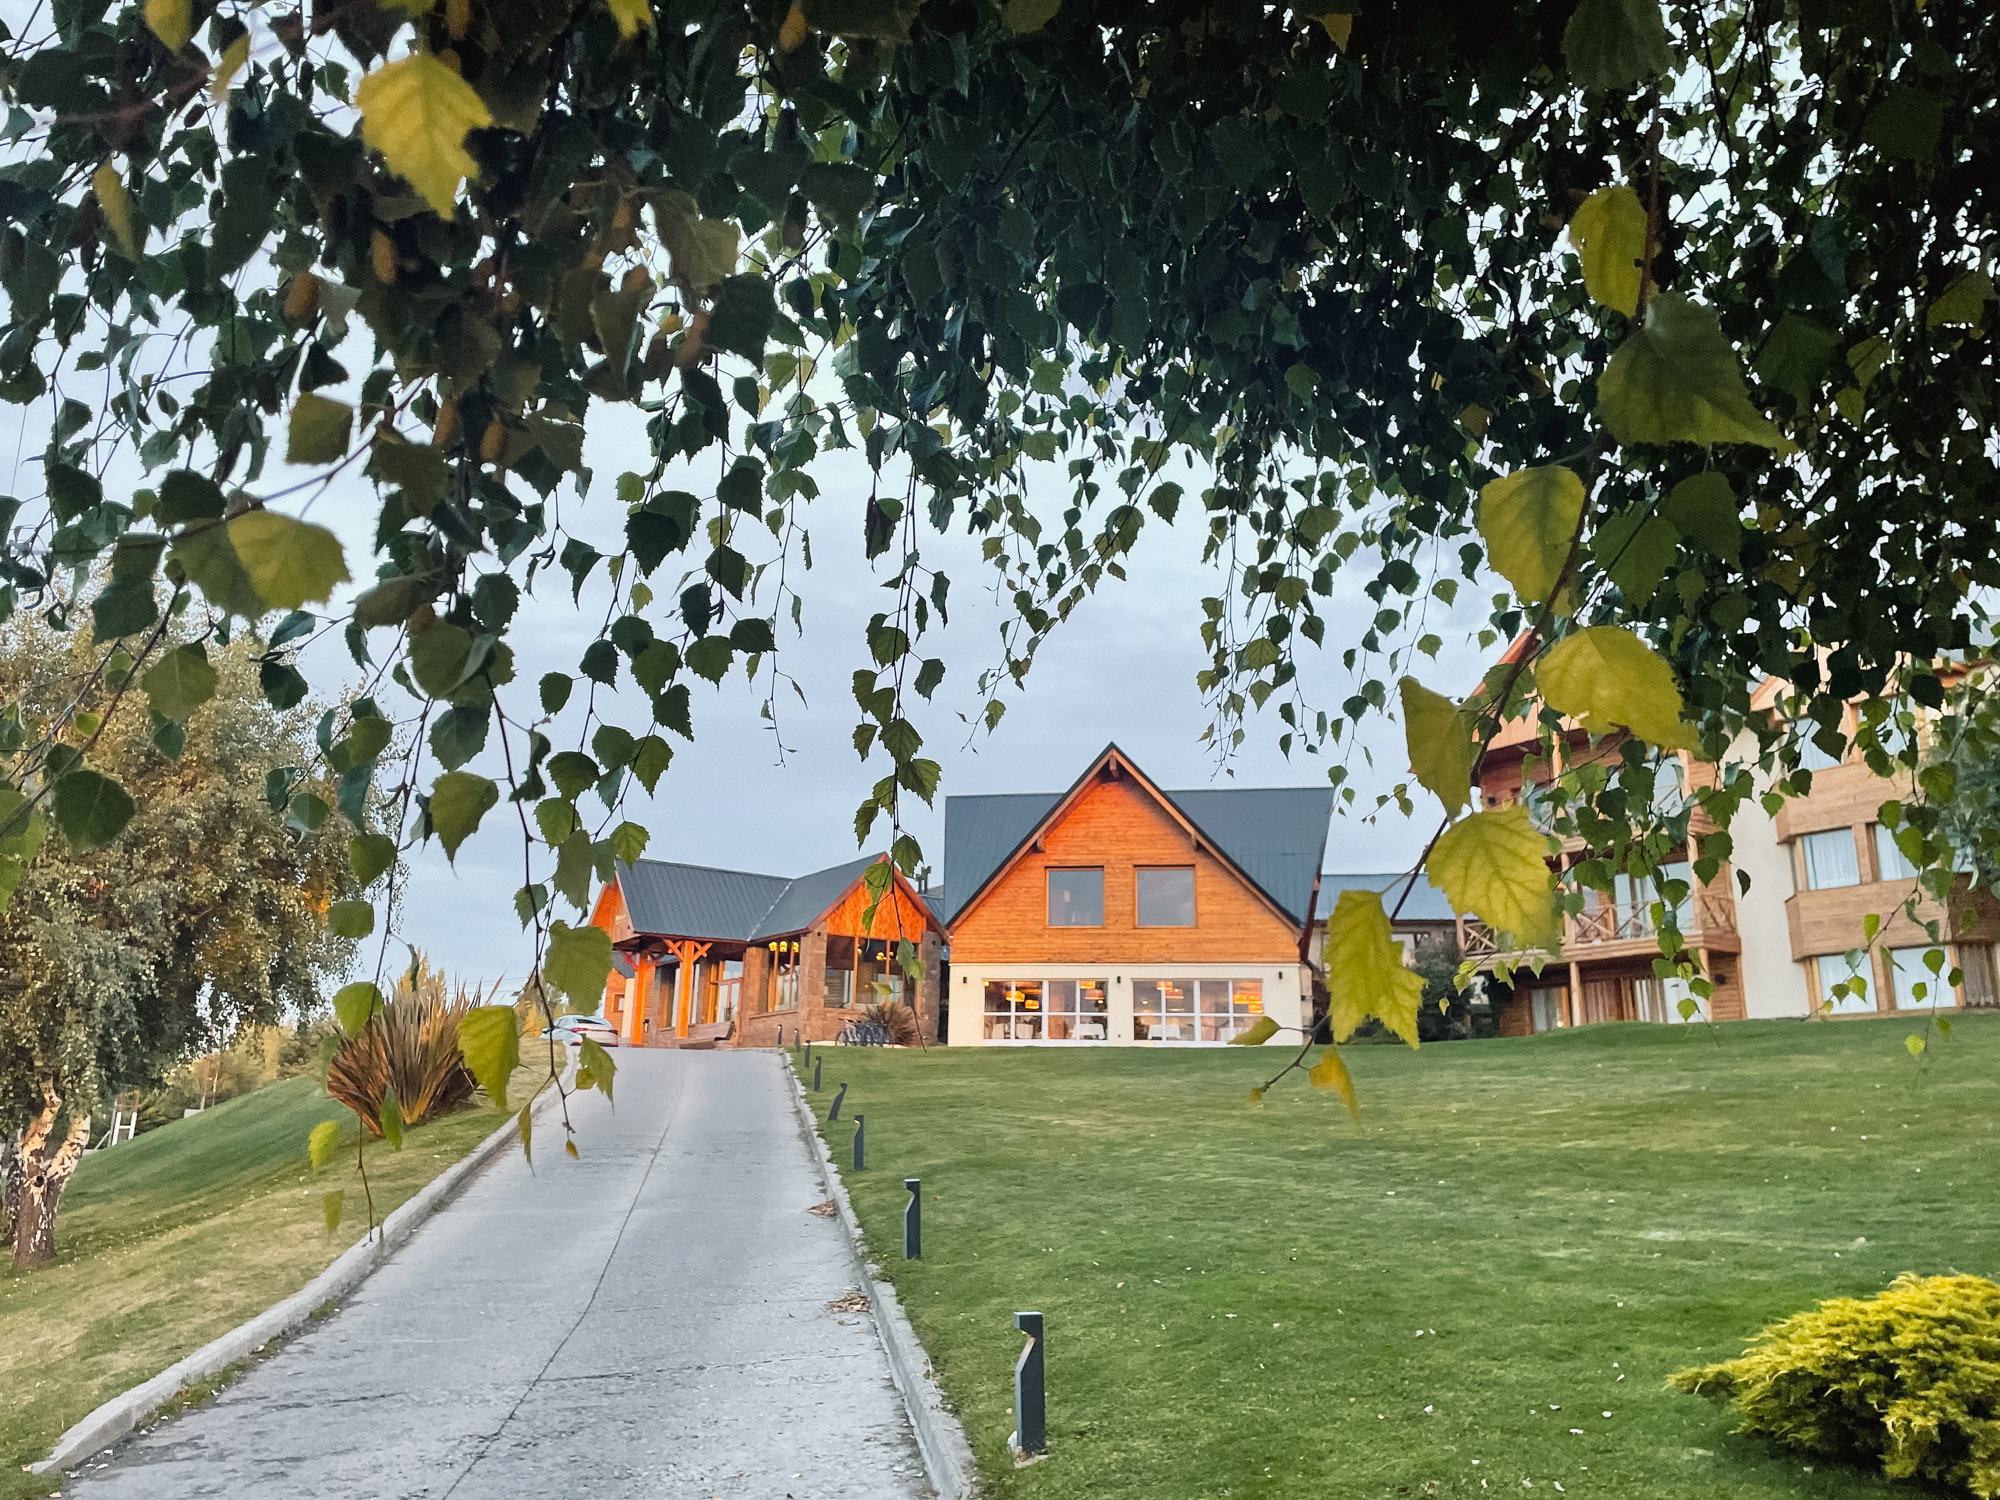
Mirador del Lago Hotel – This is where I stayed and I would absolutely recommend it as the rooms were comfortable, clean and it’s location is ideal for exploring town, and heading out to the glacier. If you’re taking a bus, you may need cash for a taxi to/from the station. One tiny point to note was the soundproofing in the rooms wasn’t great, however we noticed this was the case in most hotels we stayed.
Design Suites Calafate – A little further out of town, this is a hotel friends of mine have stayed at and recommend. It’s more on the luxury end of style, but the food is apparently amazing and the views across the lake too!
Lar Aike – Slightly further out of town in the direction of the glacier, this hotel has rave reviews and offers rooms at a far cheaper price than most others. I walked by this location while photographing flamingos and it’s a nice and quiet part of town, with a bakery nearby, and only about 15-20mins walk into the main area with restaurants.
Dining of Note in El Calafate
Excluding the Visual Hotel Reviews, this may be the first guide I’ve felt inclined to include any food recommendations but these two places I’ll name were so impressive, I couldn’t not mention them because you have to visit if you’re in town. If you’re looking where to eat in El Calafate, take a peek at these options, both on the western side of the town’s main street, heading toward the glacier.
Pura Vida – Just wow. Fresh, healthy, traditional food blended with a warm and friendly approach was exactly what we needed after a chilly day at the glacier. The breads, meals, desserts, drinks and décor, everything was just so delicious and calming…a beautiful space with a lovely energy and atmosphere.
Veggies Patagonicos – As someone who has to maintain a gluten-free diet, I usually walk by bakeries and know I’ll never be able to eat the delicious treats inside. However, a quick Google search for gluten-free cafes resulted in finding this bakery and inside, they have the best gluten-free croissant I’ve ever had! I’ve lived in France so there was a lot to live up to! They’ve got cakes, pastries, coffee and other goodies if you’re keen on packing a picnic for the glacier.
Related Guides + Articles:
A Photographer’s Guide to Torres del Paine National Park, Chile
Walking on a Glacier in Canada – Icefields Parkway
Photographing Details within a Scene – Landscape Photography Tips

Travel and landscape photographer from Australia who is far more comfortable in a pair of flippers than heels! Having worked for publications such as Lonely Planet, Wanderlust and the Sunday Times, Lisa founded The Wandering Lens to share destination guides to the worlds most photogenic places and outdoor experiences.
Blog Comments
Sylvia B
June 16, 2024 at 8:21 pm
Awesome! So comprehensive!