
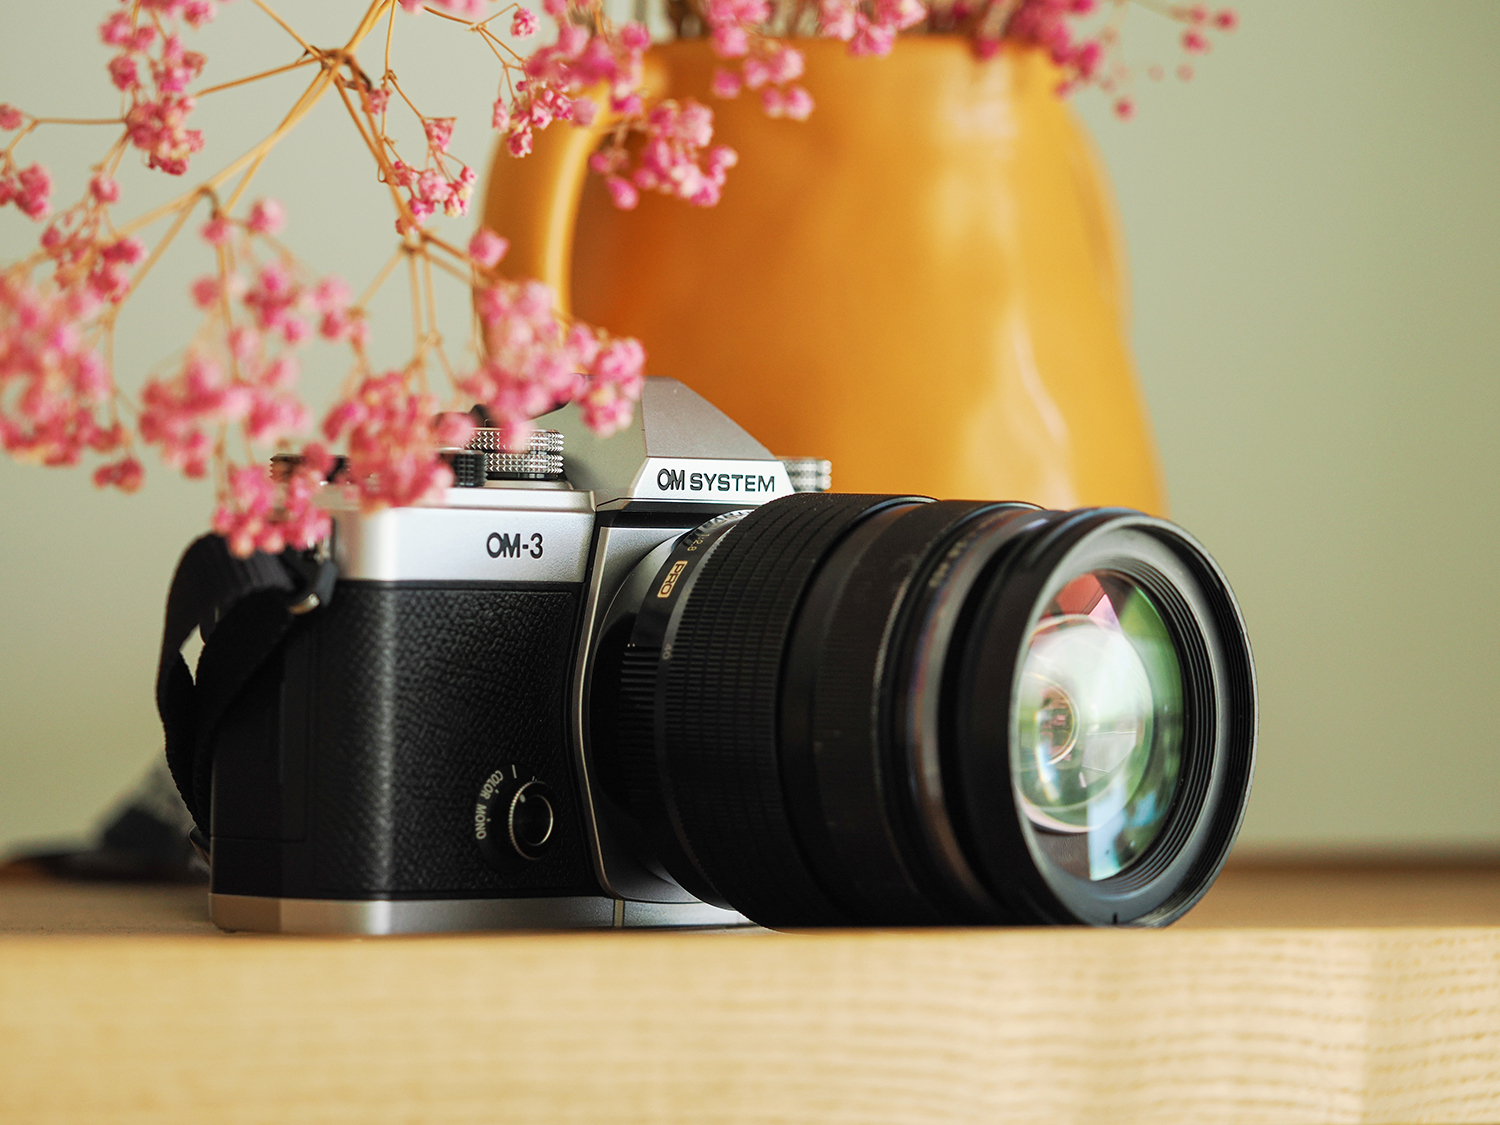
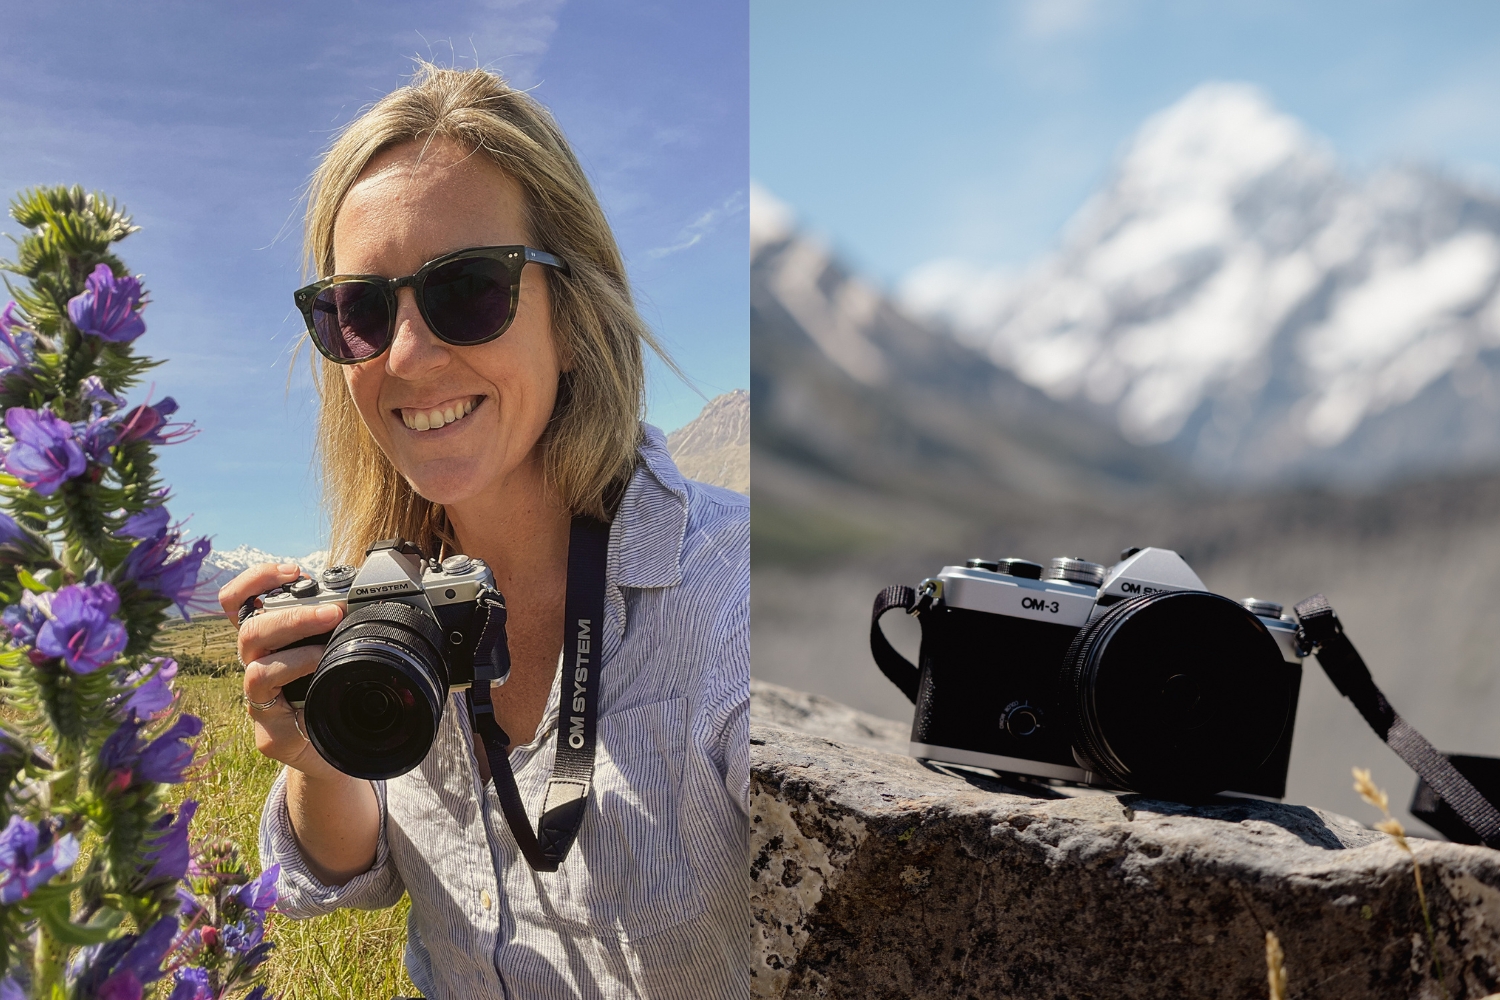
OM-3 Review : User Experience + Creative Possibilities
Well, hello there OM-3. Just announced by OM SYSTEM, this new camera is a game changer for creatives and I’m going to share my recent experience working with it to photograph landscapes and lupins in New Zealand. There are sample images plus a whole bunch of behind-the-scenes visuals to show you what the art tools and camera functions look like.
If you enjoy experimenting, playing with colour, seeing the world with a creative eye and producing images with a consistent tone, you’ll want to keep reading. There’s so much inside this compact (and cute) camera!
Just a quick note, I am an OM SYSTEM ambassador, however this is an experience and user review. I knew there would be a lot of focus on the technical specifications in other reviews of the OM-3, so as you’ll see throughout the words below, I’ve taken the creative approach, sharing what I found innovative and fun to incorporate as I photographed.
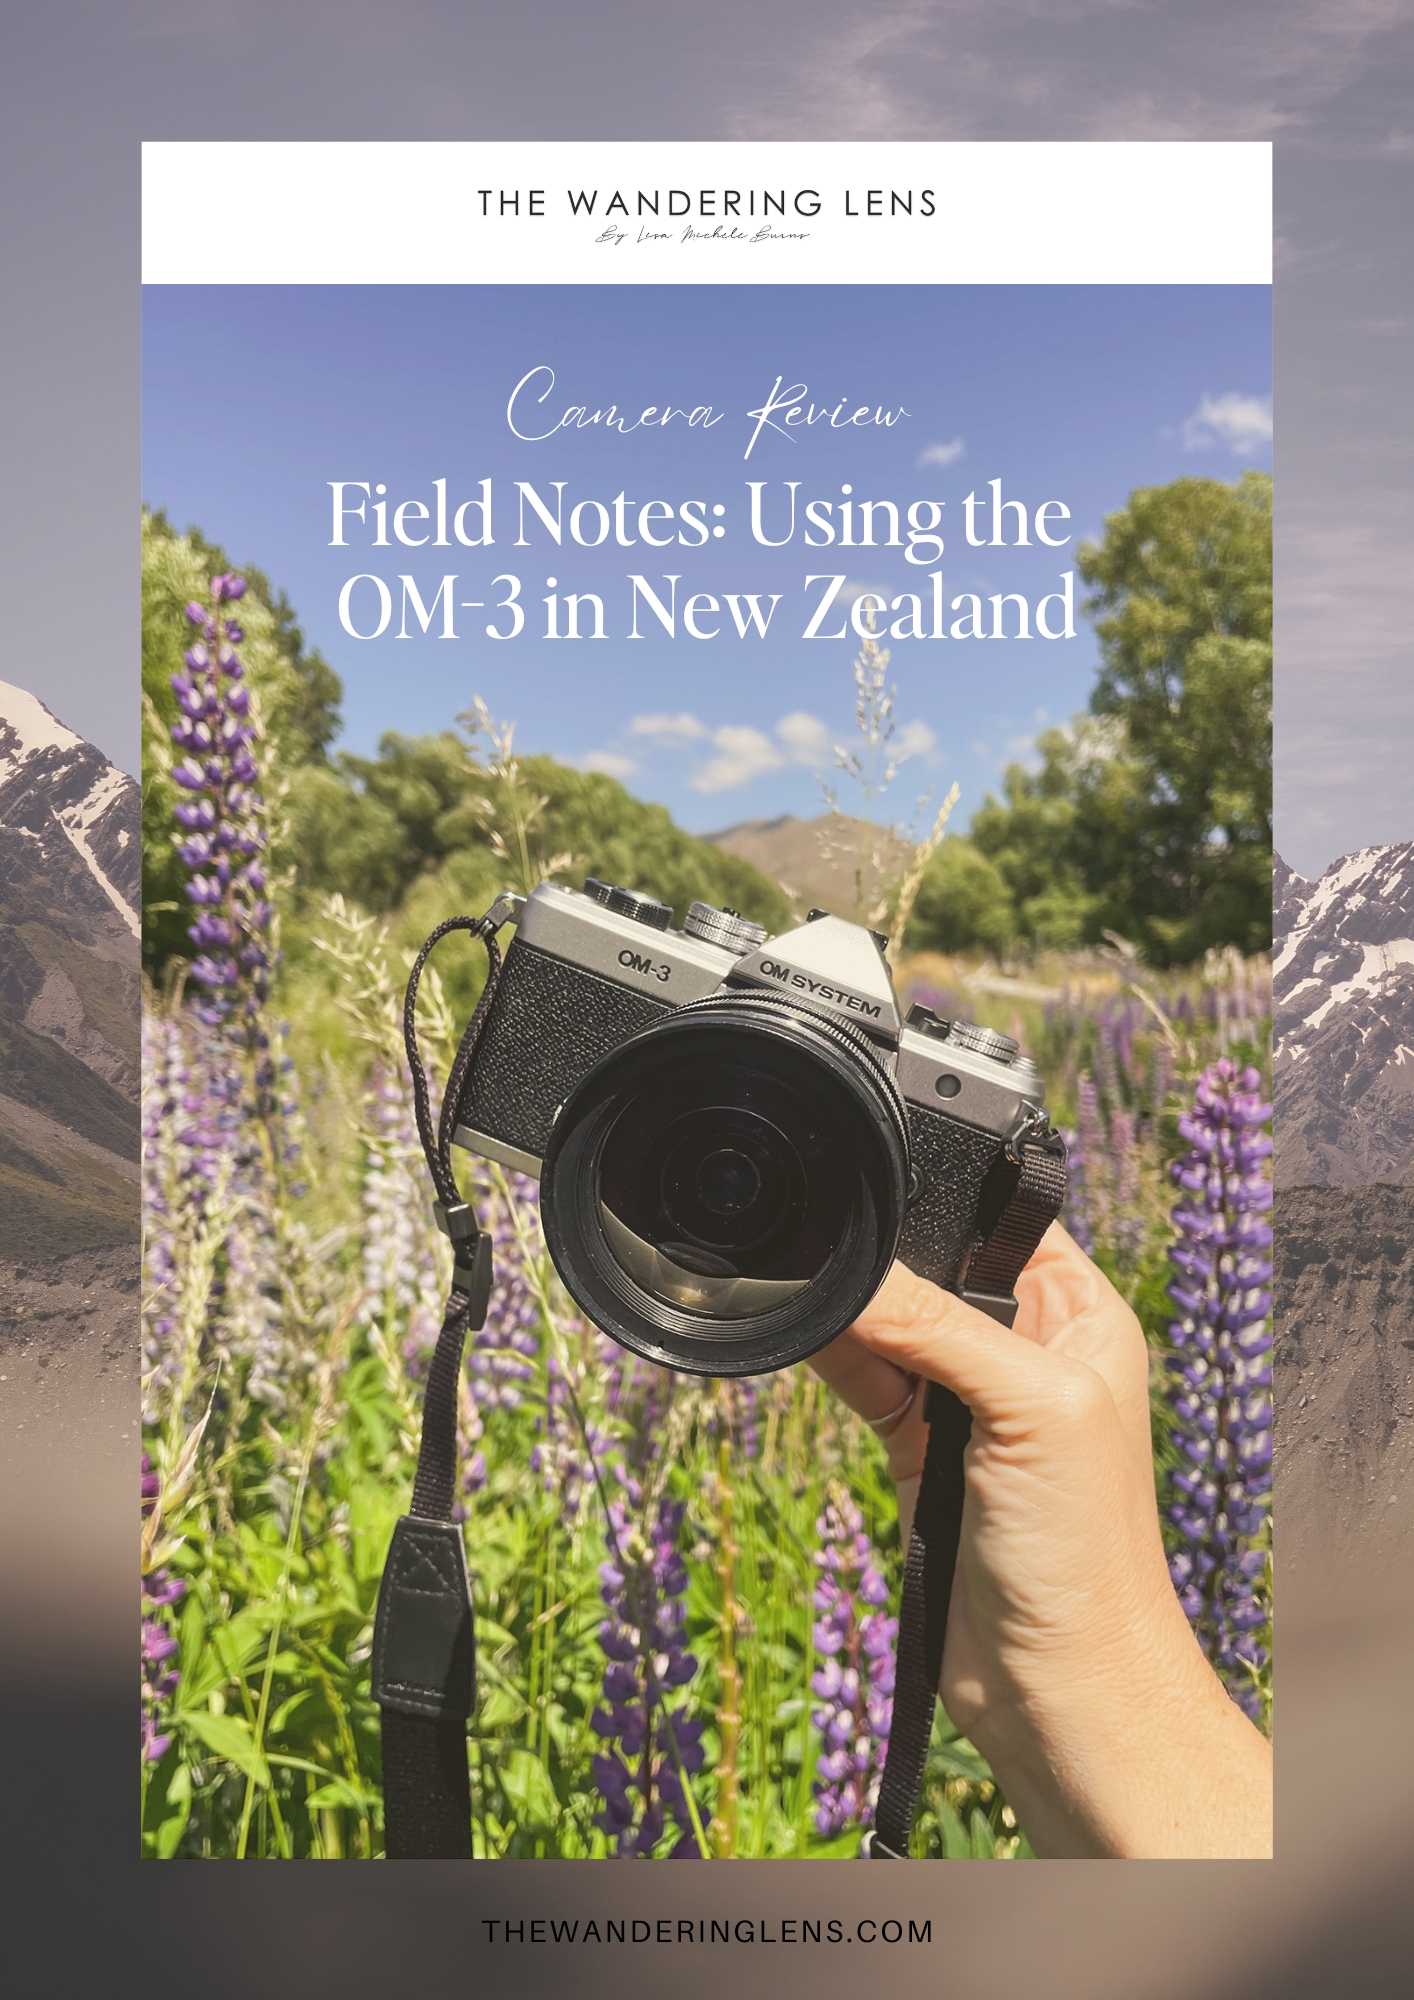
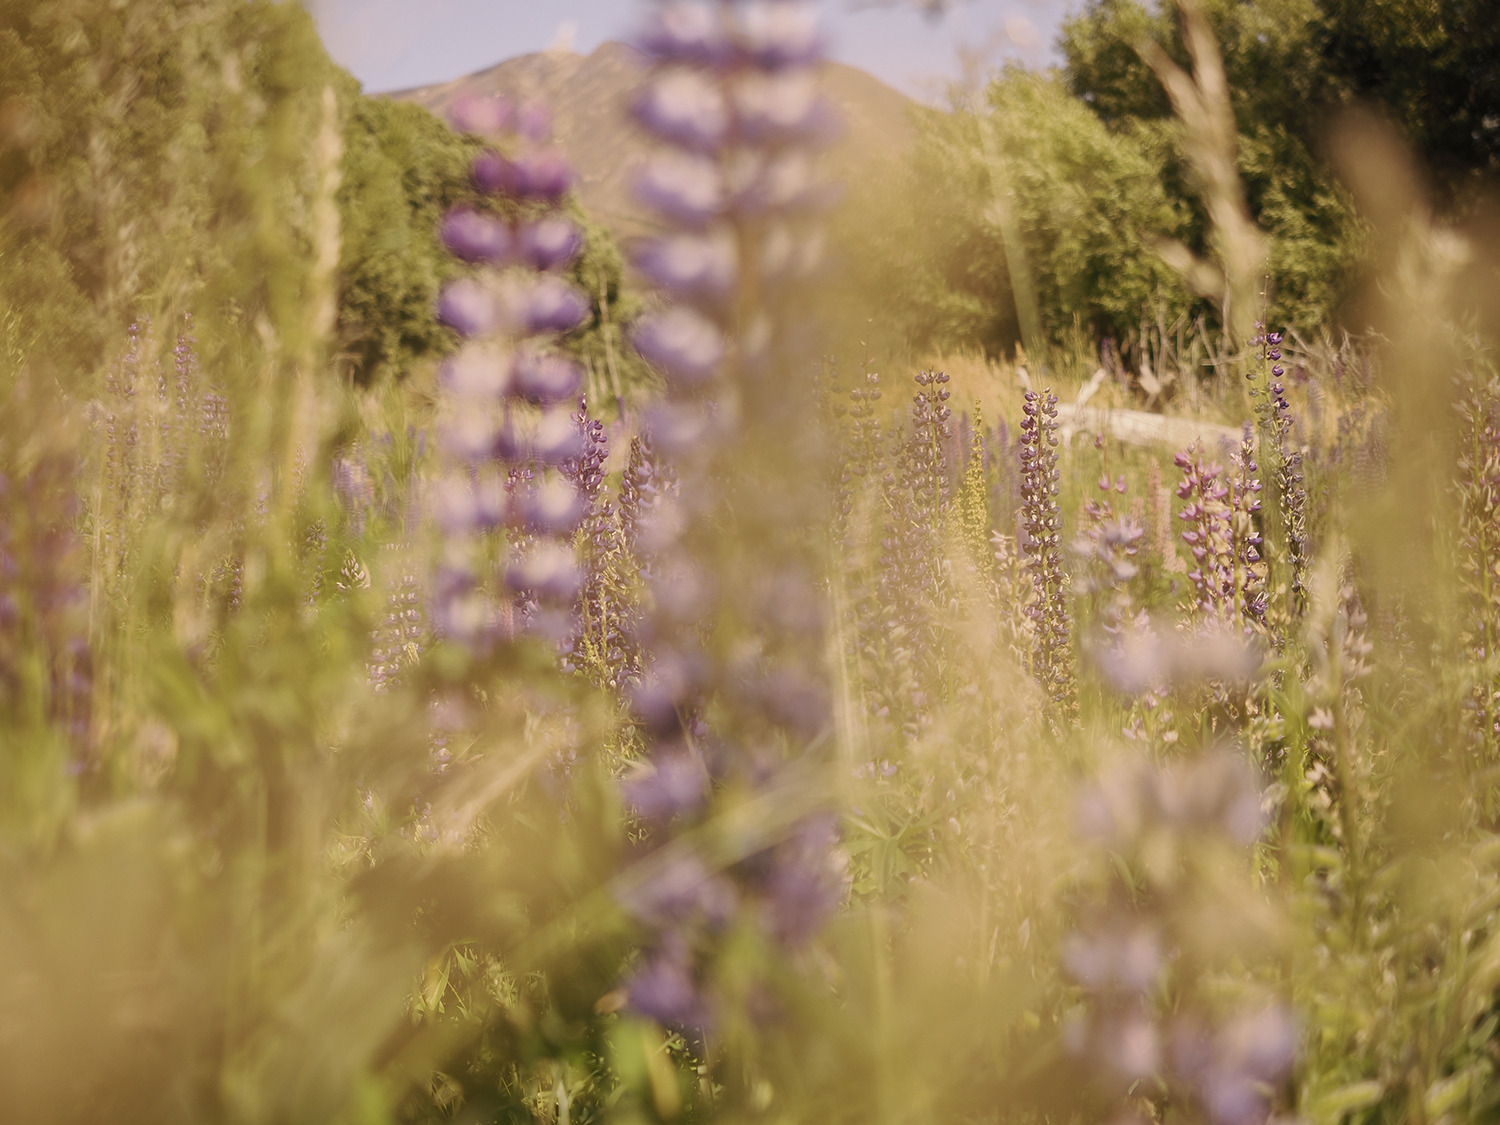
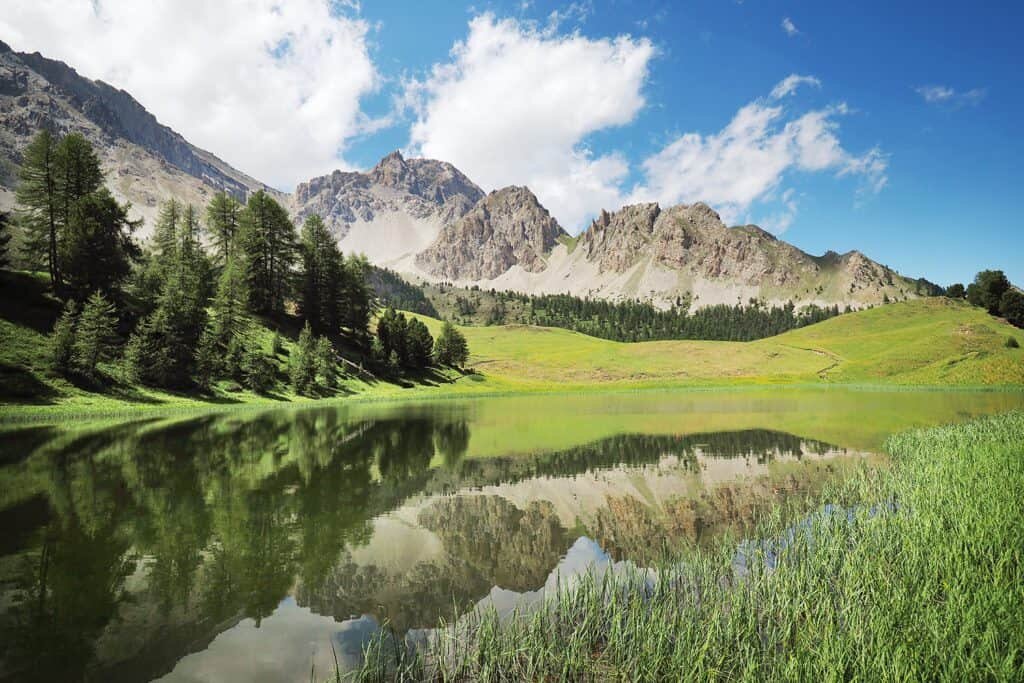
In December I took a secret squirrel trip with the OM-3 to New Zealand. On social media I mentioned it was my solo/self-employed Christmas party (which was also the case), however, I wanted to take the opportunity to use the OM-3 somewhere I felt inspired to create. Somewhere I knew I could stare at mountains, alpine lakes and wander in the vibrant fields to explore the camera and all that it offers creatively.
When I found out the OM-3 had a colour wheel and innovative options to control and contort colour palettes, I couldn’t get the visual of pink and purple lupin fields out of my mind. Sure, it was lupin season and my Instagram feed was filled with the vibrant shores of Lake Tekapo, but it felt like the ideal subject that would allow me to immerse myself in nature and use the camera to its full potential.
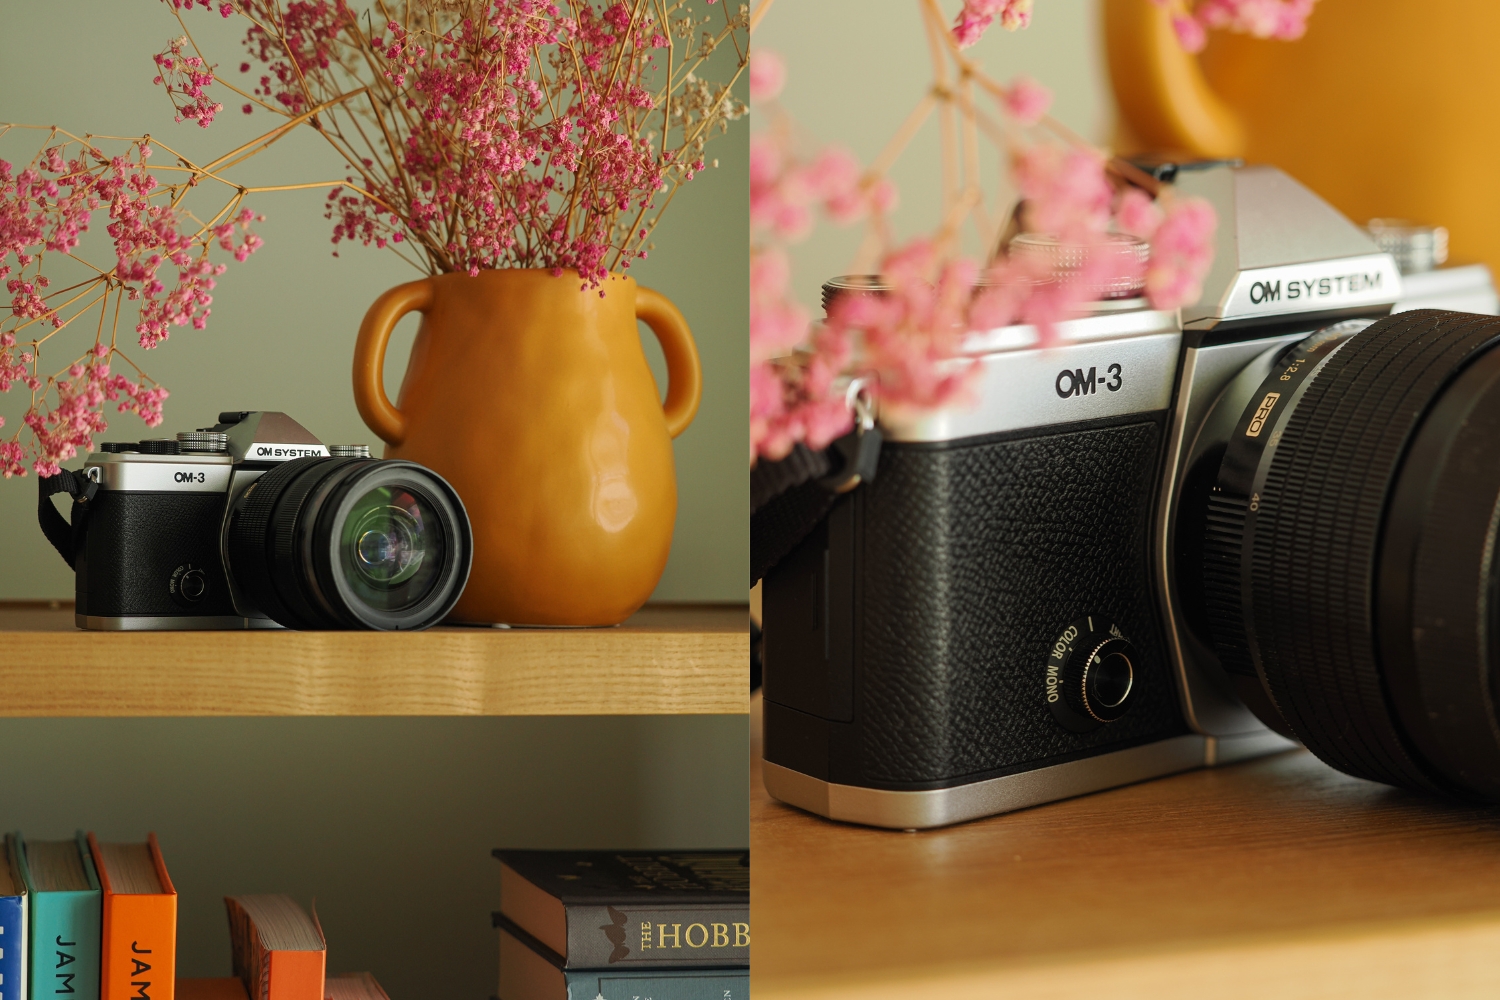
First Impressions of the OM-3
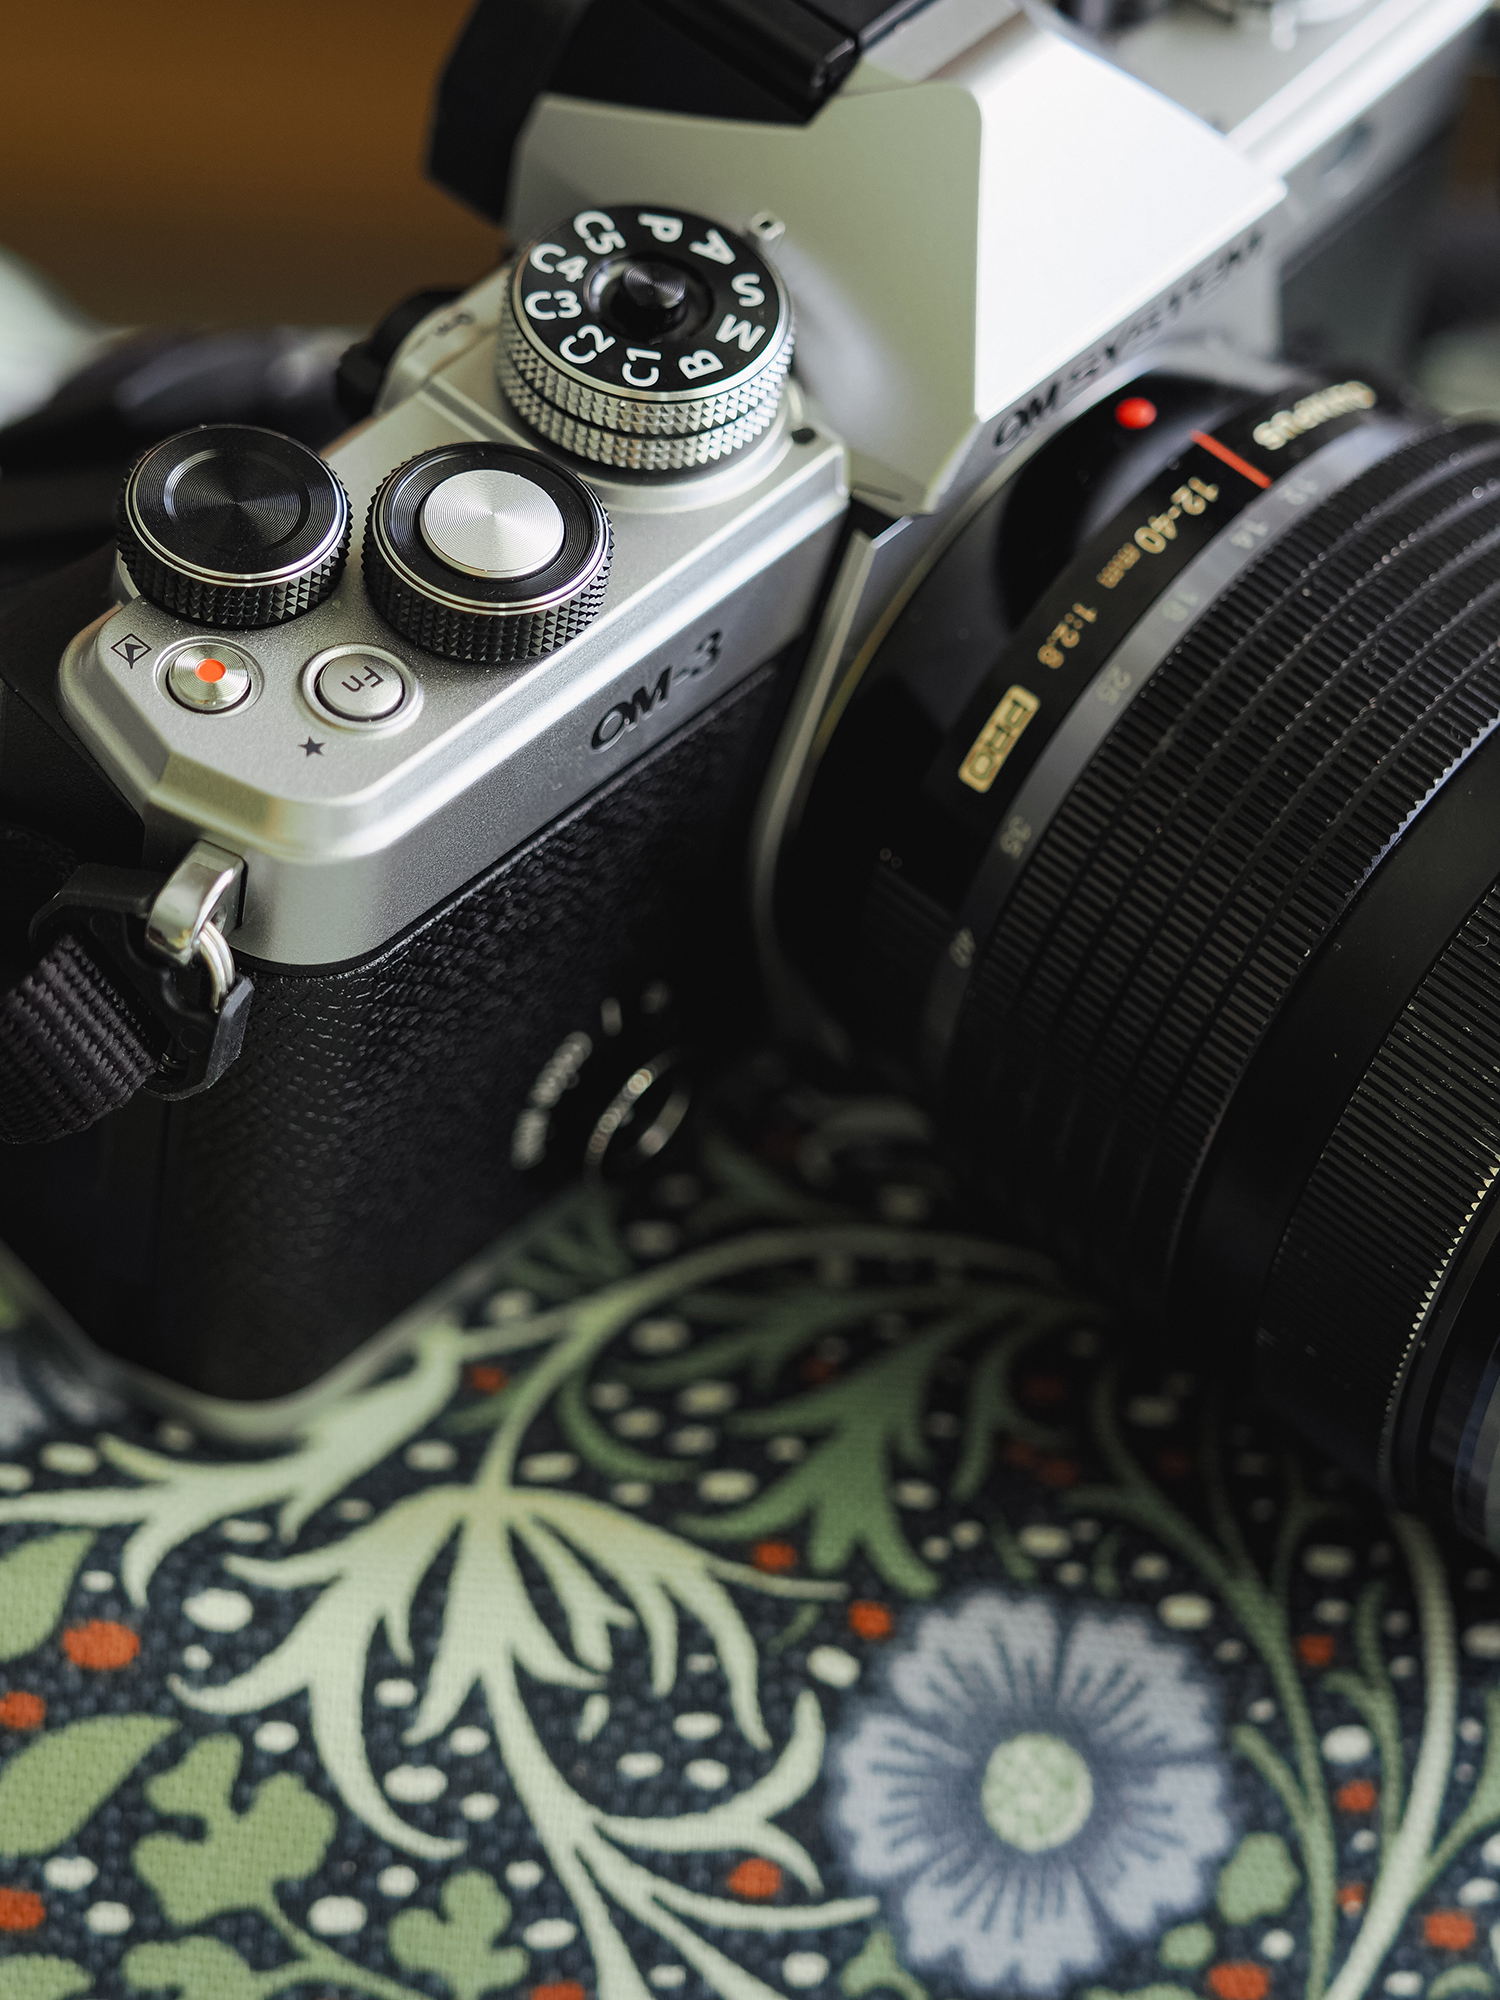
While I’ve been shooting with Olympus/OM SYSTEM since 2017 and have used various camera models in this time, I’ve never actually used the PEN-F, so upon opening the box and seeing the retro look of the OM-3, thought it was the cutest camera I’ve ever seen. Now, you’re likely not here for that groundbreaking insight that it’s cute, but of course, one immediate difference is the return of the ART dial, with the Mono| Colour | ART | CRT options.
As someone who isn’t particularly technical, this dial was so intriguing, and I knew it would likely enhance how I approach taking photos. The first thing I did was charge the camera, pop a memory card in and start pressing buttons, I wanted to see all the possibilities inside!
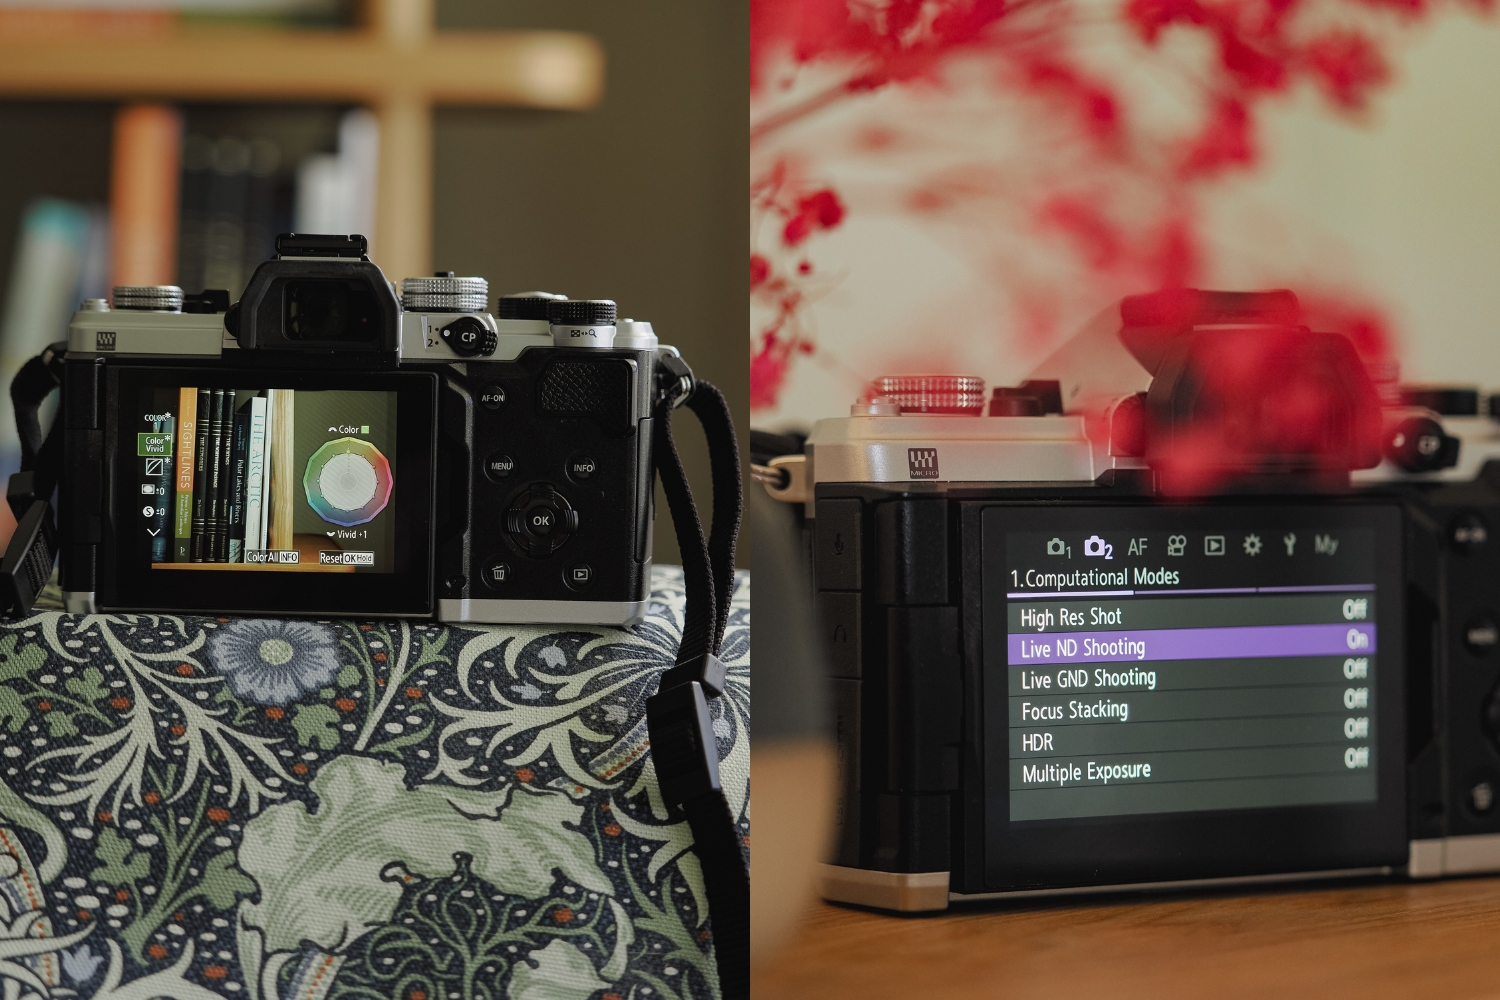
Exploring the menu I was happy to see a lot of the functions I use for landscape photography are available, with the Live ND and GND filters there, plus the High-Res Mode, enabling 50 megapixels when shooting handheld. These are all essentials for the type of photography I do, and I love that it now offers the chance to combine these with the creative colour profiling.
The Tech Specs of the OM-3
The OM-3 is a little beauty, blending creative tools with innovative functions, and as noted above features many gadgets and goodies inside that exist in the OM-1 and OM-1 MKII. If you’ve been reading The Wandering Lens or following my work for a while, you’ll know I’m less about the technical specifications and more about the creative possibilities. I can answer anything you need to know about the creative process and your approach, but ask me a tech question on the spot and I’ll likely need a moment to think it through – but that’s the beauty of photography and art, we all work differently and our approach is unique! Anyway, that was just to say, I’ll note the impressive tech specs of the OM-3 below and then continue on with my user experience below.
- 20.4MP Resolution
- TruePic™ X Processor
- 4K 60fps Video – With an ‘S&Q’ option on the dial for quick access to Slow + Quick recording times…so handy!
- Creative dial with the Colour, Art + Mono Profiles
- ISO up to 102400
- Internal Stabilisation – Up 7.5 stops EV with Sync IS lenses and 6.5 stops EV internally.
- OM-3 delivers incredible speeds, with 120 fps sequential shooting in S-AF mode
- IP53 Weather sealing
- Splashproof | Freezeproof | Dustproof
- Super Sonic Wave Filter to protect the internal elements
- Computational Photography button
- Live ND | GND | High-Res Mode making it possible to shoot either 80MP with a tripod or 50MP handheld
You’ll find the full list of details available on the OM SYSTEM website here.
Colour Palettes + Creative Possibilities
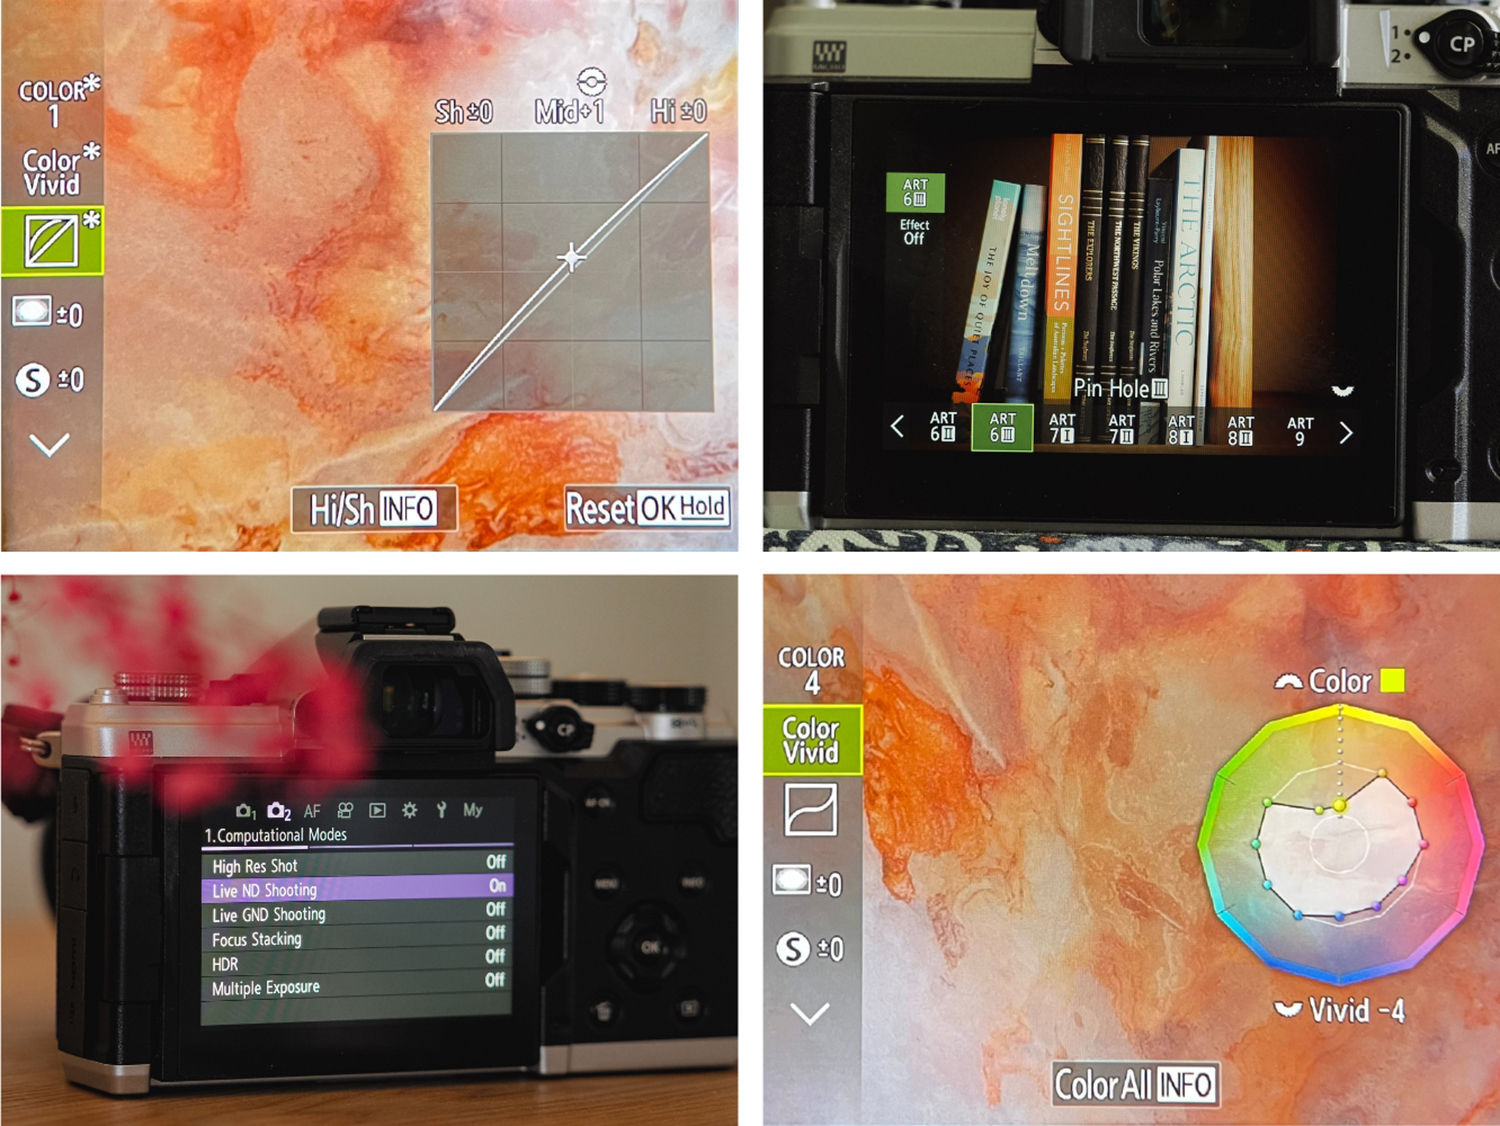
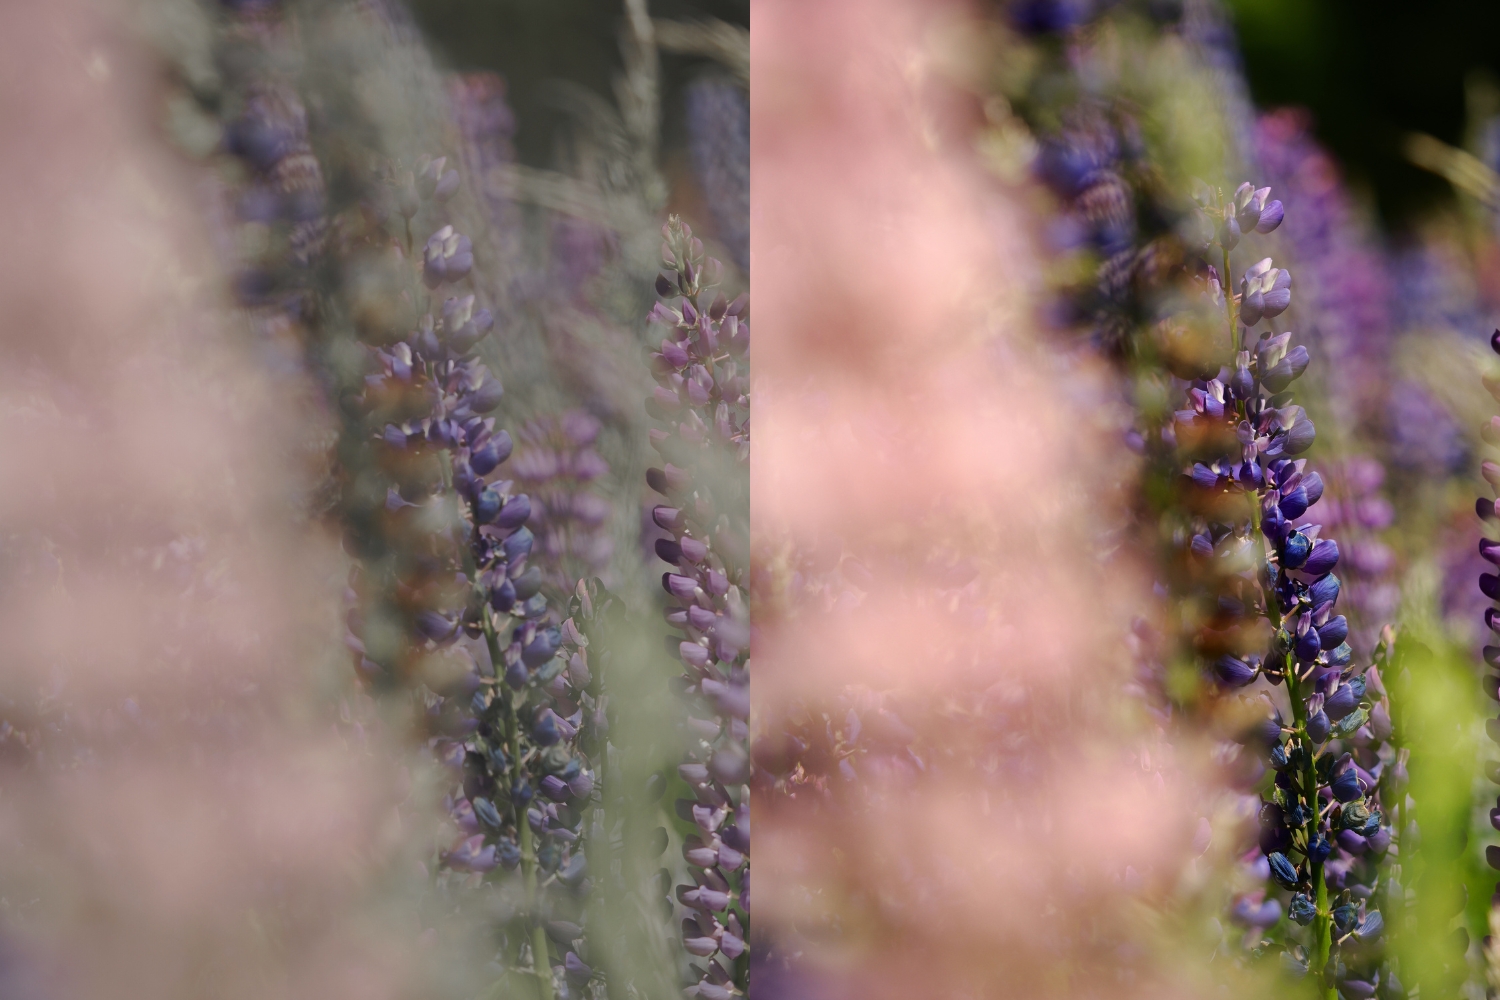
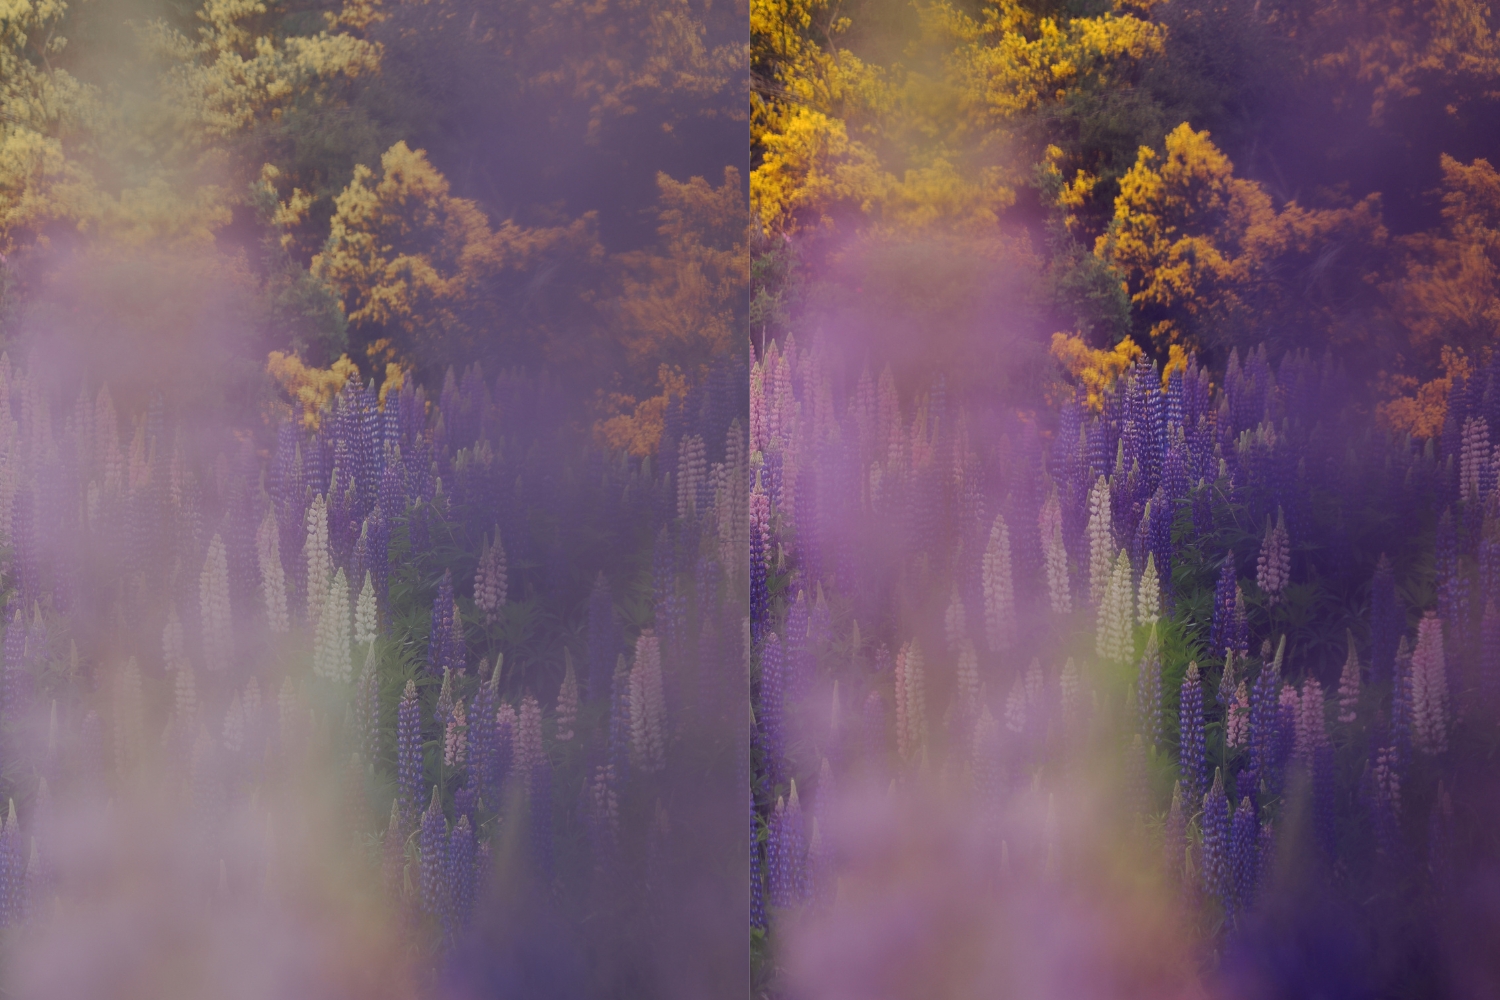
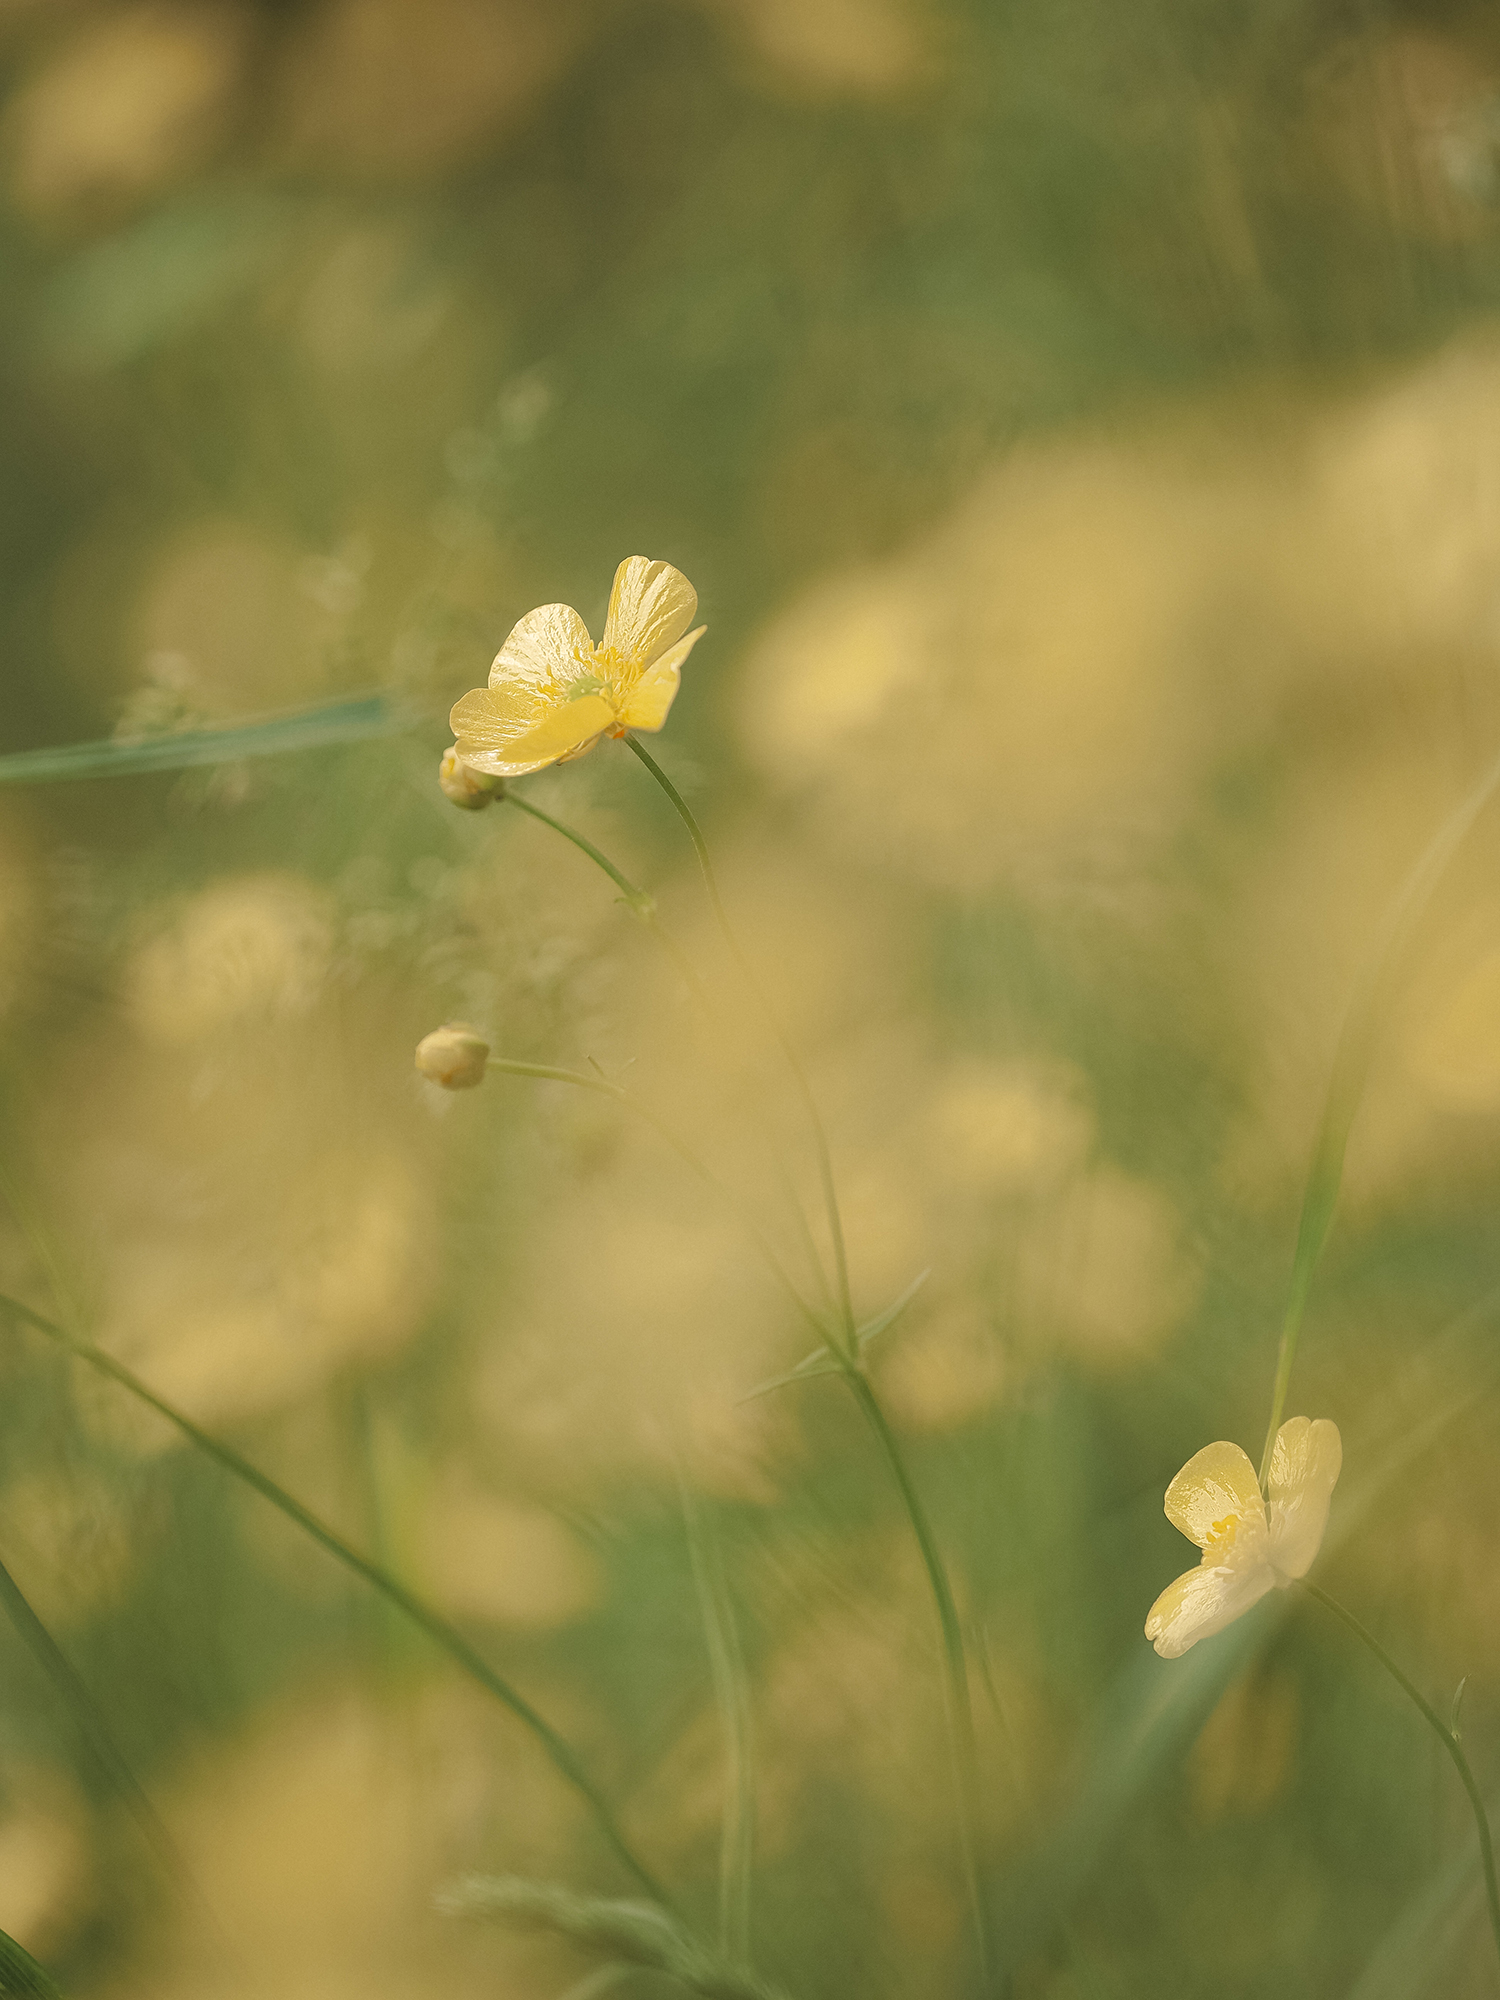
By turning the dial to access the Colour modes, you’re presented with four preset options that can then be tweaked. What I find so incredibly innovative is that it’s all happening live, exactly like the Live ND allows you to see the movement flowing through the frame, colours are adjusted in real-time so you can see the impact immediately before pressing the shutter.
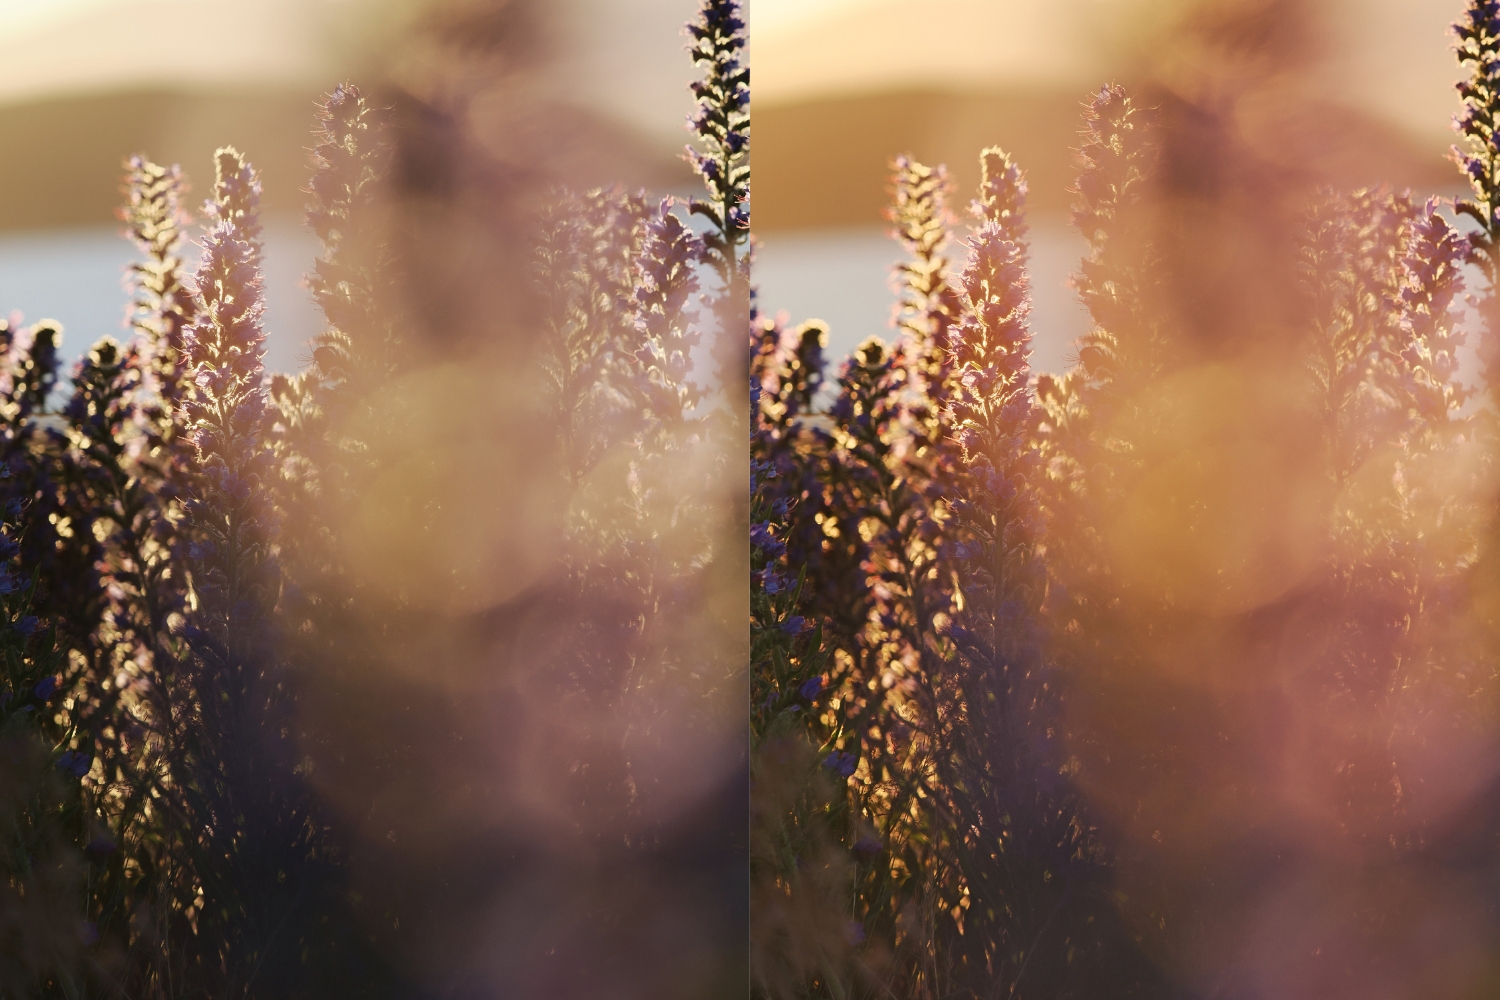
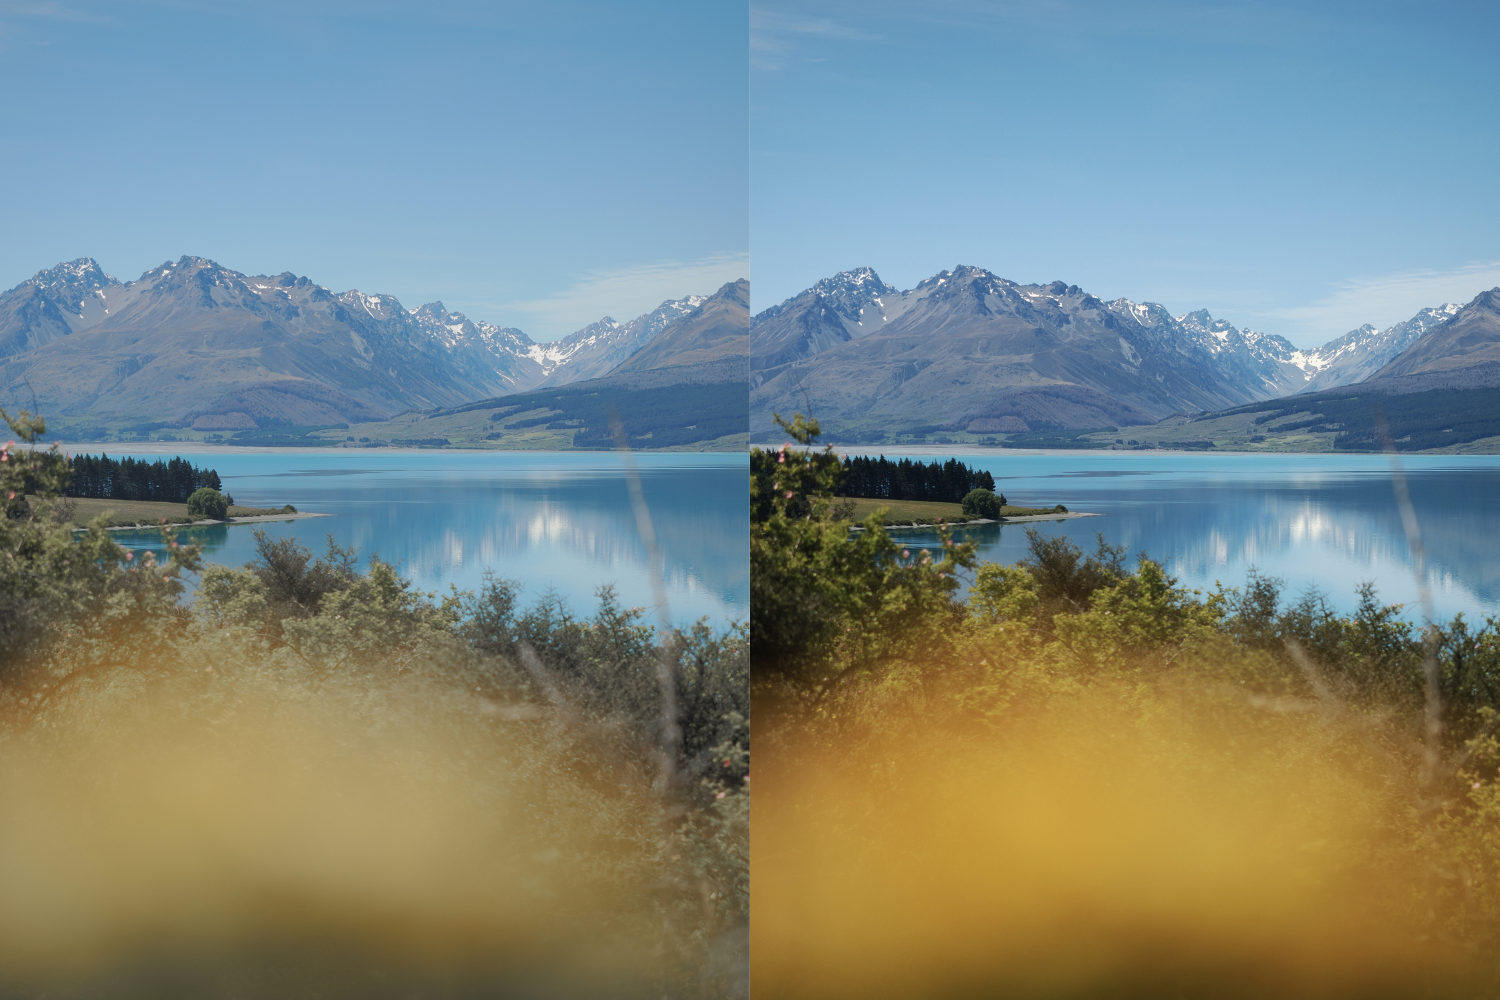
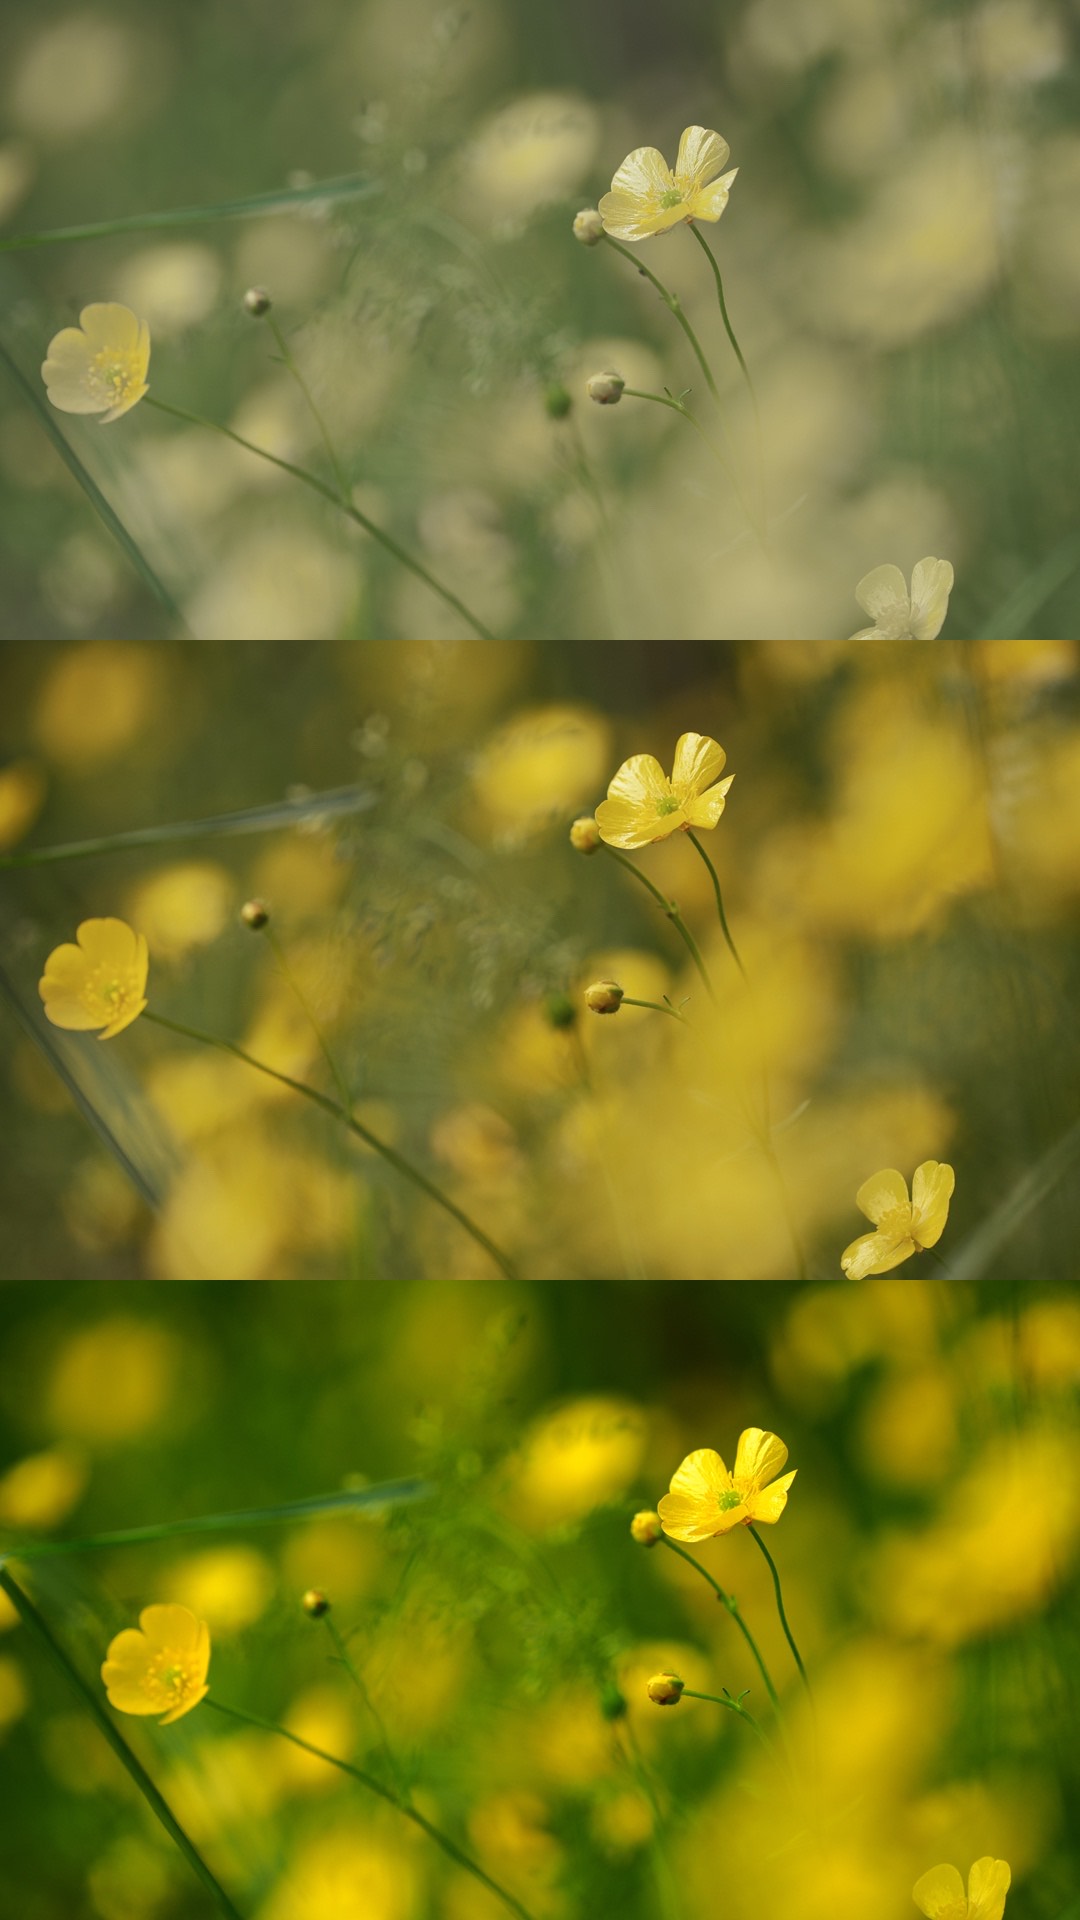
As an insight into my workflow, typically I’ll shoot with a warmer, brighter tone and then make minor adjustments in post processing on Adobe Photoshop. I enjoy producing warm pastels, sometime on the more vibrant side, but never too dark or contrasted, I love working with softer palettes. One of the first things I wanted to trial was whether or not I could produce an outcome similar to what I typically edit, within the camera itself. An example below of golden hour with the lupins…zero editing on these images, only the adjustments in camera, the left side is using the softer more muted profile, the right is the more vibrant, warm tones.
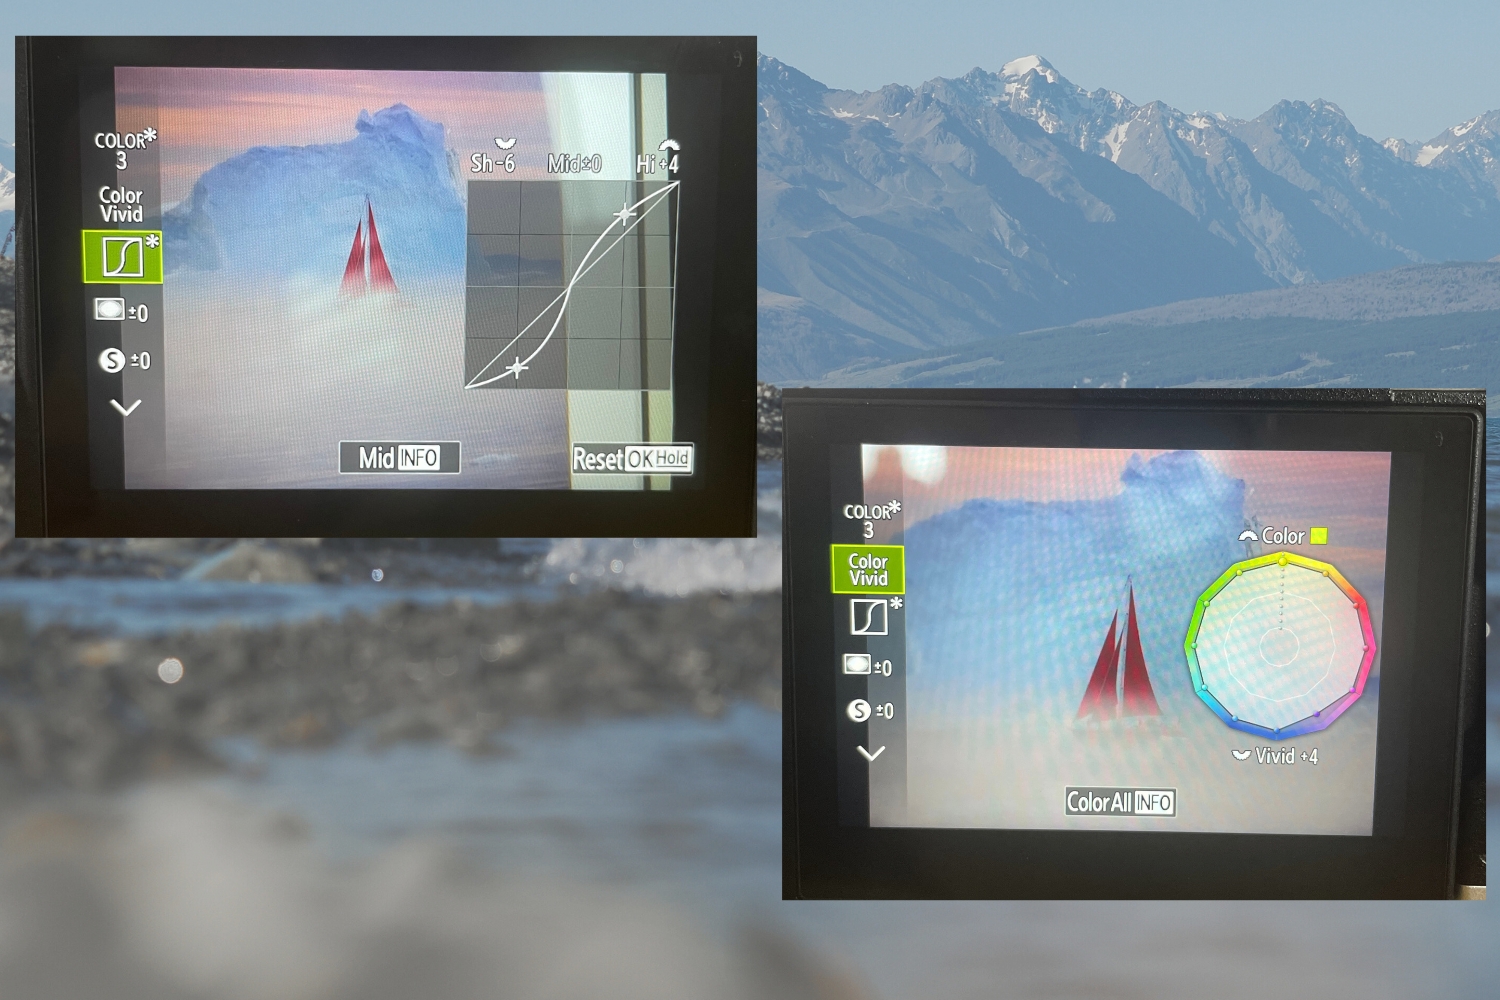
These are some screenshots taken at home while focusing on a print to highlight the features…there were no icebergs or boats with red sails in Lake Pukaki that day 🙂
Just a quick note – The OM-3 also has regular modes like aperture, manual, auto and incredible video capabilities. You can opt to use the colour and art features, or not. I wanted to note this incase I got overexcited regarding the colour profiles and it came off as the only possibility, it does it all AND has the bonus creative tools 🙂
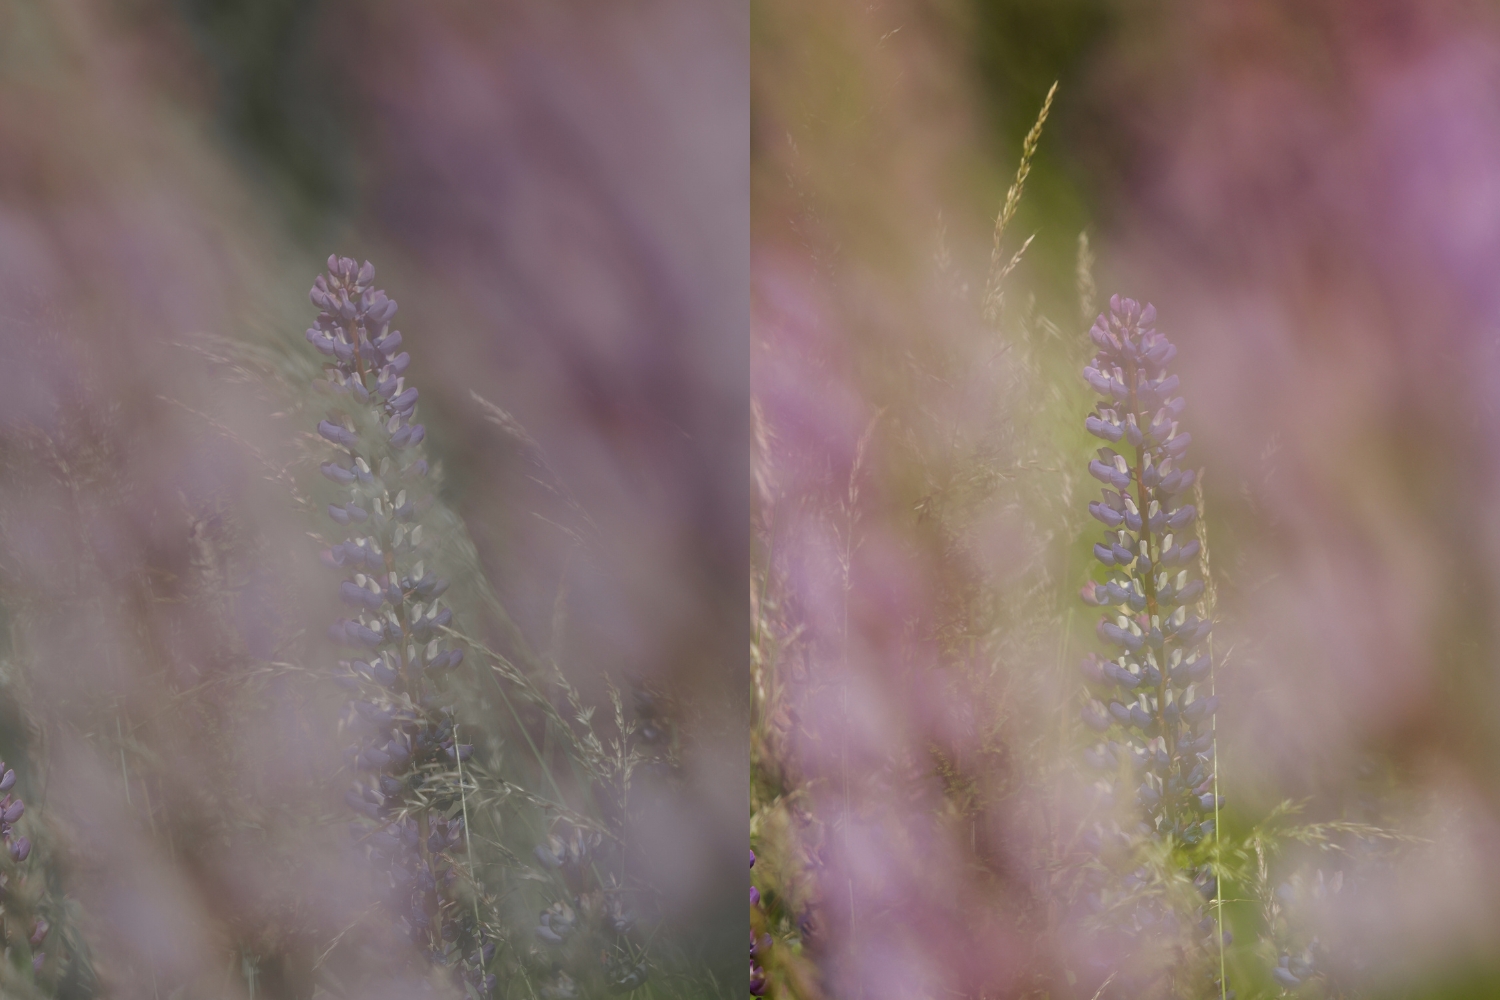
Below you’ll see some examples of the various colour possibilities. Access to colour adjustments are via the colour wheel and tone curve, plus you can increase or decrease contrast, sharpness and shading.
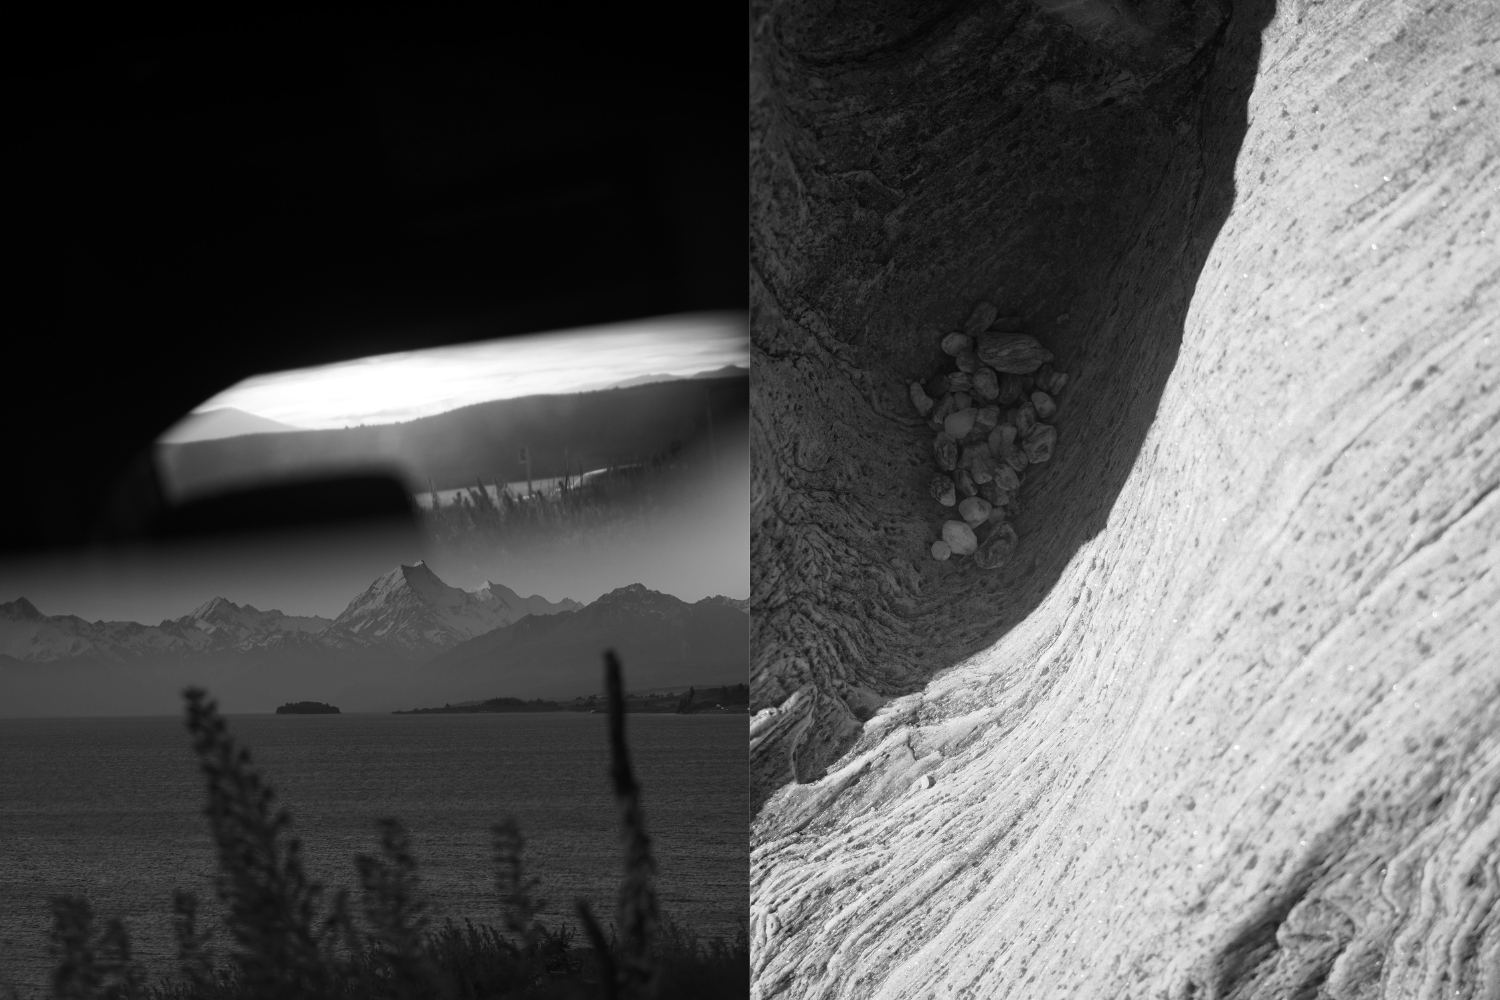
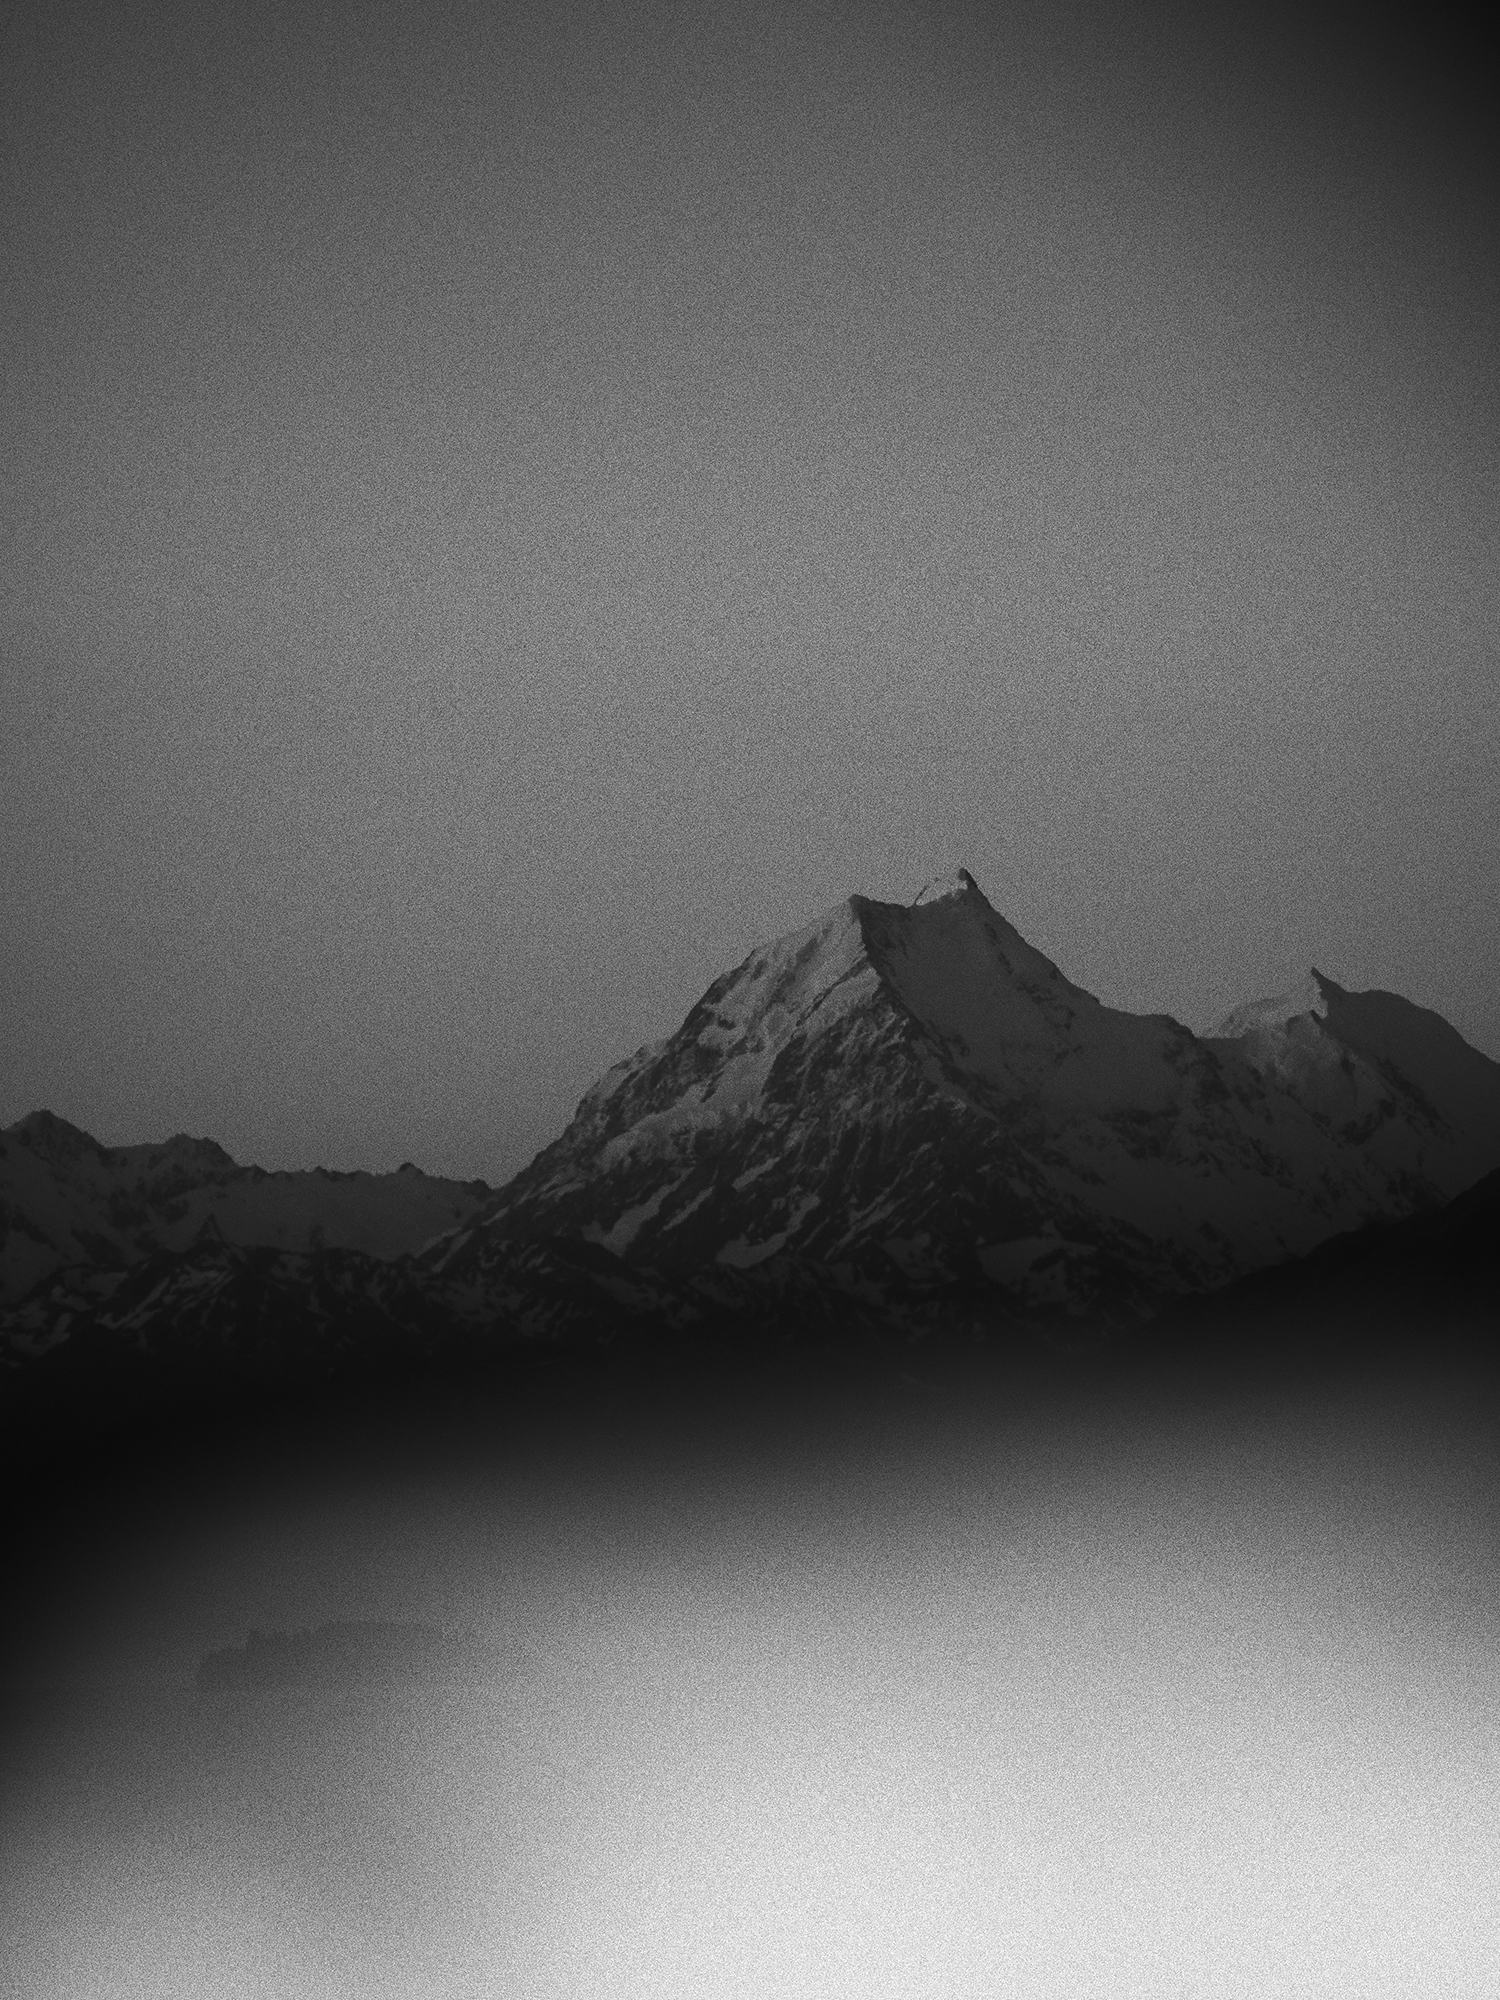
While I enjoy shooting colourful scenes, playing with the Monochrome profiles produced some gorgeous results. I’ve always loved the black and white art filters in the other models, and these are a collection of four beautifully crafted outcomes that enable a film-like tone, softer tone, and classic monochrome. The darker ‘MONO 2’ profile is my favourite, particularly when paired with an alpine landscape, or rugged textures, even when I was shooting inside the car using the mirrors, the result had such depth.

Using the OM-3 In the Field
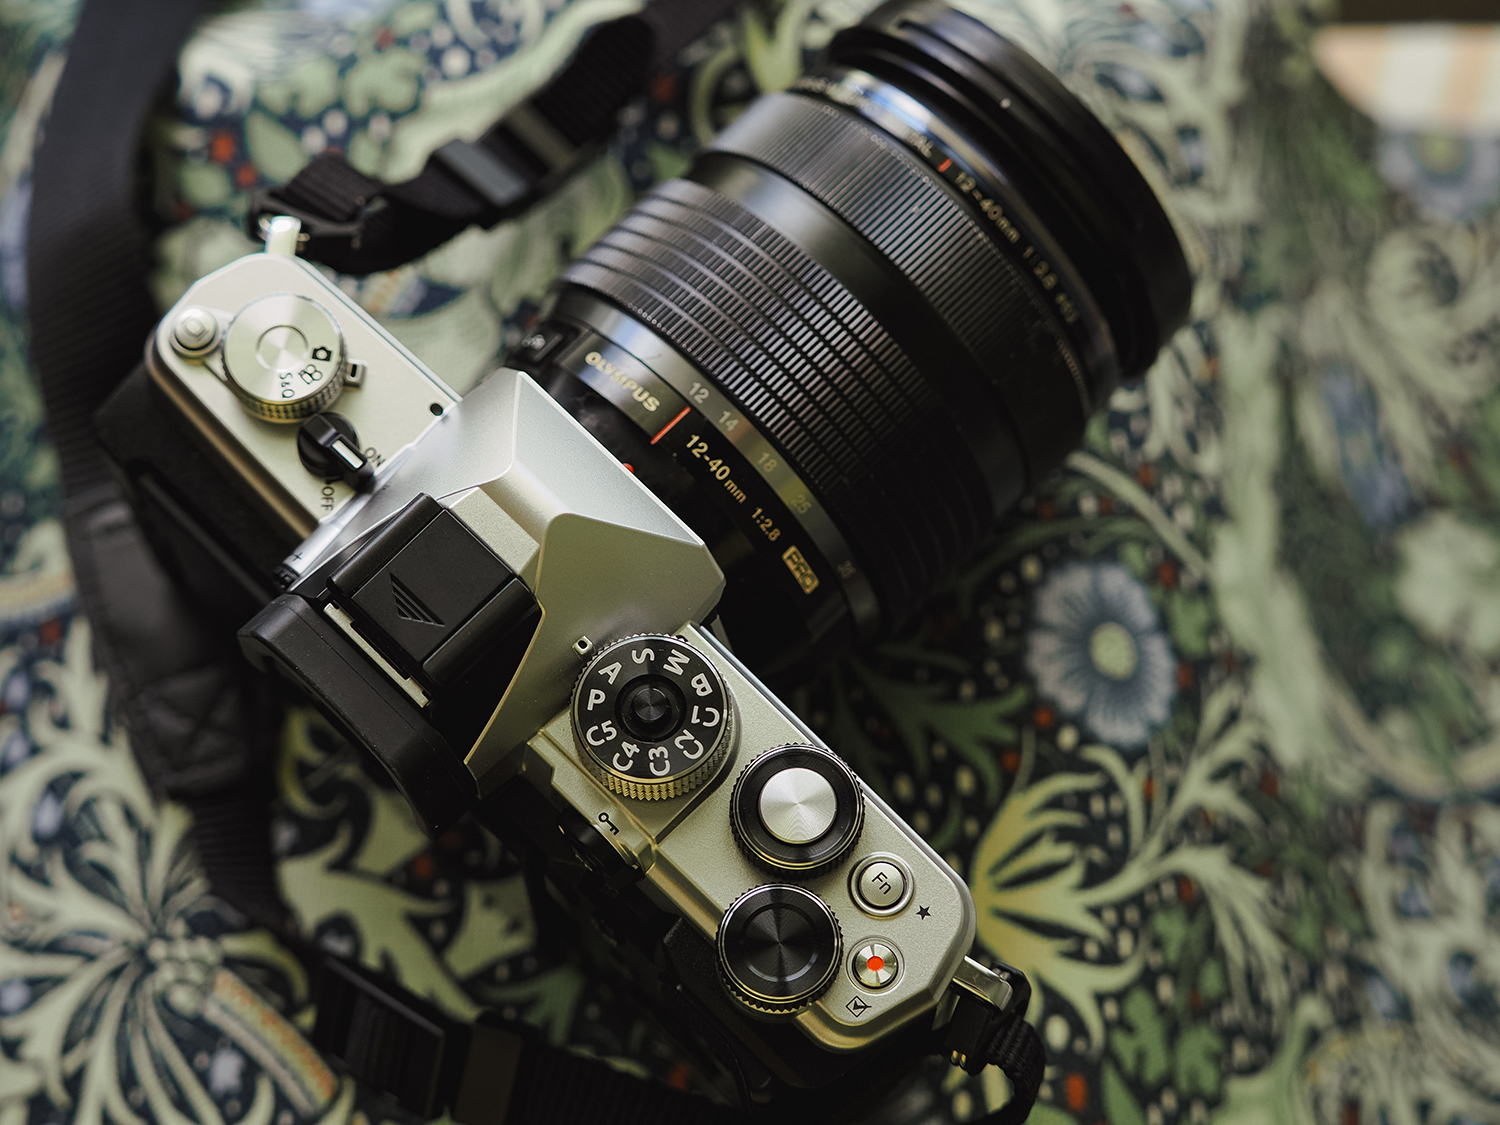
To ensure faster transition between the colour profiles while I was out exploring, I opted to set the 5 x custom positions in the mode dial with 5 colour profiles, C1-C5. I also wanted to use these as clear examples of the variety that can be achieved in just a few clicks. These are the five profiles I set.
- C1 Customised to match the soft, warm tones in the style I typically produce with post-processing.
- C2 The Colour 2 Profile (preset)
- C3 A profile with slightly muted saturation and vibrancy
- C4 Strong, vibrant tones to experiment on the depth of colour available
- C5 Cooler tones with an outcome that felt like film.
To create these I firstly photographed a few scenes to assess how the filters, tone curve and various creative controls worked. When editing, the tone curve is actually the tool I use most, it’s become a habit to tweak this and produce the brightness, or overall adjustments using RGB channels. It felt so thrilling to see the colour adjustments available by simply playing around in real time with the scene before me.

I spent time at Kea Point lookout which is one of my favourite viewpoints of Aoraki/Mount Cook, somewhere I knew would have access to open sky and an interesting foreground and landscape to work with. One thing I didn’t expect was a bluebird day with almost no detail in the sky. Plus, it was about 28 degrees and I was roasting once I reached the top, providing a good reason to sit and experiment with the GND filter and colour settings.
For sunset, I wanted to see if the warm tones would be possible without any additional editing. Luckily, the weather stuck around with clear skies and golden tones. Ducking out to shoot the lupins at Lake Pukaki, I quickly realised the temperature had dropped significantly, which was also due to the fact I decided to have a swim in the chilly lake, so was still in my swimmers as the gusty winds hit. Brrr.
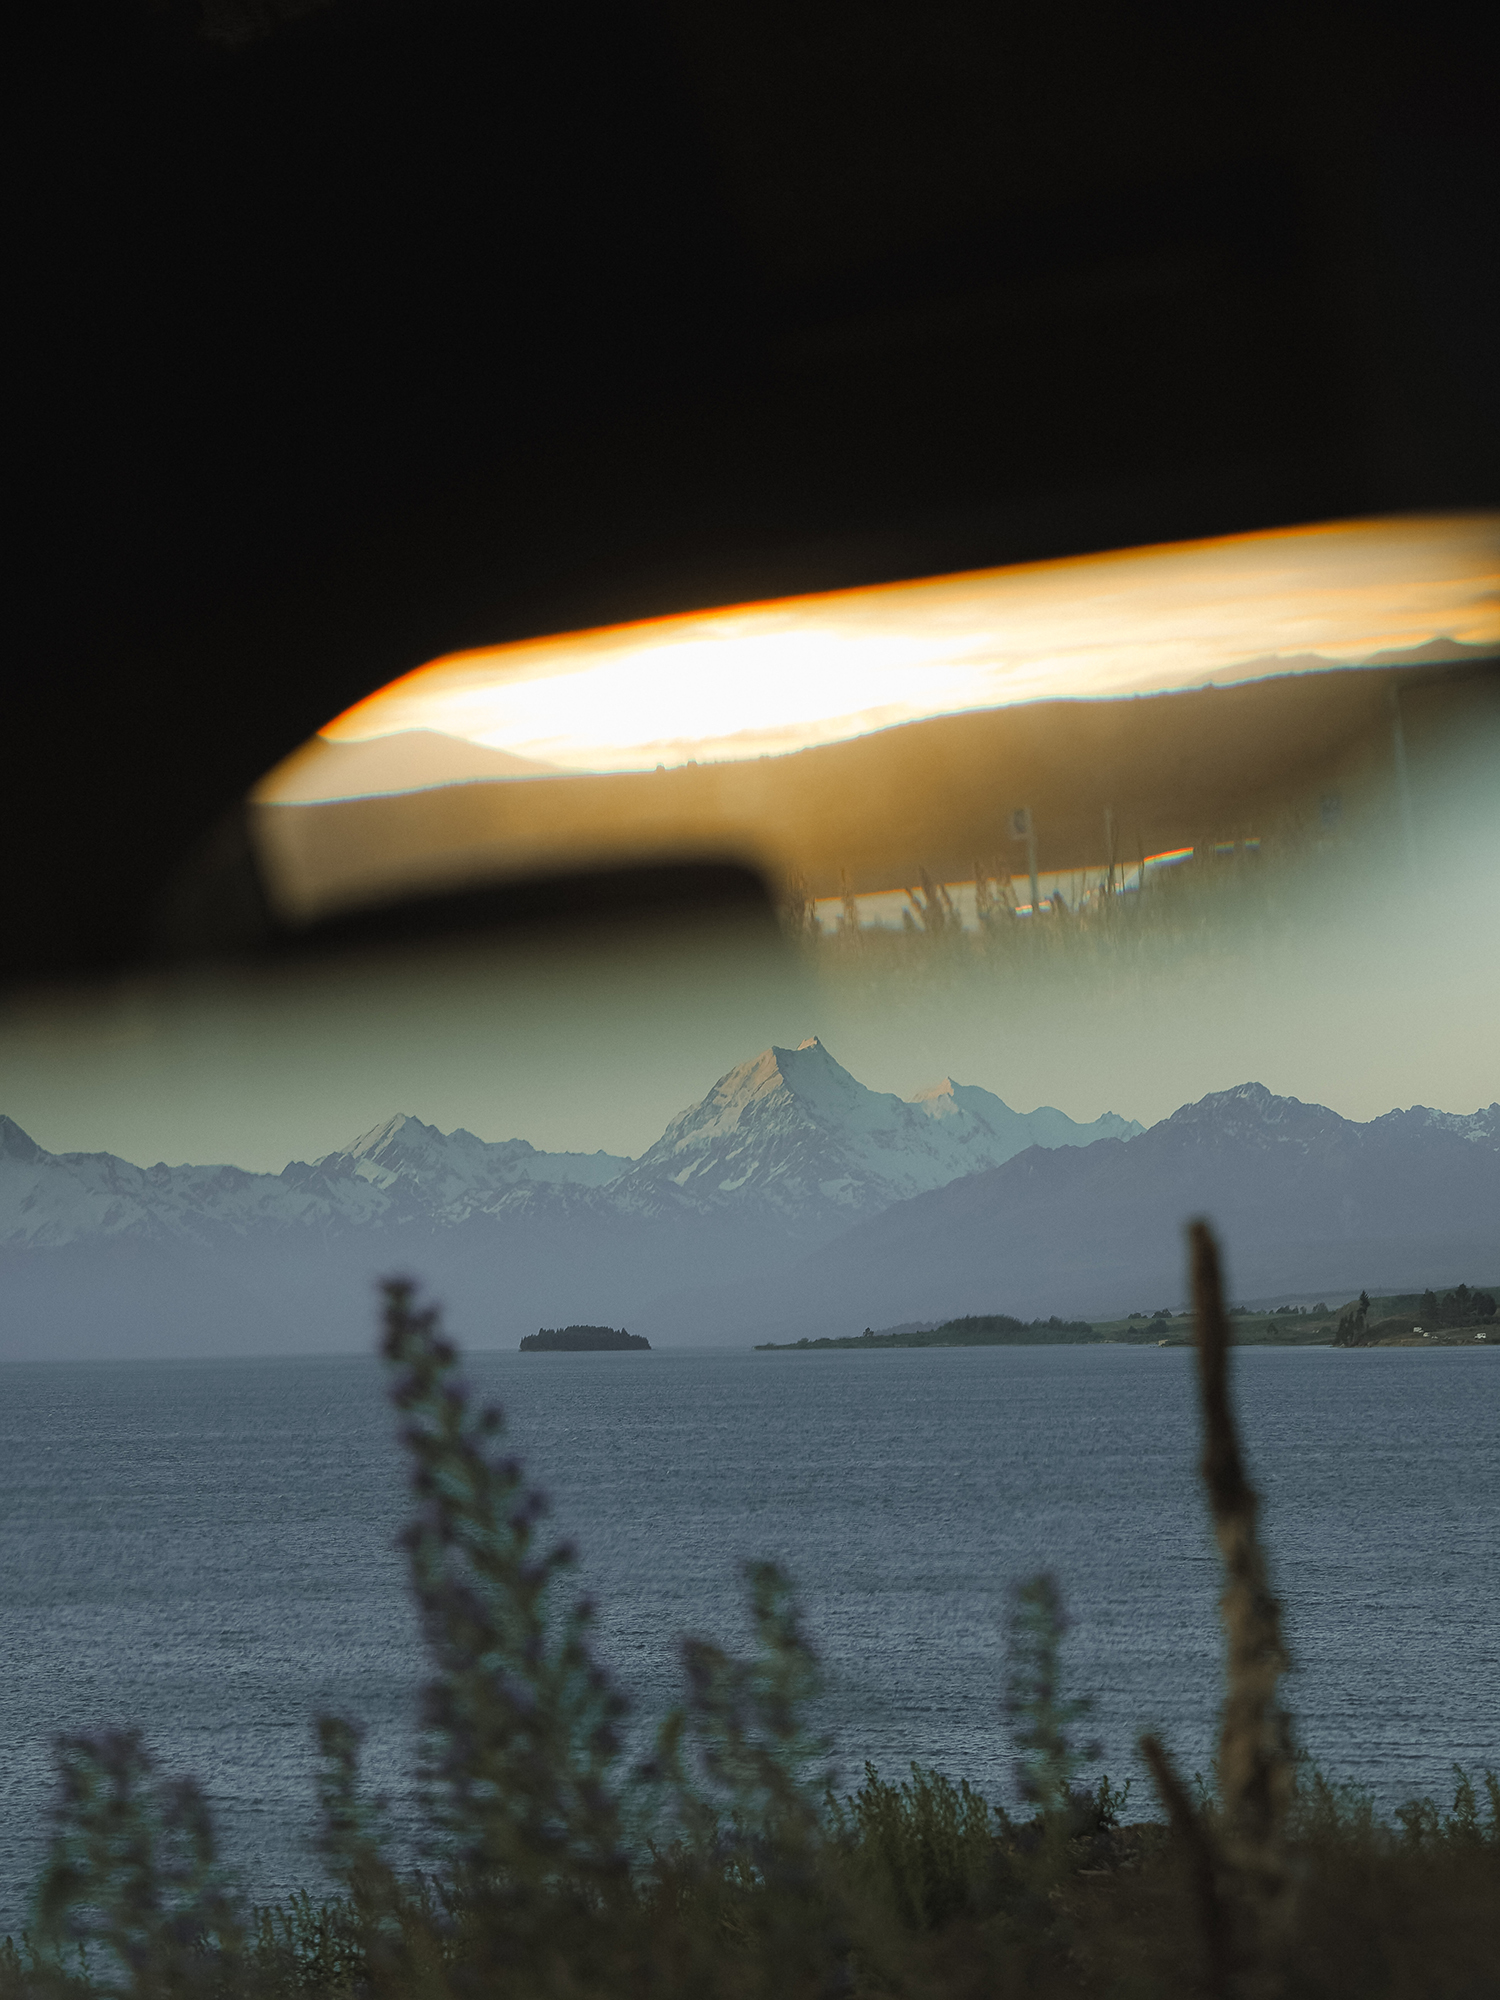
All that to say, the wind forced me into my hire car before sunset hit; this provided the chance to get a little arty and use the windscreen and rear-vision mirror as my subjects to help frame the landscape creatively. These images worked really well with the cooler tones and mono profiles.
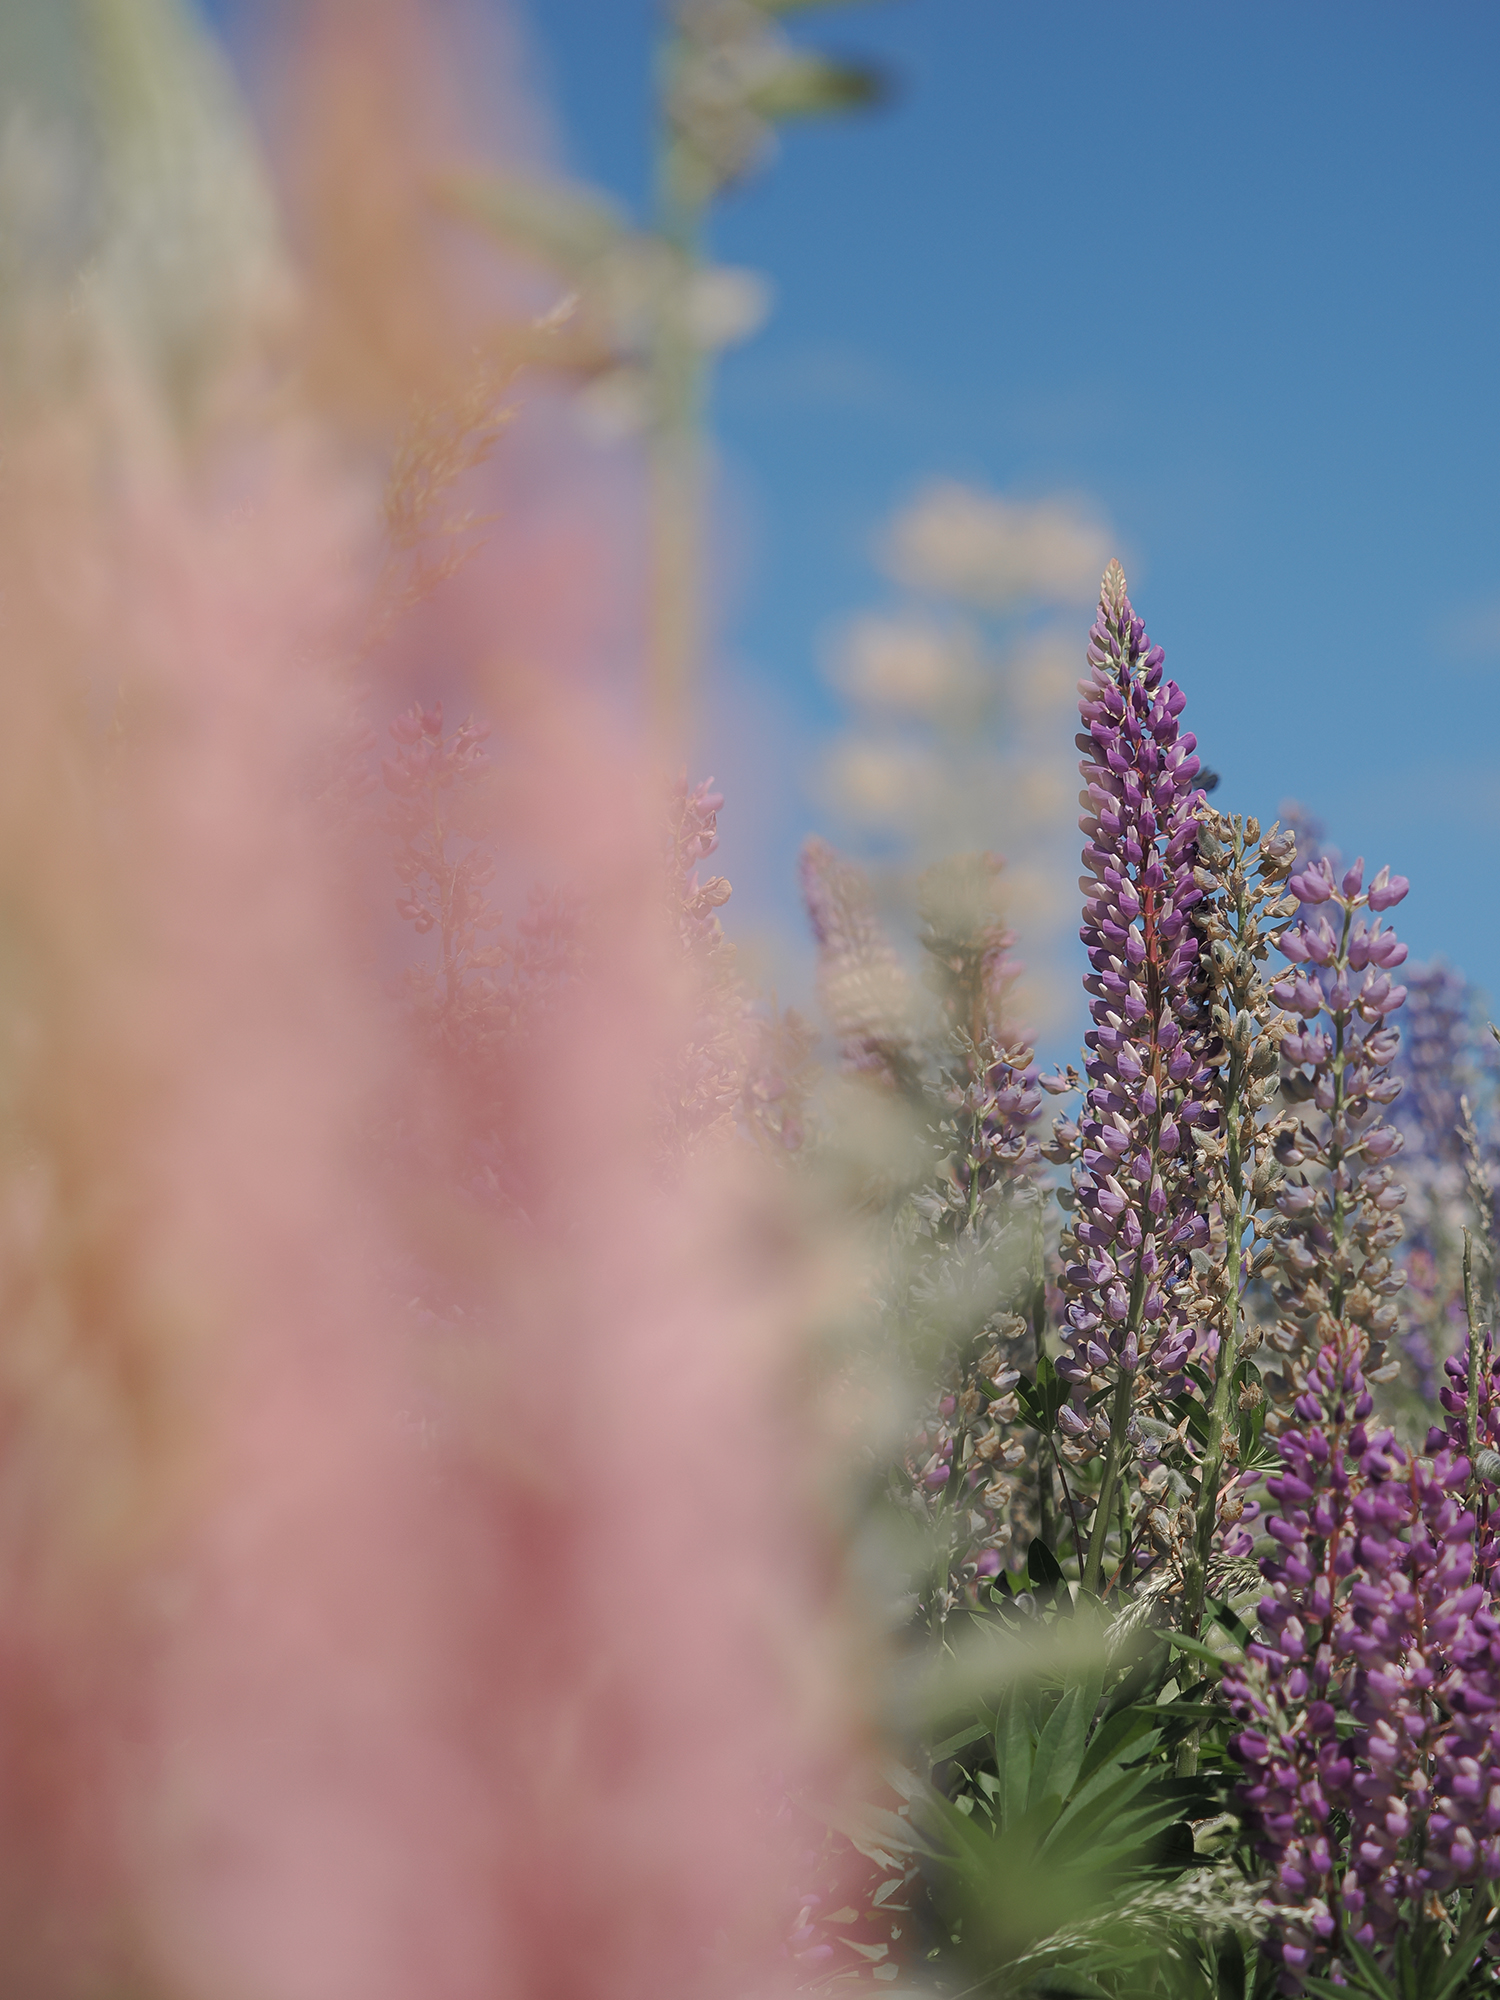
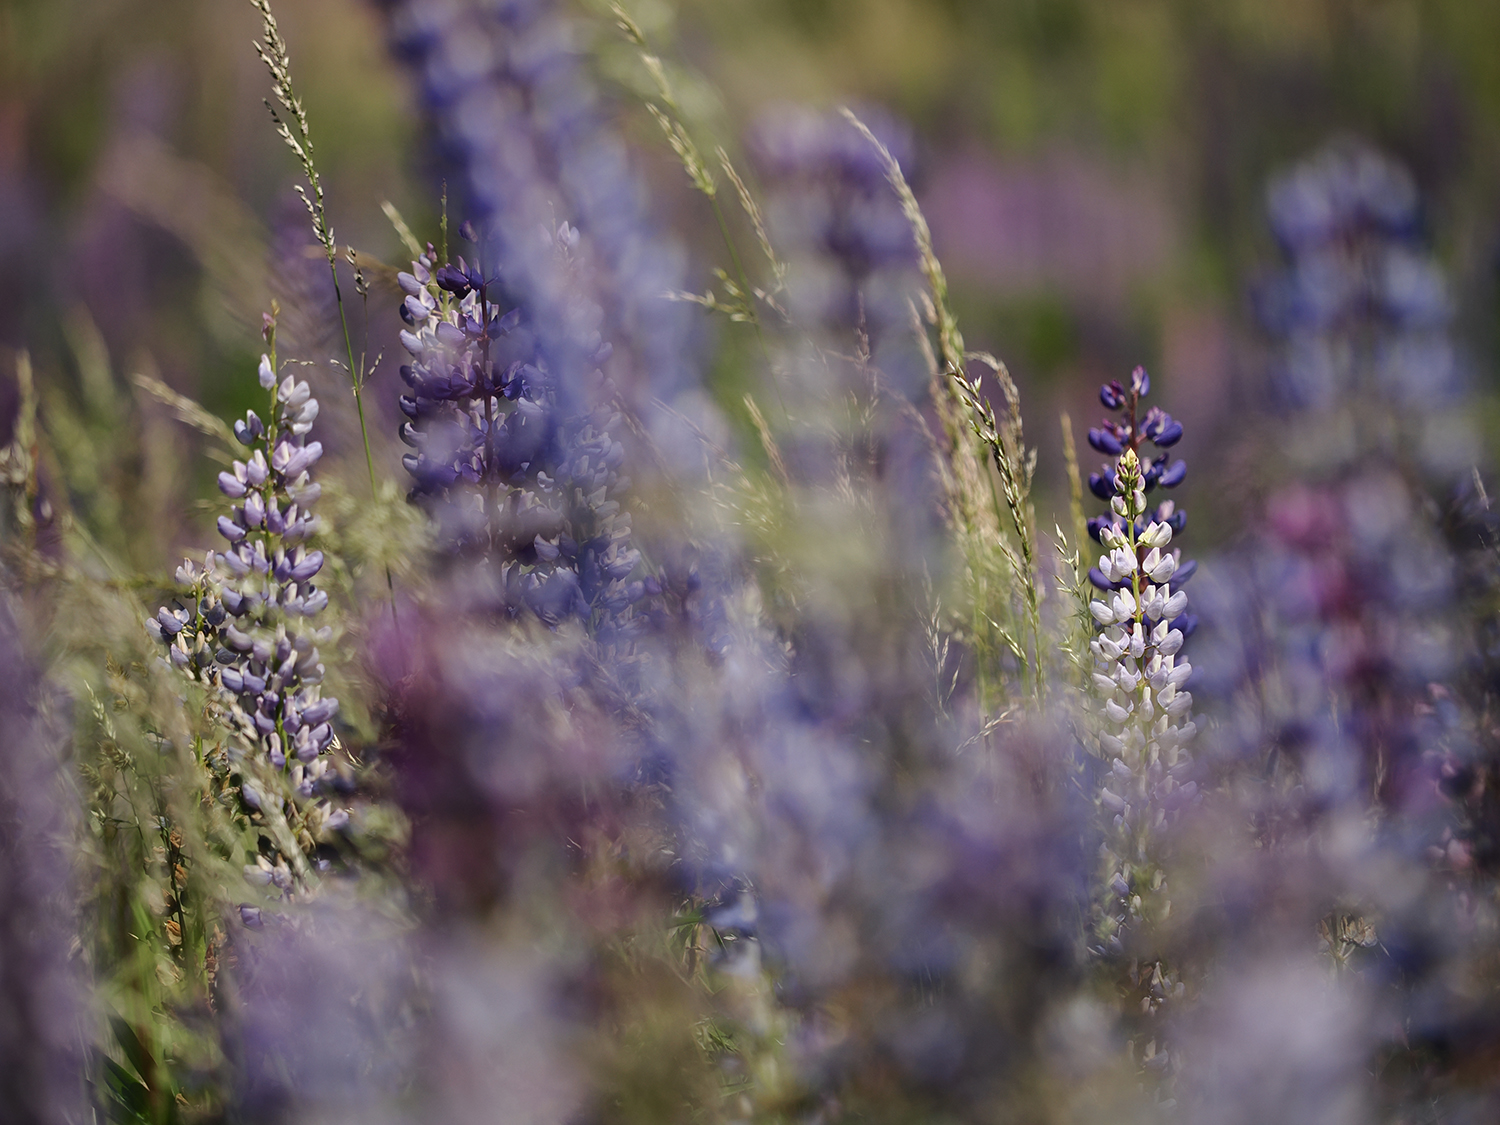
Photographing Lupins in New Zealand
Colour has always been such a huge part of my work, so to see the results occurring as I adjusted the creative tools was such an unexpected source of motivation. When photographing I’m always putting myself in odd positions trying to scout frames within the scene through branches, trees, across water etc. I have to say the opportunities were flowing because it felt interactive, every adjustment was an encouragement to seek new angles or incorporate the colours within the frame with a different approach.
You’ll notice a lot of the images I captured are shot with a wide aperture, and this is how I love to photograph, boosting the bokeh by integrating foreground subjects. However, with the custom colour profiles, it felt like I could play around with the outcomes, getting close to the pink and purple lupins then move around to see how the splash of colour worked best within the composition.
Final Notes on the OM-3
If you’re in the market for a camera that does everything, and provides the chance to get creative and actively involved in the outcome of each image, this should absolutely be considered and if you’ve got any questions at all, you’re welcome to leave a comment or DM via Instagram @the_wanderinglens.
The OM-3 isn’t only for nature and outdoor photography, it’s actually an ideal camera for city wanders and urban environments, suited to handbags and camera backpacks alike. I think the art filters and colour options would work beautifully if you’re interested in portrait photography too!
Having the ability to customise colour palettes whilst still having access to the innovative Live ND and GND filters is quite simply a game changer. Releases like this are one of the many reasons I love being an OM SYSTEM ambassador. They’re at the forefront of innovation and produce gear that’s not only taking advantage of leaps in technology, but they’re putting that knowledge into tools and functions that are extremely useful for the photographers behind the lens. OM SYSTEM are crafting cameras that enable us to explore our creativity, which is what I consider to be the whole purpose of photography, capturing moments, and memories, having meaningful experiences, all blended with the beauty of creating.
Take a peek at the official OM-3 Details here.
Have you heard about the new photography club?
If you’re not already a member, there’s a new photography club filled with like-minded photographers from over 18 countries! Launched in November 2024, The Travel Photography Club is an exclusive online space focused on travel photography with a library of creative resources, challenges, photography tips and travel itineraries. There’s a private chat community too, where we’re having discussions about editing, photography careers, beautiful places and so much more.
Come and join us, memberships are available on an annual subscription so you can take advantage of new resources released on the first of each month.

Travel and landscape photographer from Australia who is far more comfortable in a pair of flippers than heels! Having worked for publications such as Lonely Planet, Wanderlust and the Sunday Times, Lisa founded The Wandering Lens to share destination guides to the worlds most photogenic places and outdoor experiences.


Leave a Comment