
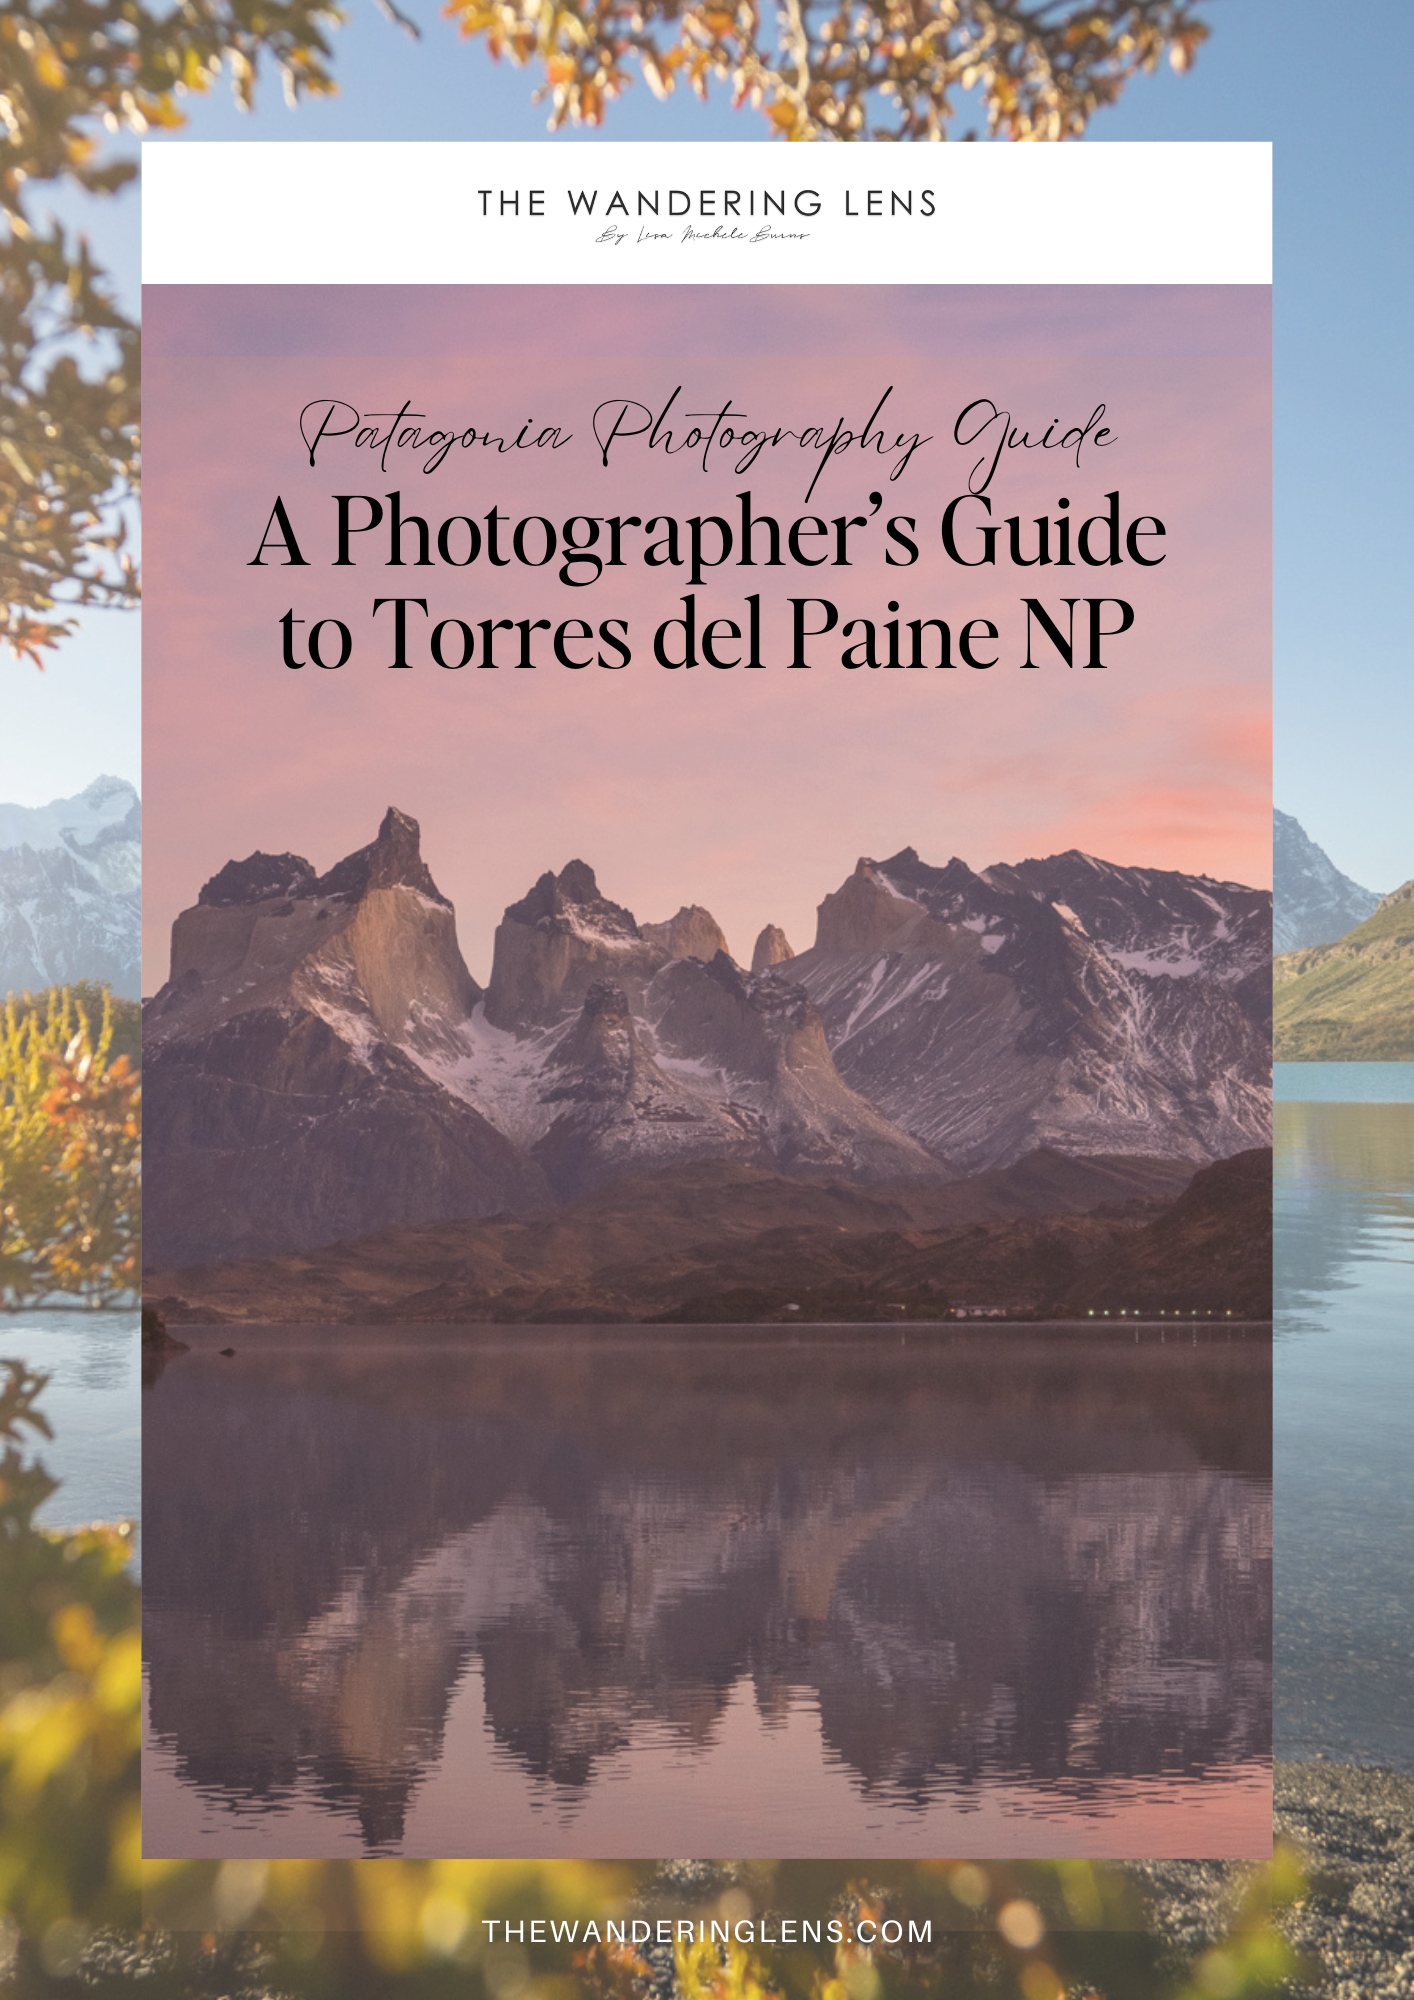
Photographing Patagonia – Torres del Paine National Park
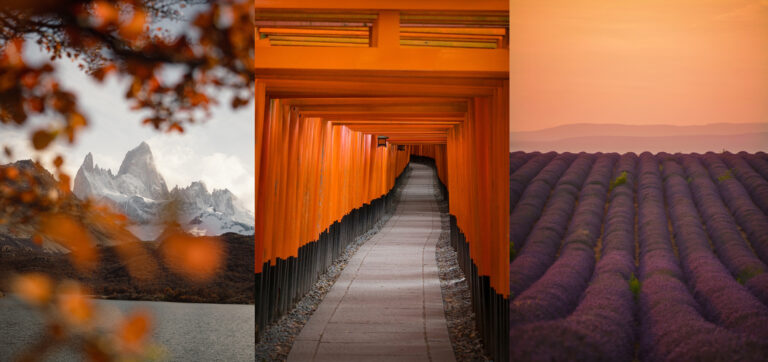
Patagonia is on the wish list of landscape photographers from all corners of the world. The frosted mountain peaks, world-class hiking trails, wilderness and culture draw us in as happy snappers keen to get amongst the elements and experience the outdoors with our cameras.
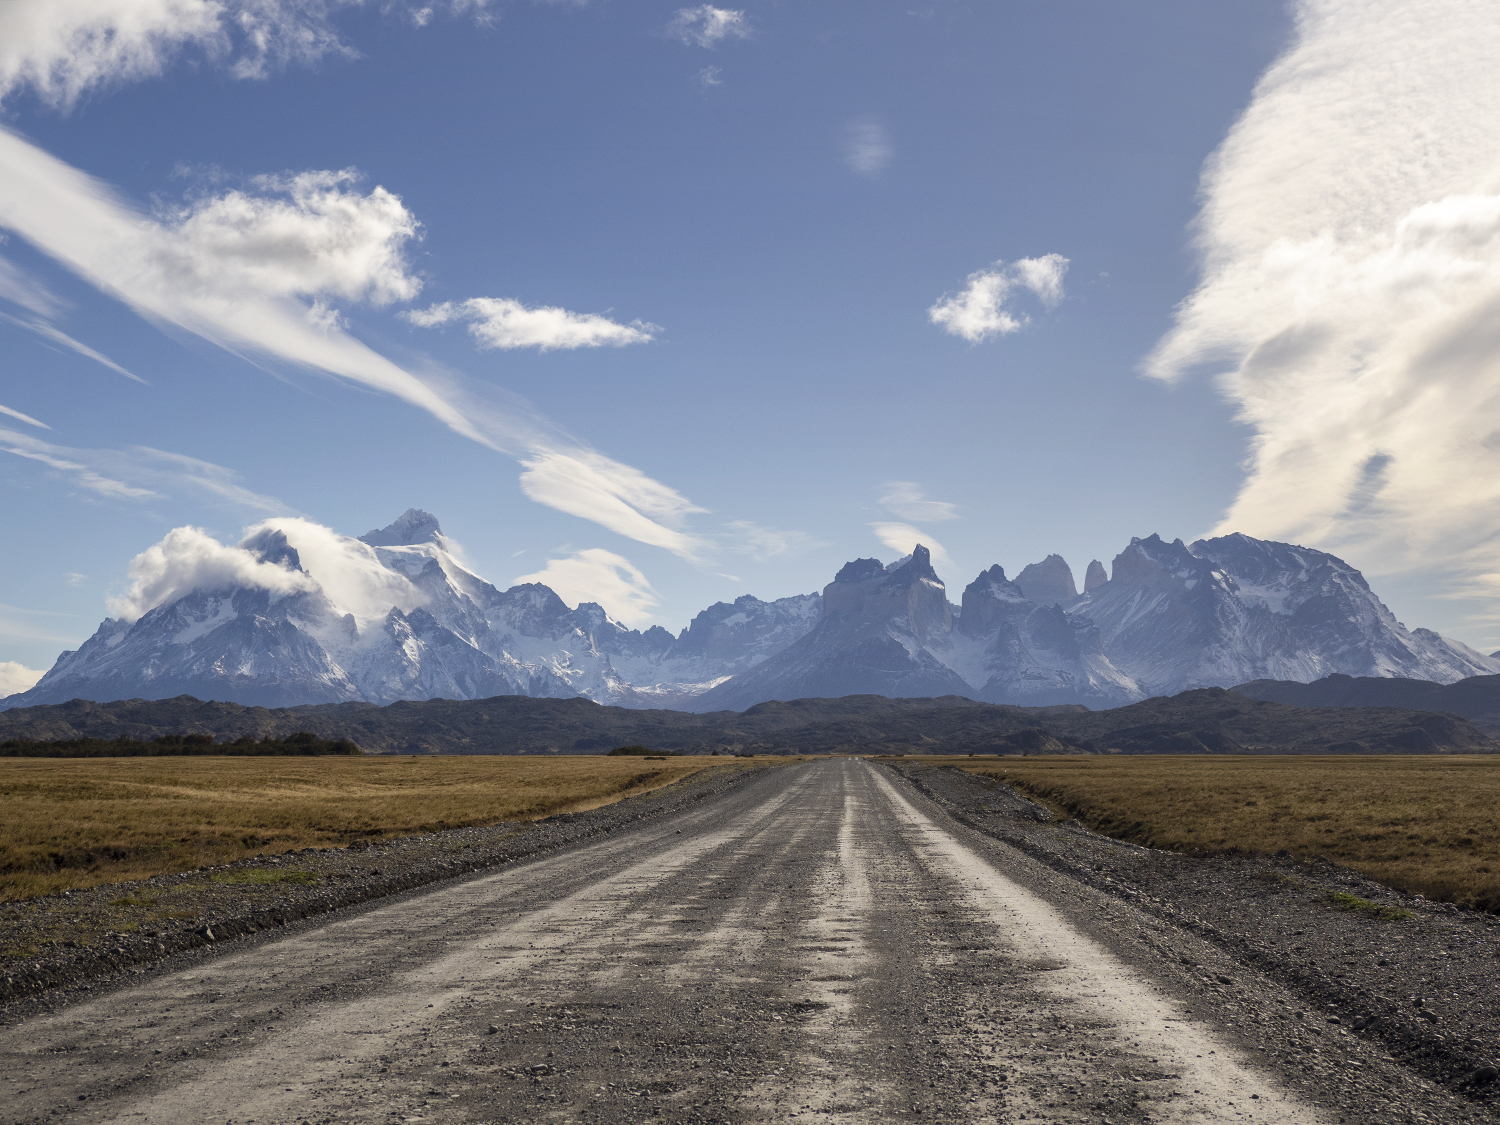
Torres del Paine National Park falls on the Chilean side of Patagonia, where lakes, glaciers and alpine valleys combine to offer scenery that’s so spectacular it’s hard to know where to go first for sunrise or sunset!
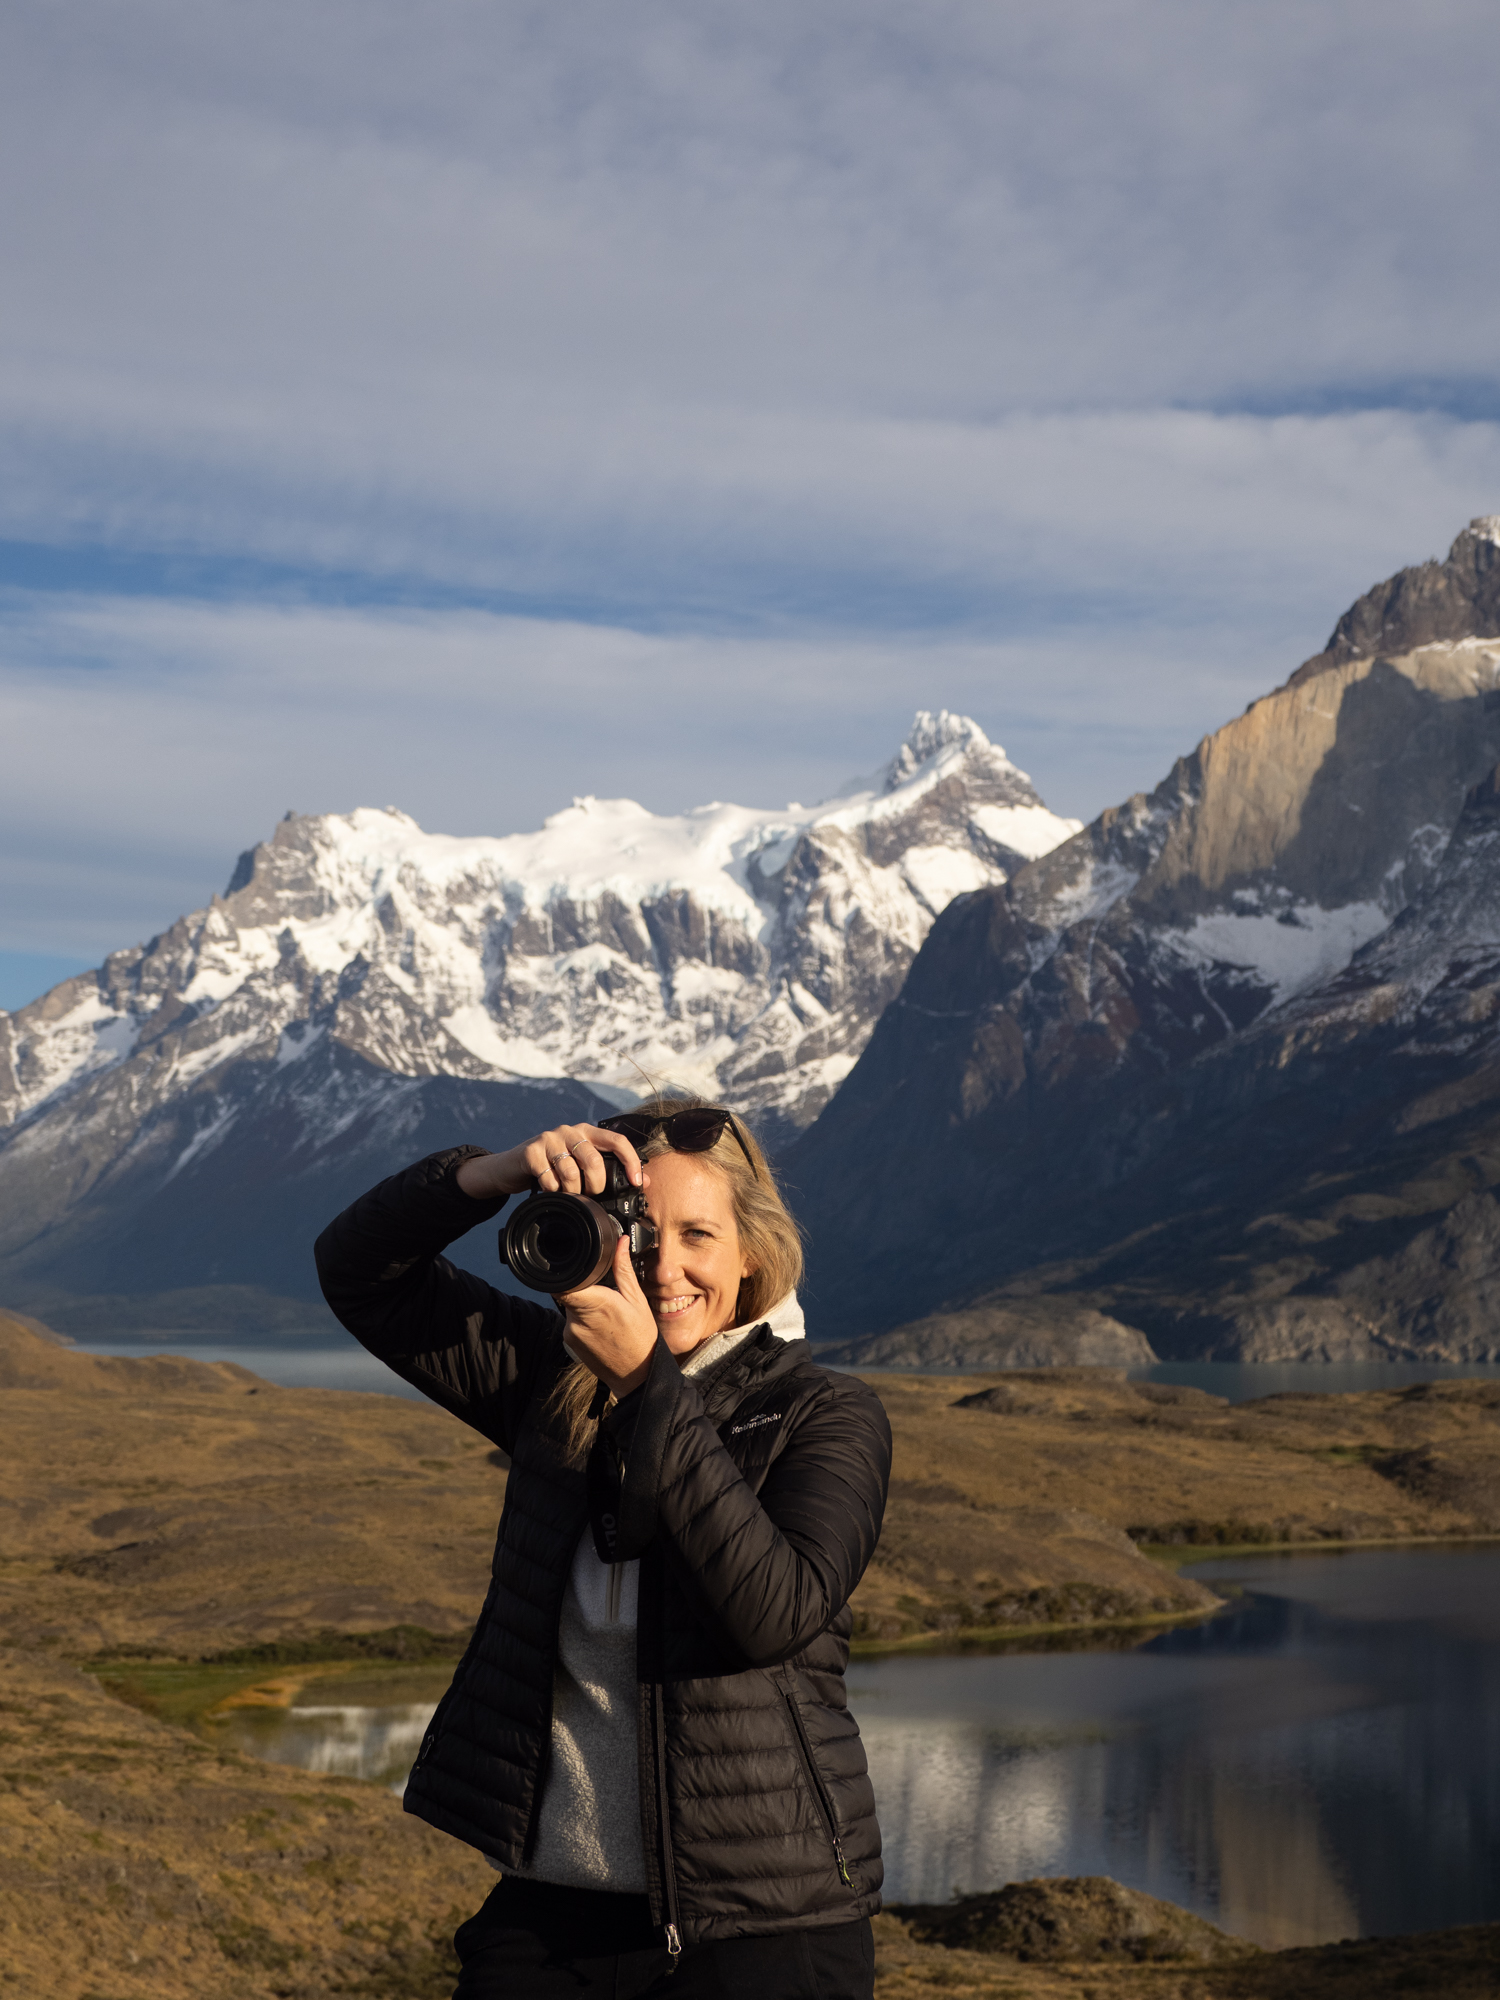
Having visited the region this past April to document every inch and viewpoint, I’m excited to share my tips on photographing this environmentally rich pocket of Patagonia. If you’re reading this and have been before, or want to share some comments after your upcoming trip, please share them in the comments at the end of this guide as it’ll help those planning to have advice from fellow travellers too.
This guide will share advice on how to plan your trip to Torres del Paine National Park, Chile and where to photograph so you can map out your visit and make the most of your time photographing Patagonia. In additional guides to follow, I’ll also be sharing all about photographing El Chalten and Perito Moreno Glacier on the Argentinean side of Patagonia.
When it comes to planning a trip to Patagonia, it’s essential to do a lot of research. There are multiple locations you can fly in or out of, there are vast distances to account for, and you want to ensure you’re staying somewhere that gives you easy access to some of the most photogenic locations across Patagonia.
The key to a great photography trip in Patagonia? Researching, allowing yourself enough time, and having a little flexibility in your schedule in case the weather decides to swoop in from the chilly southern seas. The good news is you’ve found this guide, so make yourself a cup of tea and get ready to read all there is to know about photographing Torres del Paine National Park.
Where is Torres del Paine National Park?
Located in Chilean Patagonia, Torres del Paine is in the stunning southern region of Chile, roughly a one-hour drive north of Puerto Natales, or 4.5 hours from Punta Arenas. The closest airport is Puerto Natales, with regular flights from Santiago, however, those flights fill up fast, particularly in peak season so be sure to book ahead.
The park is 1,814 km² so it can take a few hours to drive around between photography locations, particularly as the speed limit is 40kmph and most of the roads inside the park are dirt/gravel. This is where planning and staying somewhere close to the areas you’re keen to photograph is important, I’ll share my recommendations later in the guide! Scroll to the end of this guide for a Clickable Google Map with all locations marked.
Preparing to Photograph in Patagonia
Having weather-sealed equipment and versatile lenses will result in a more relaxing trip because you could run into rain, snow, wild winds, and of course, so many photogenic opportunities that you’ll struggle to know which lens to use first! It’s a bonus if your gear is also lightweight as every kilo counts when you’re hiking these trails, they’re pretty darn steep.
The landscapes are so diverse and ever-changing, that it’s worth bringing a variety of lenses to cover various focal lengths you know you’ll want to capture. I tend to opt for tighter shots of details within a scene, so I’ll always pack my OM SYSTEM 40-150mm f2.8 pro lens, then love having the MC-20 2x teleconverter in my bag if I need a little extra reach without carrying another larger lens. Full gear list below.
Not only do you need to plan what photographic gear to take, but you also need to ensure you have the right clothing to match the wild conditions. Wind-proof layers, gloves, beanie, raincoat, thermals (very helpful for chilly sunrises!), and plenty of socks, shirts, and pants to wear hiking. During my visit in April, I was actually surprised at how warm it was, so while I was wearing my winter layers for sunrise, during the day while hiking I was in a t-shirt and hiking pants with all the layers tucked back into my camera bag…because the camera never stayed in the bag, way too many things to capture!
How much time do you need to photograph Torres del Paine?
I spent 5 nights/6 days exploring the national park, and 1 night either side of this in Puerto Natales. While I felt that I could’ve stayed longer, it was also the perfect amount of time to get a good feel for the landscapes, photography locations and do some hiking.
If you’re pairing the visit with time on the Argentinian side of Patagonia, a week in each works well from my experience. I did 6 days Torres del Paine National Park, 3 day in El Calafate for the Perito Moreno Glacier, and 5 days in El Chalten. I’ll be publishing the full itinerary in a separate post.
I was lucky in that the weather conditions were ideal for the entire week, however, if you’re unlucky and find you’re instead treated to some wet and windy days, it may be handy to have a few additional days up your sleeve. Flexibility is key for Patagonia, we saw how quickly conditions changed while staying in El Chalten and heard from a number of other photographers that despite staying a week in Torres del Paine, they never saw the mountain peaks!
Travel tip – A number of guides noted that April is known for its calm conditions, and that there’s usually a weather window of about 7-10 days when the sky is completely clear. Of course, the weather will do what it wants, but this was feedback from guides who have been working in the area for a number of years…so if I were you, I’d be aiming for April, luckily it worked out for my visit, but funnily enough, the rain hit the day we left.
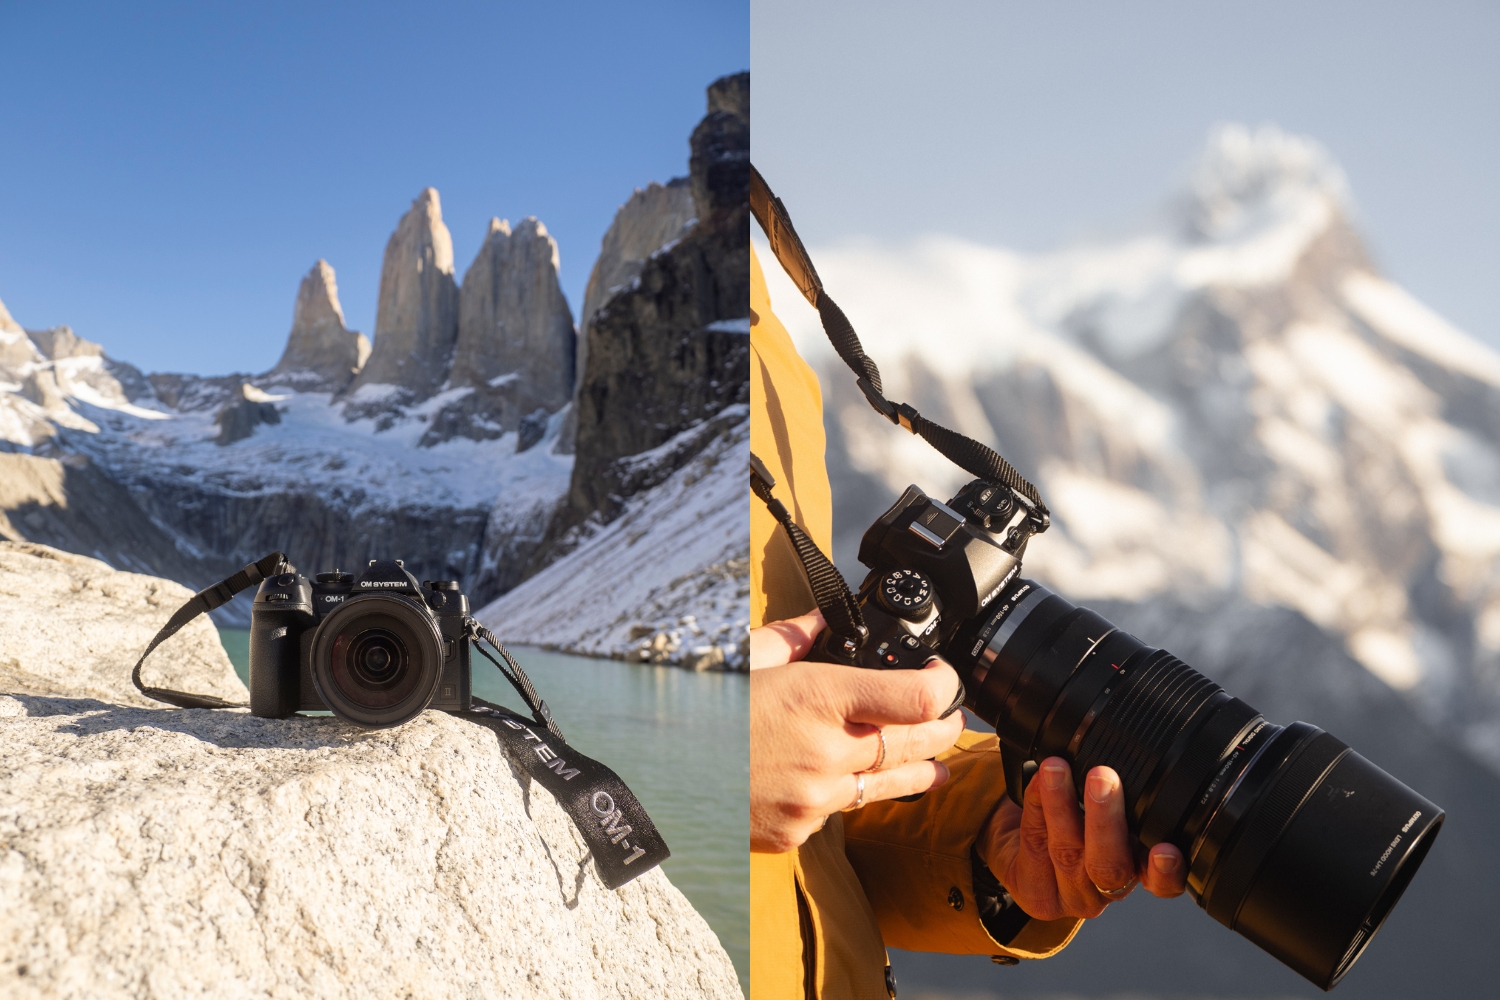
Inside my Camera Bag for Patagonia
Camera Bodies: OM-1 and the OM-1 MKII
Lenses: 7-14mm f2.8 PRO lens, 12-40mm f2.8 PRO lens, 40-150mm f2.8 PRO lens + MC-20 2 x teleconverter.
Accessories: LS-P5 Audio Recorder, 4 x rechargeable batteries, 6 x memory cards (I use the SanDisk Extreme 64 + 128GB), 2 x 4TB LaCie External Hard Drives (they stayed back in the room when hiking).
*The OM SYSTEM cameras I took have built-in Live ND filters so there was no need for me to pack any additional accessories or filters. This innovative feature has been such a game changer for my landscape photography and as you’d know if you’ve been following my work for a while now, I use the ND filter almost every time I’m out shooting landscapes, I love experimenting with light and motion!
I also didn’t pack a tripod due to the superior image stabilisation of the OM SYSTEM gear 😊
The Best Photography Locations in Torres del Paine National Park
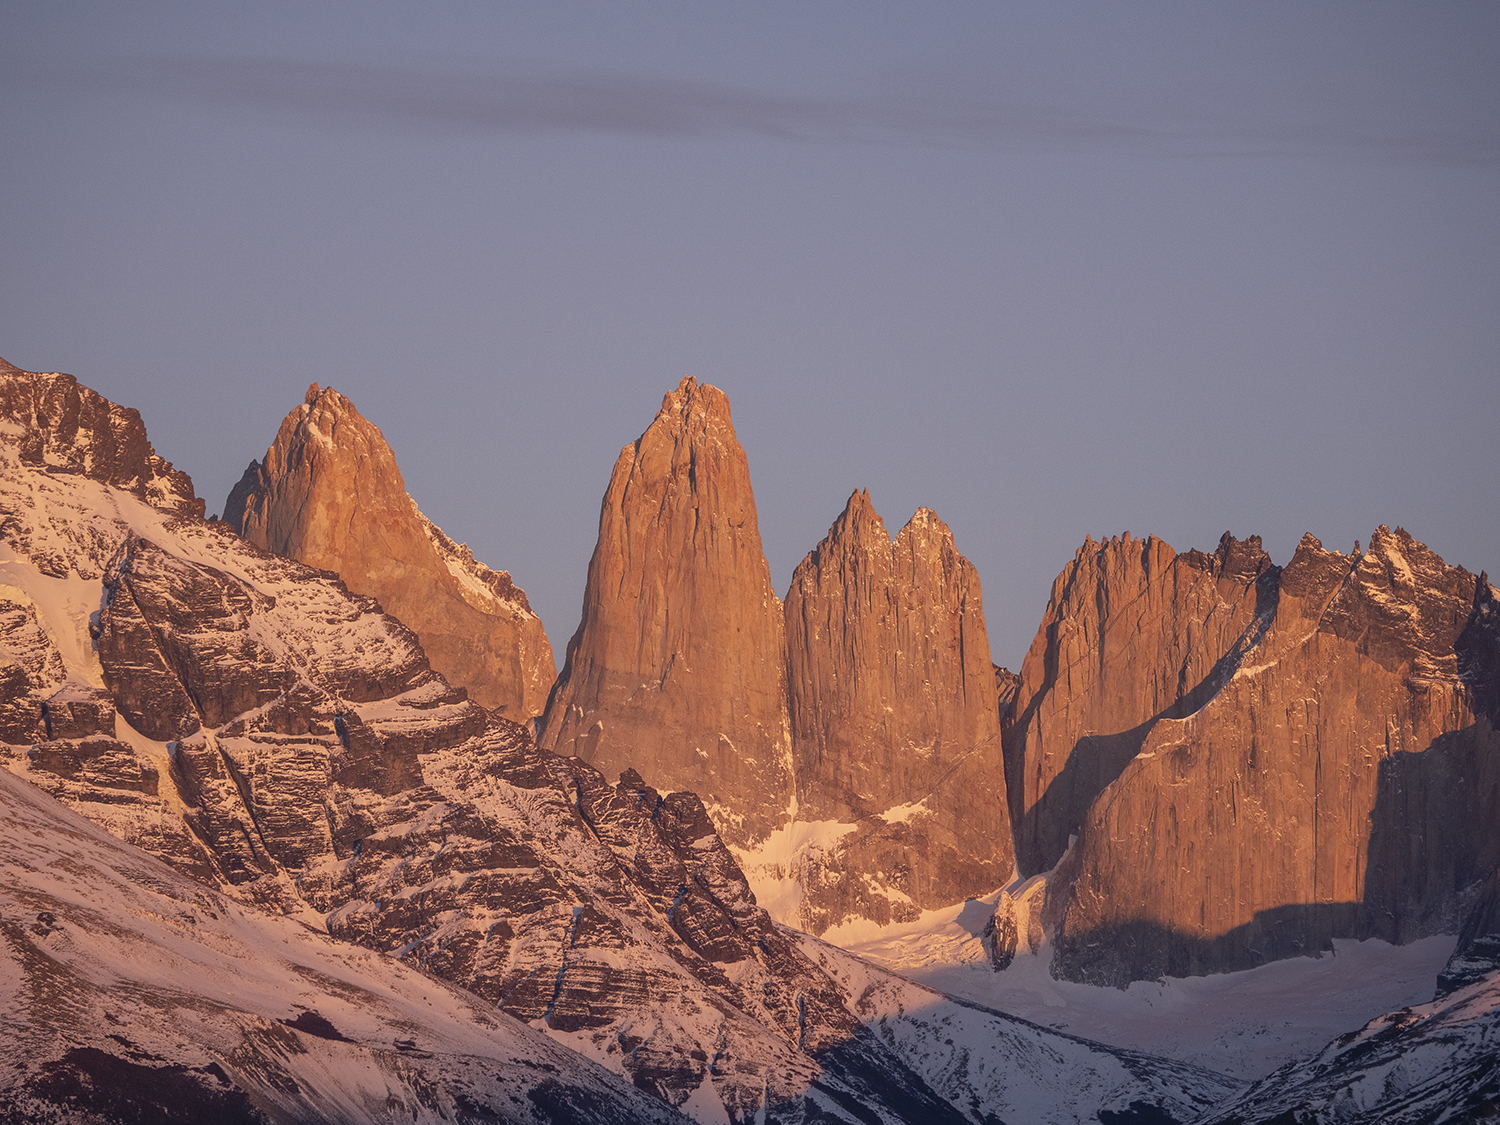
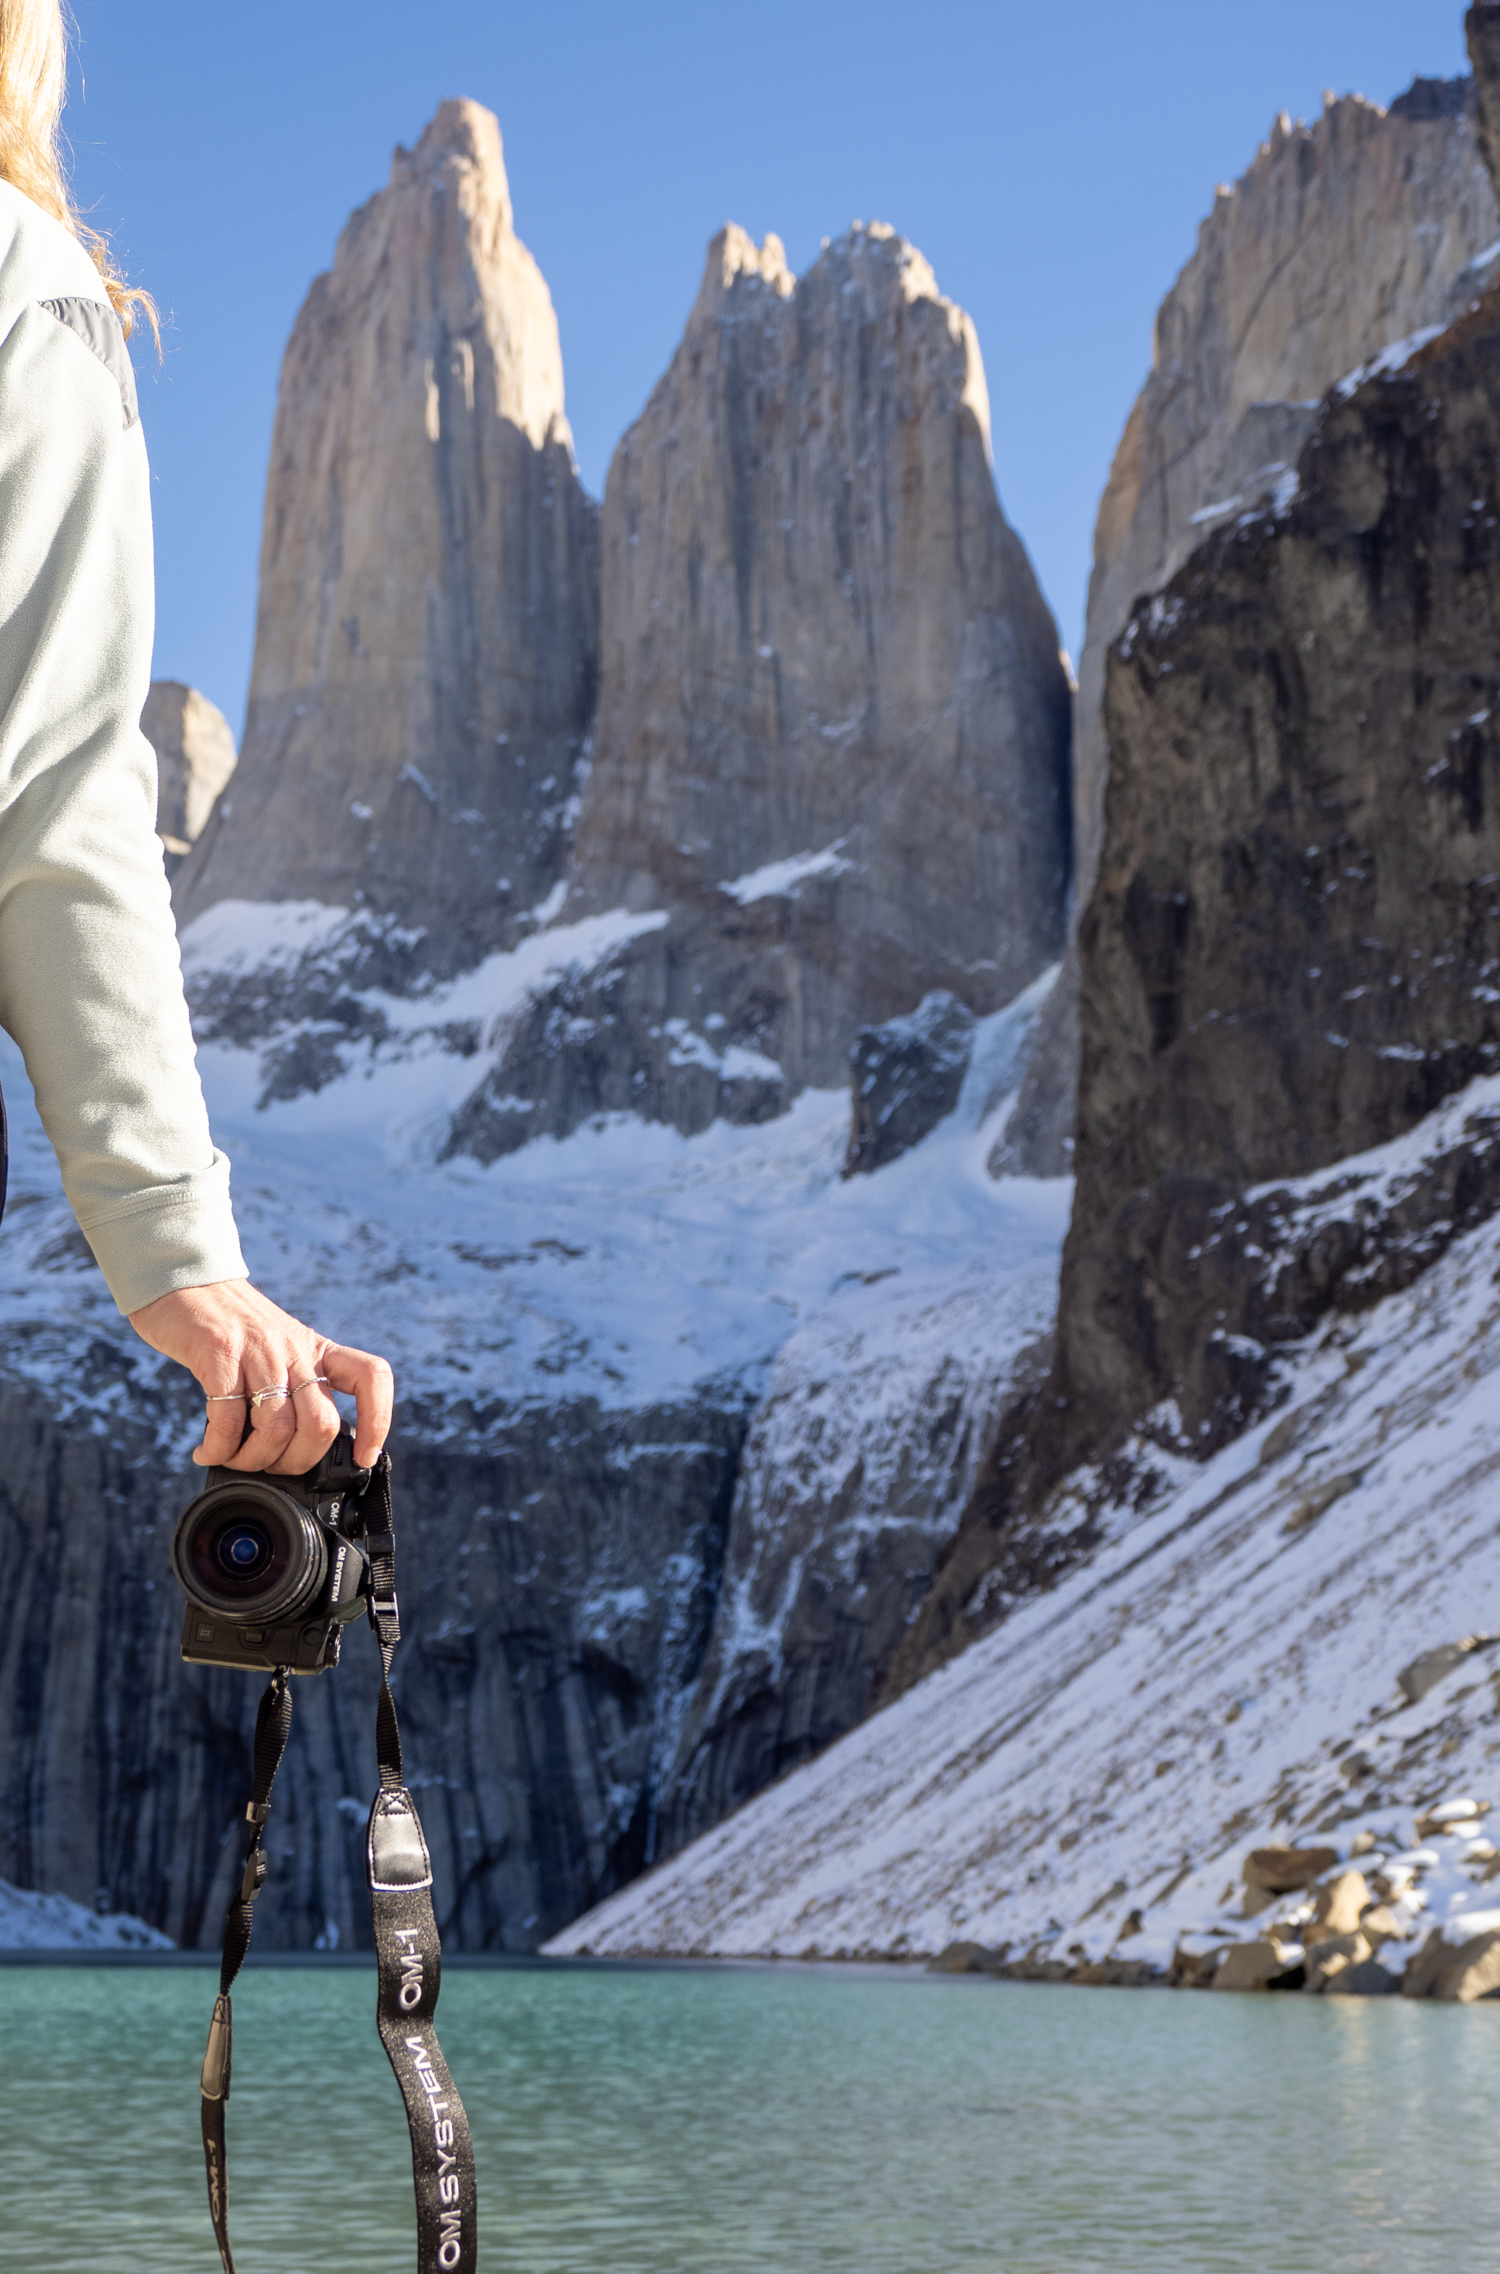
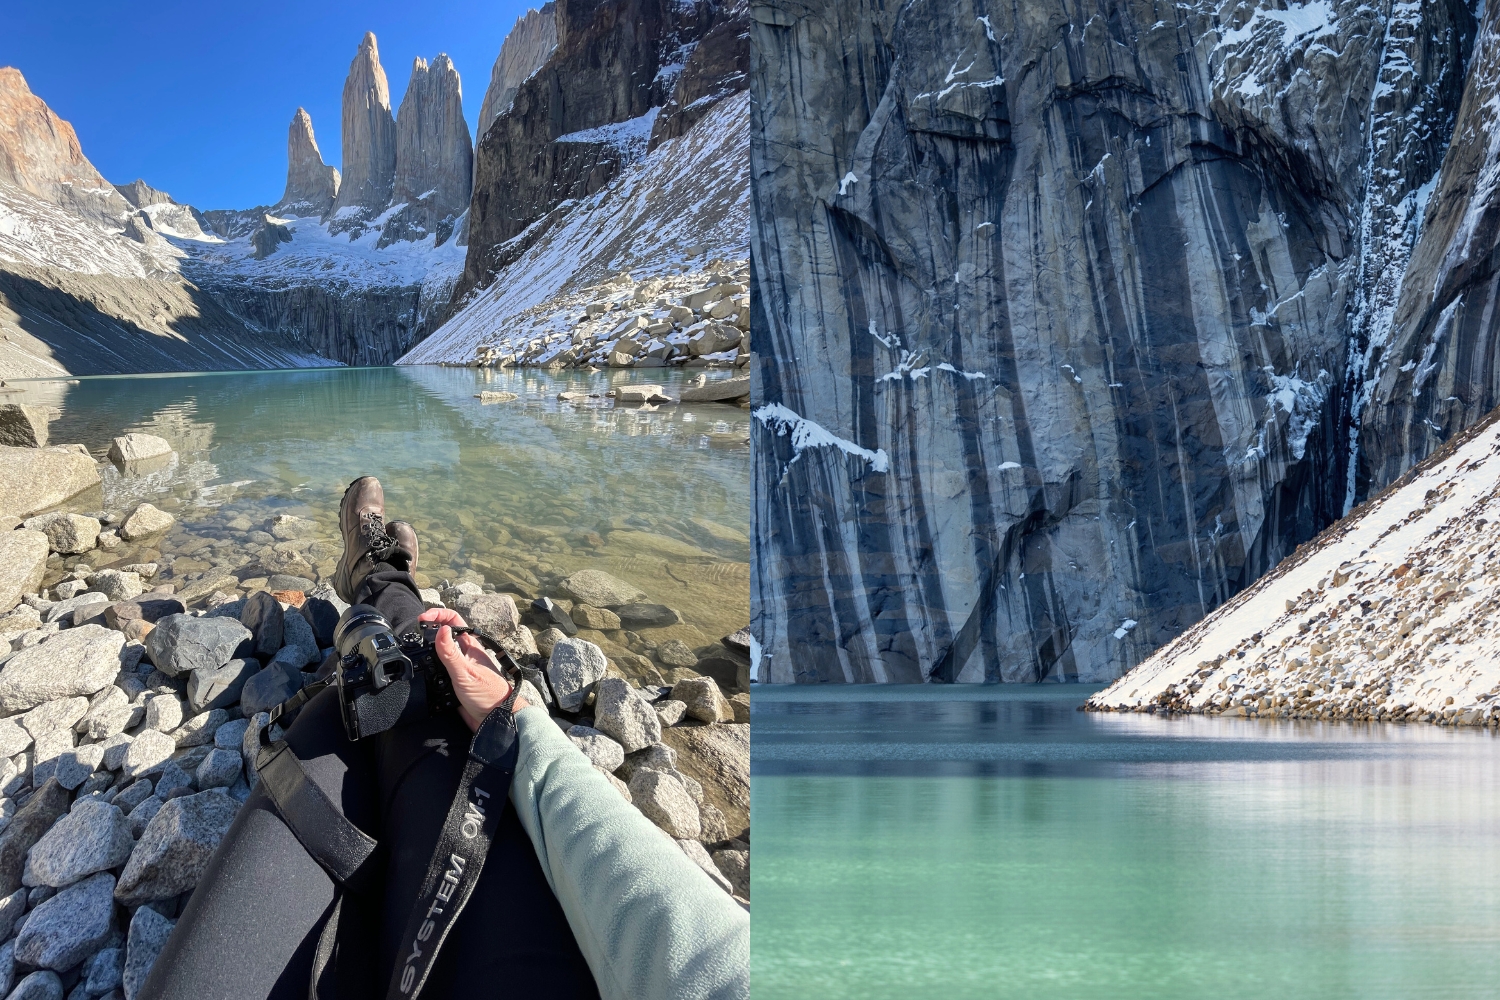
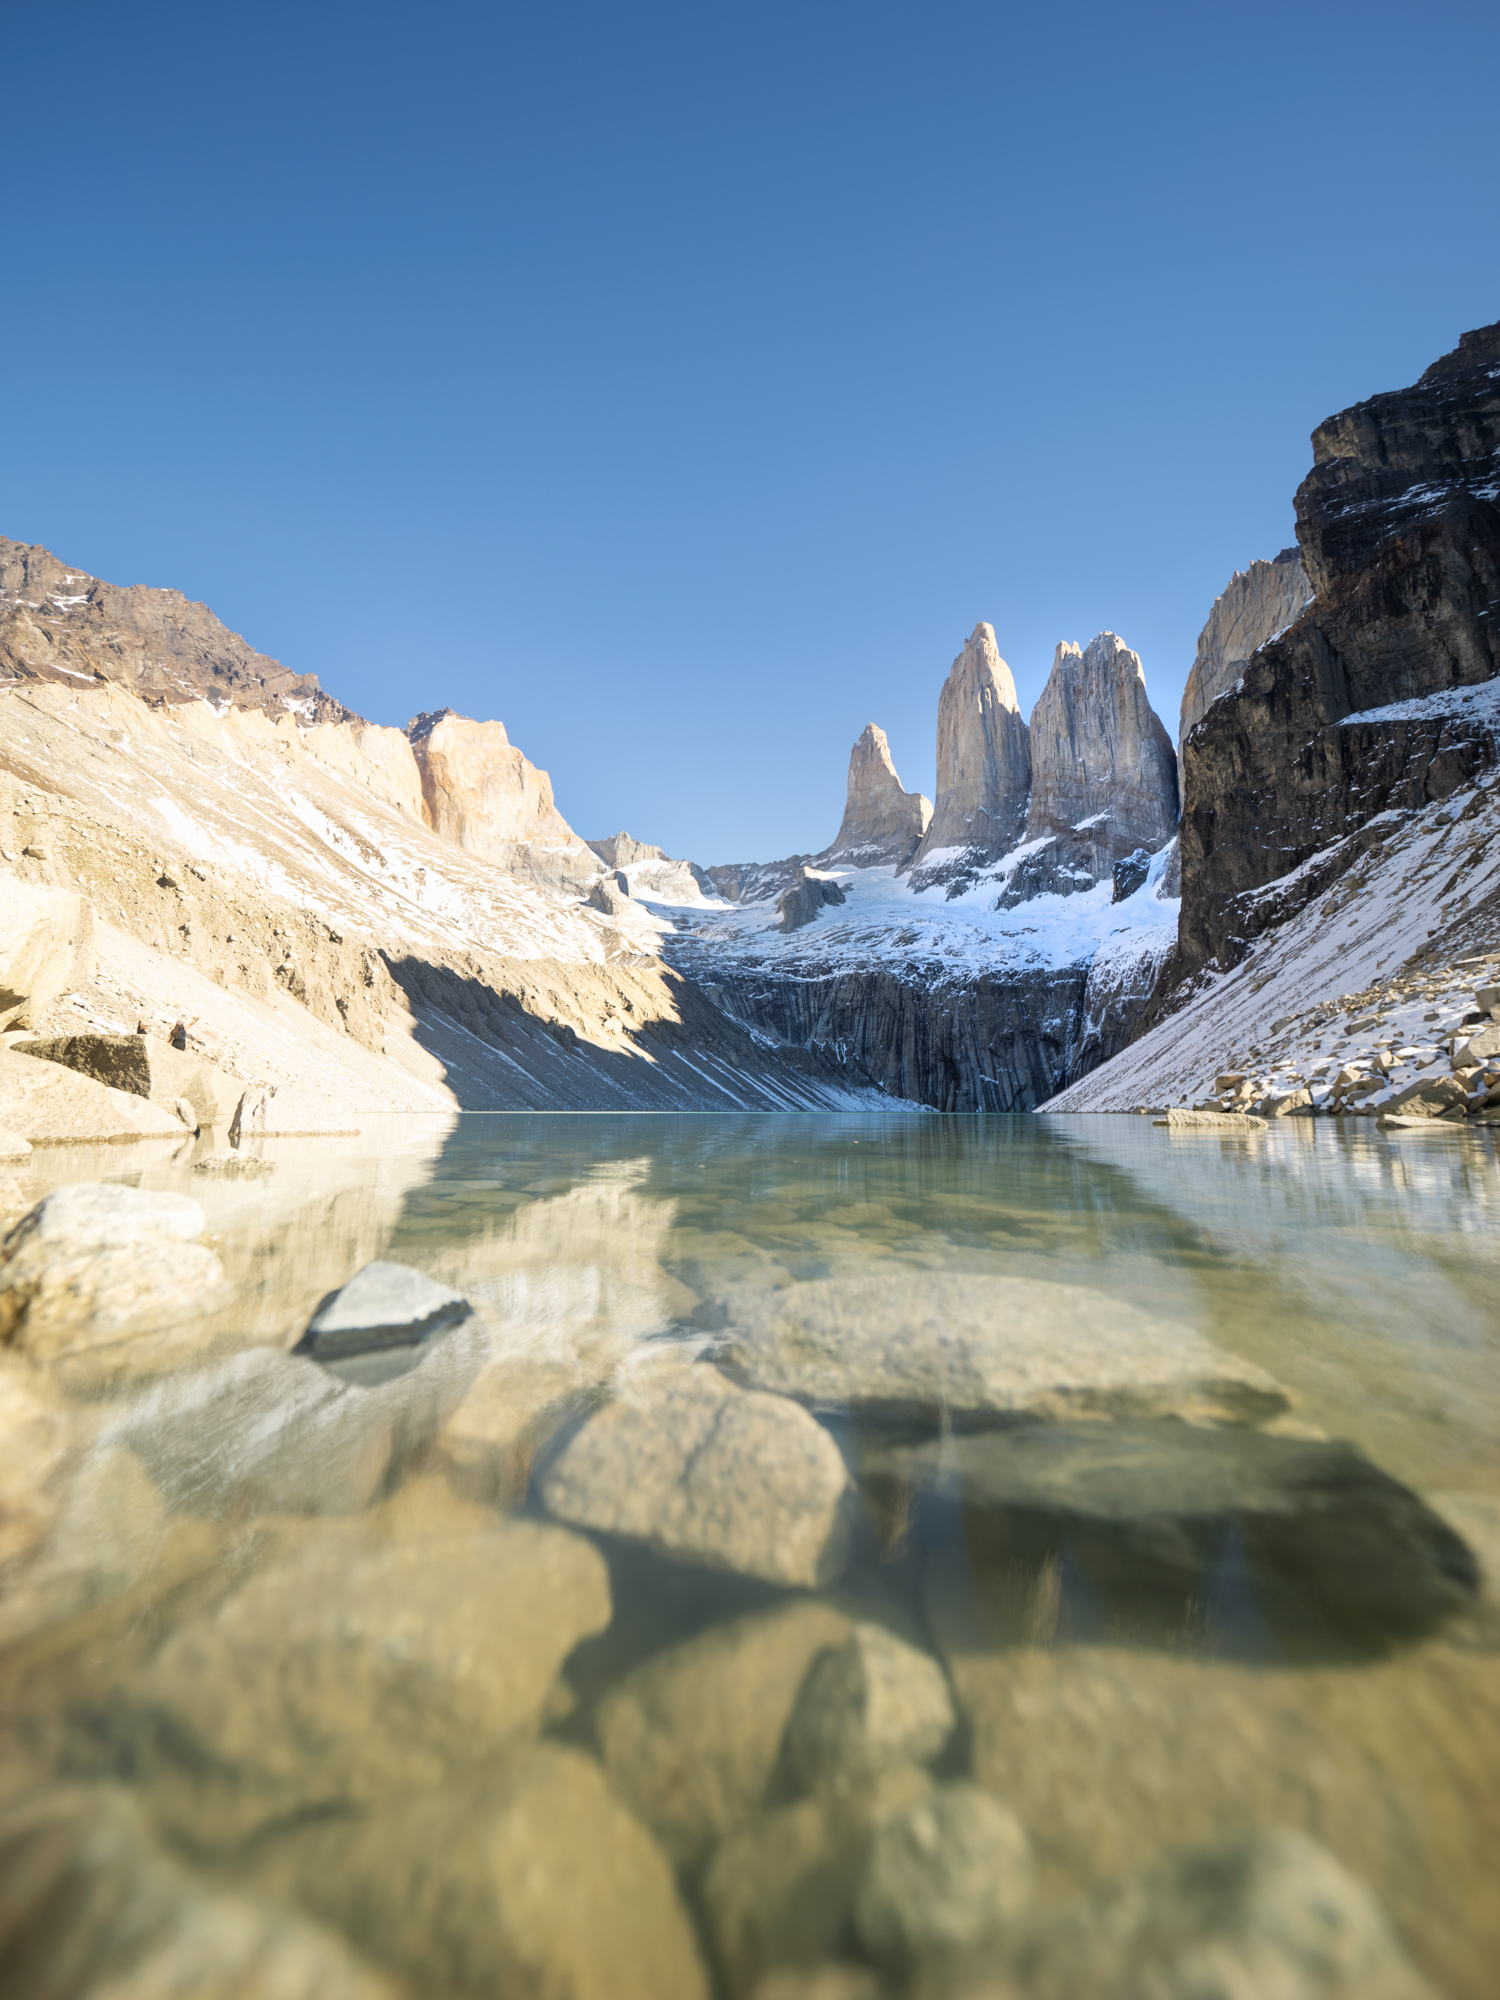
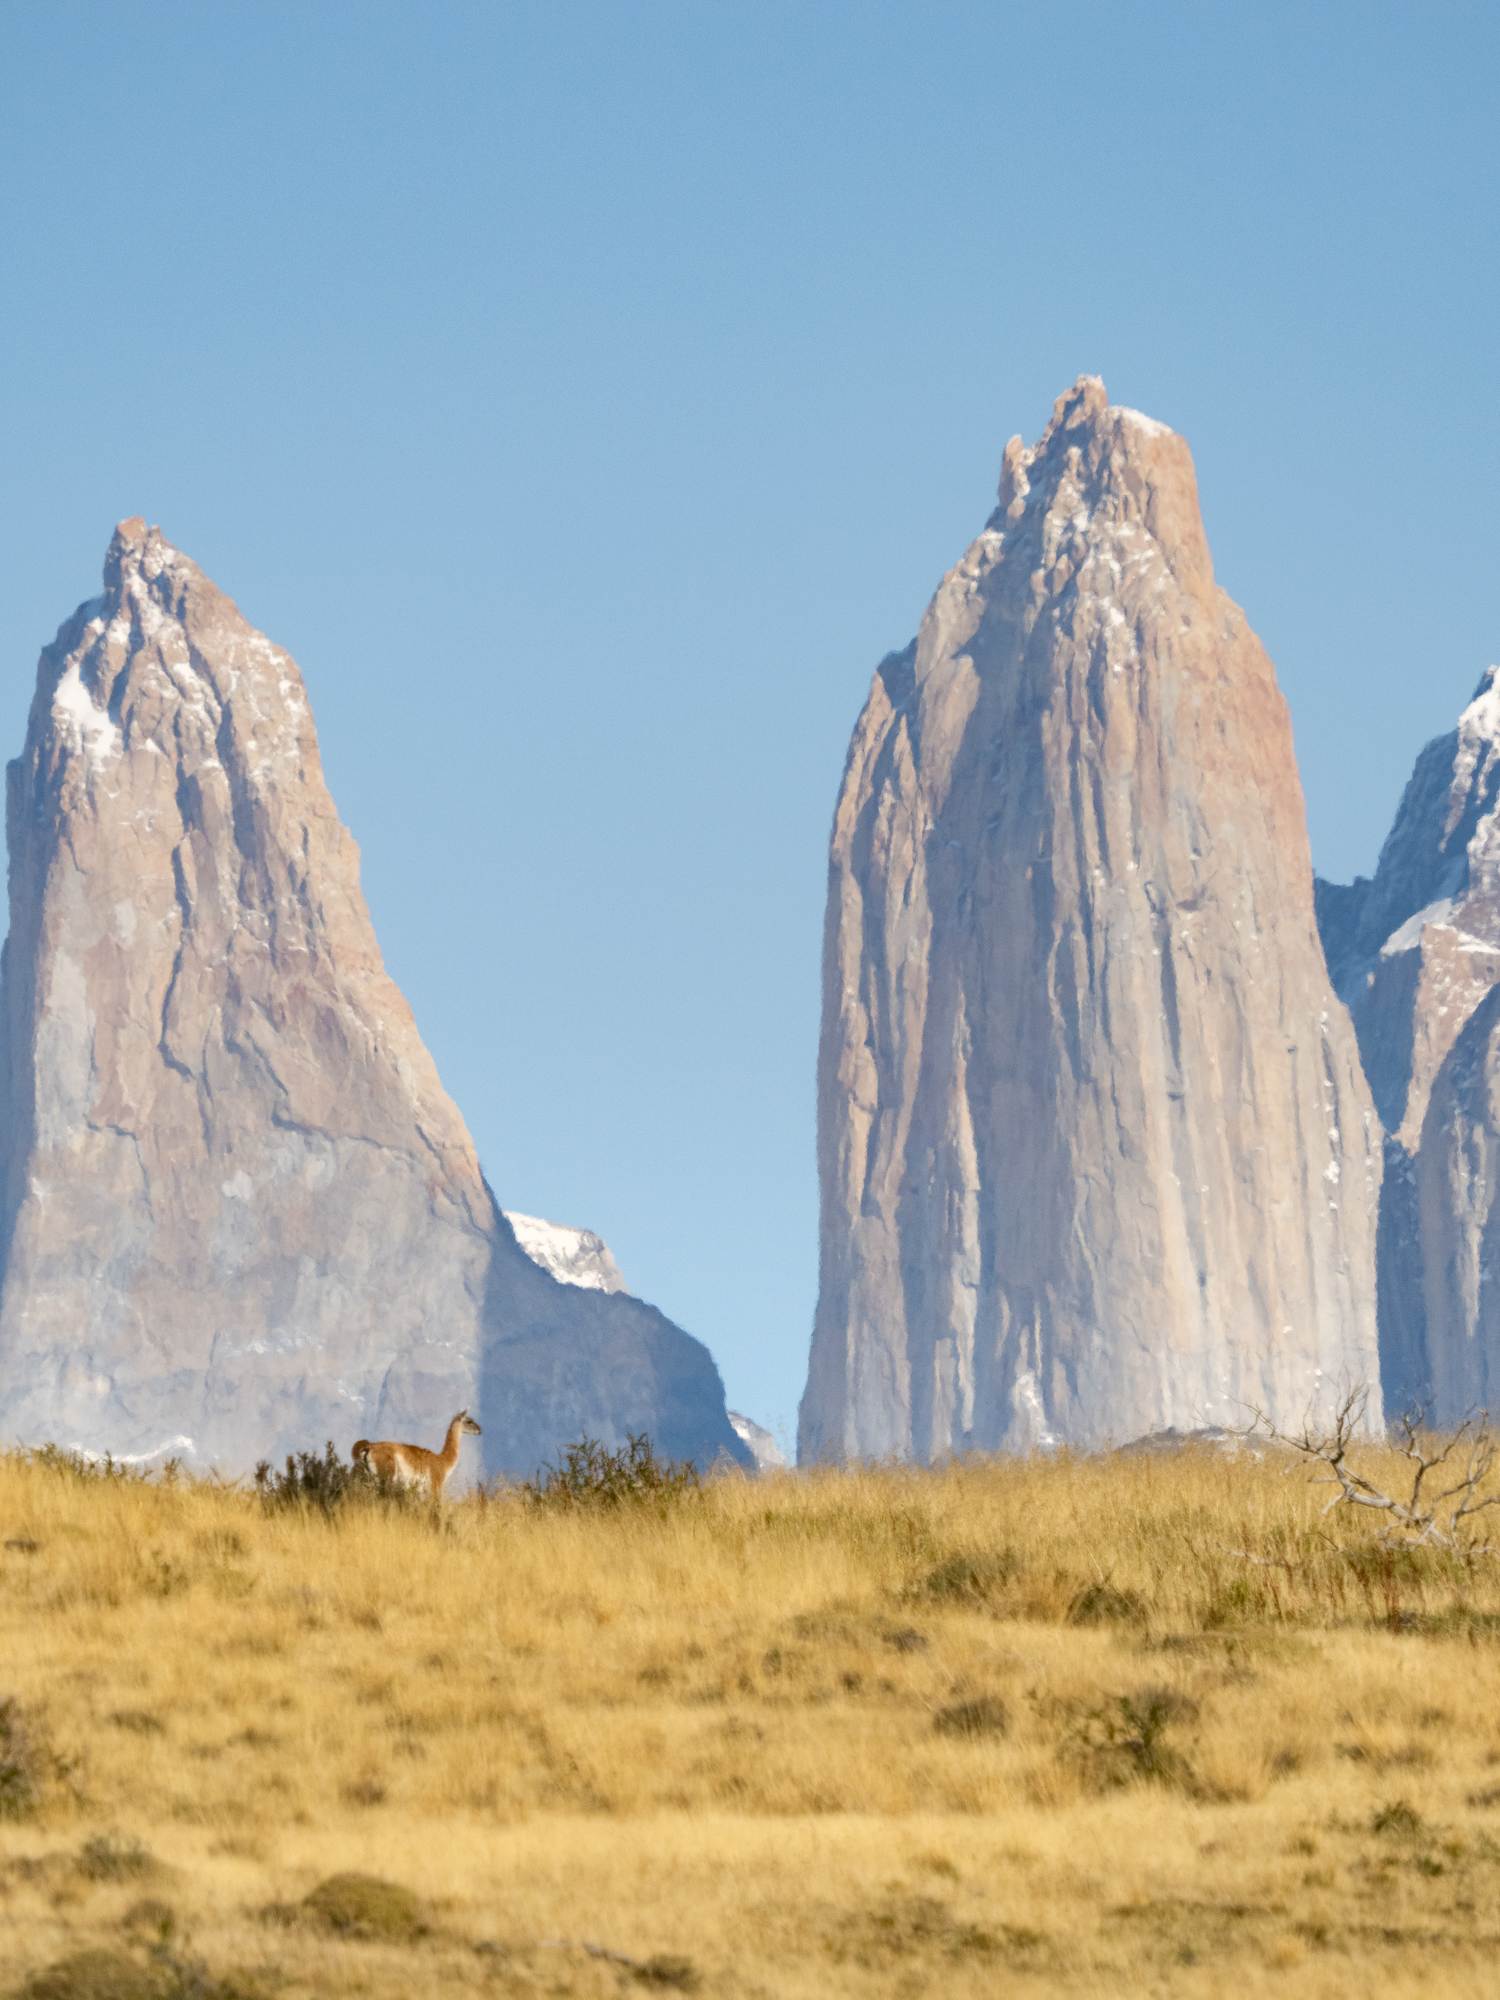
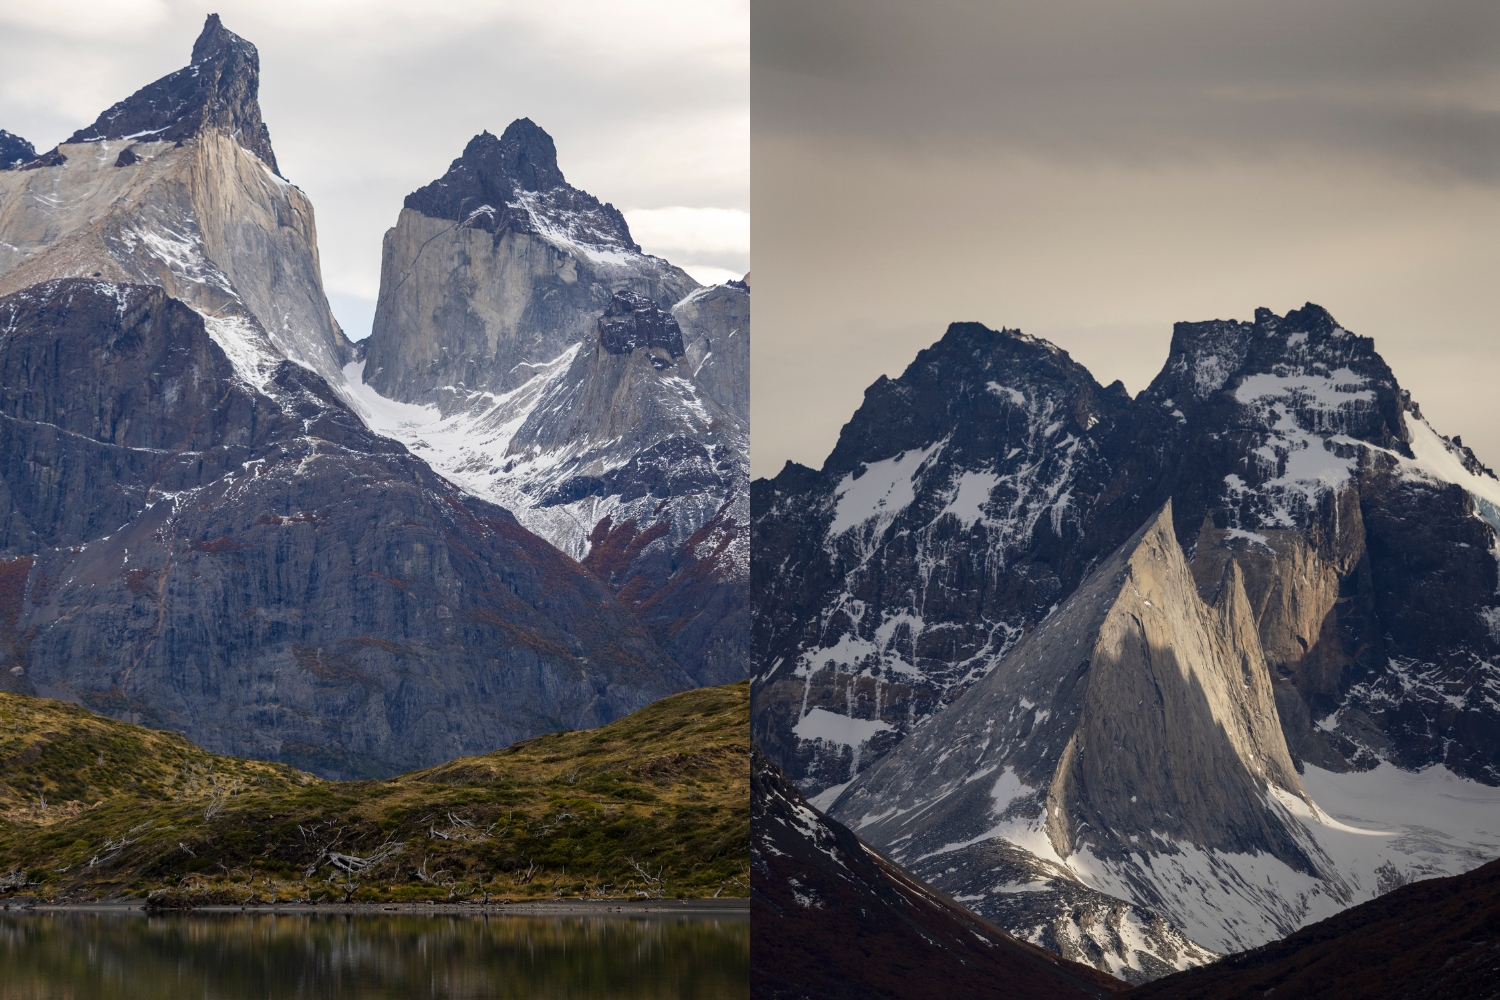
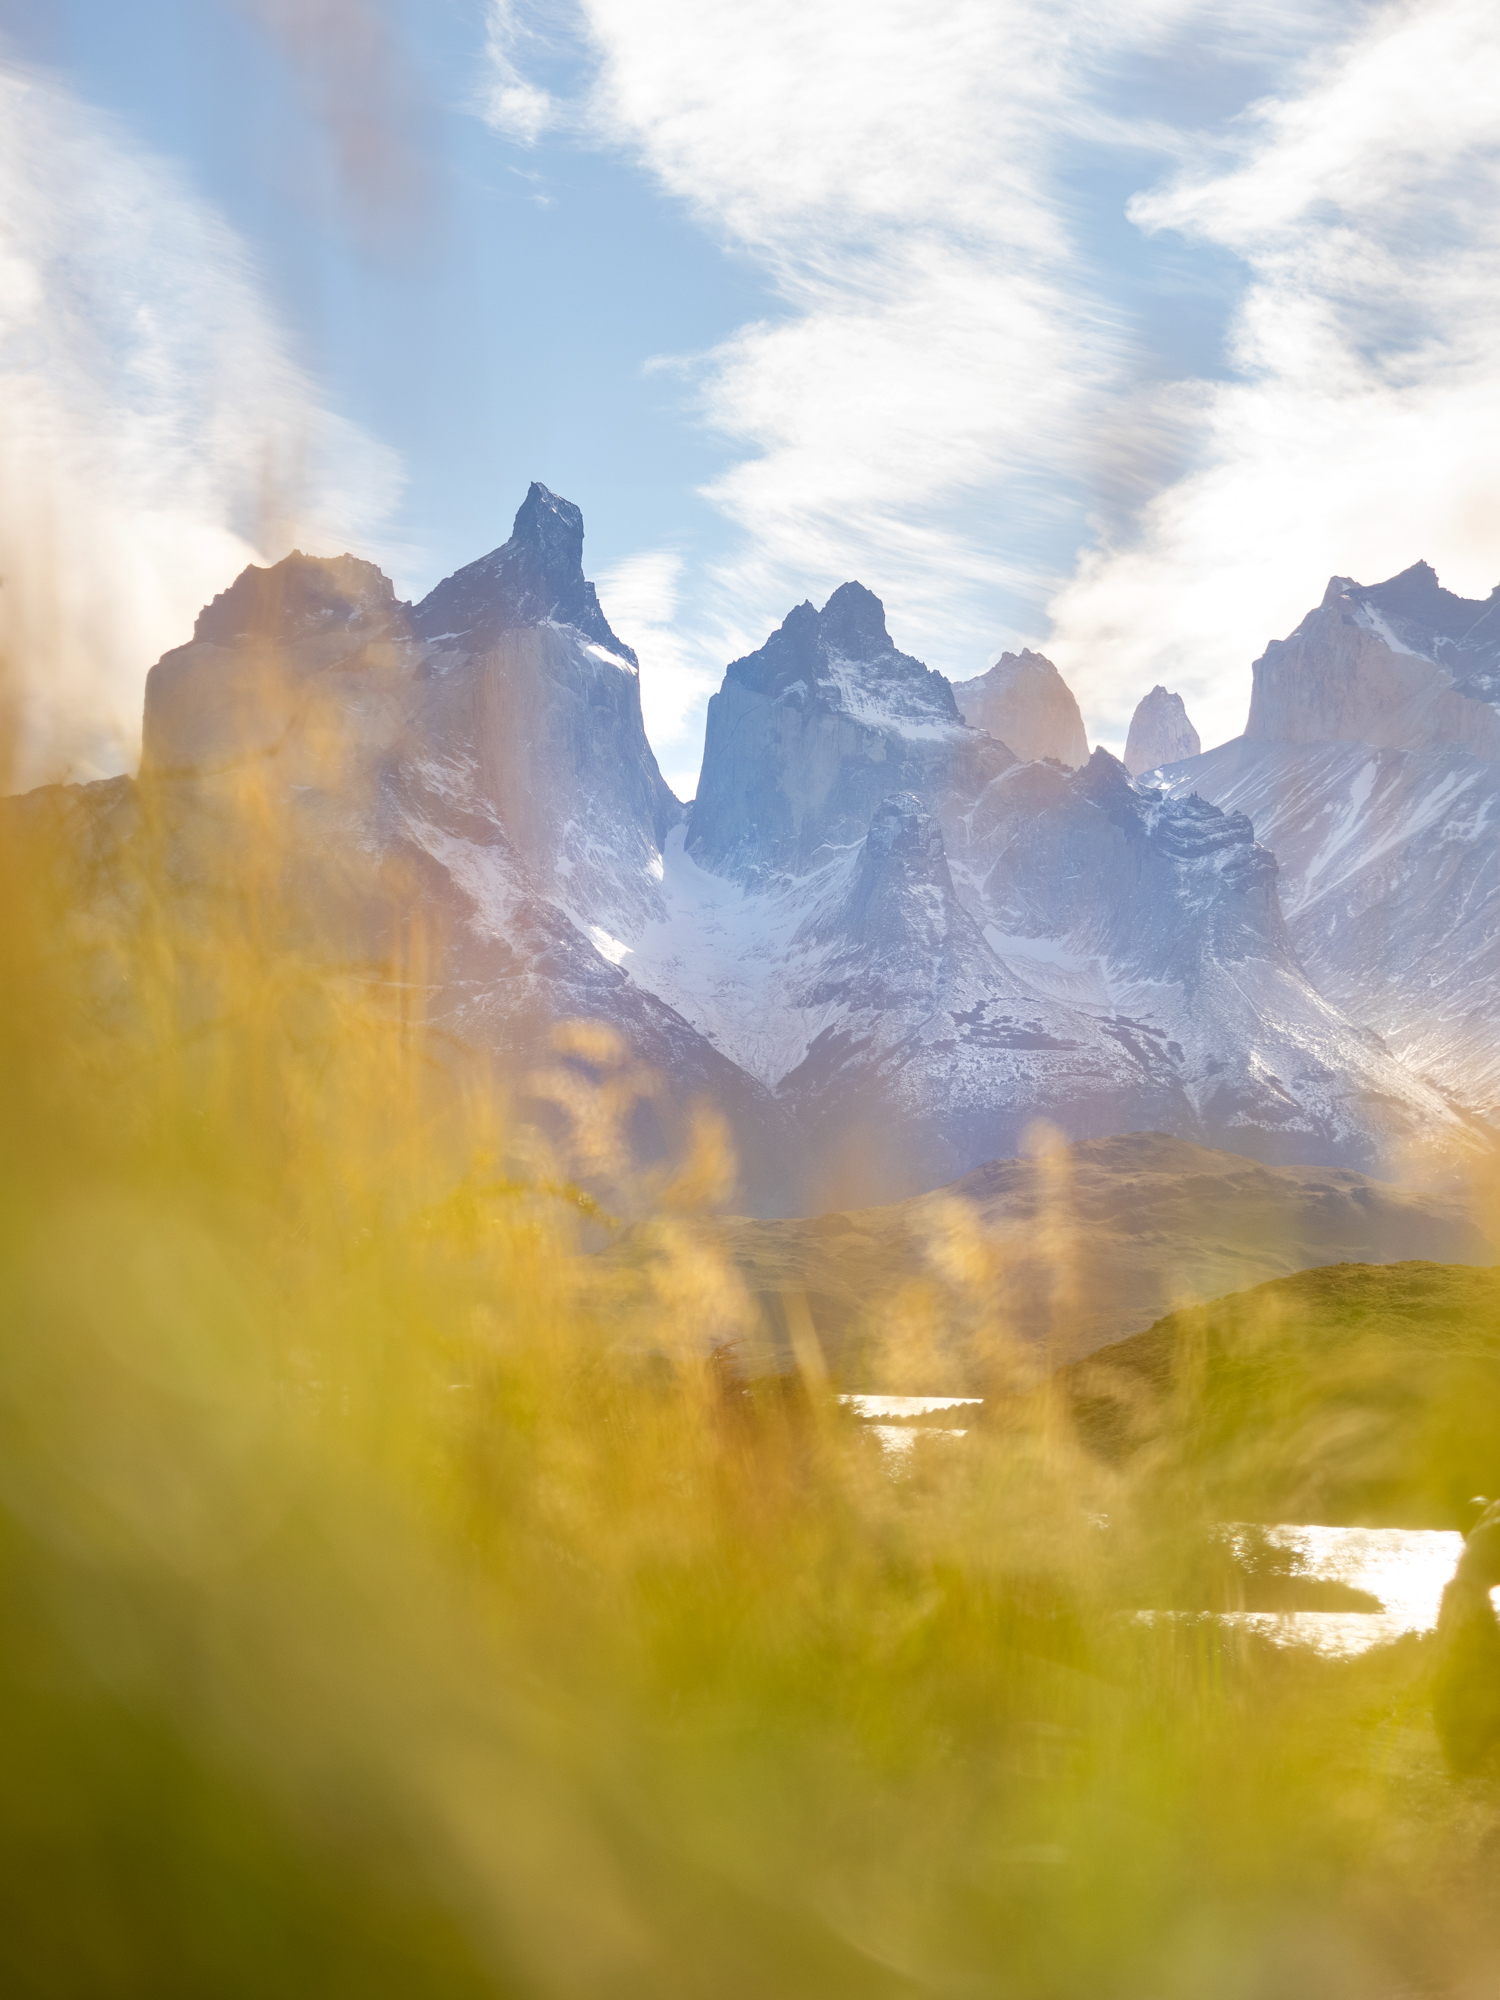
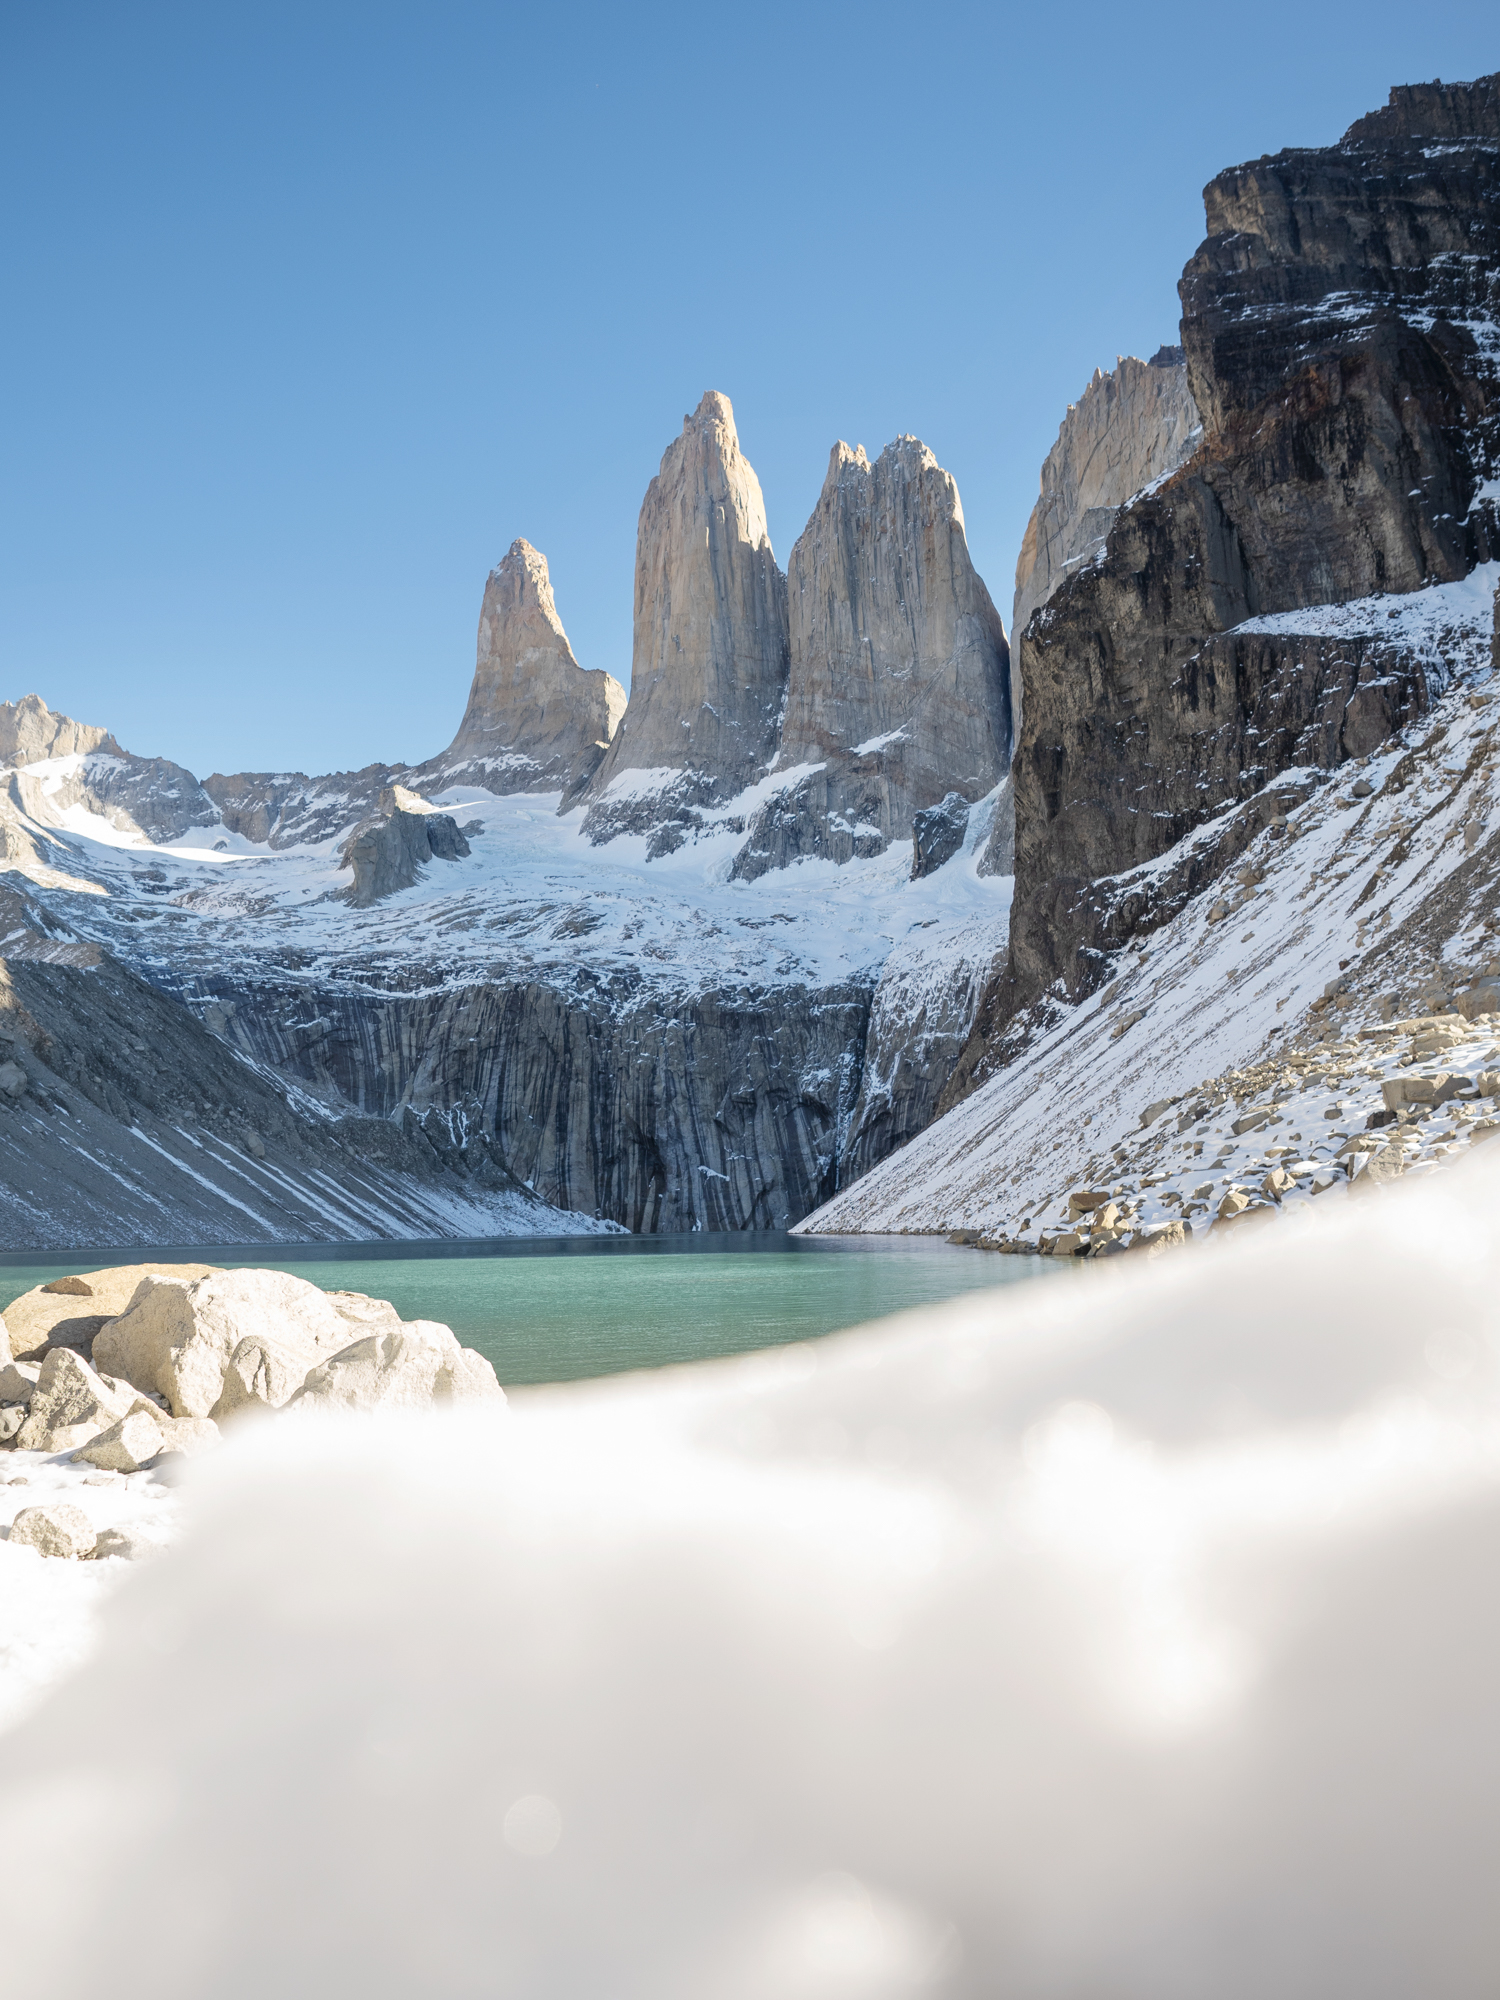
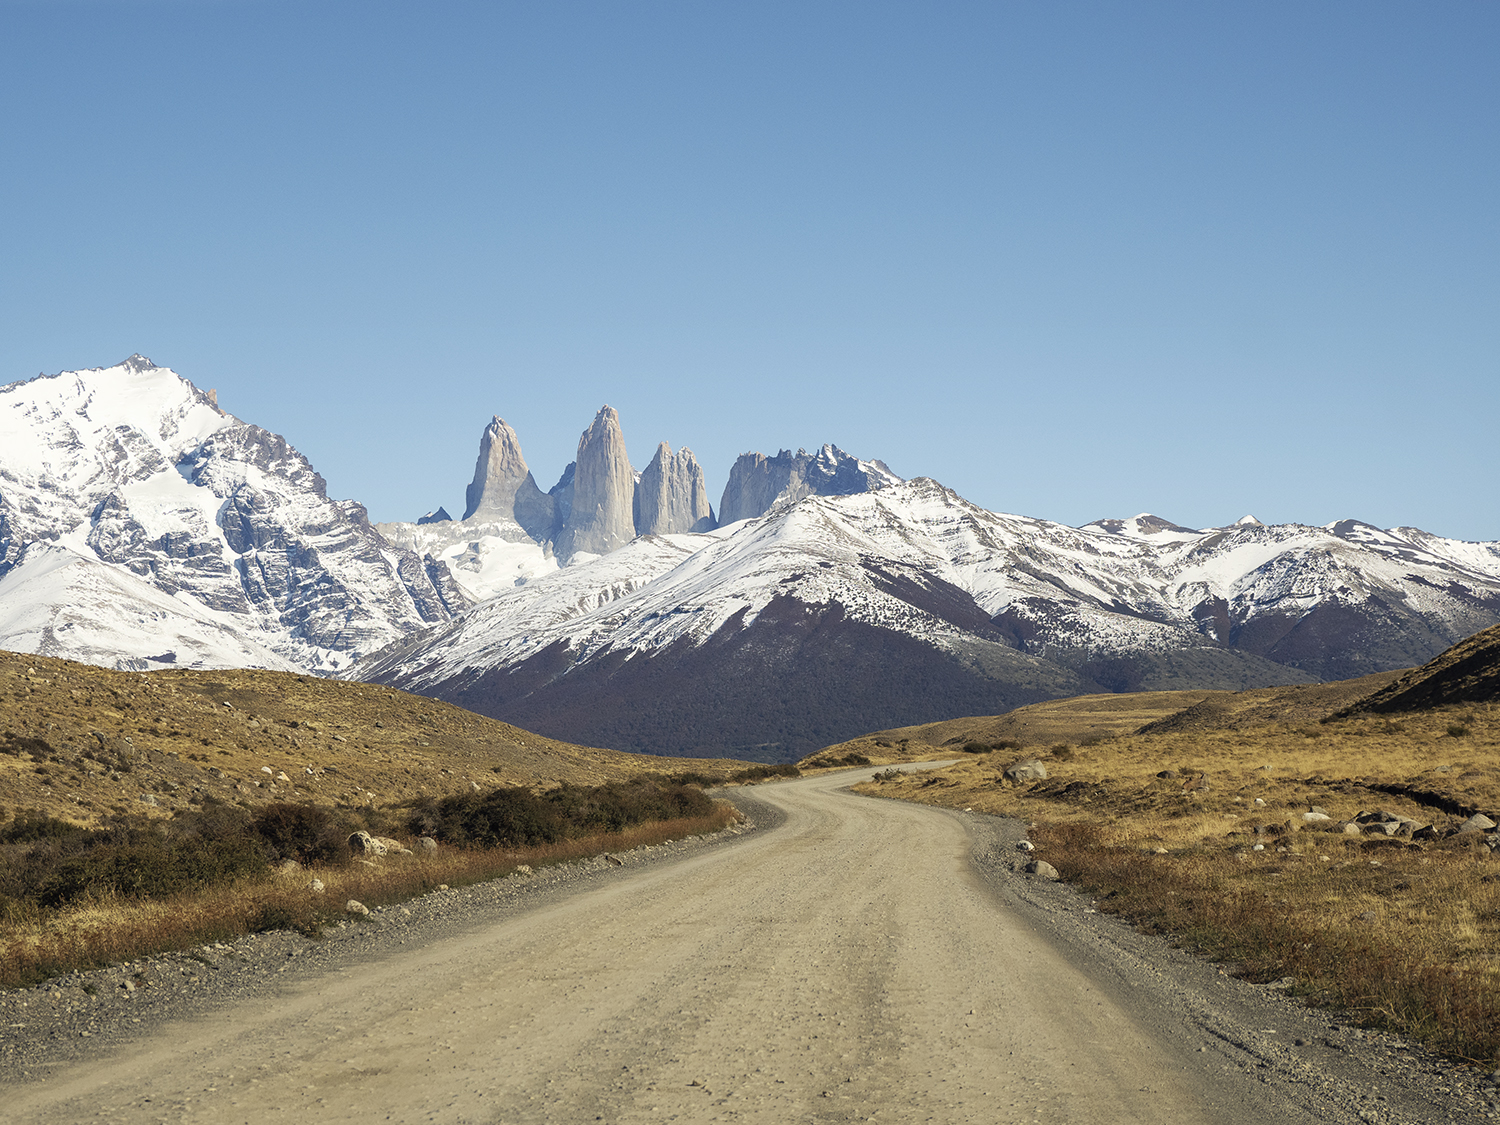
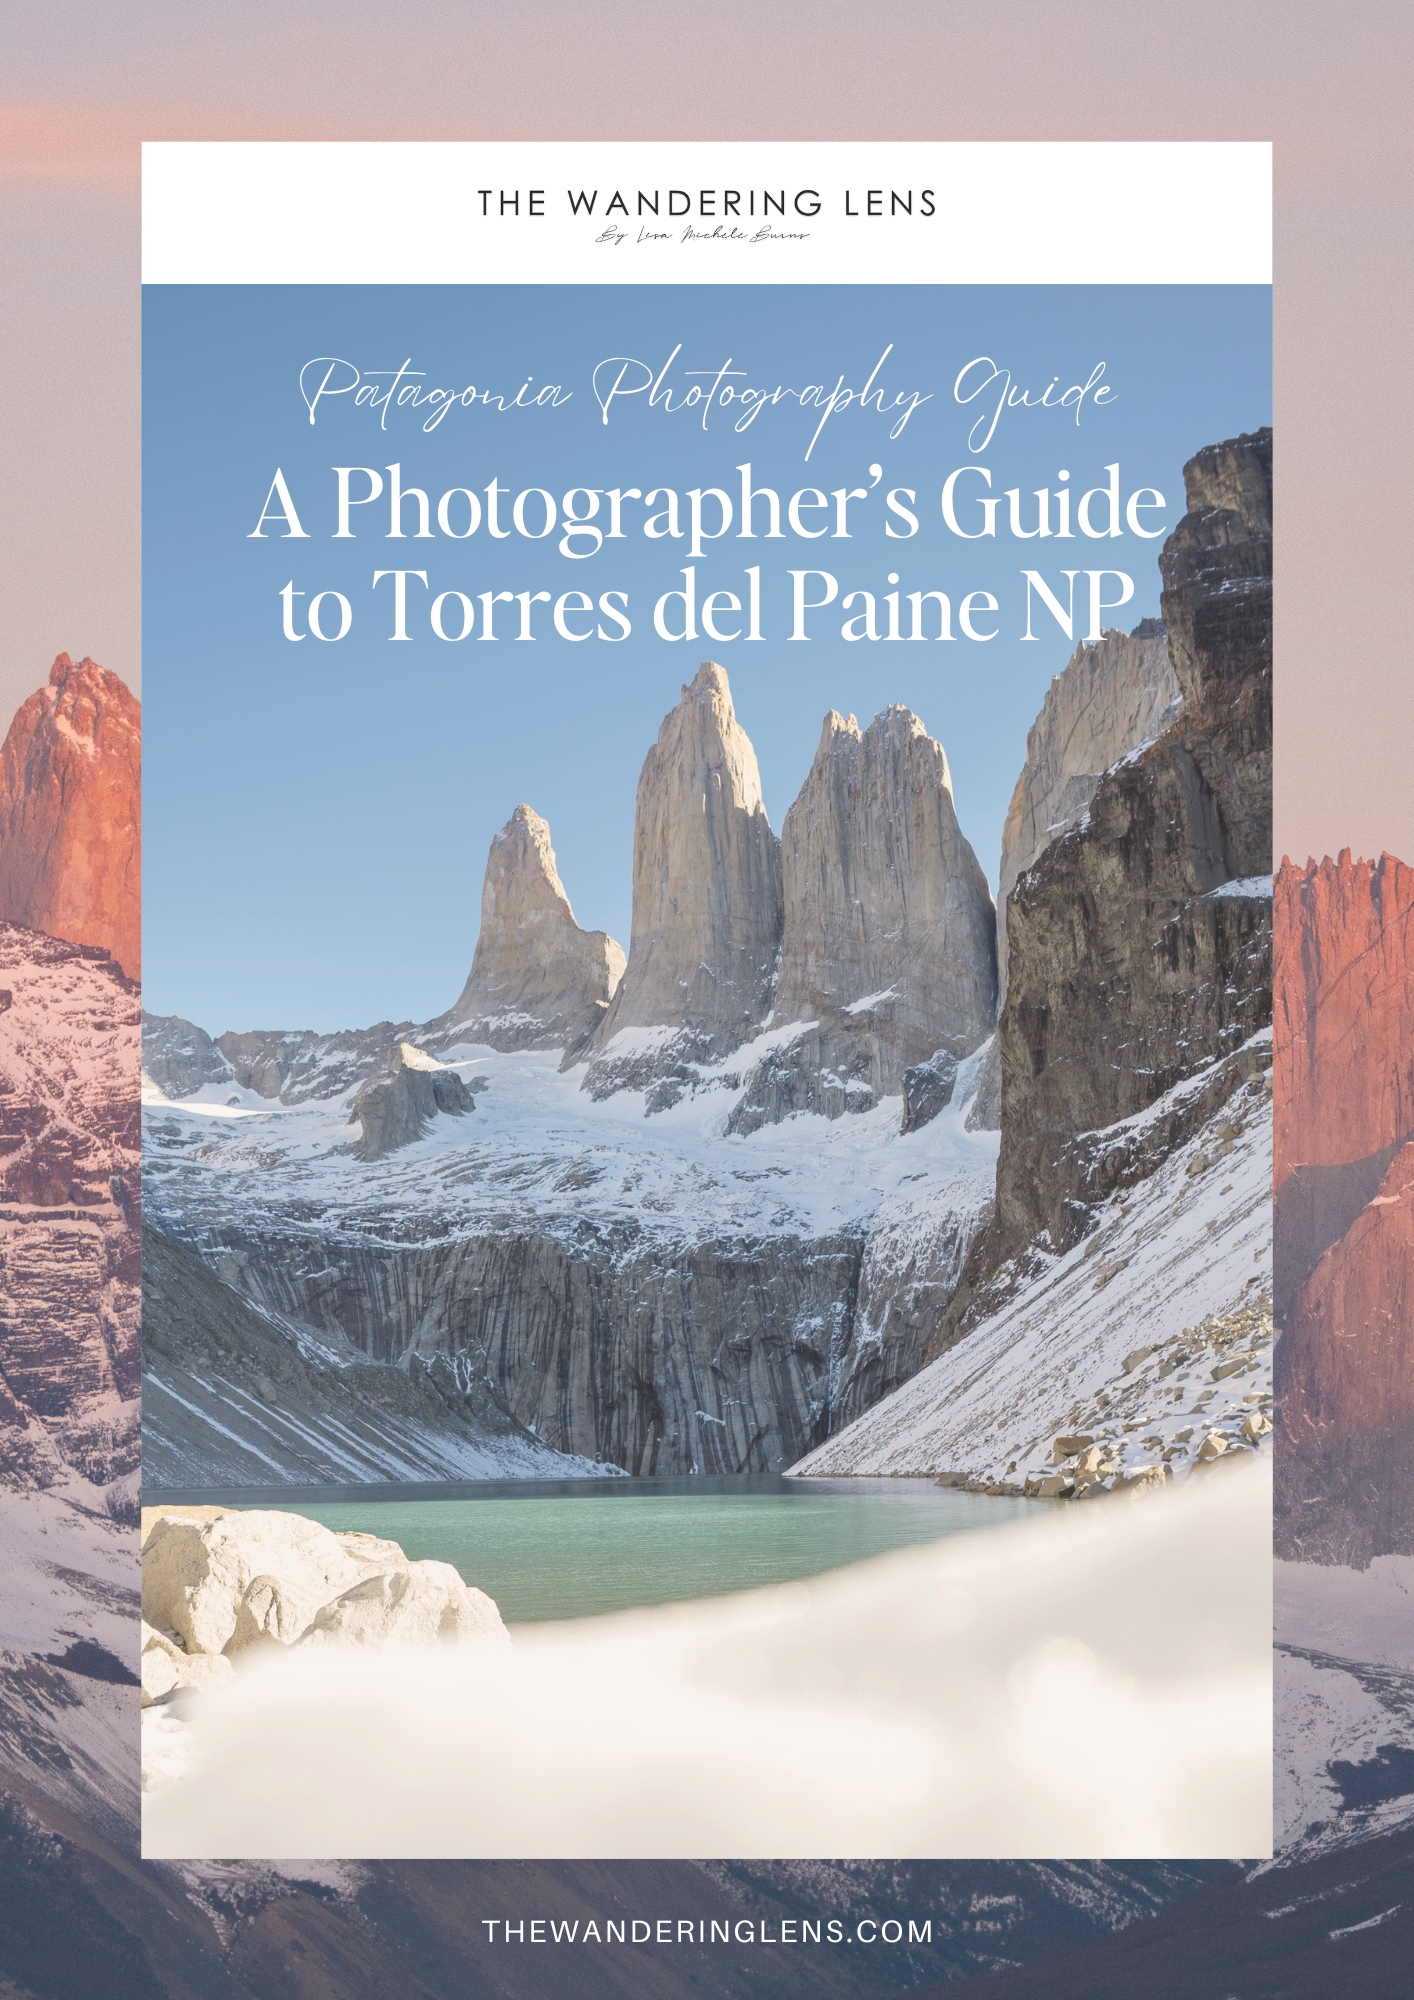
Mirador Base de las Torres
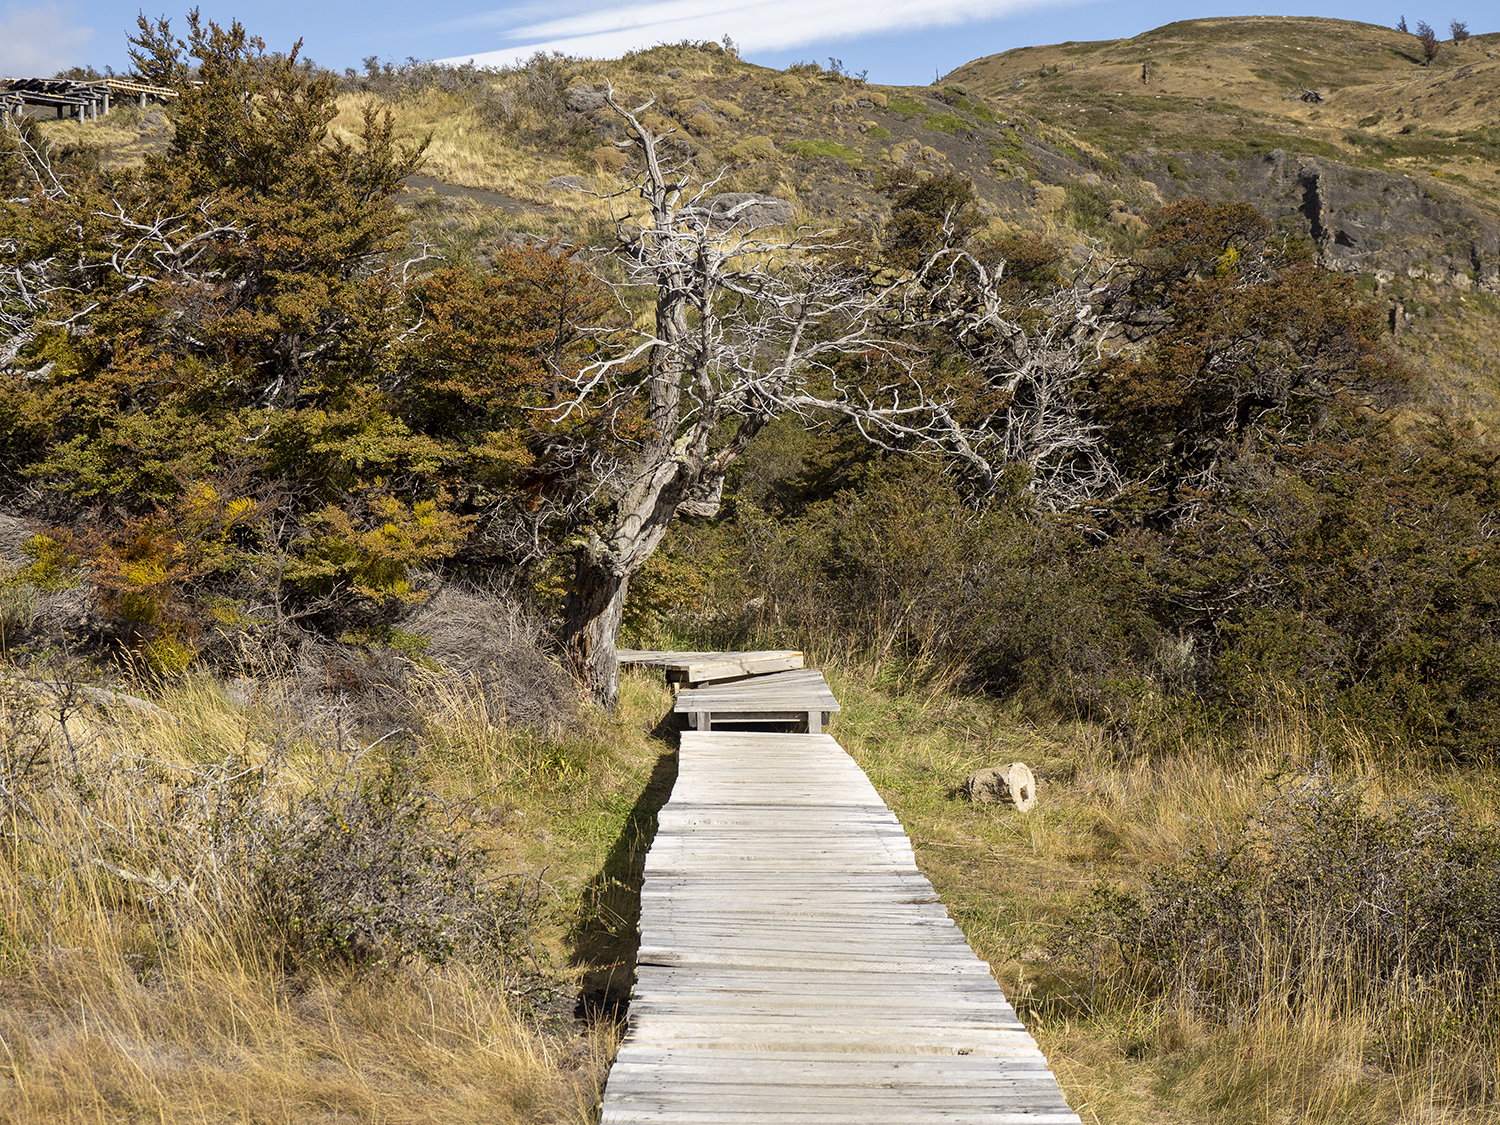
It’s a tough 20km hike, I’m not going to sugarcoat it, but this iconic viewpoint offers a breathtaking view of the three granite towers that give the park its name. The trail is noted as ‘challenging’ and this will depend on your level of fitness, but with no prior training, I found it extremely challenging haha. I’ll be publishing a longer article solely focused on this hike shortly.
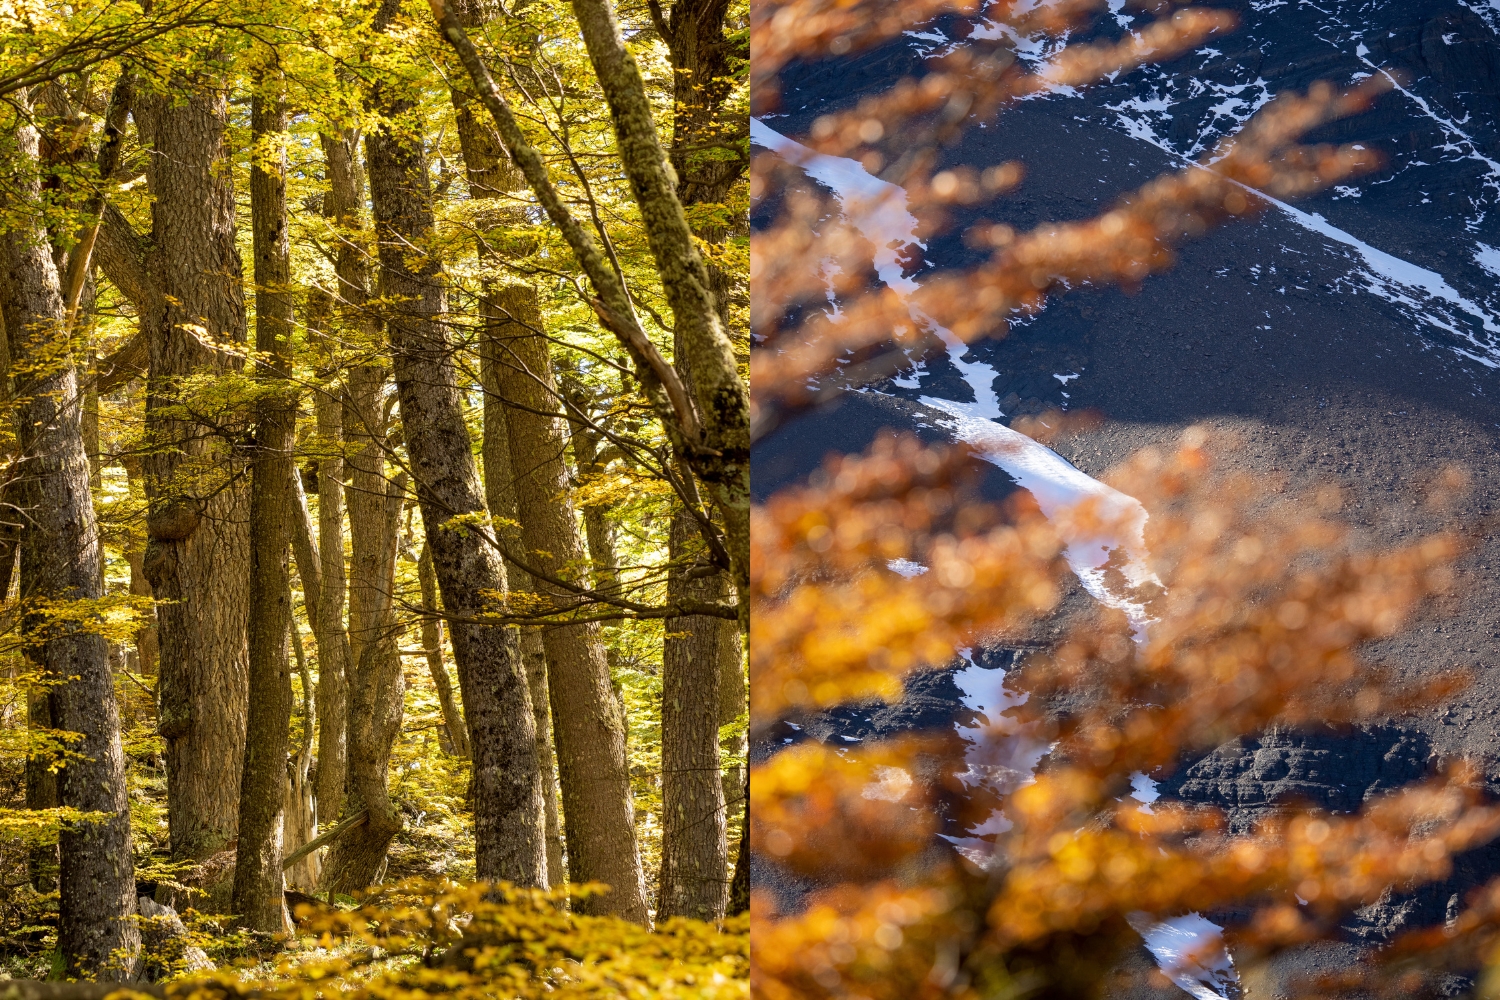
Worth it? Absolutely! The most surprising thing was that it wasn’t just the final viewpoint that was the most spectacular, the entire trail is photogenic as you venture through beautiful lenga forests, alongside a flowing river with majestic mountain scenery in all directions.
- Best Time to Photograph: Sunrise, rise early and attempt to make it to the top to watch the glow appear across the towers. I didn’t do this, instead, I departed from Hotel Las Torres at 7:30am (still dark in April), and because I took so long reaching the top and photographing in the forest, I didn’t get to the lake until 3pm…oops.
- Photo Tips: Use your time wisely at the top and try to capture a variety of images to showcase the overall scene, but also the incredible detail of the stone, contrasting tones, and surrounding scenery.
Laguna Amarga
This stunning lagoon is known for its reflective qualities, offering fantastic mirror-like images of the surrounding mountains and Las Torres peaks. Due to the flora and fauna in and around the lagoon, it’s not possible (at the time of writing this) to go down to the shore of the lagoon, instead, you can capture images from a viewpoint (marked on the map below), or from the eastern side where a small parking lot has an area you can photograph from that’s closer to the water level and where flamingos also frequent occasionally! *Note the fence in the second image, that’s as close as you can get to the water on the eastern side, still a great view.
- Best Time to Photograph: Sunrise, the morning light is ideal from this vantage point as it illuminates the mountains and slowly brings the lagoon to life with vibrant colours.
- Photo Tips: If there’s a chance the sky will erupt in colour for sunset, the higher viewpoint is a great place to photograph from as you can face east and west depending on how the scene is looking.

Laguna Azul
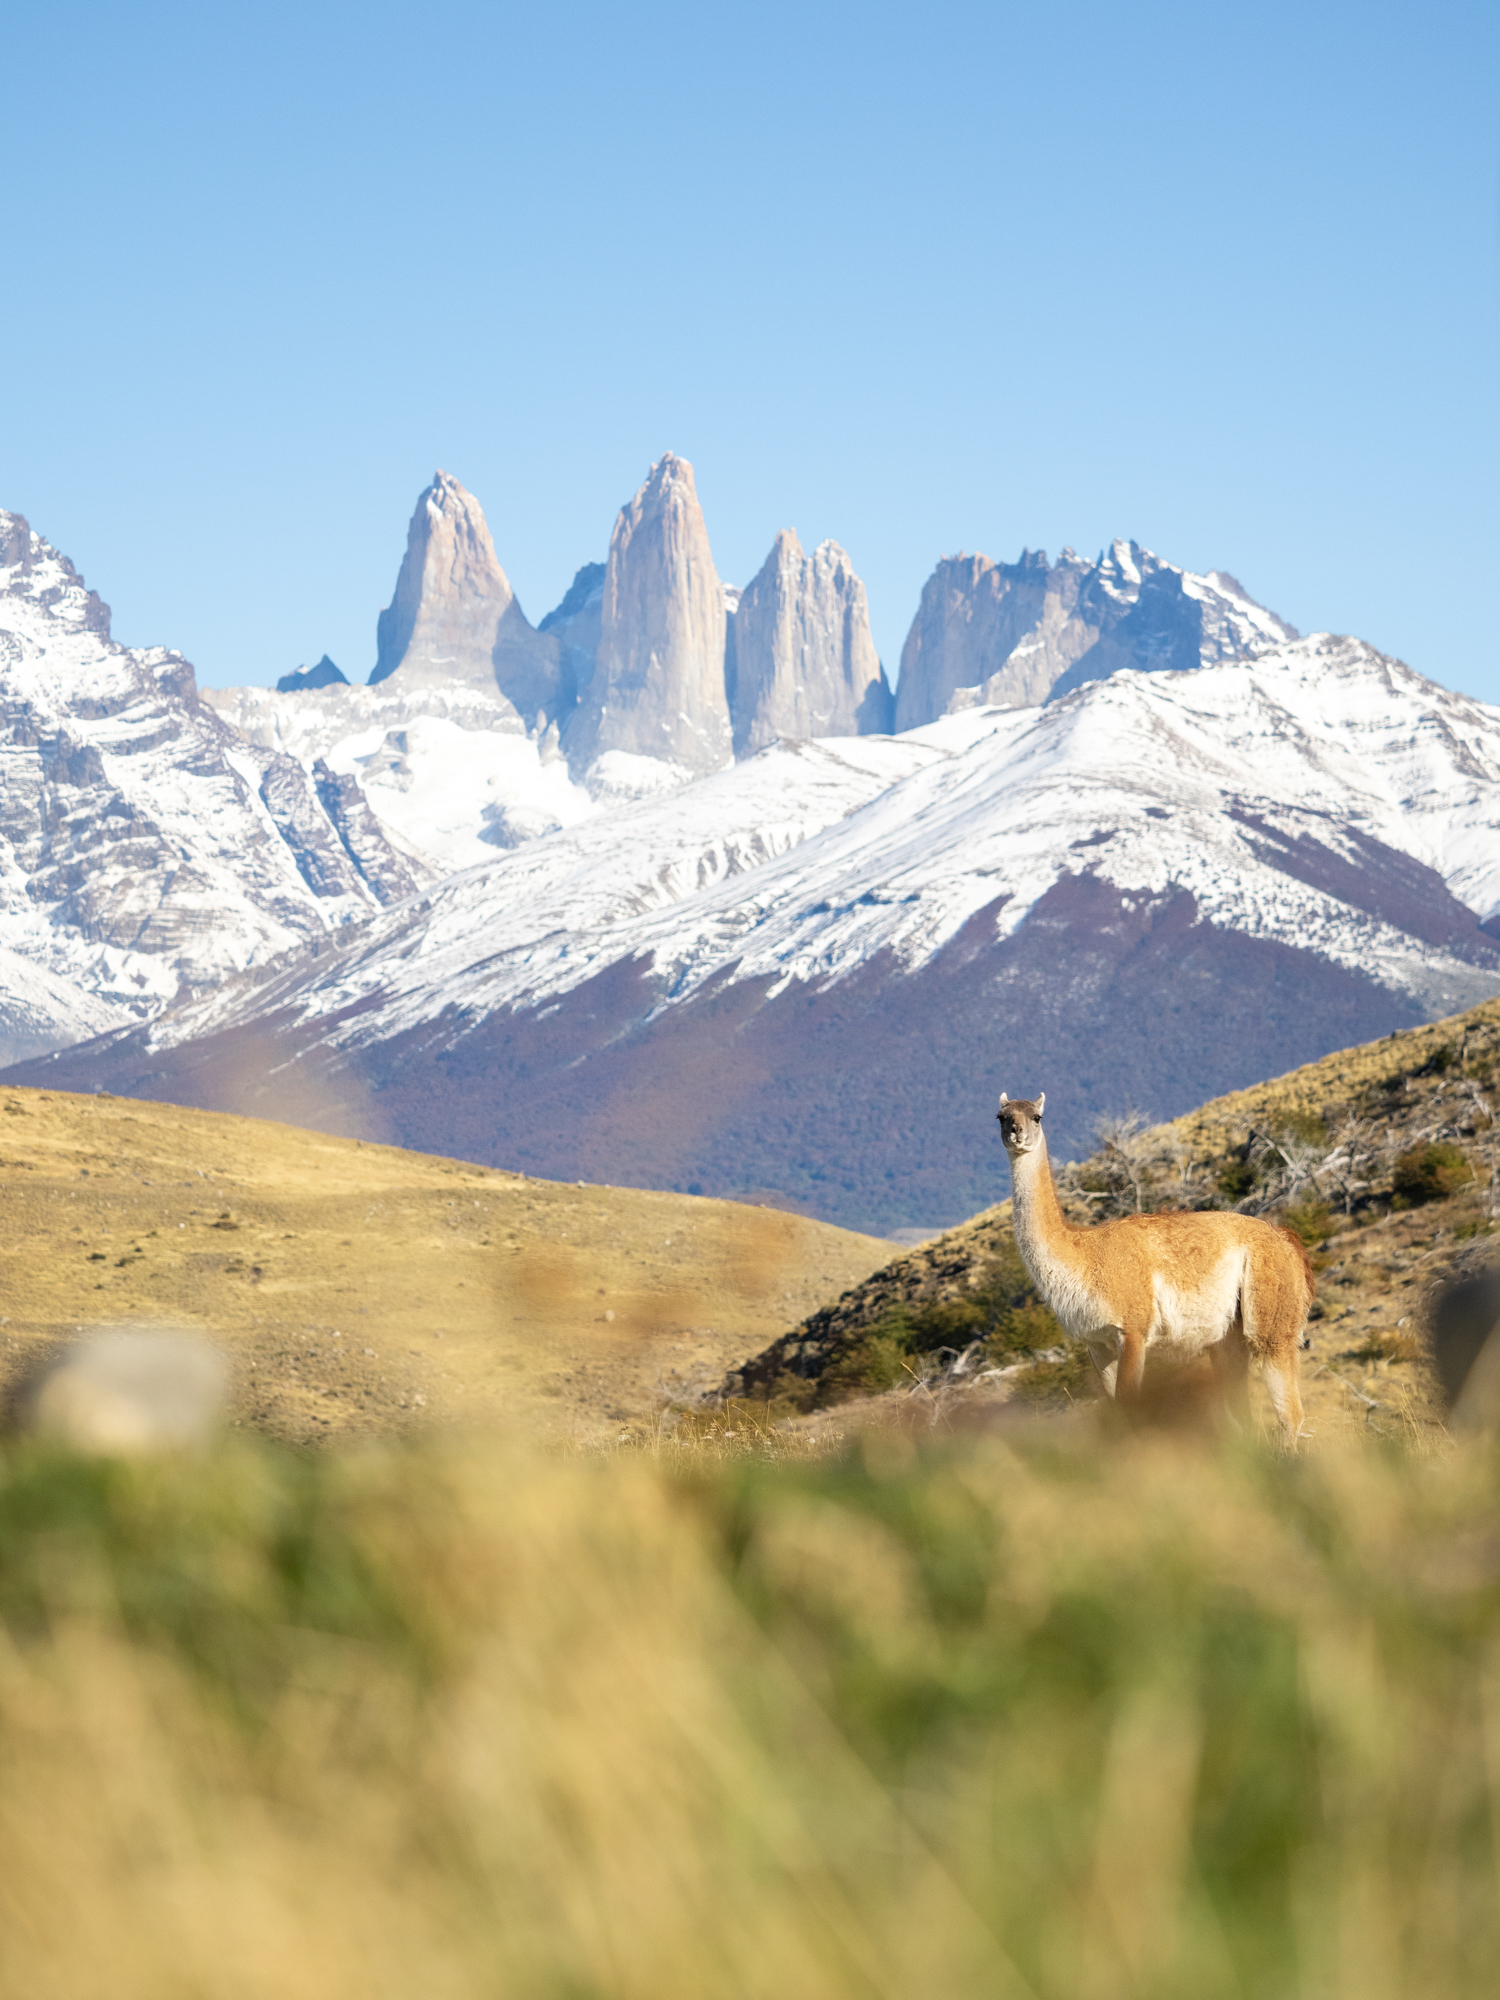
A lesser-known spot that provides a beautiful view of the towers from a different angle. The blue waters of the lagoon add a striking contrast to the rugged peaks and the drive out there alone is worth the trip. While you can drive all the way to the start of the trail, once you get there, it’s about a 2hr round-trip to do the 9.5km route. I didn’t have time to do it, but you can access the trail information and reviews via All Trails here.
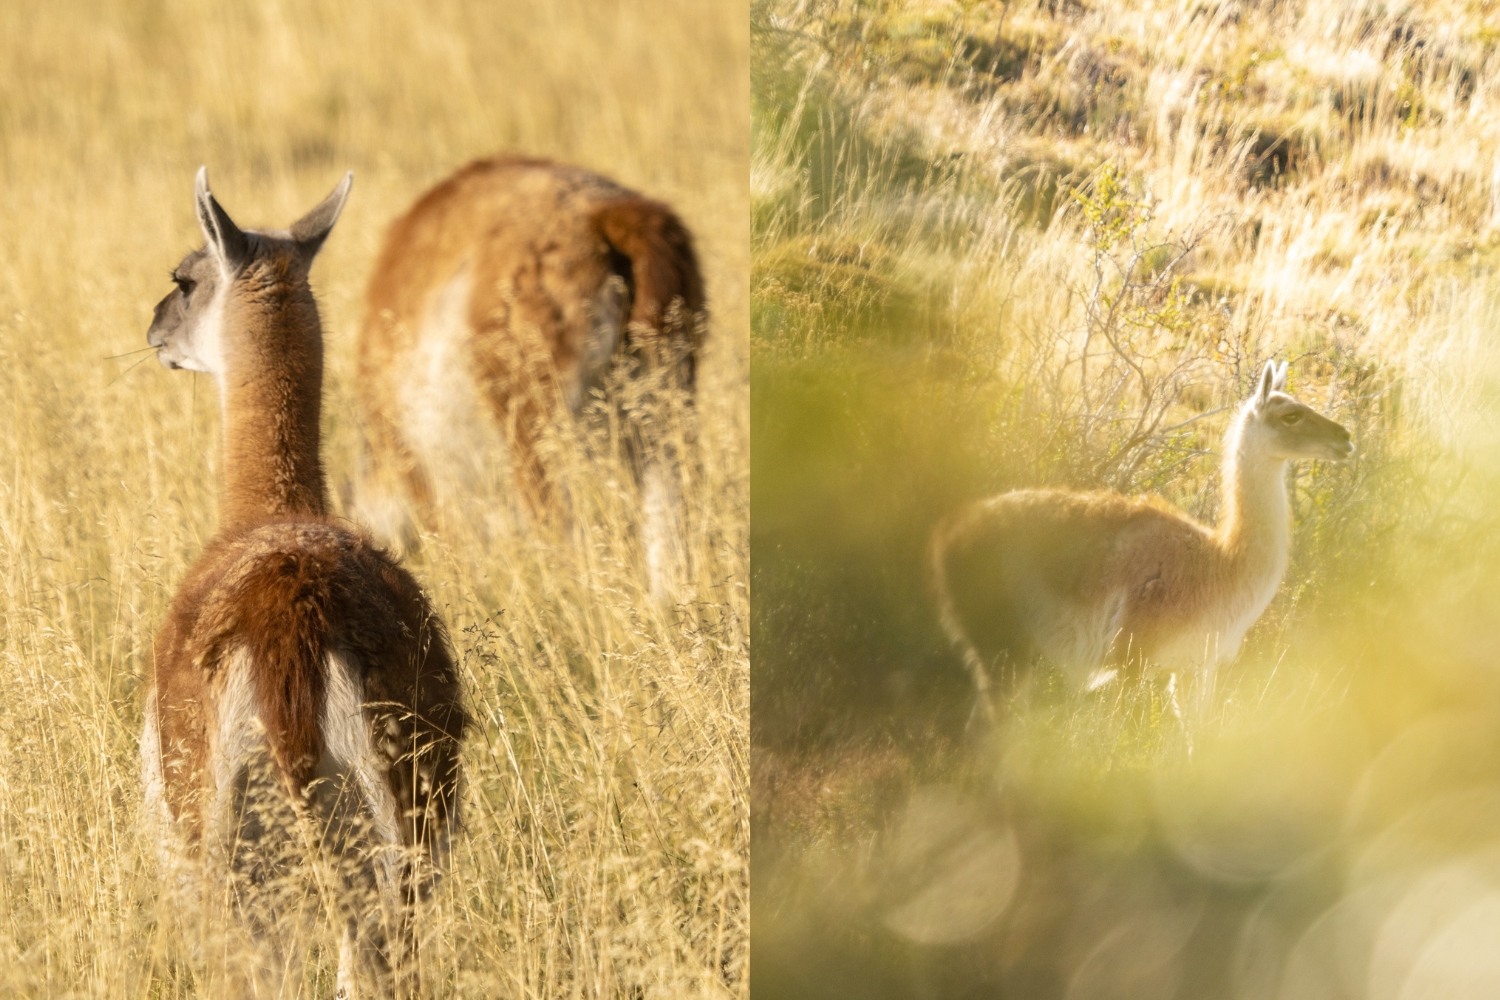
I photographed my favourite Guanaco shots while driving to Laguna Azul, and you’ll also get a variety of angles to photograph the towers along the route.
- Best Time to Photograph: The morning light falls beautifully across the landscape here, but the afternoon glow also works well for the surrounding scenery and grasses.
- Photo Tips: Keep your zoom/telephoto lens at the ready while driving out there! Experiment with different compositions, including reflections and foreground elements.
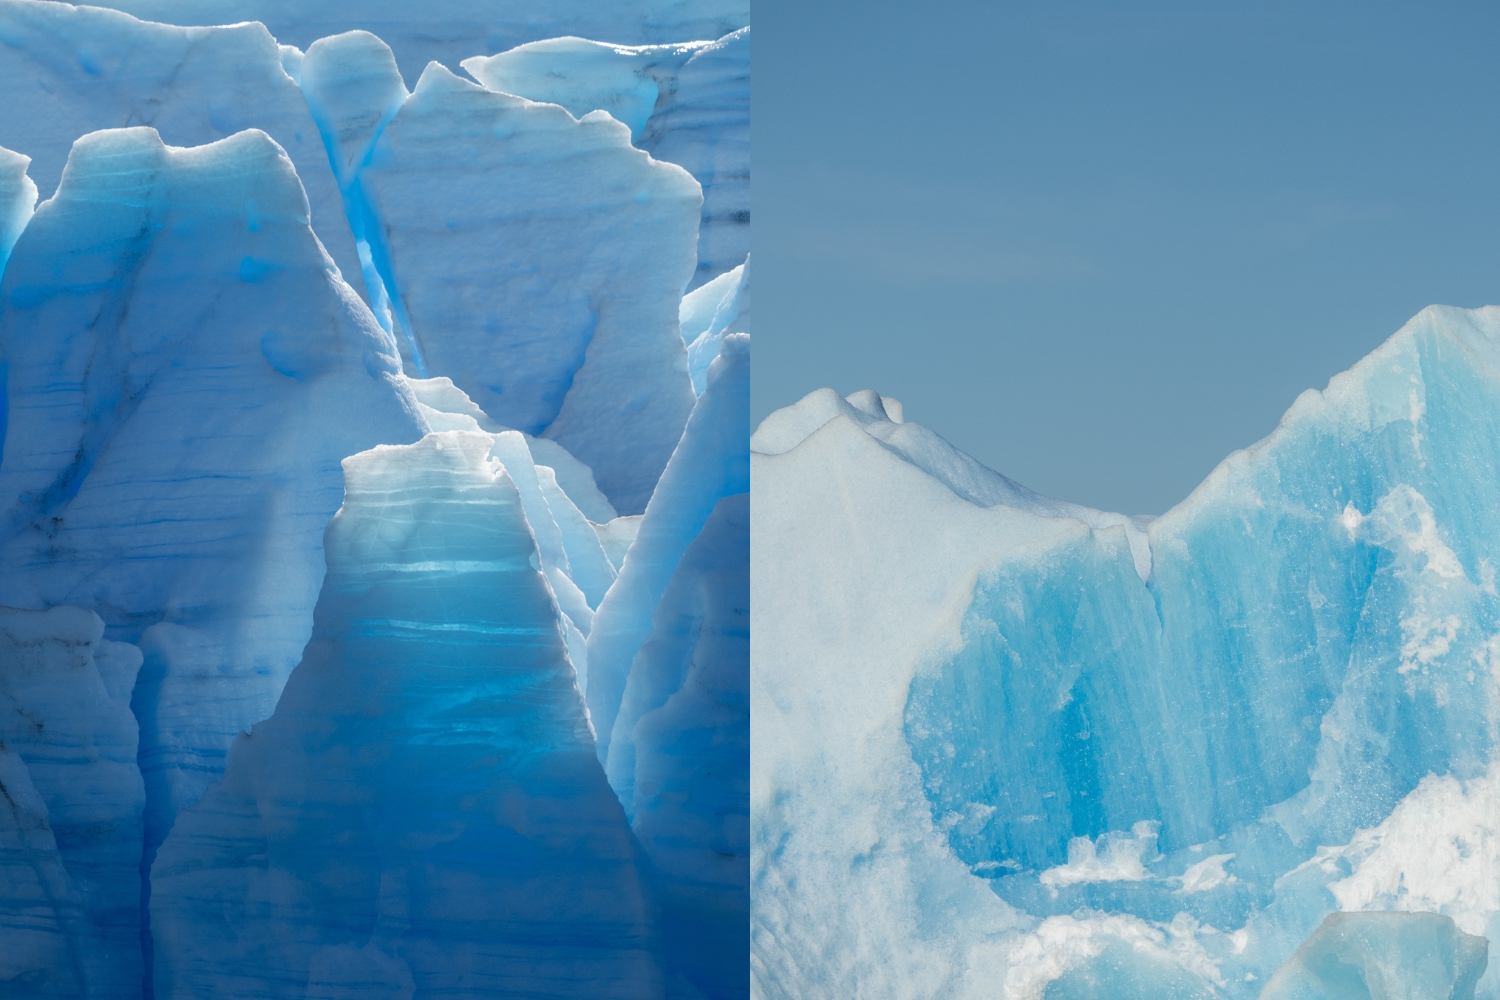
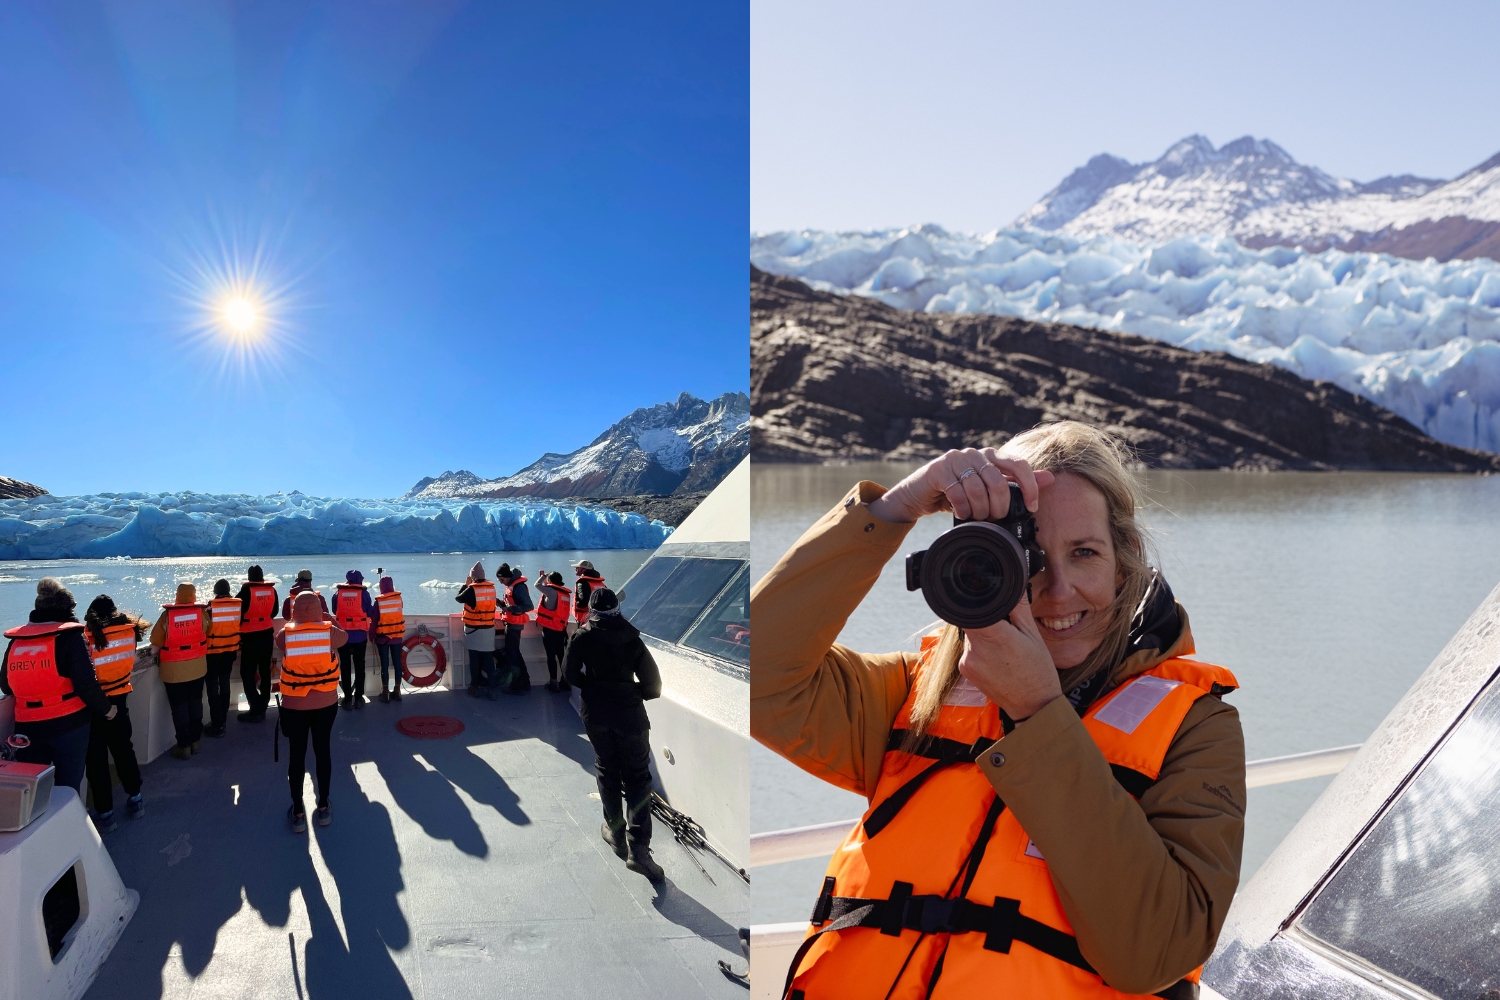
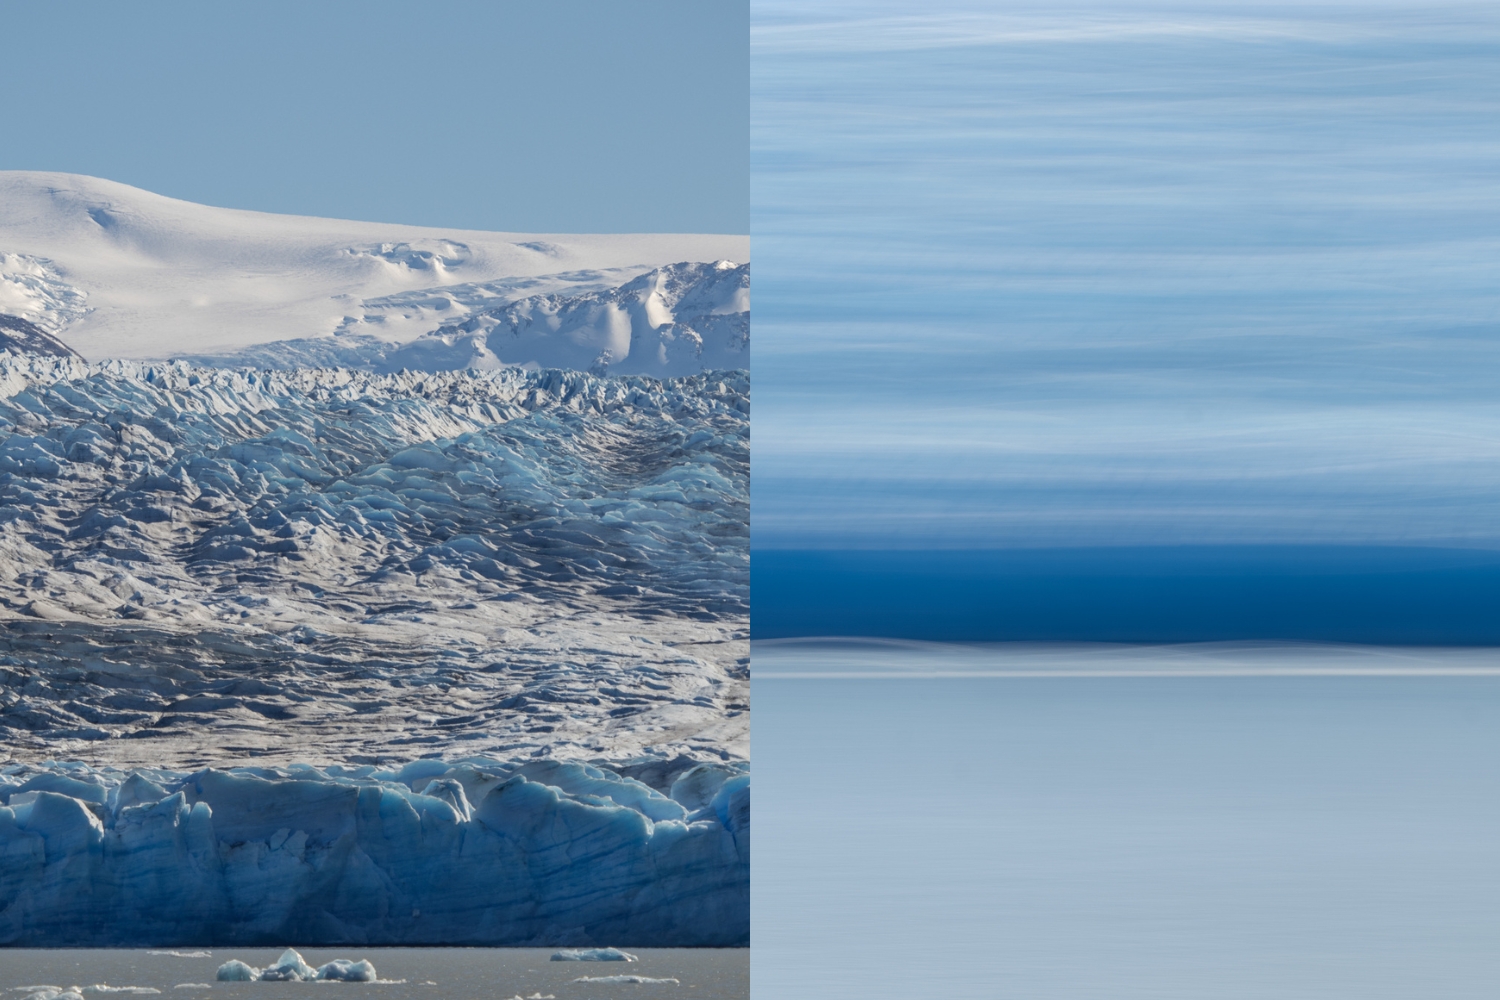
Grey Glacier (Boat Trip)
Having previously photographed glaciers in Iceland and Greenland, I wasn’t sure what to expect from Grey Glacier, but wow was I blown away by its beauty. I took a boat tour on Lago Grey which was part of the Full Paine Tour with Hotel Las Torres (you can also book your boat tour directly), and the cruise takes you right up to the front of the glacier for wonderful opportunities to capture the textures and tones.
The boat has two levels and plenty of outdoor space to move around and photograph from. There are two main arms of the glacier that the boat moves along, so if you didn’t capture that dream shot on the first attempt, there’s plenty of time to experiment and keep photographing.
- Best Time to Photograph: I opted for the lunch tour and found the light was beautiful, but slightly harsh. If there’s availability on the afternoon or early morning tour, I’d perhaps opt for those timings instead to enhance the shadows and overall drama of the scene.
- Photo Tips: Use a telephoto lens to get in nice and close to the ice as it layers into the distance. You may also get a chance to photograph icebergs within the lake, so keep your eyes peeled for broken chunks with deep blue sections, they’re stunning!
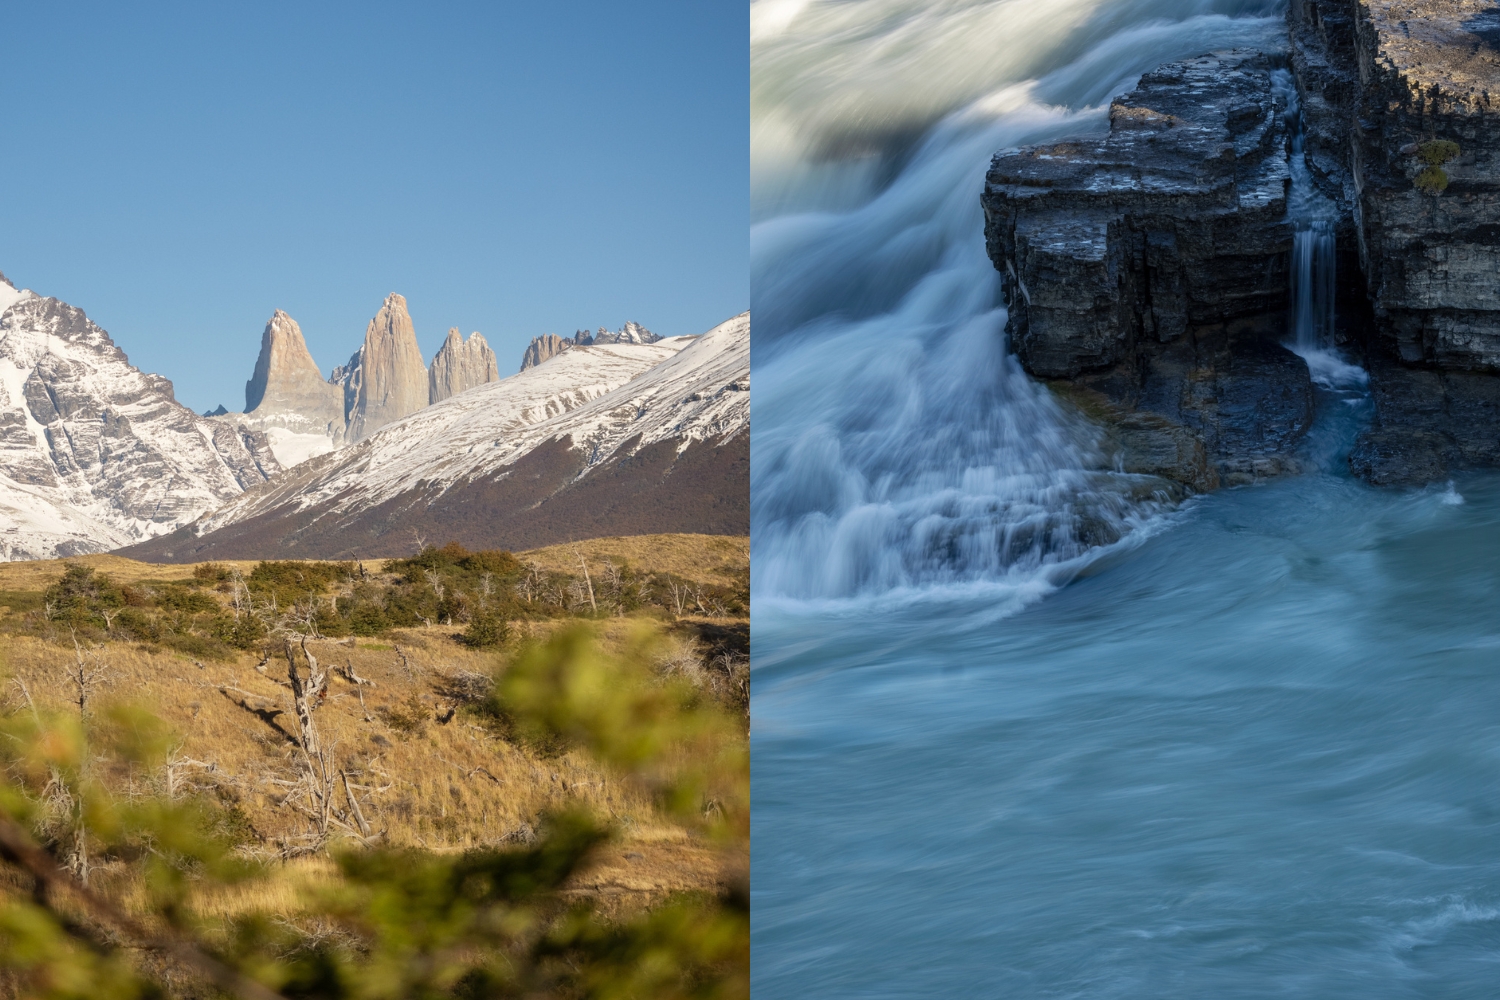
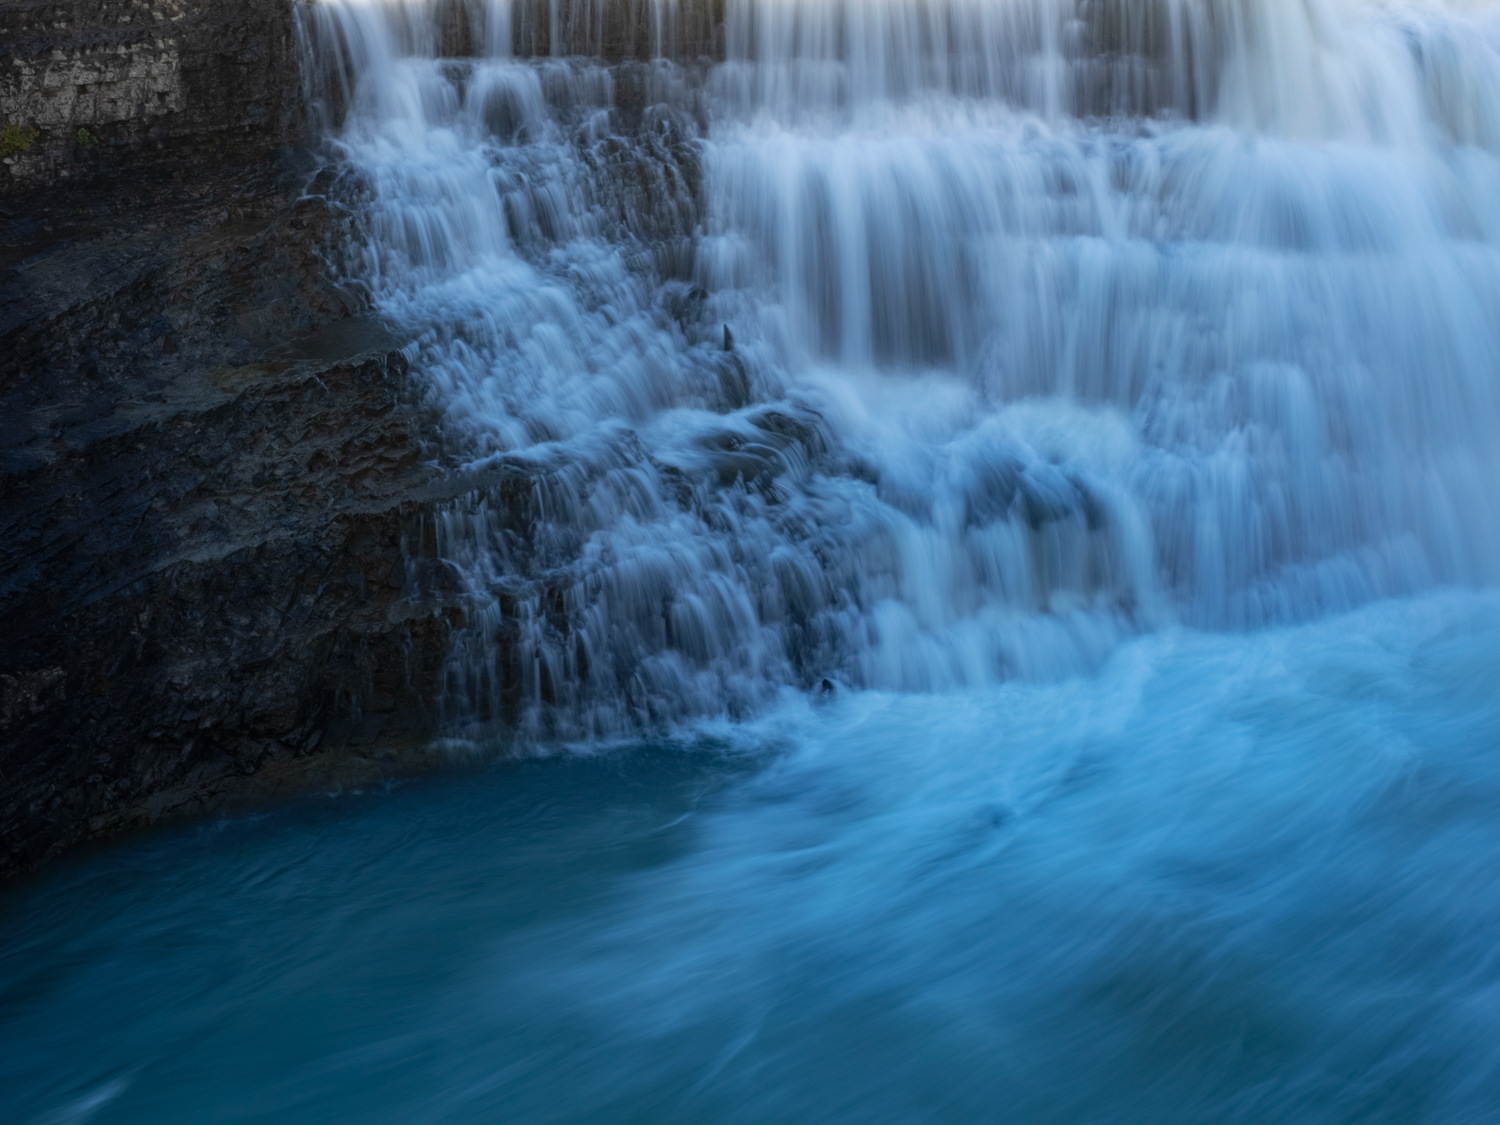
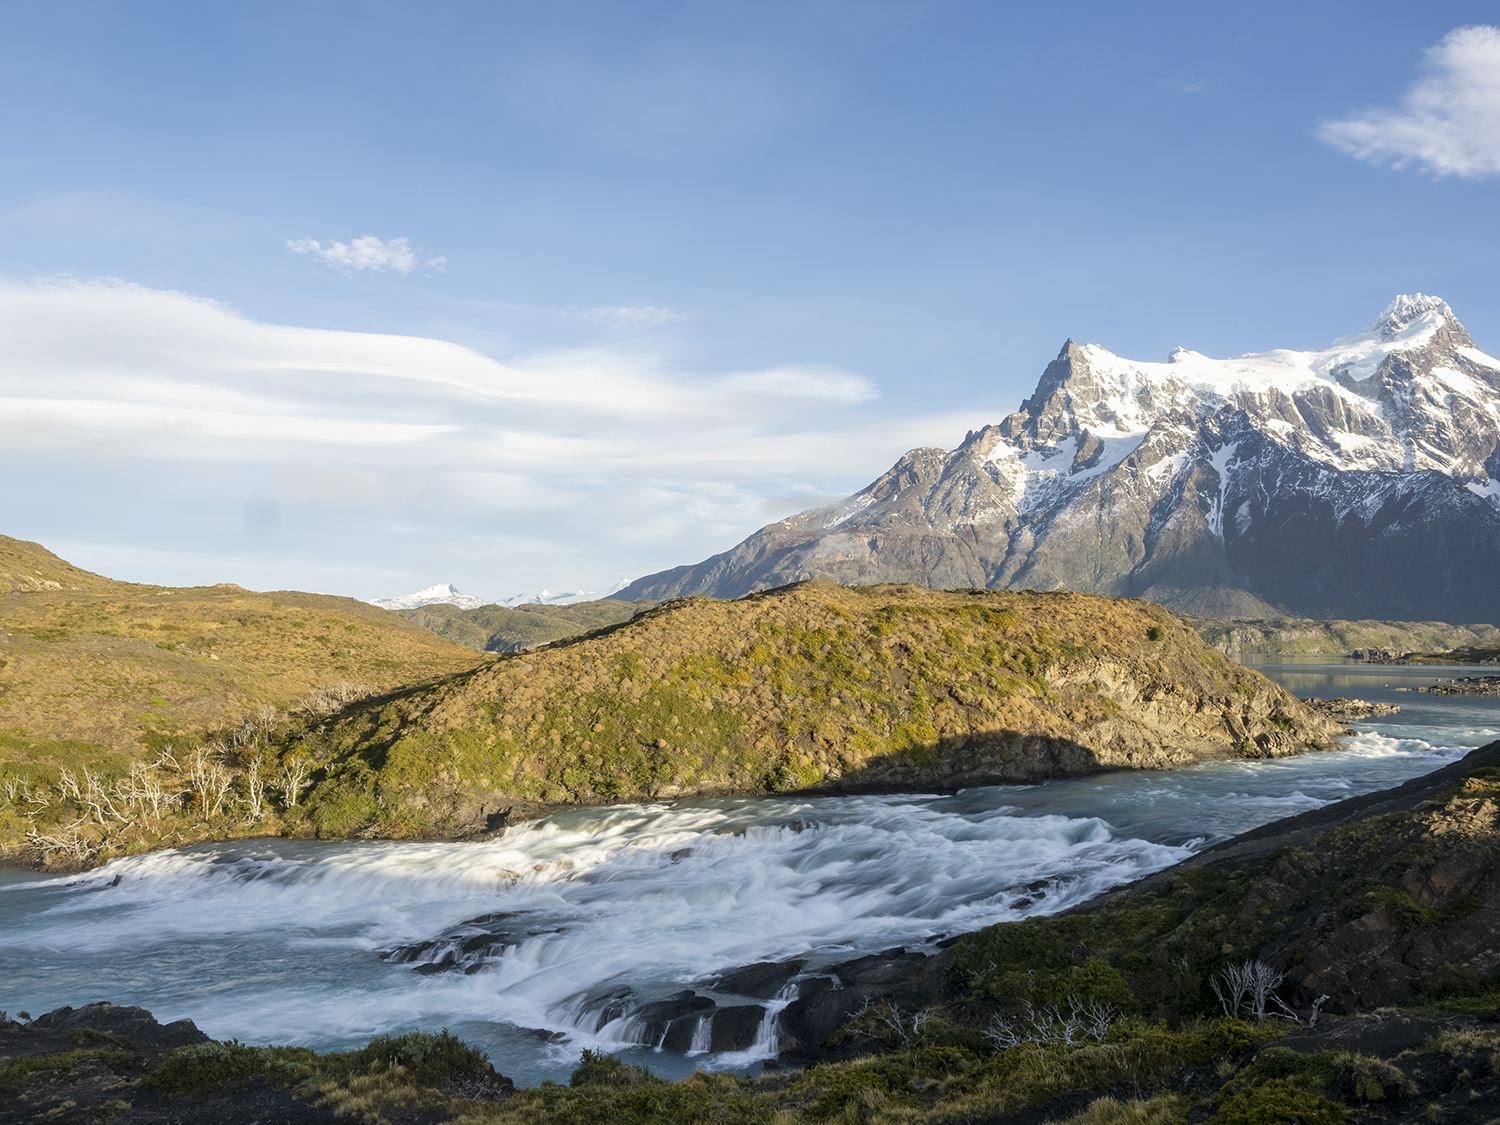
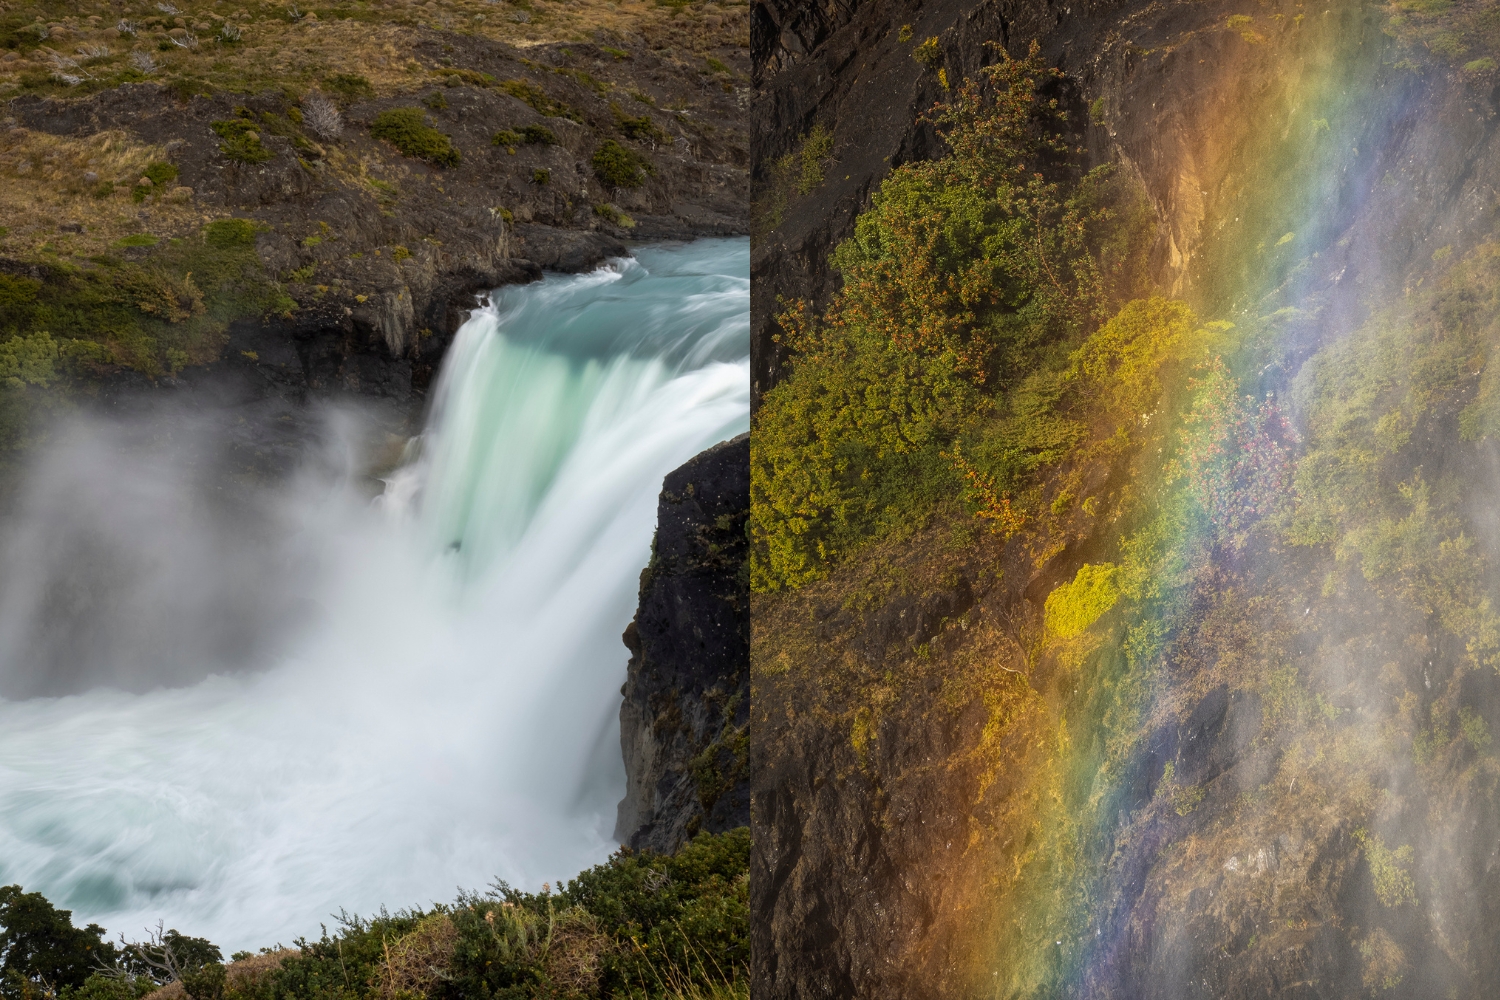
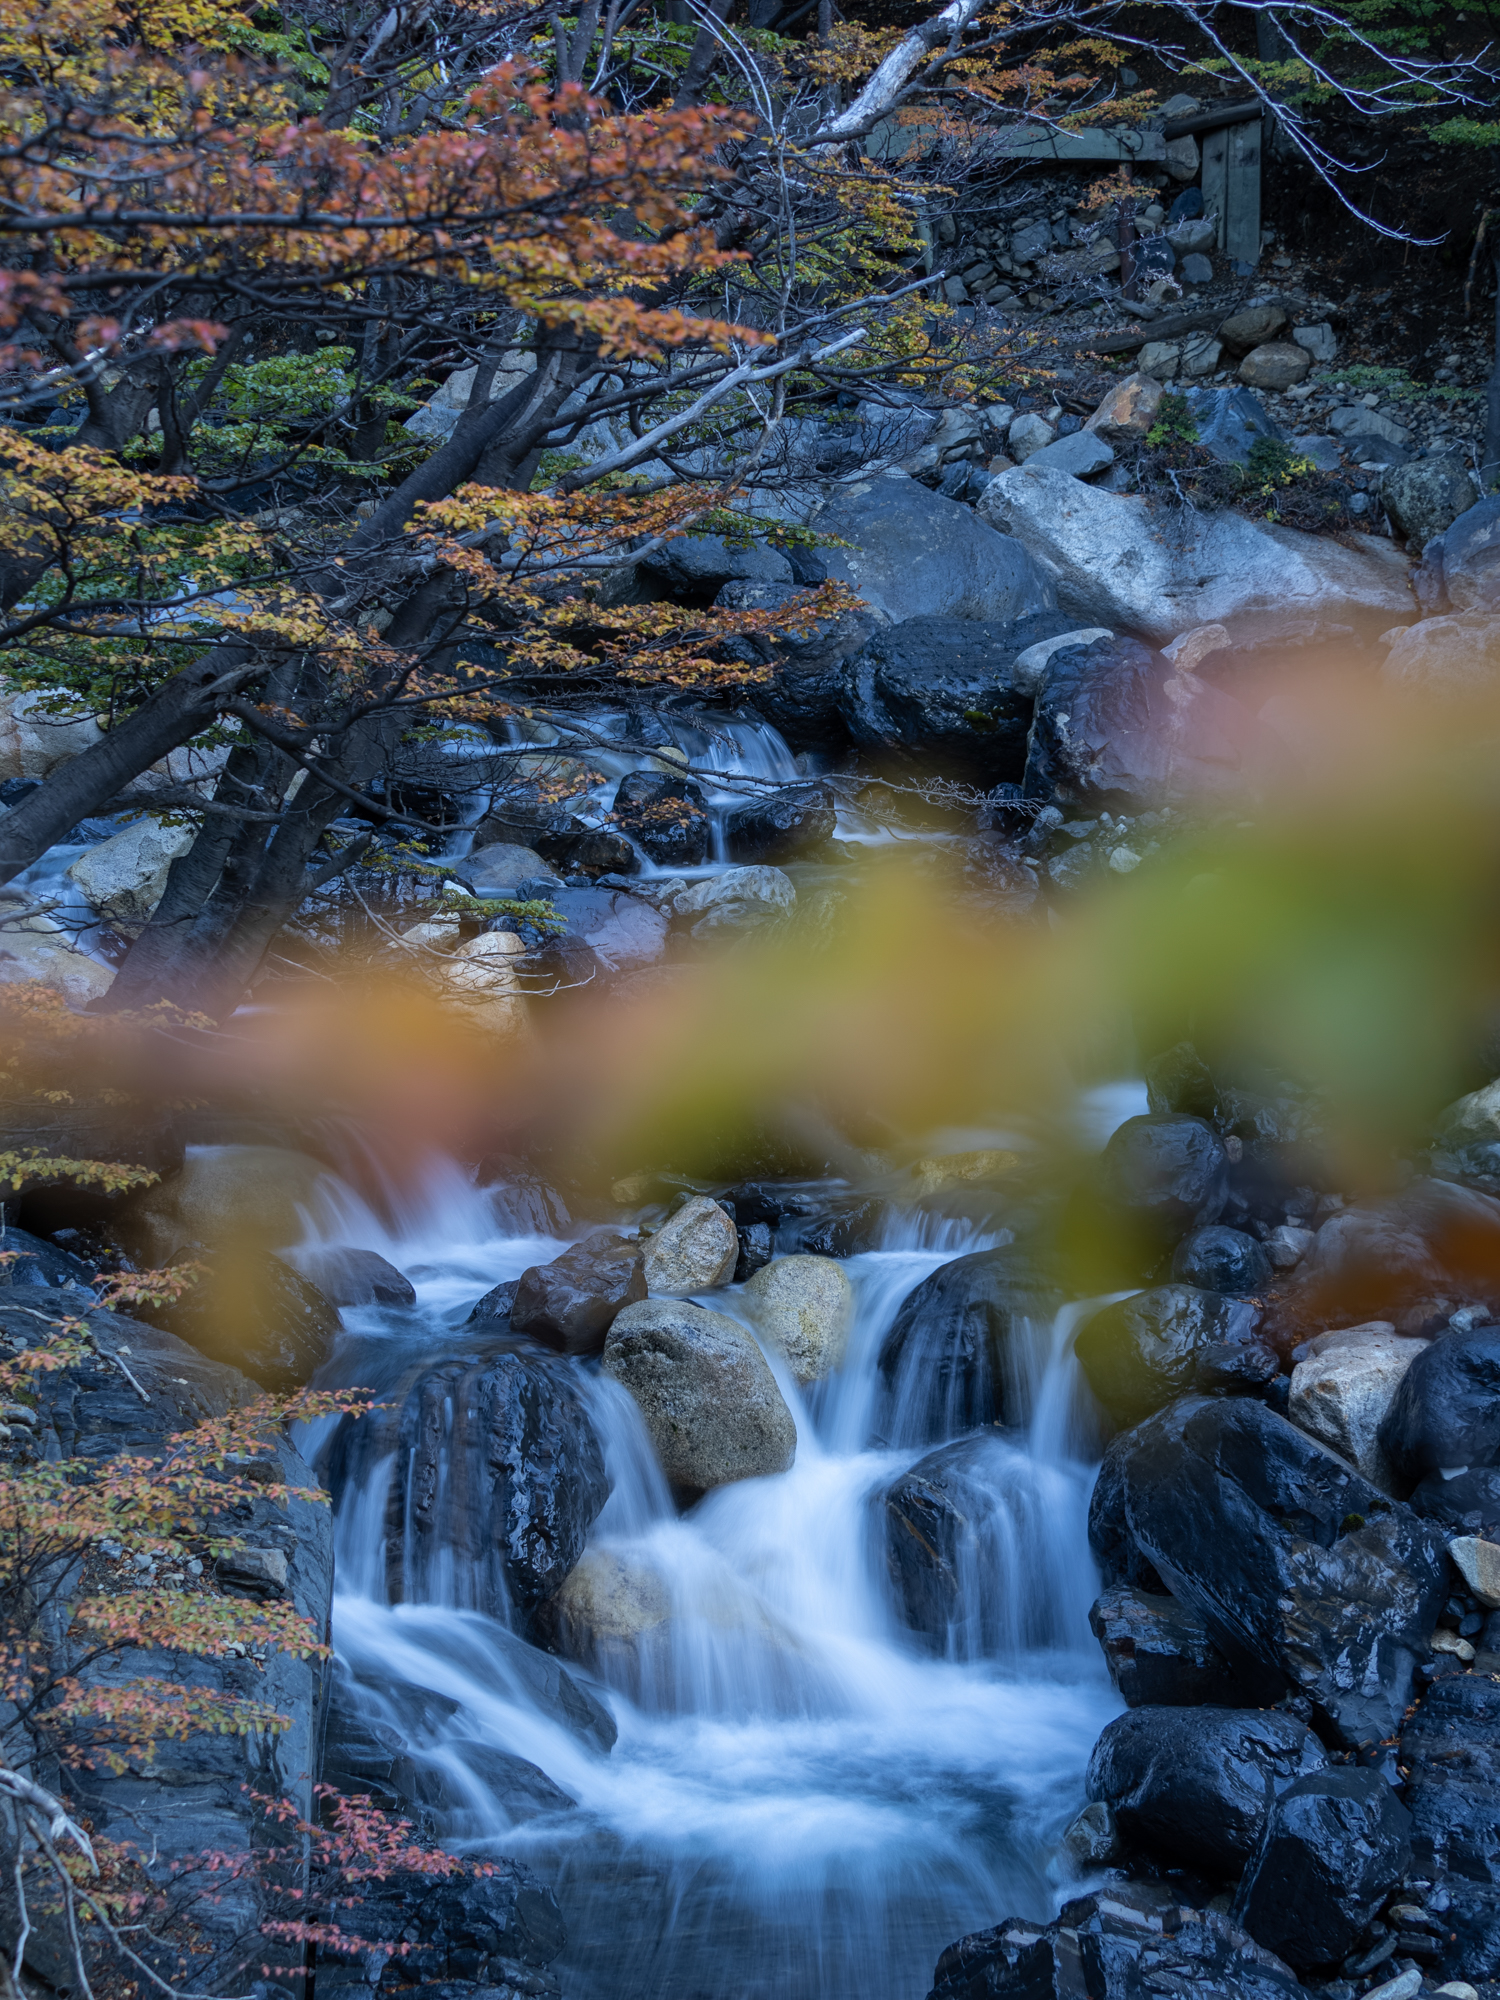
Cascada Rio Paine
If you’re a fan of long exposures, this is the spot for you. With a backdrop of the towers, this picturesque waterfall sees water from the Rio Paine cascade down a staircase of stone.
There’s an easy-to-access car park and the viewpoint is right in front, making it a great place to photograph anytime without a long hike. Upon arriving, you’ll be able to spot the main viewing point quite easily, but I’d also suggest wandering along the path to the left, where you can get a slightly higher vantage point and an alternate angle down to the smaller sections of waterfalls.
- Best Time to Photograph: You’ll want to avoid strong shadows across the falls, so I’d actually suggest photographing here in the middle of the day, particularly if you’ve got an ND filter to aid in shooting long exposures.
- Photo Tips: Bring an ND filter for long exposures and a tripod for stability, alternatively, like me, you could use a camera equipped with both! I used the OM SYSTEM OM-1 that has an in-built live ND filter and incredible stability so I can shoot long exposures without a tripod or additional accessories. Also aim to assess the scene, watch the water movement and then compose your image, there are so many images hiding within the scene here.

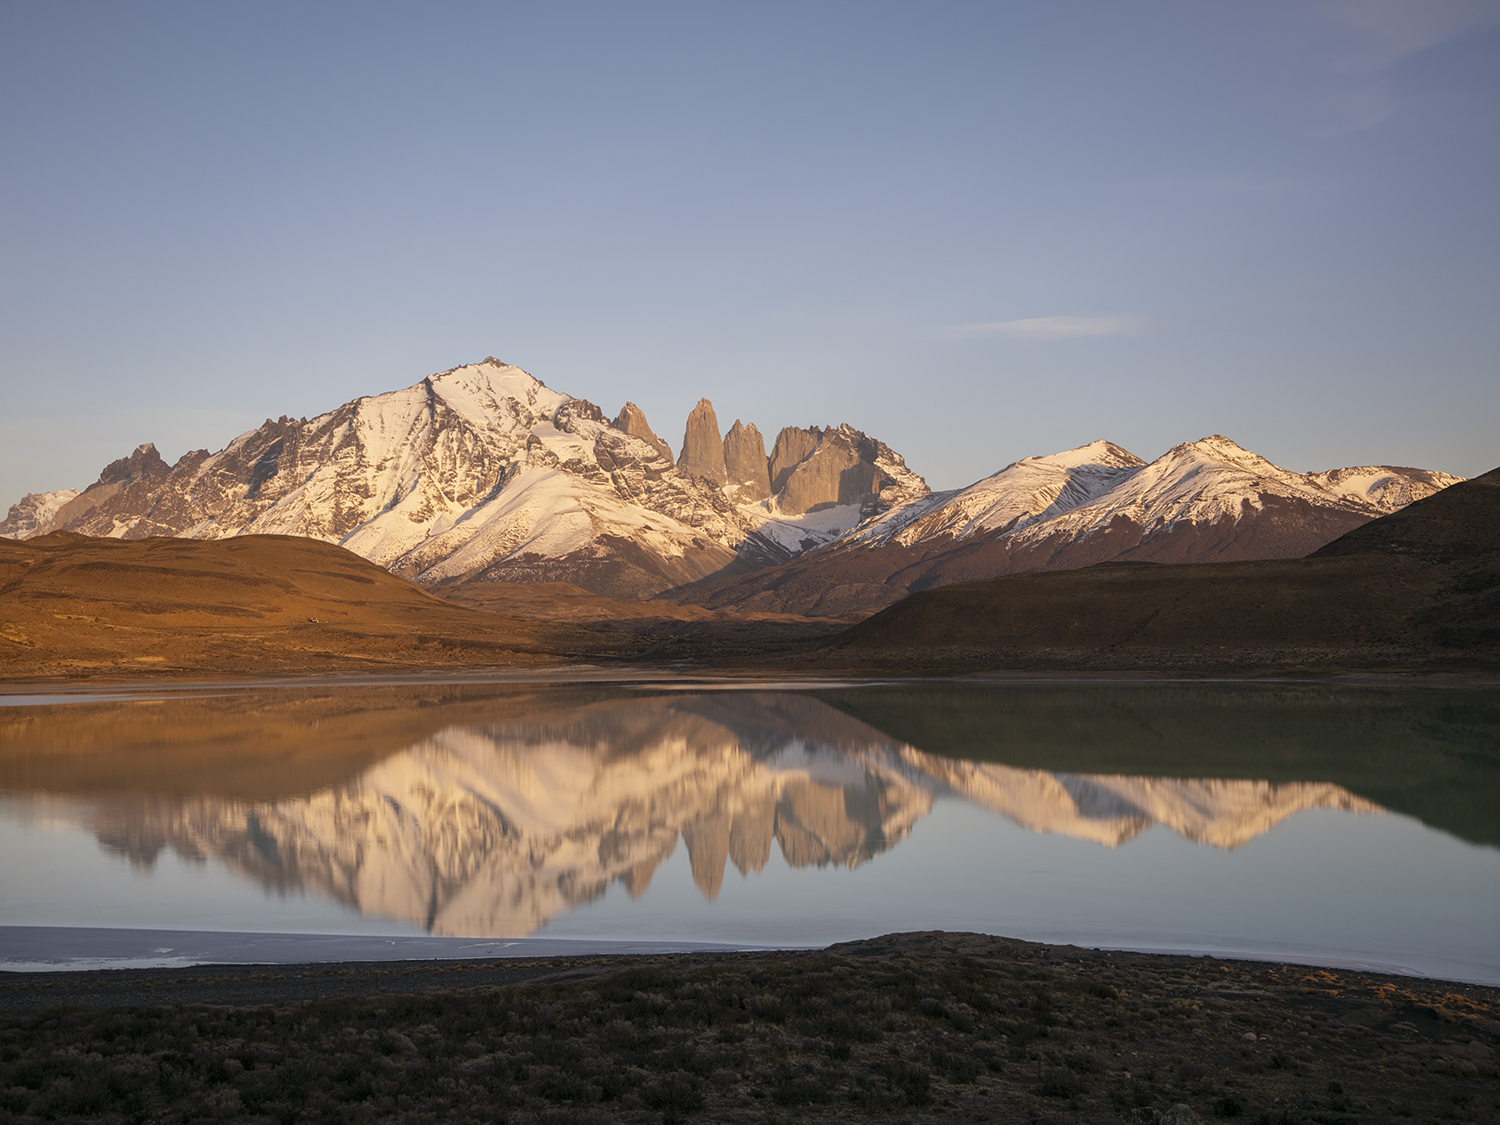
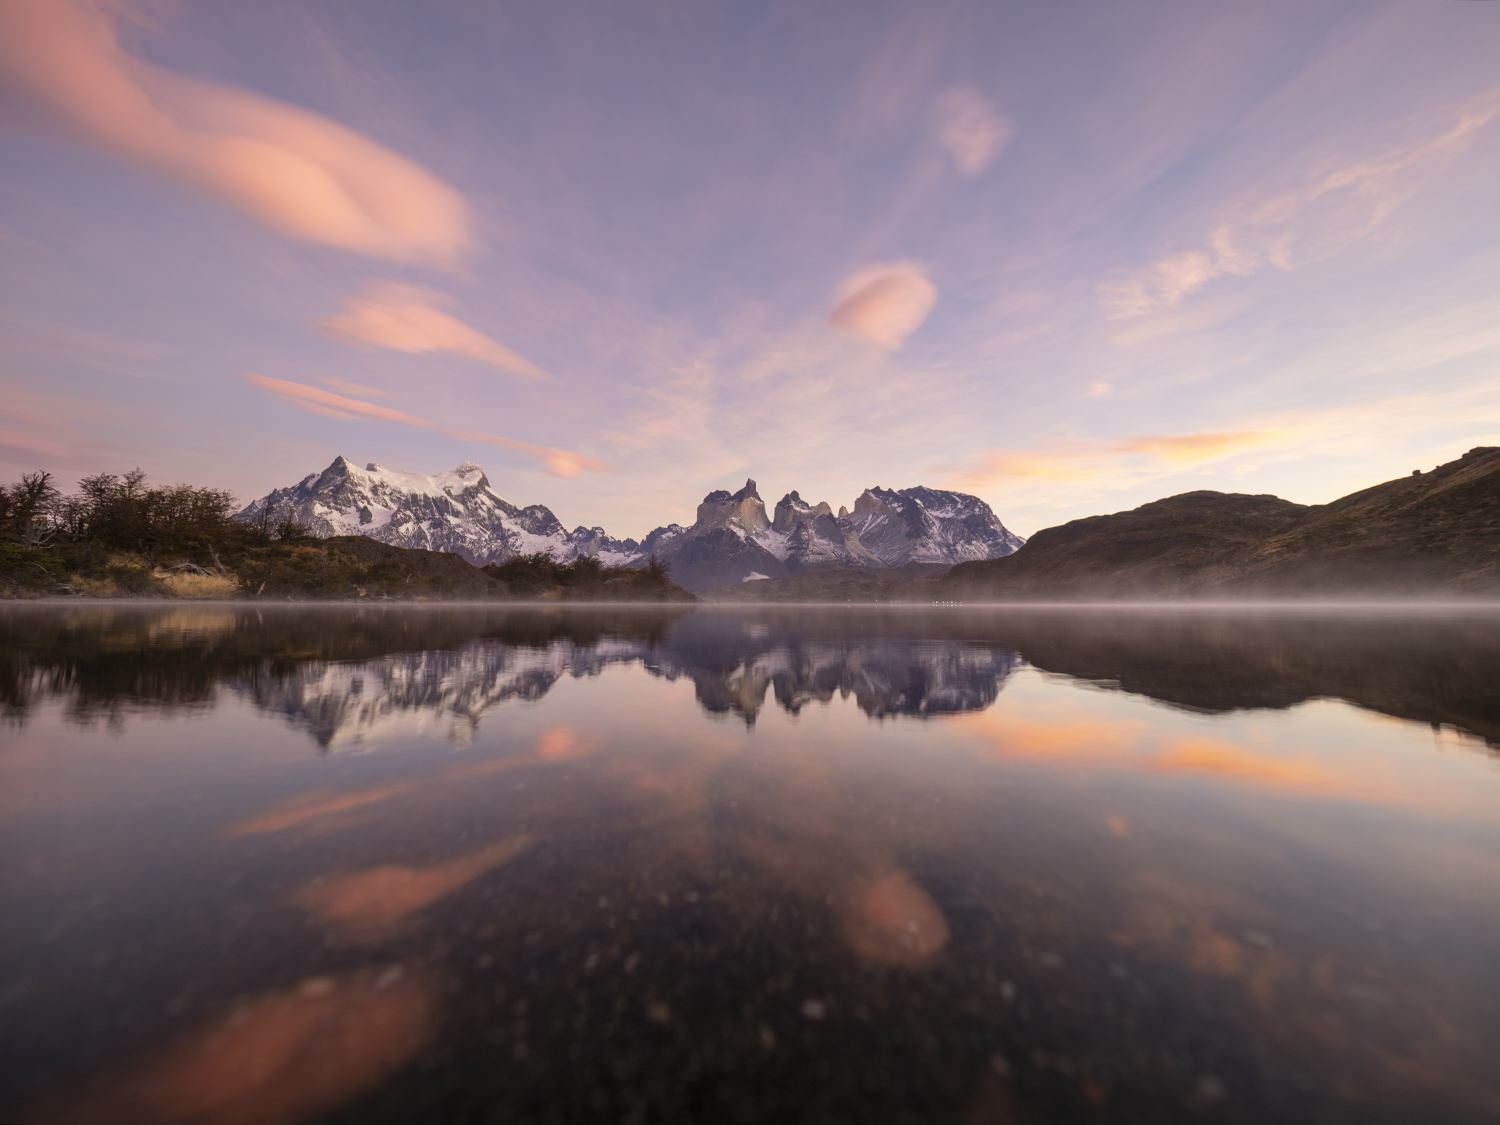
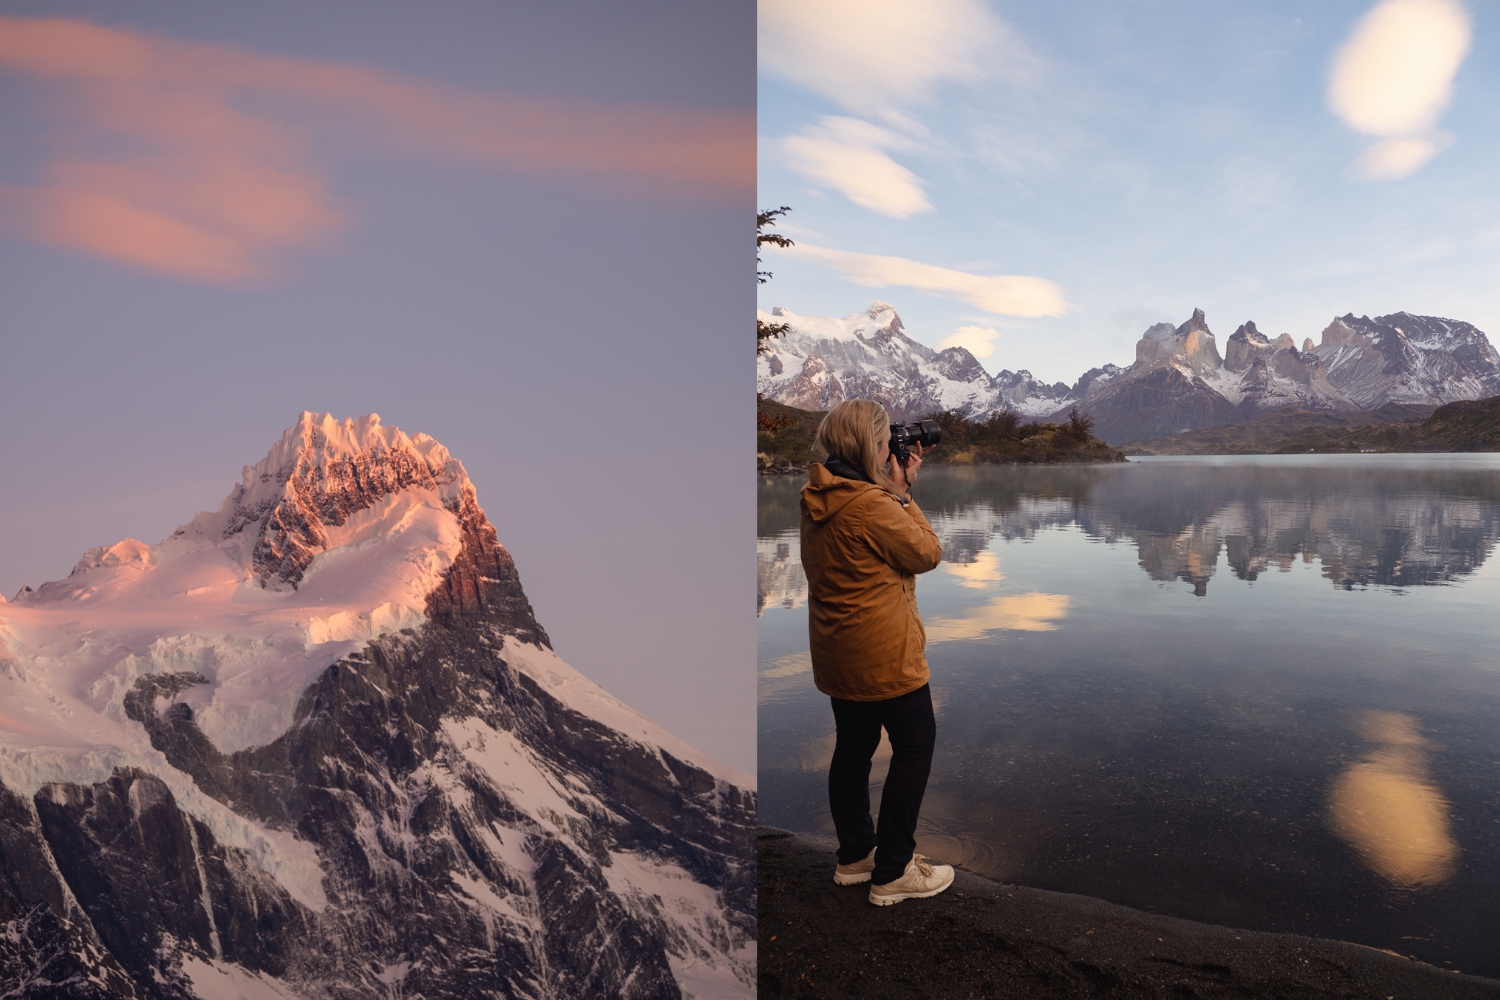
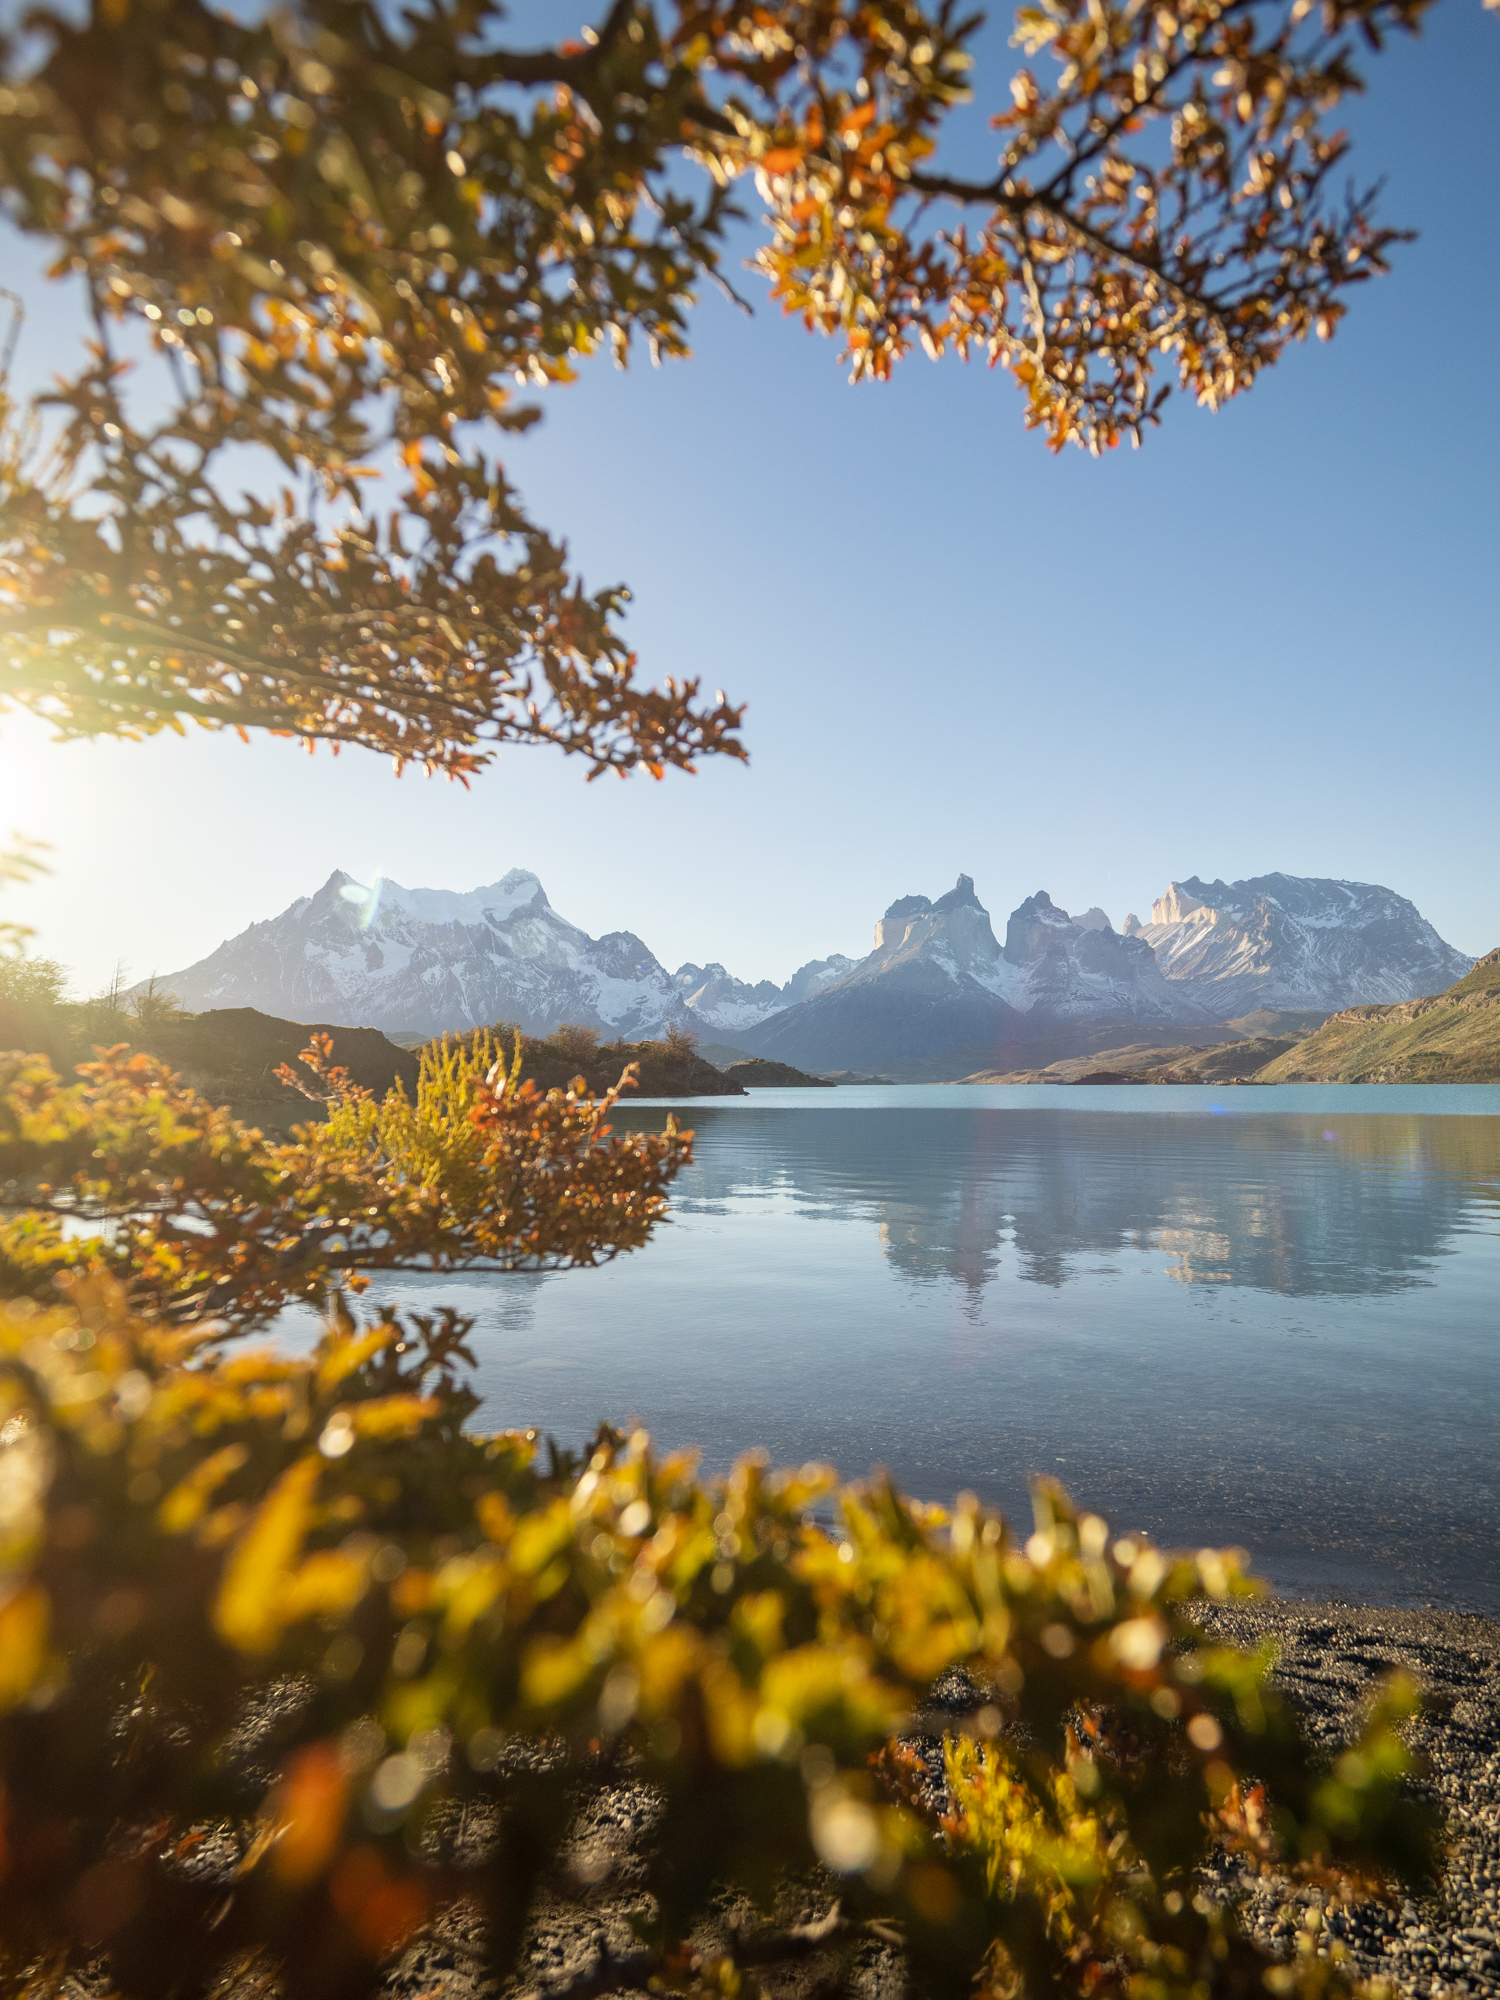
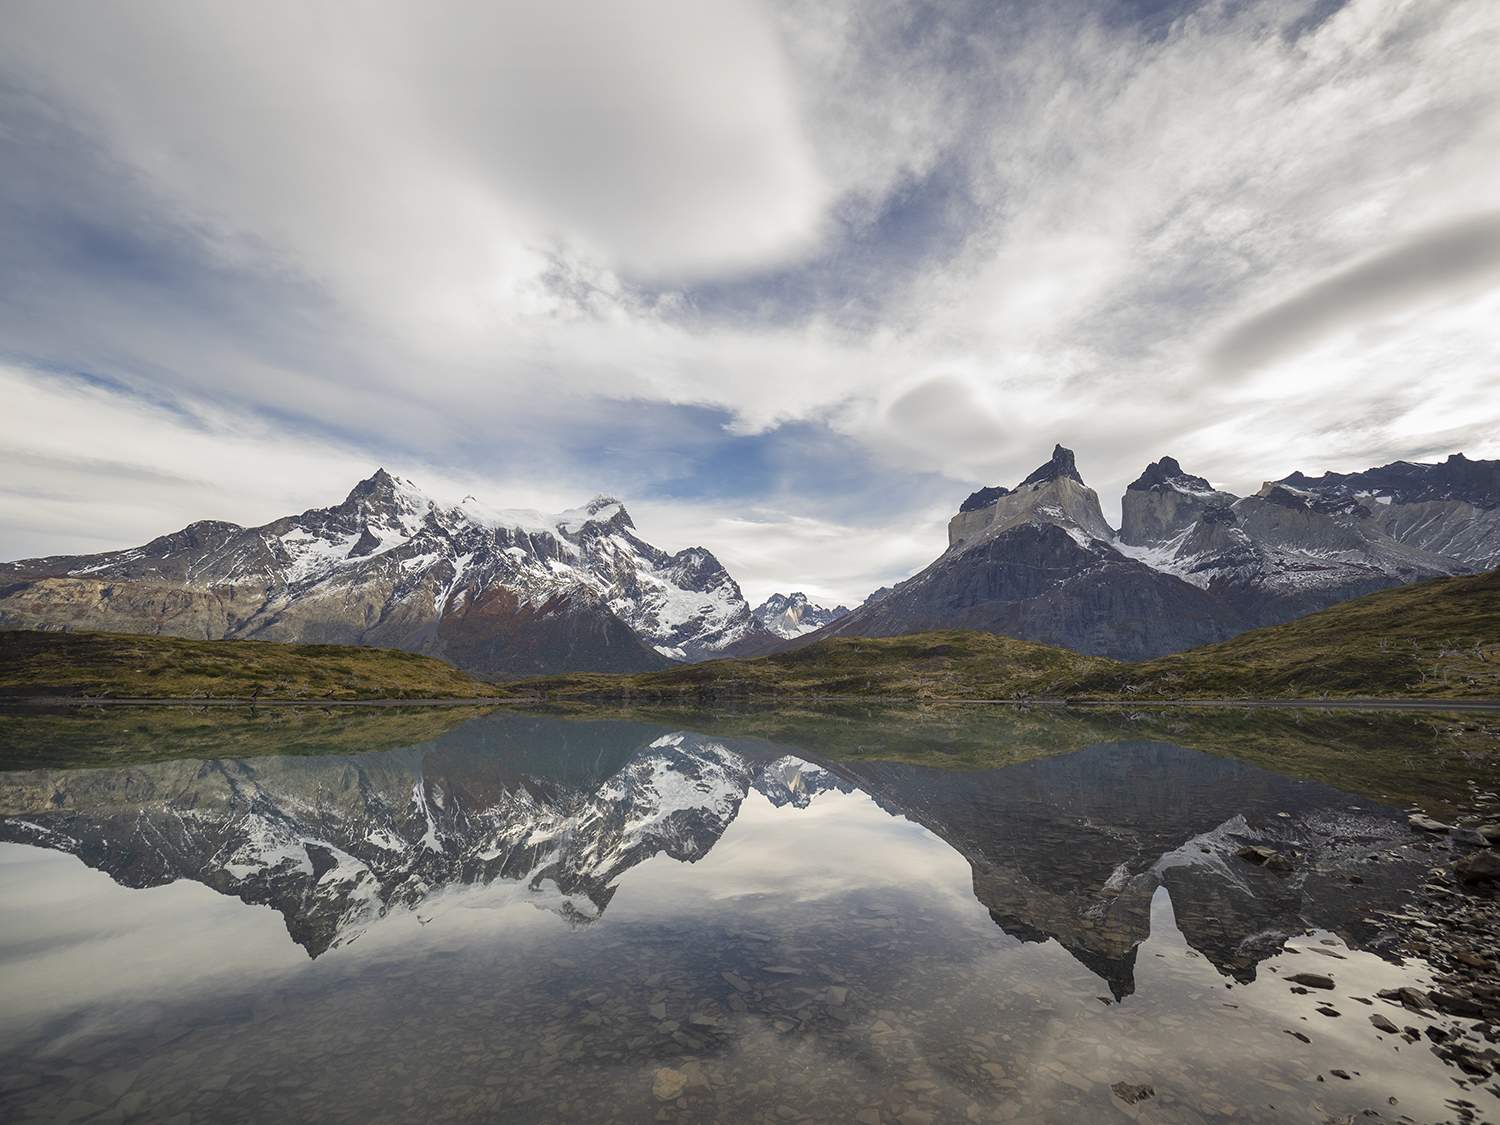
Shoreline in front of Camping Pehoe (aka the Best Sunrise Location in Patagonia!)
A classic spot for visiting landscape photographers, you’ll likely find others here at sunrise in particular as I think it may just be the most beautiful (and easiest to access) location in Torres del Paine National Park. The shoreline in front of Camping Pehoe offers stunning views across Lake Pehoe toward the jagged peaks of the Cuernos del Paine. The reflection of the mountains on the calm lake surface creates a mesmerizing and tranquil scene, even better if you’re treated to a dancing fog across the surface.
- Best Time to Photograph: Early morning or late afternoon, when the light is soft, however having seen sunrise here, it’s hard to beat. Try to aim for at least one sunrise here if you can, it’s spectacular! I also visited during the day and used the vibrant autumn foliage to frame my shot and reduce the glare and contrast of the bright blue sky.
- Photo Tip: Use a wide-angle lens to capture the expansive scene and include foreground elements like rocks or vegetation to add depth and interest to your composition. Wander along the shoreline to explore various angles too!
- Related Articles: Setting the Scene – Sunrise Photography or, if you’re planning a trip to Patagonia and want to polish your composition skills, try the Composition Reset Short Online Course.
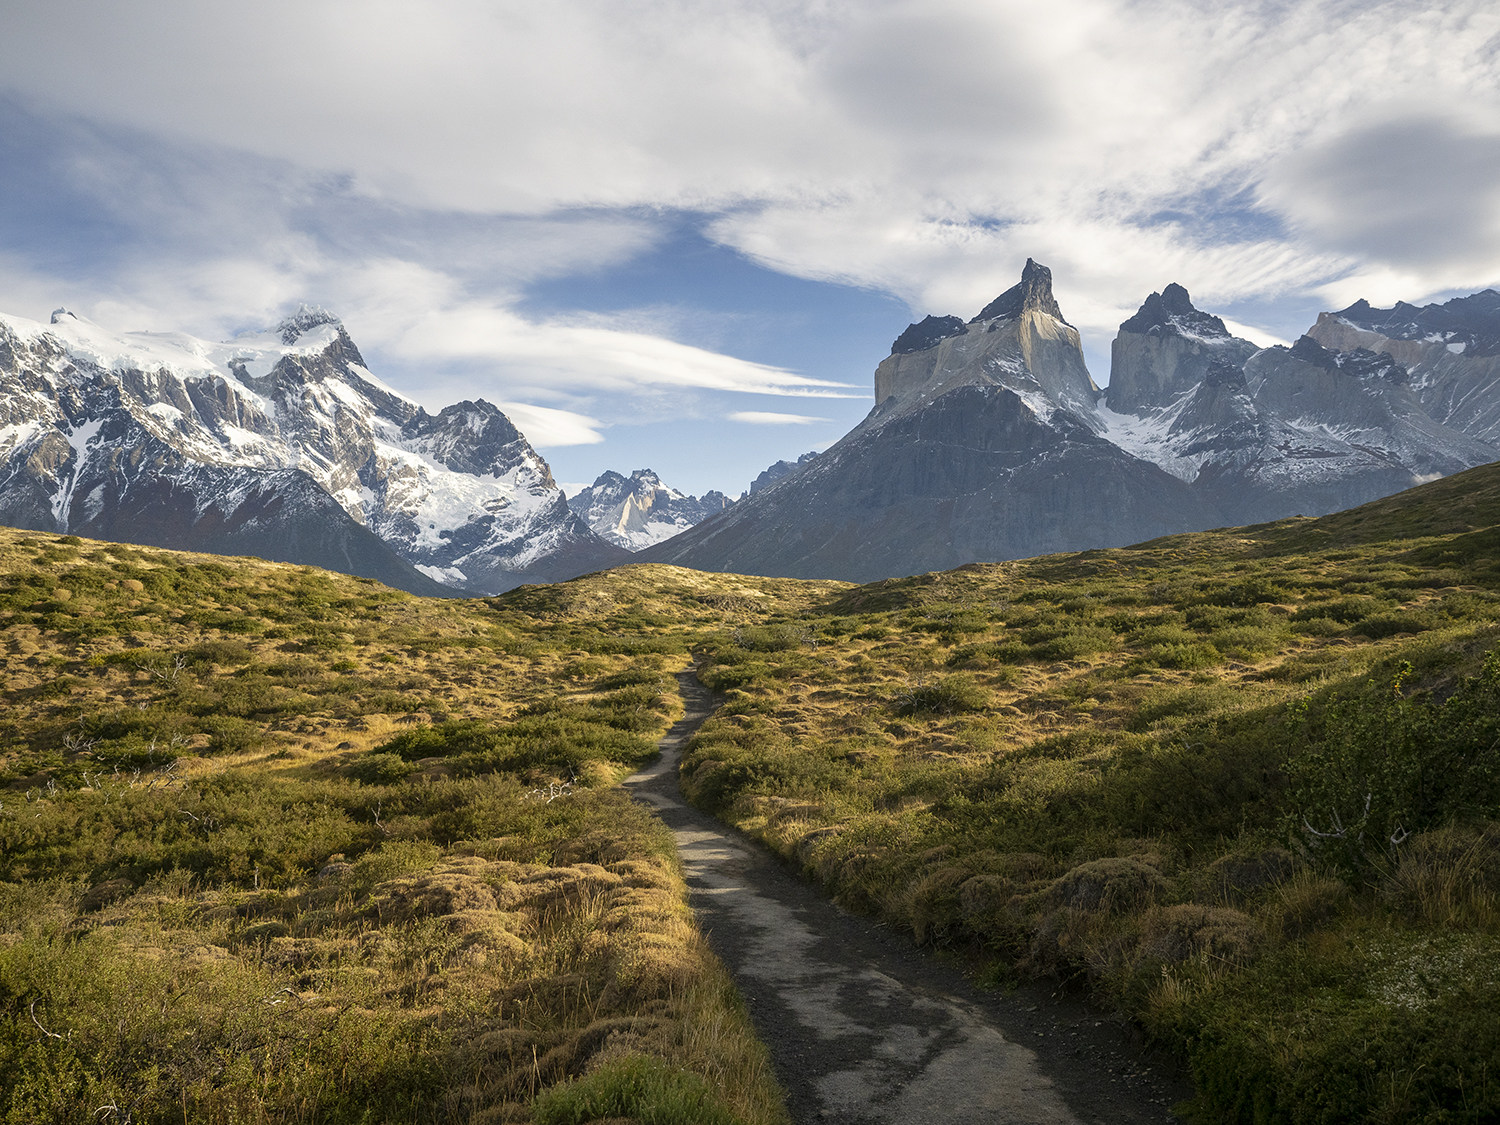
Mirador Cuernos
To reach this viewpoint, there’s a short hike of approximately 90-120mins return. Along the route you’re treated to plenty of photography opportunities with twisted trees, the Salto Grande Cascade (at the start of the trail), and Mirador Cuernos itself offers a panoramic view of the striking Cuernos del Paine (Horns of Paine) rising dramatically from the surrounding landscape.
- Best Time to Photograph: As with most locations in Torres del Paine National Park, the sunrise and morning works best here when the sunlight illuminates the eastern faces of the Cuernos del Paine, highlighting their unique shapes and textures.
- Photo Tip: Use a telephoto lens to isolate and emphasise the unique shapes of the peaks, and try to incorporate some of the flora found along the trail to help frame your image.
Salto Grande Cascade
Salto Grande is a powerful waterfall that connects Lake Nordenskjöld and Lake Pehoe, accessible via a short walk to where you’ll find two viewing platforms. Paine Massif in the background creates an awe-inspiring natural landscape, and you can capture a series of wider shots, and tighter details of the moving water with long exposures. There are viewing platforms with a great vantage point looking down to the main fall, and across the landscape toward the lake. Read the guide to photographing moving water here.
- Best Time to Photograph: You’ll get sick of reading this soon…but sunrise. The morning light will hit the water far better than the afternoon shadows do, so ensure you spend at least one morning of your trip photographing Salto Grande and then wandering further to Mirador Cuernos.
- Photo Tip: Use a tripod and a slow shutter speed to capture the motion of the water, creating a silky effect. An ND filter can help you achieve longer exposures during the day. Include elements like rocks or plants in the foreground to add depth.
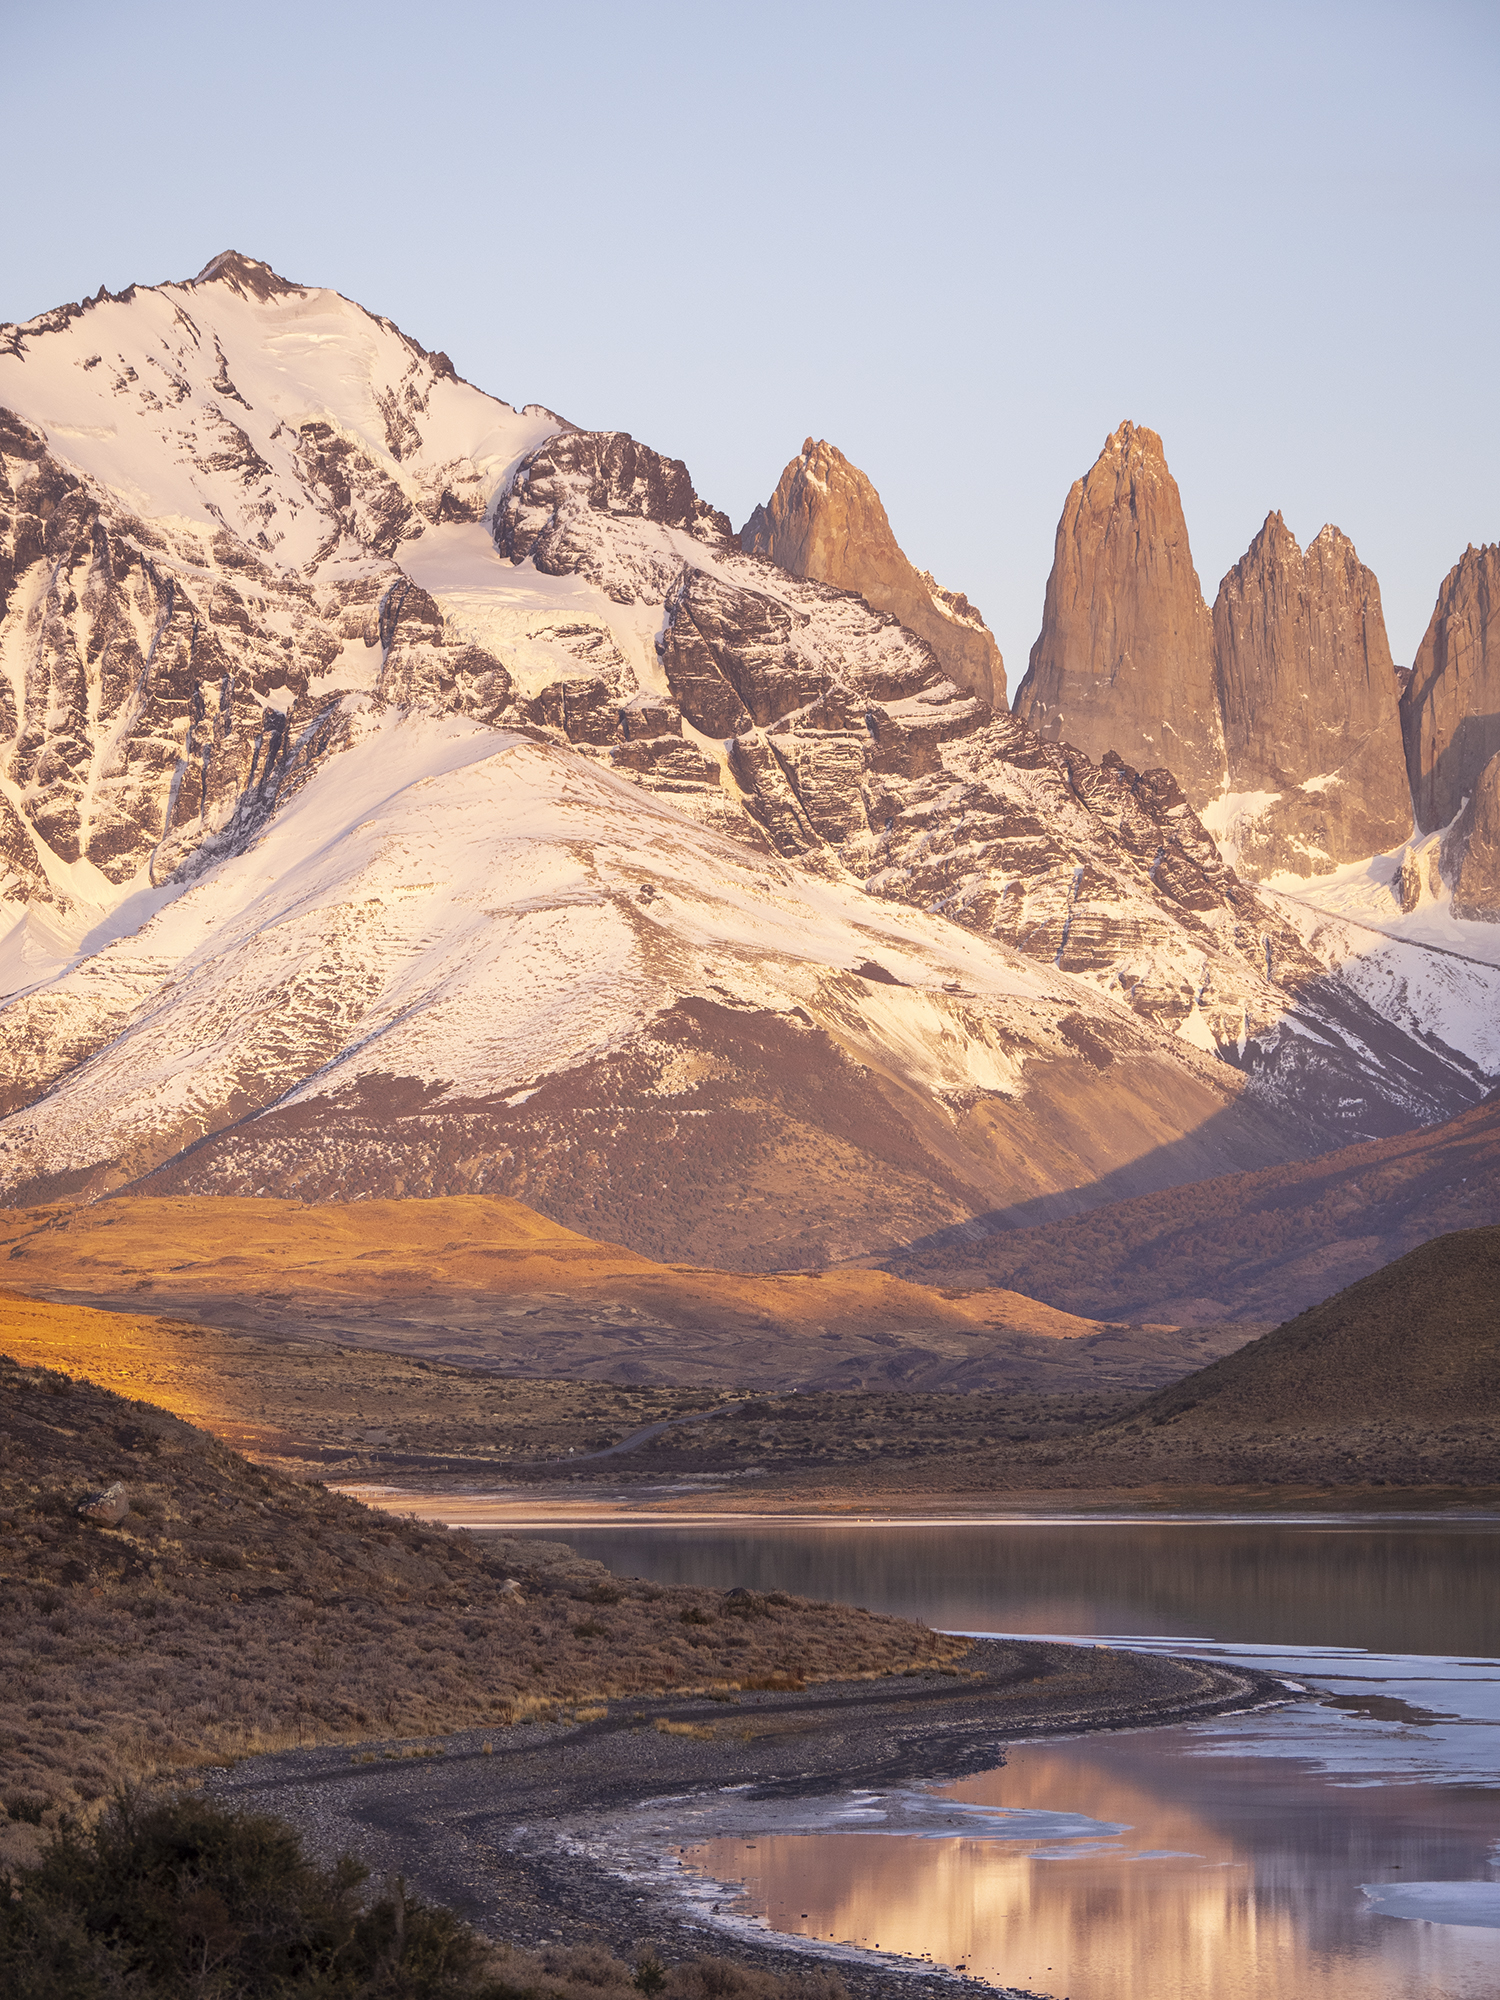
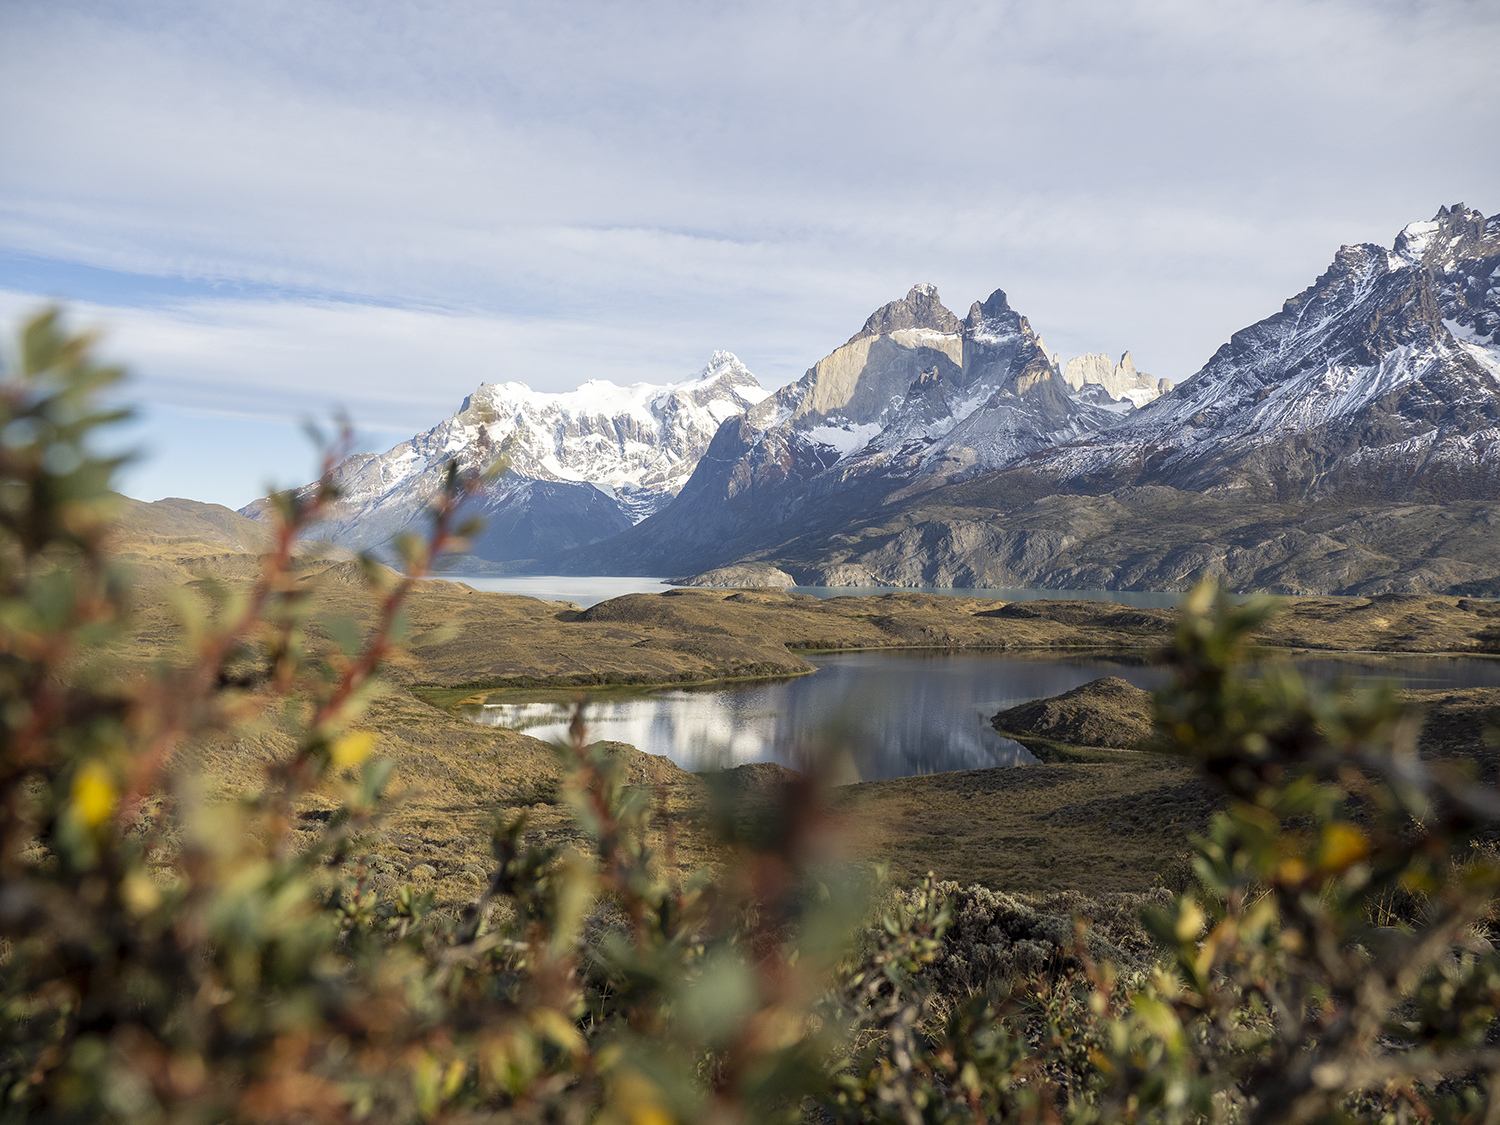
Mirador Nordenskjöld Lake
This viewpoint offers sweeping vistas of the turquoise waters of Lake Nordenskjöld with the iconic Paine Massif looming in the background. It’s located right beside the road, meaning you can stop on your way to photographing other areas of Torres del Paine National Park…then again on the way home to capture a different light! While it’s a small stop by the road, I actually found it to be one of my favourite locations, as you’re able to zoom into the distant features of the peaks, and use the lakes in the foreground as leading lines to point toward them.
- Best Time to Photograph: Mid-morning, when the sun is high enough to illuminate the lake and the mountains without casting harsh shadows.
- Photo Tip: Use a wide-angle lens to capture the full breadth of the scene. Pay attention to the sky and clouds, as they can add interest and balance to your composition. Also keep your eyes peeled for Puma, this is a great spot to see them in the nearby grass!
Staircase near Explora Hotel
I’m not sure if this is permitted, or if it’s technically within the boundaries of the hotel, but there’s a small carpark and staircase found near the Explora Hotel. I’d seen this location mentioned by a number of landscape photographers online and on social media, so I took a peek and agree, it’s a gorgeous vantage point!
You’ll find the location can be crazy popular at sunrise, with quite the line up of tripods. But if you want to separate from the crowds, venture down to the bay below the staircase, there’ll likely still be others around, but it’s still a stunning vantage point.
When is the best time to visit Torres del Paine?
The summer months of December to February are the most popular, but they’re also the most crowded, so it can be wise to opt for a shoulder season instead if you’re keen on enjoying those natural wonders in peace.
Due to its location, there are four distinct seasons within the national park, and depending on what you want to photograph, there’ll be a best time to visit. During winter, a lot of hotels, lodges and tour operators actually close, so while the landscapes will be snow covered perfection, it may be tricky to find somewhere to stay.
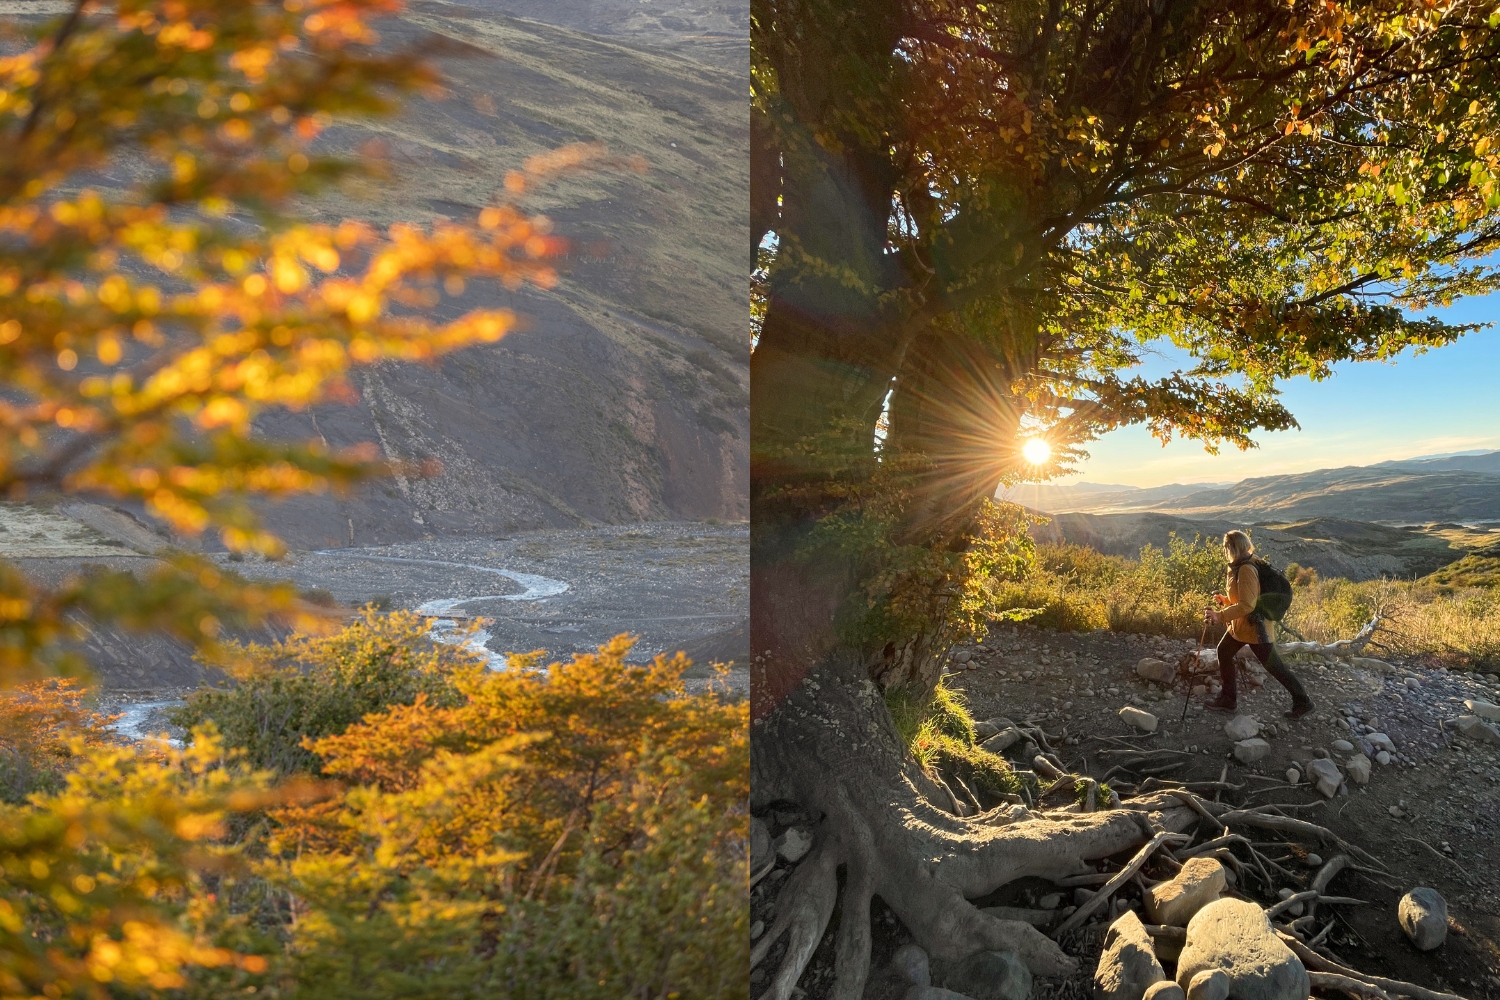
I wanted to experience the vibrant autumn colours, snow on the mountain peaks, and cooler temperatures for hiking, so I opted for April, the conditions ended up being absolutely perfect, with clear skies, cool nights, calm winds and warm days between 12-20 degrees Celsius.
Shoulder seasons are great because they mean fewer crowds, but you have to be prepared for some wild weather. Patagonia is known for its fierce winds that whip up surfable waves across the lakes, and can sweep you off your feet while hiking. Visiting Patagonia means being adaptable and at the mercy of the weather, it’s part of the price you pay for photographing somewhere so beautifully remote and rugged.
Spring (September to November)
Spring in Torres del Paine is a time of renewal. Wildflowers begin to bloom, and wildlife becomes more active. The weather can be unpredictable, but the dramatic skies and lush landscapes make it a great time for photography.
- Highlights: Blooming flora, wildlife activity
- Challenges: Variable weather, potential for strong winds
Summer (December to February)
Summer is the peak tourist season due to the longer daylight hours and relatively stable weather. The landscapes are vibrant, and the turquoise lakes are at their most striking. However, the popularity of this season means more visitors and higher accommodation prices.
- Highlights: Long daylight hours, vibrant landscapes
- Challenges: Crowds, higher costs
Autumn (March to May)
Autumn is a favourite among photographers. The fall foliage transforms the park into a tapestry of reds, oranges, and yellows. The weather starts to cool, and the crowds thin out, making it an ideal time for capturing serene landscapes.
- Highlights: Autumn colours, fewer tourists
- Challenges: Cooler temperatures, shorter days, possibility of snow (can also be positive!)
Winter (June to August)
Winter brings a magical, snowy transformation to Torres del Paine. The park is quieter, and the snow-capped peaks offer stunning photographic opportunities. However, the weather can be harsh, and some areas may be less accessible.
- Highlights: Snowy landscapes, solitude
- Challenges: Harsh weather, limited access
Where to Stay in Torres del Paine National Park?
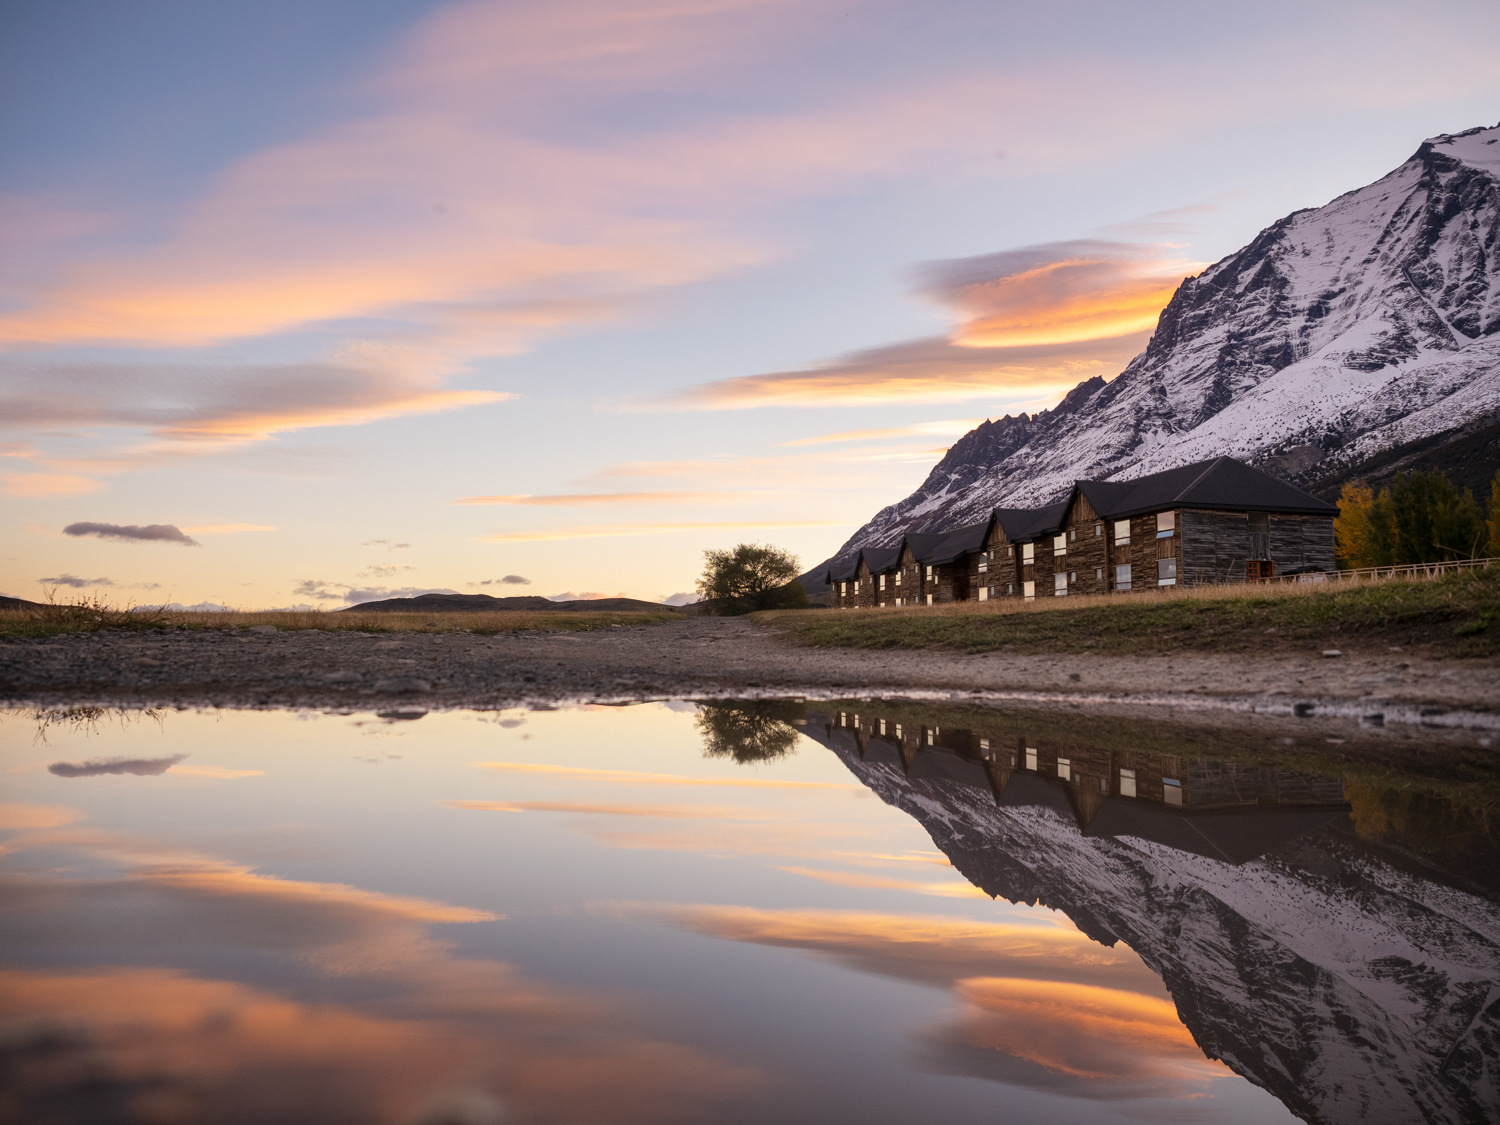
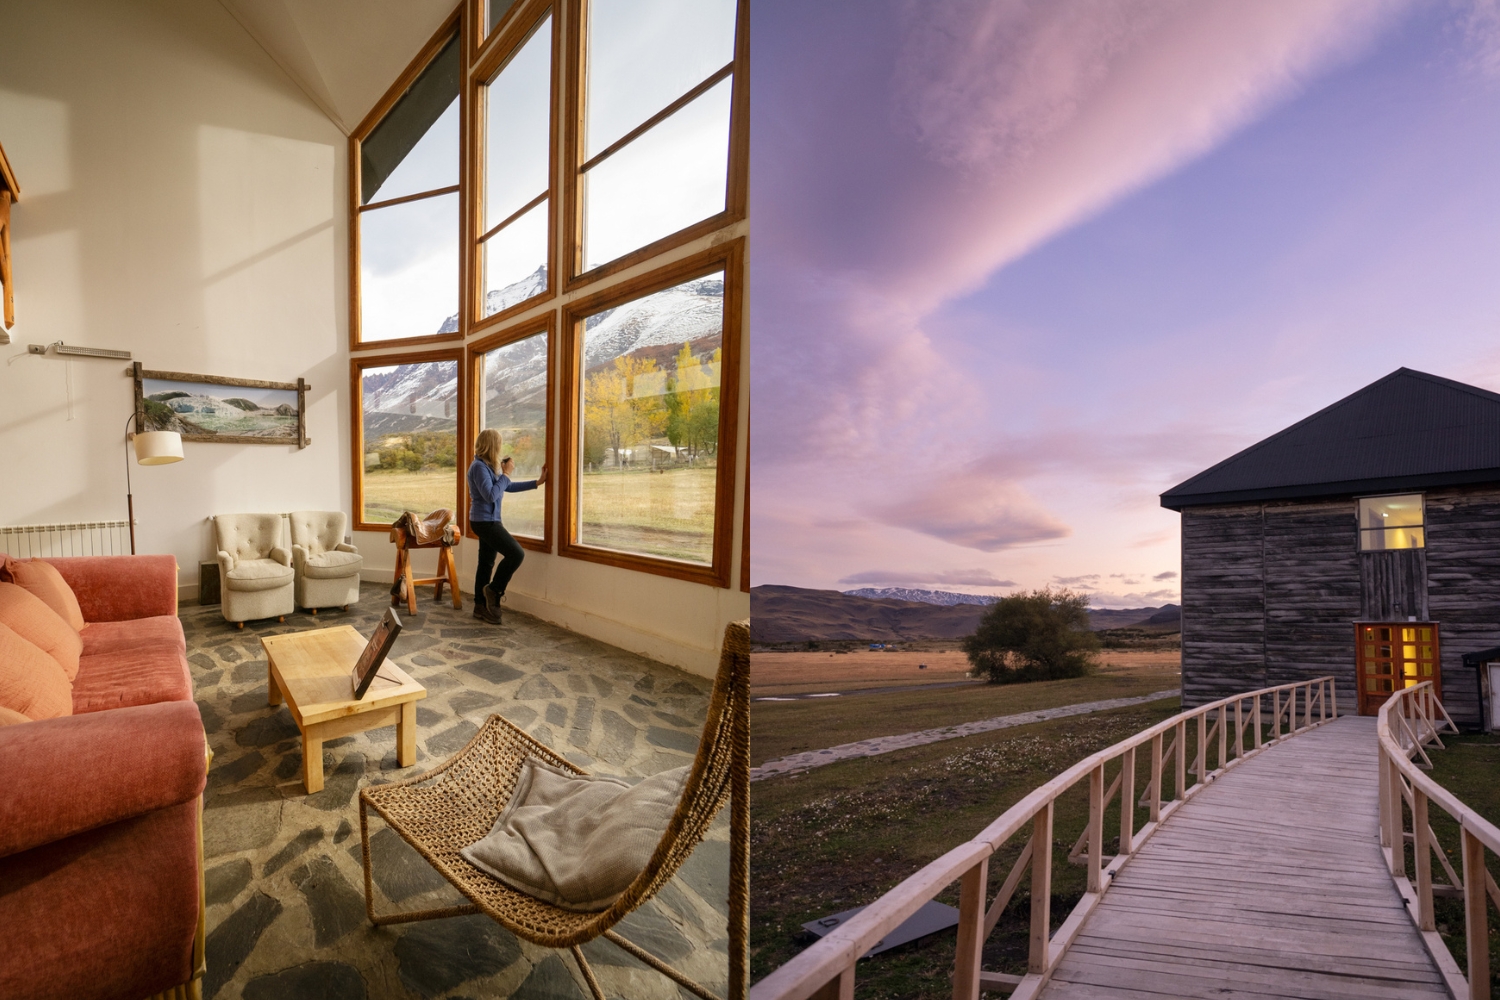
My suggestion is Hotel Las Torres which is located within the park gates at the base of the trail to Mirador las Torres, where you can capture the classic shot of the three towers! You can read my full review of the stay here – ‘In the Shadow of Patagonian Peaks – Hotel Las Torres‘
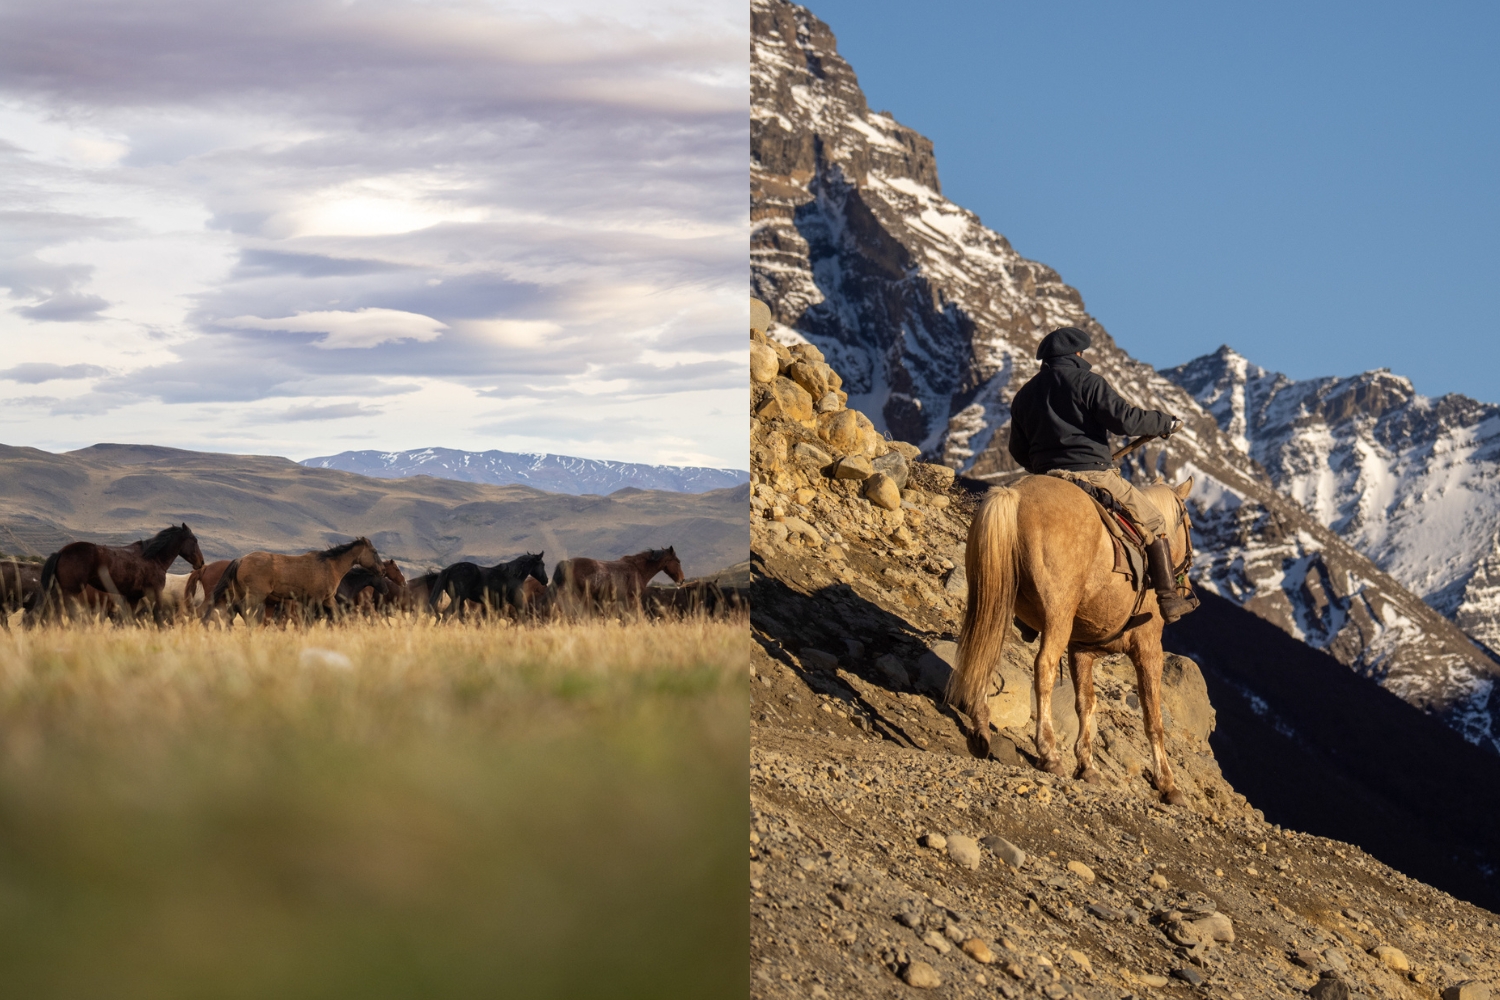
I stayed at the hotel for 5-nights while photographing Torres del Paine, and it proved to be such an ideal base with such a stunning backdrop. They have a strong focus on culture and conservation, so it feels like staying at an estancia with all the modern comforts of a hotel. Every morning and evening, horses ran across the fields with the bacqueanos never far behind, the rooms are comfortable and cosy, offering the ideal place to relax after a long day of photography, and the on-site restaurants make everything so easy because there isn’t a town within Torres del Paine National Park, so you either need to bring your own food, or indulge in the all-inclusive menu options…they’re SO delicious!
It’s also a great place to begin/end the W or O trails which are popular multi-day hikes that venture further into the park with refuges set up and packed lunches sorted. The team at Hotel Las Torres can help plan your stay whether you’re after all-inclusive packages based at the hotel, or want to experience some of the refuges and have a blend of hotel + hiking for your adventure.
*Please note, I was a media guest of Hotel Las Torres, however had heavily researched the hotel options prior, and reached out to them directly. All opinions, images and recommendations reflect my experience…and it was wonderful 🙂
Puerto Natales – If you’re opting to base yourself in Puerto Natales and do day trip visits to Torres del Paine National Park, I’d recommend staying at Hotel Vendaval. I had three separate stays at Hotel Vendaval and every one was perfect. Stylish, trendy rooms with calming tones, textures and great views towards the water and distant mountains. There’s also a welcome drink, roof top bar, and breakfast is included, plus it’s located right in town, making it ideal for wandering if you’re keen to explore the cafes and restaurants nearby. *Please note this is an affiliate link, however all recommendations are places I’ve stayed and recommend, these links help support the running of this website with a small commission from every booking, at no additional cost to the guest.
Hiring a Car – Recommendations + Tips
This is the part I found most difficult to research when planning my own trip. Having a car made the trip SO much better, and if it falls within your budget, I completely recommend hiring a car in Puerto Natales or Punta Arenas so you can stop and photograph whenever you like.
The flexibility of having our own car meant we could go on sunrise missions to scout photography locations based on the weather conditions, rather than rely on set tours and timings, which rarely benefit photographers and mean you’re arriving to a location with a bus load of fellow travellers.
There are some things to consider though when hiring a car for Torres del Paine National Park. Firstly, there are no petrol stations within the park, so you need to carry fuel with you if you’re staying a few days. The park is quite large, so it’s likely you’ll use up an entire tank and will need fuel to get back to at least Cerro Castillo (if coming from the north) to fill up again. We carried a 20L tank with us, and didn’t actually need to use it despite driving to/from Puerto Natales and around the park quite a lot. That said, we rolled into Puerto Natales on close to empty, so I’m very happy we had it just incase.
*Also, if you get really, really stuck, fellow travellers and your hotel may be able to assist in providing some fuel within the park. But to reiterate, there are no petrol stations within Torres del Paine at the time of writing this guide (May 2024).
The roads are dirt, gravel and can be bumpy with a lot of potholes, so while it may seem smart to opt for the cheapest rental car, consider if you want to be jolted around for a few hours each day, or if you want to select a car that can handle the off-road conditions a little better.
Lastly, make sure that you have insurance for your rental car. As I noted before, the roads are gravel which means stray rocks can crack your windscreen easily when other cars or trucks drive by, but also when the winds pick up!
Where to hire a car in Puerto Natales?
I can highly recommend Leonardo from Magallanes Rental Car, we had such a wonderful experience with them! From an initial email enquiry, right through to returning the car and communicating via Whatsapp and Google Translate, they’re professional, the car was in great condition, and it made the process so smooth.
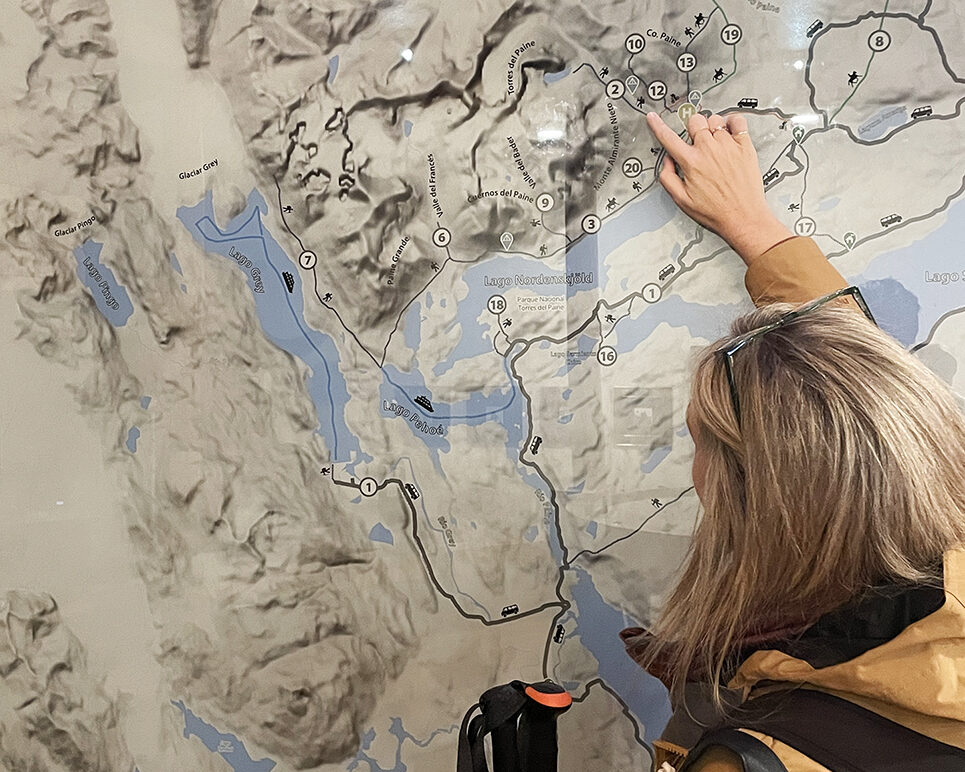
A Map of Photographing Locations within Torres del Paine National Park
Summary of Travel Tips for Torres del Paine
- Research which photography locations you’re keen to photograph most, and base yourself nearby. Due to the distance and road conditions, it can take a while to drive between locations, so stay on the side of the park that suits your plans. I loved staying at Hotel Las Torres because I was most looking forward to photographing the Mirador Las Torres, and experiencing the Baqueano culture, alternatively, if you’re more interested in the viewpoint seen on a lot of photography accounts, you may wish to opt for the Explora Hotel side of the park.
- Book your flights in advance if you’re hoping to arrive in Puerto Natales. I found the LATAM website was a bit glitchy, and some days it told me the flight was $300, other days it said $1200, then when I finally wanted to book, it wouldn’t let me so I ended up booking via the AMEX Travel website. Keep an eye on flight times and prices and try to book in advance if you have specific dates.
- If you’re hiring a car, ensure you’re covered with insurance for any stray rocks/wind/weather related events, and also take a jerry can of fuel with you as there’s no fuel in the national park.
- Always have layers with you, you never know when the chilly wind will strike!
- This isn’t photography related, but if you’re gluten-free like I am, pop into a supermarket in Puerto Natales and grab some snacks prior to arriving in the national park.
- Sunrise was the best time to photograph most locations within Torres del Paine National Park. Plan out your time to ensure you’re hitting the key locations in the morning!
- If you’re hiking to Mirador Base de Las Torres, leave early and ensure you’ve got a LOT of water, snacks, and a head lamp/light incase you’re leaving/returning in the dark.
There will be a number of additional guides here on The Wandering Lens covering some of the locations and experiences noted within this guide more extensively. As noted earlier, coming soon are also guides to Perito Moreno Glacier and El Chalten.

I hope this guide has provided some helpful information for planning your trip to photograph in Patagonia, if you have any questions at all, leave them in the comments and I’ll do my best to get back to them all. Also just to note…the locations mentioned within this guide were my favourites, but that doesn’t mean I wasn’t hanging out the car window taking a million other random photographs each day. The entire region is wonderfully photogenic, explore, enjoy, and take your time gazing at the epic views in every direction.

Hello! I’m the founder and photographer behind The Wandering Lens.
With 19+yrs experience as a professional travel and landscape photographer, all advice found on this site is from my personal experience, or that of contributors, on the road. I hope it’s useful for your own travels and would love to hear in the comments about your trips and experiences around the world.

Leave a Comment