
How to Edit in Photoshop
Photoshop Tricks – How to Remove Unwanted Subjects, Clone + Replicate
Photoshop is magic. That’s basically my conclusion on the matter.
I don’t really know how it works from an IT or programming perspective but I do know how to use its tools and that it works wonders when you’re editing photographs.
A lot of Photoshop skills can be learnt by trial and error. A quick Google search will tell you what tools are for what purpose, or even just hovering your mouse over each icon will reveal its intended use or name.
Before reading any further, if you don’t yet have Adobe Photoshop, you can sign up for a 7 day free trial here so you can test it out and see if it works for you.
Sometimes on location there’s an incredible shot just waiting to be taken but there’s a rubbish bin in the middle of it, or one person that just won’t move out of the way despite your less than subtle hints. Rather than wait for someone to move or physically ripping the bin out of the ground, you can simply take the shot and then remove them later. Much less hassle!
Of course this is more time consuming later but for simple items that have a plain coloured background or in the grand scheme of the image are relatively small, it’s a super easy way to clean your shot up and make it just how you wanted in the first place.
So, without further chatter, I present to you my three magic tools for Photoshop…
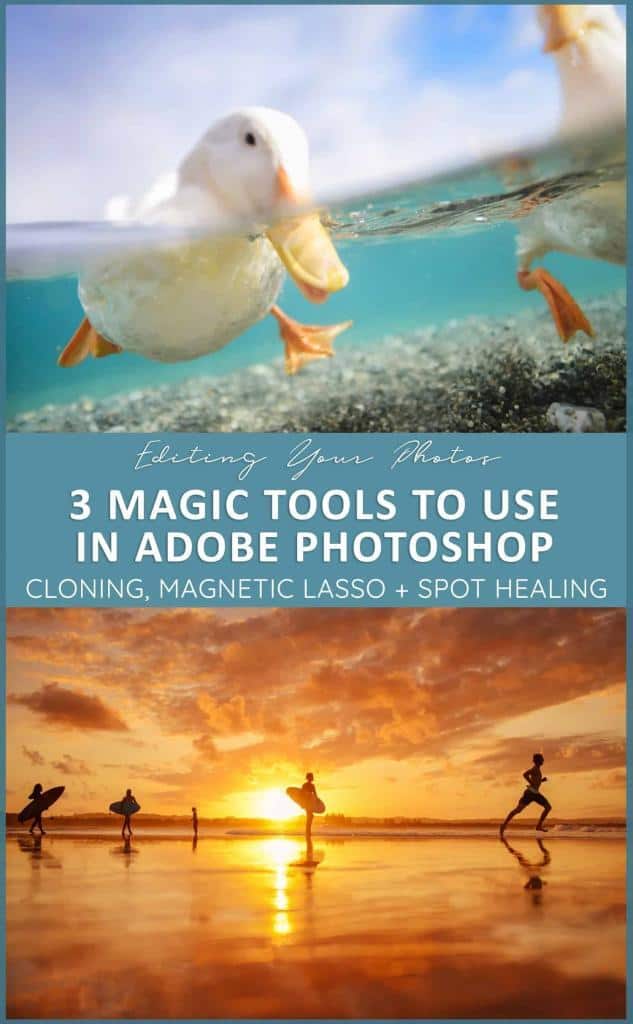
Photoshop Tool – The Clone Stamp
This little tool allows you to paint over your image, either using the same colour tones or by taking a section of image and replicating it elsewhere. You’re basically stamping how you imagine perfection all over your image.
If for example you have a lens spot in the sky, you can clone a piece of sky nearby then simply stamp it over the spot to blend it into the image. Alternatively you can extend a tree branch, copy and paste an entire person or remove people from your image all together…the limits are endless!
Once you’ve selected the clone stamp from your toolbar, just below the top menu on Photoshop you’ll find some adjustments to make the clone just right. You can adjust the size and hardness of the stamp, its mode, the opacity and flow.
Adjusting the opacity and flow will tell the tool how much you want to copy across when you use it. Typically with skies or a single colour tone I opt for about 70% to blend it a little better but if you’re looking to extend something like a tree branch or building, you’ll need it up at 100% to ensure all of the detail is replicated. Just keep an eye on the edges as you may have to blend them back down into the image.
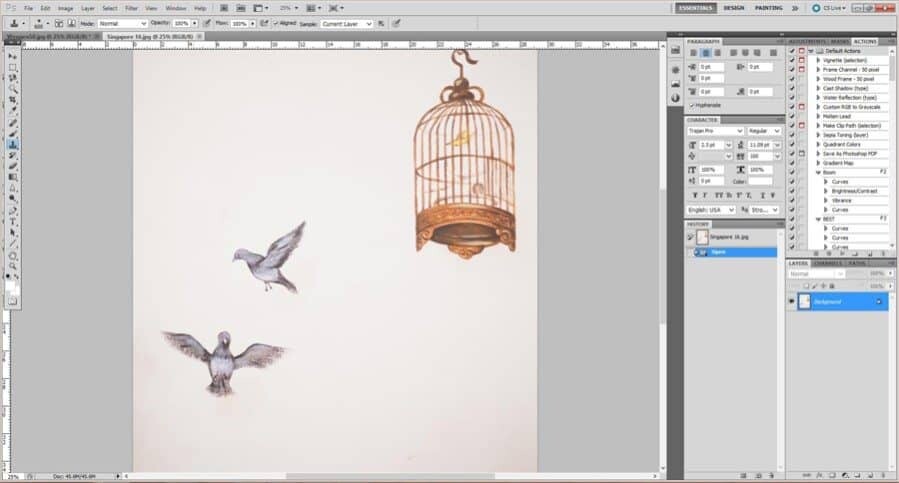
The original image, our aim is to remove the two pigeons using the clone tool.
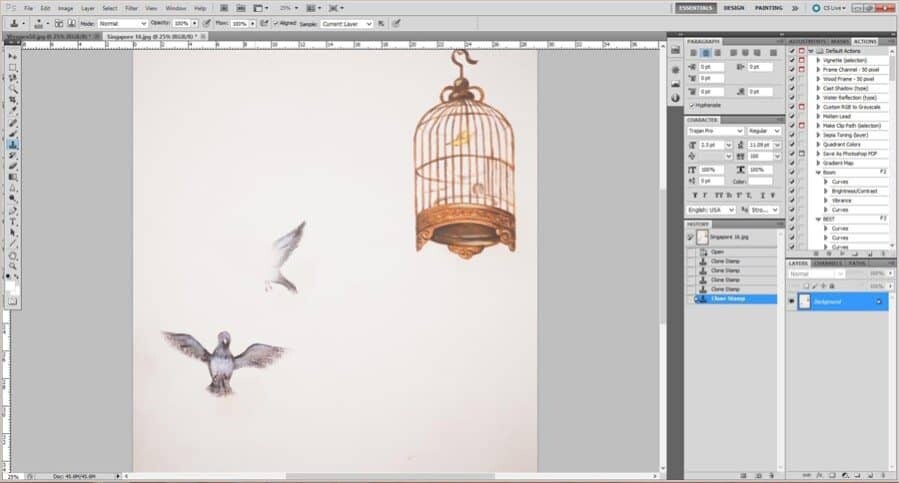
Because it’s a plain coloured background, I’m using the clone tool at 100% to simply cover the subjects.
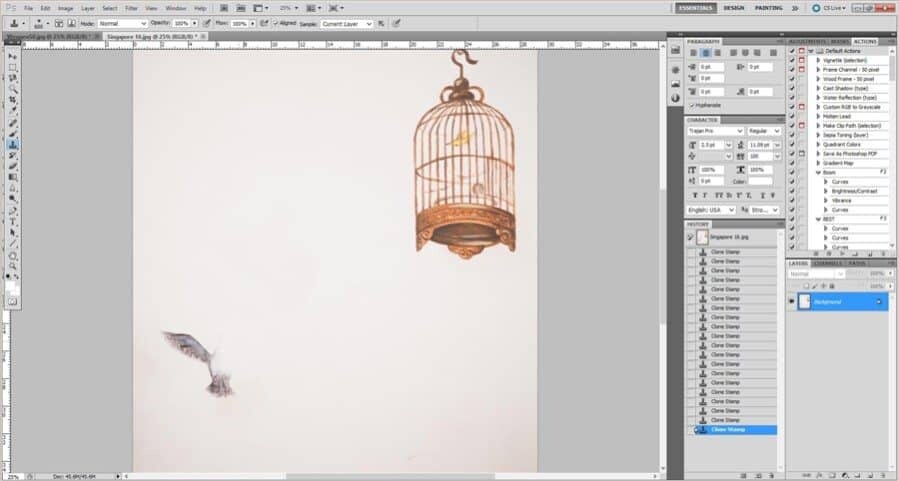
After each small section is covered, I reselect an area close to the subject I wish to remove, in order to keep a consistent result and to ensure the coverage is smooth and blends with the background.
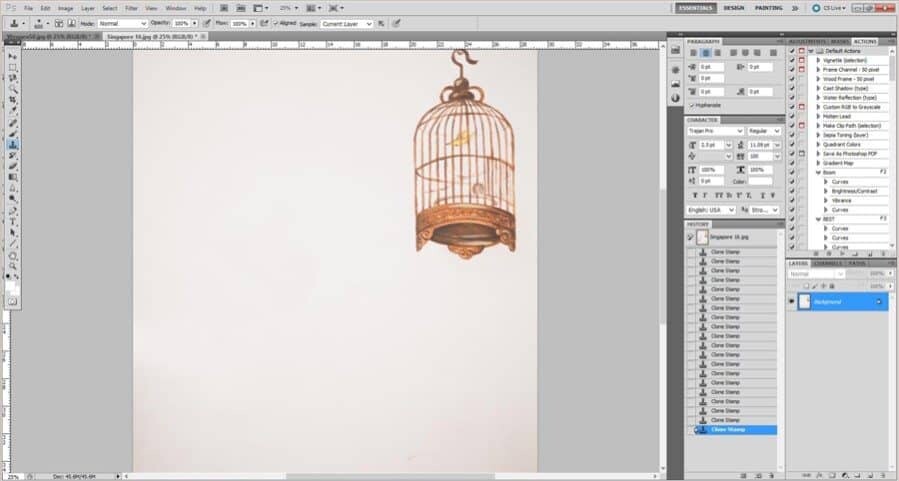
The above examples show the clone tool in action as I copy the white wall and brush it over the two pigeons. When using the clone tool you can click a number of times to cement the effect, it also helps to continue to reselect as you click, that way you aren’t simply pasting the same section over and over again as it may start to look like a pattern and hence obvious that it’s been edited.
Photoshop Tool – The Bandaid (Spot Healing Brush)
This is my favourite little tool on Photoshop, I call it the ‘Bandaid’ but officially it’s called the Spot Healing Brush Tool. It’s great for removing unwanted subjects from your image whether that’s a house, lens spot, plant, person, rubbish, absolutely anything! If you’ve got one annoying spot on your lens that is repeated on every image, this is the tool for you to remove it quickly.
It’s basically magic.
By selecting the bandaid tool you can then increase or decrease the size, pop it over the top of the item you wish to remove and then click once. It’s super simple and once you’ve worked it out, will become an essential ingredient to creating beautiful images without any pesky distractions.
For best results just below the top menu bar you’ll see three ‘types’ to choose from, select ‘Content-Aware’. This means that when you click the bandaid, it will make every attempt to blend with the surroundings, it’s actually quite impressive to see just how quickly and effectively it works!
One tip with the bandaid tool is to make it just a tiny bit bigger than the subject you wish to remove. Making it too big will mean more ‘fakeness’ appears, and making it too small will confuse the tool and probably cut off one part of the subject and leave the other part sitting there just looking weird. If you do end up with tiny bits left over, you can repeat the process and simply make the bandaid tool a little smaller to fit and then simply click over those extra bits that weren’t removed in the first stage.
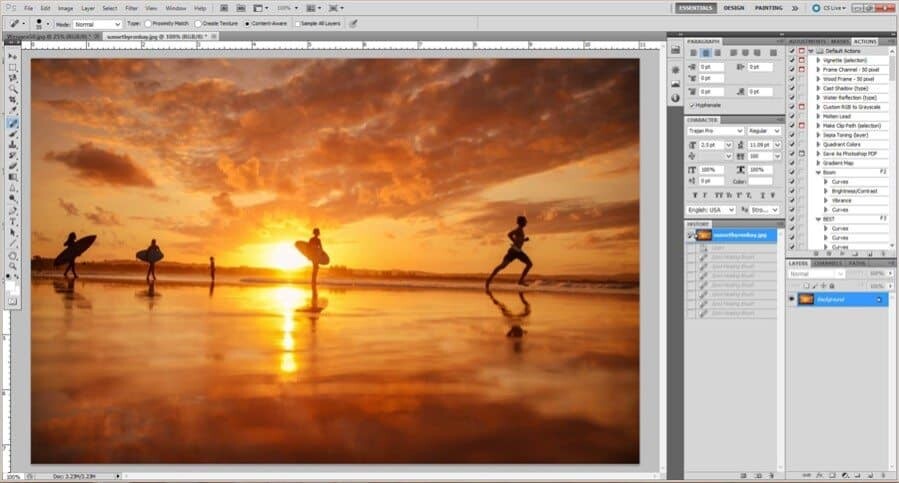
The original image, the aim is to remove all but the central surfer using the bandaid tool.
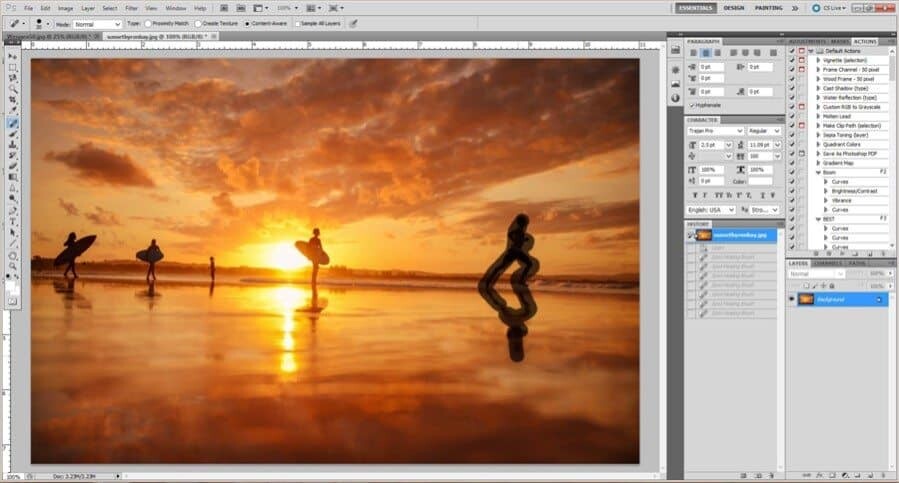
By selecting the size of the bandaid, I then drag it over the subject I wish to remove on the far right, being careful not to overdo it too much, only selecting the subject and a tiny bit of space around it.
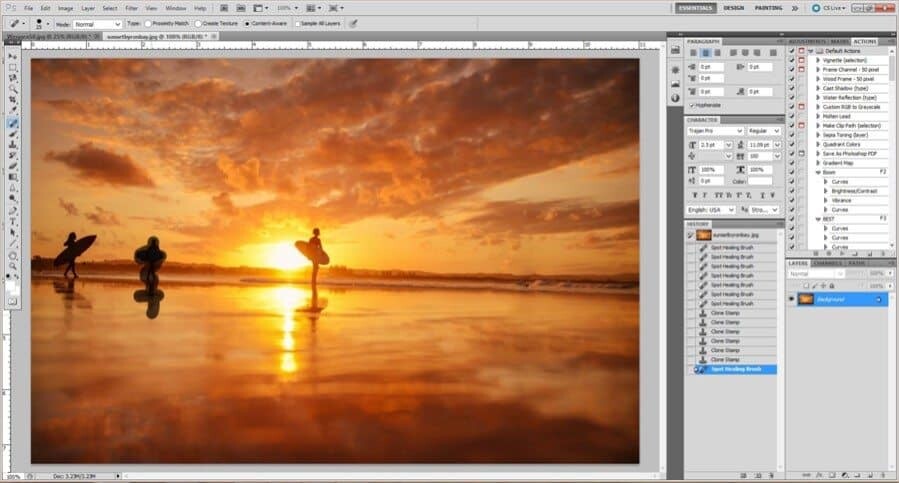
You can see the result on the far right, the surfer has disappeared and I can then continue on the other three surfers on the left of the image.
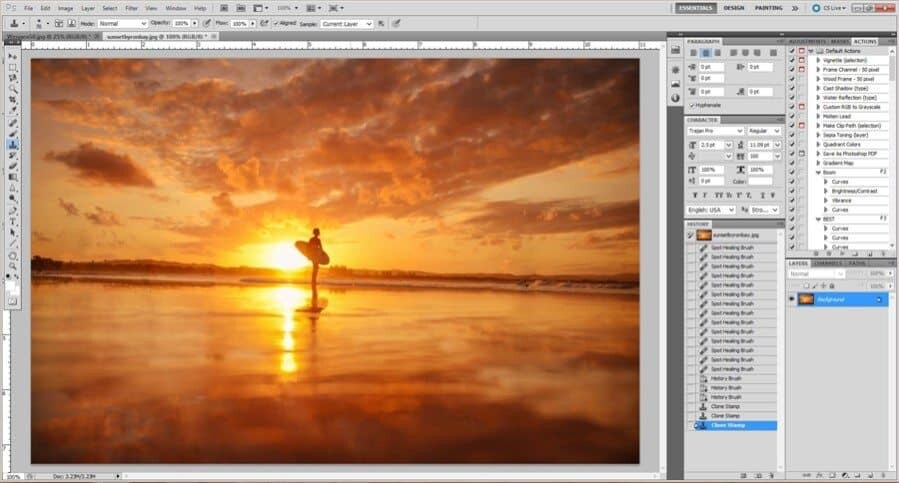
By using the content-aware type for each bandaid click, you can see the end result is like they were never there. The subjects location is now replaced with the surrounding colour tones, textures and shapes.
Photoshop Tool – Magnetic Lasso
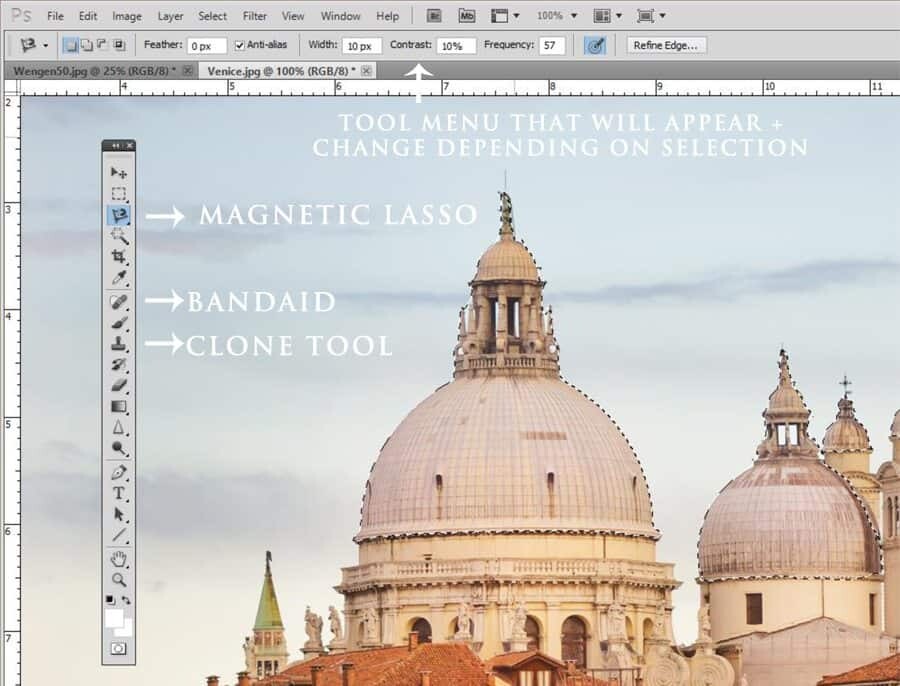
For selecting sections of your image that contain the same colour tone, this tool is genius. The magnet lassos itself around an item and all you have to do is click and point it in the right direction. It’s great for smaller detailed sections, for tracing the outline of a person, for selecting those tiny bits of hair that stick up or for getting a precise selection of a large area.
I like to use this tool if I want to enhance the brightness of a certain part of an image, but nothing around it. If you’ve perhaps underexposed someone’s face and want to avoid the bright ring that happens if you simply increase the brightness, lassoing the subject and brightening just what’s inside will allow for more exact editing possibilities.
The magnetic lasso tool is a great way to select an object you wish to duplicate also. Take the sunflower field below as an example, by using the tool to select a sunflower, you can then copy it and create a fuller field of flowers.
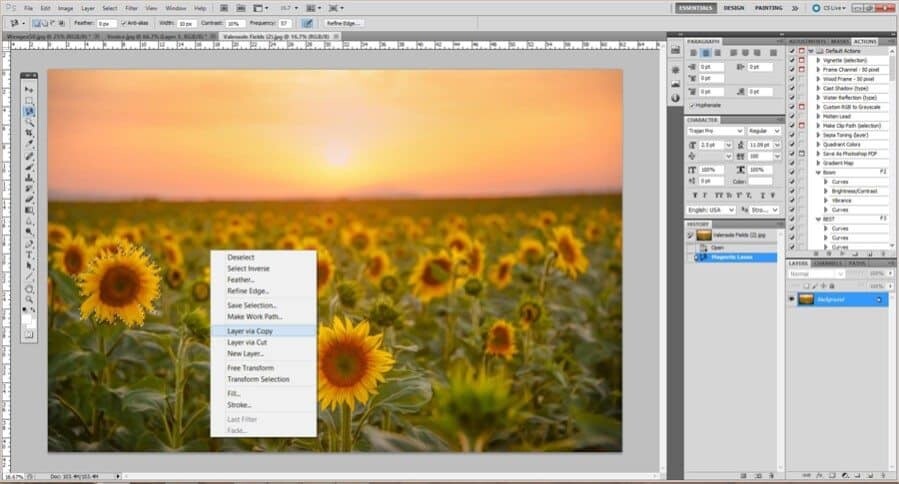
Caption for image above – Select the Magnetic Lasso tool then repeatedly click around the subject you wish to copy, be sure to remain close to the edges and it will also ‘lasso’ to similar colours and tones. In the top menu bar you’ll see the option to change the ‘Feather’, adjusting this will smooth the selection so the end result will be less jagged and sharply edged. A feather of 10-30px is usually a good place to start. To complete the selection, simply join back to the start and you’ll see a little ‘o’ appear. Once the subject is selected right-click and choose ‘Layer via Copy’ which will create a new layer. This new layer is now free to move wherever you wish.
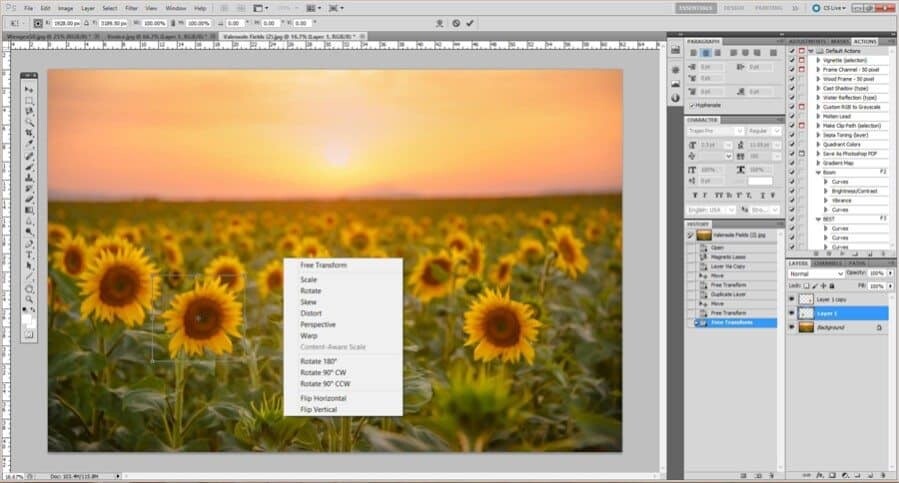
Caption for image above – After you’ve created the new layer, you can move the subject to where you wish to replicate it. I wanted to make more flowers in the field so moved it onto a bud that had no flower just beside it. So you don’t end up with the exact same flower shape, right-click on the new layer and choose ‘Free Transform’, this will allow you to make it bigger smaller, stretch, bend, rotate etc.
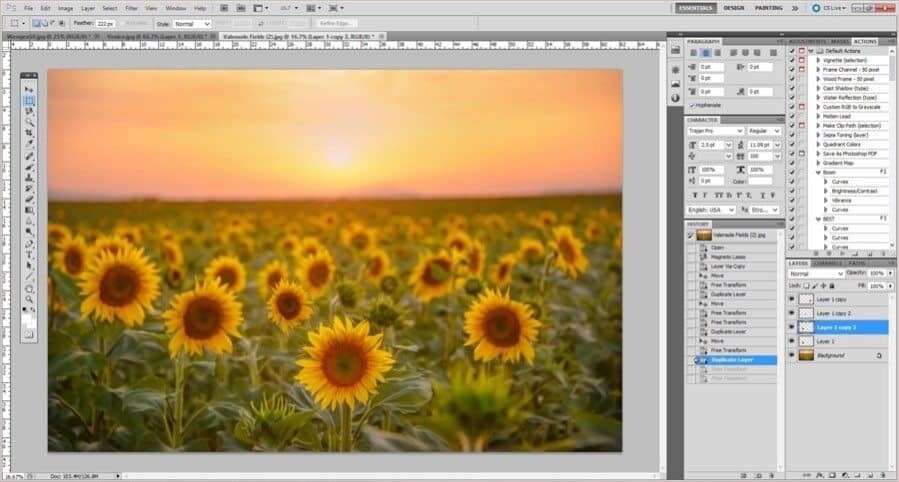
Caption for image above – While the example is not the smoothest lasso, I’ve managed to put another four flowers in the field just by using that one lassoed sunflower we started with. If you find the subject is too harsh and stands out as an edit, simply zoom in closer and blend with the clone tool.
To continue learning about editing, the following articles might be useful –
Learn How to Create Pastel Skies in Photoshop
How to Edit Your Travel Photos in Photoshop
Editing Tips: Common Photo Editing Questions and Answers
For more about learning photography, click through to the Photo Tips Archive here.
Did you find these editing tips helpful? If you’ve got any questions or want to know more, let me know in the comments below and I’ll answer them for you…
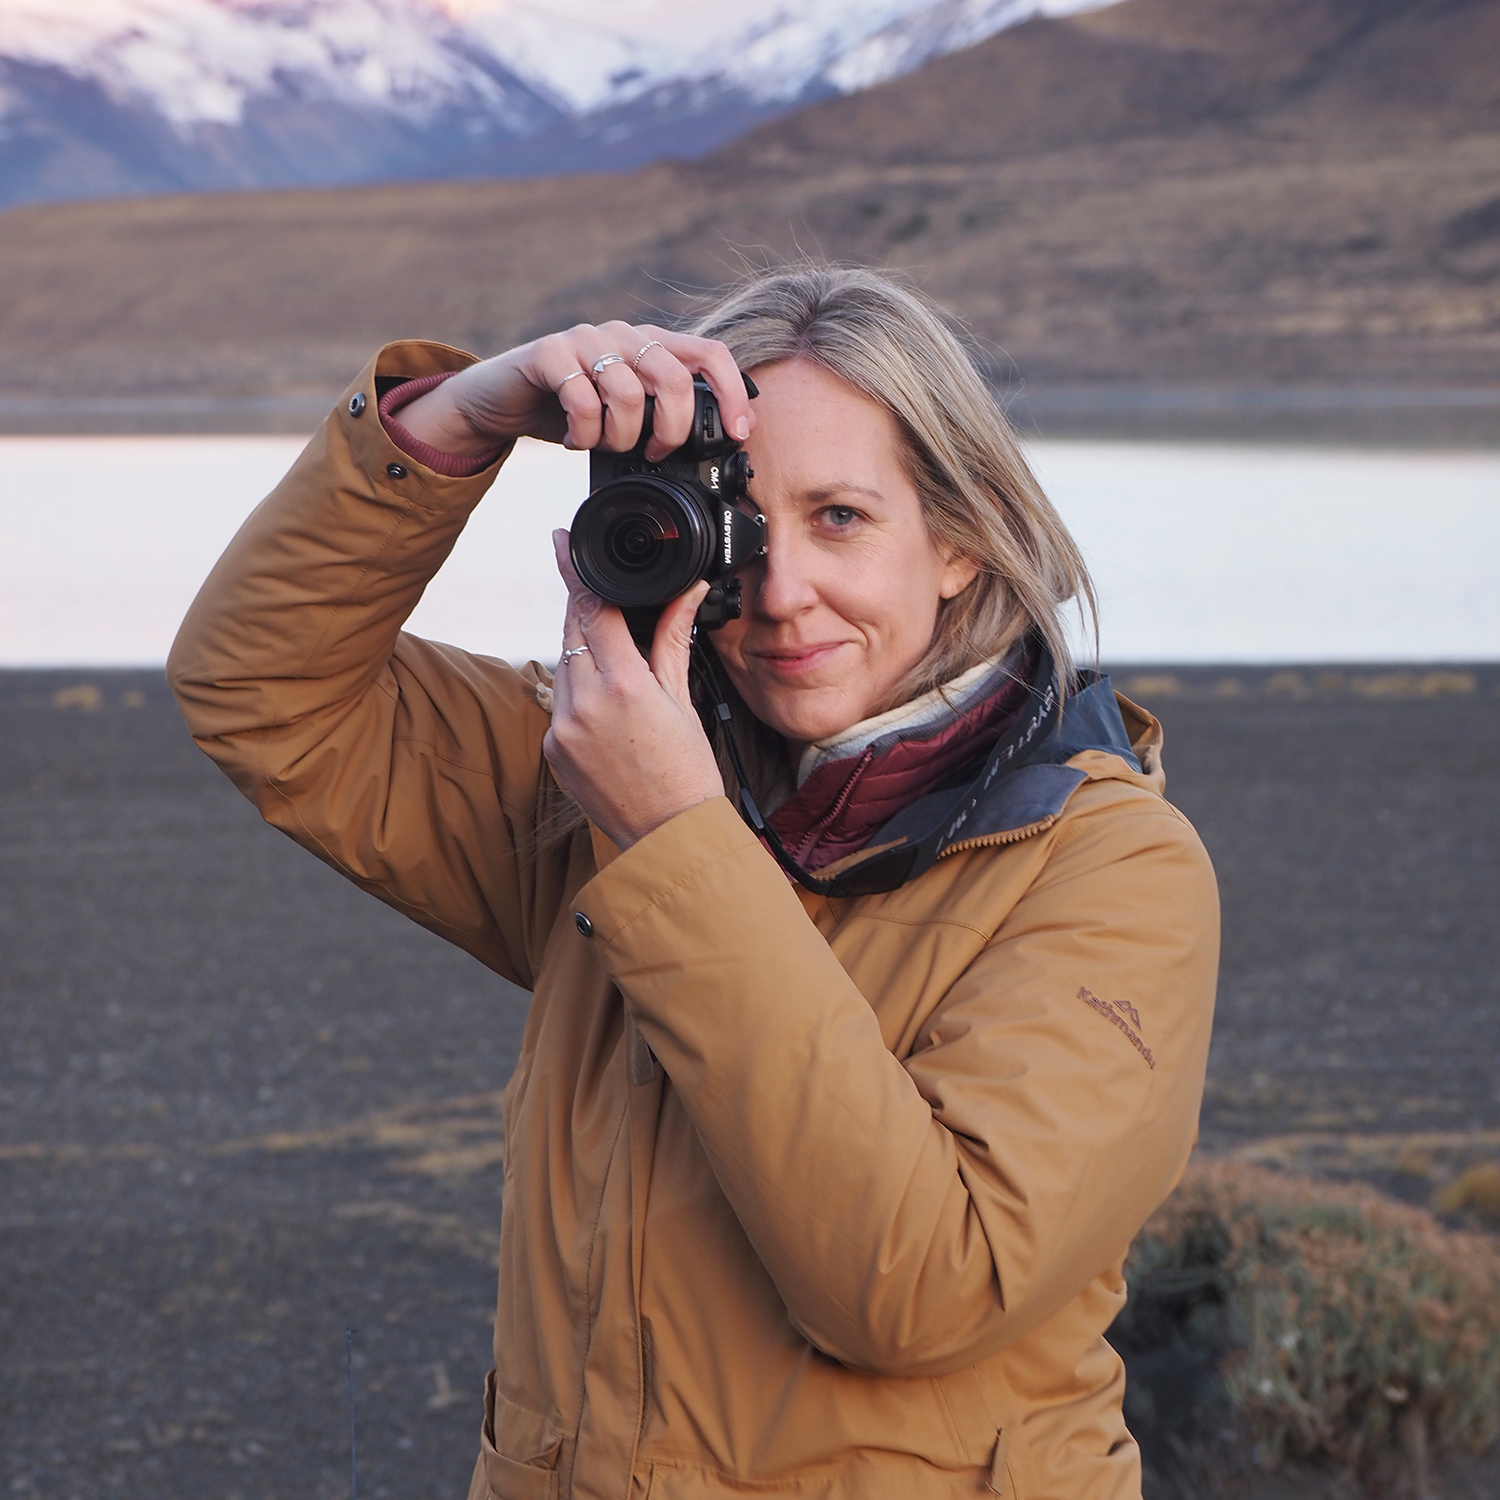
Hello! I’m the founder and photographer behind The Wandering Lens.
With 19+yrs experience as a professional travel and landscape photographer, all advice found on this site is from my personal experience, or that of contributors, on the road. I hope it’s useful for your own travels and would love to hear in the comments about your trips and experiences around the world.


Blog Comments
Justin
May 28, 2017 at 3:54 pm
YESSS Bandaid is the bomb! So awesome thanks for sharing 🙂
thewanderinglens
May 28, 2017 at 8:31 pm
Haha it’s pretty magic!
Keira Nitschke
May 28, 2017 at 8:27 pm
If I’m getting a weird reaction around the subject when using the bandaid how should I fix it?
thewanderinglens
May 28, 2017 at 8:31 pm
Sometimes the bandaid tool won’t have the perfect effect and may leave some warped blending in it’s path which might be what you’re talking about. Have you made sure that the ‘Content-Aware’ button is click in the top menu bar? If so, it may simply be a matter of doing the bandaid more than once or then using the clone stamp to fix up any errors that are occurring to blend it in properly.
Niki Gordon
June 15, 2017 at 6:56 am
Hello! I am just starting to venture out into manual mode on my camera and considering using photoshop in my editing in addition to lightroom.. baby steps! I would never have thought to use magnetic lasso to duplicate and add more flowers in that photo. I also probably never would have noticed the added flowers are the exact same if you didn’t point it out!
Thanks for the ideas and tips! Super excited to try it later this fall when the sunflowers are in bloom!
thewanderinglens
June 24, 2017 at 6:42 am
Great to hear Niki, it’s all a learning process and I’m sure you’ll be lassoing like a pro in no time! Feel free to tag your photos on Instagram with #thewanderinglens so I can see how you go 🙂 Actually, if you’re interested, I’ve got a private Facebook group where photographers both beginning and pros share their work and discuss all things photo + travel. Link to join up is https://www.facebook.com/groups/208554189649795/
Ross Alexander
October 25, 2020 at 9:18 am
I remember using Photoshop in the early 90s. I think my college had version 2. I remember being mesmerised by it and spent hours upon hours working on one piece of digital artwork. Being able to edit it on a screen and print it out was magic, but boy did it seem complicated at the time.
It’s still complicated and it has increased in complexity in terms of the tools that have been added, but they are better designed now so easier to use, along with my knowledge of the program over the years which has aided my control of the program.
I still feel like I only know a tiny percentage of what can be done with Photoshop though!