
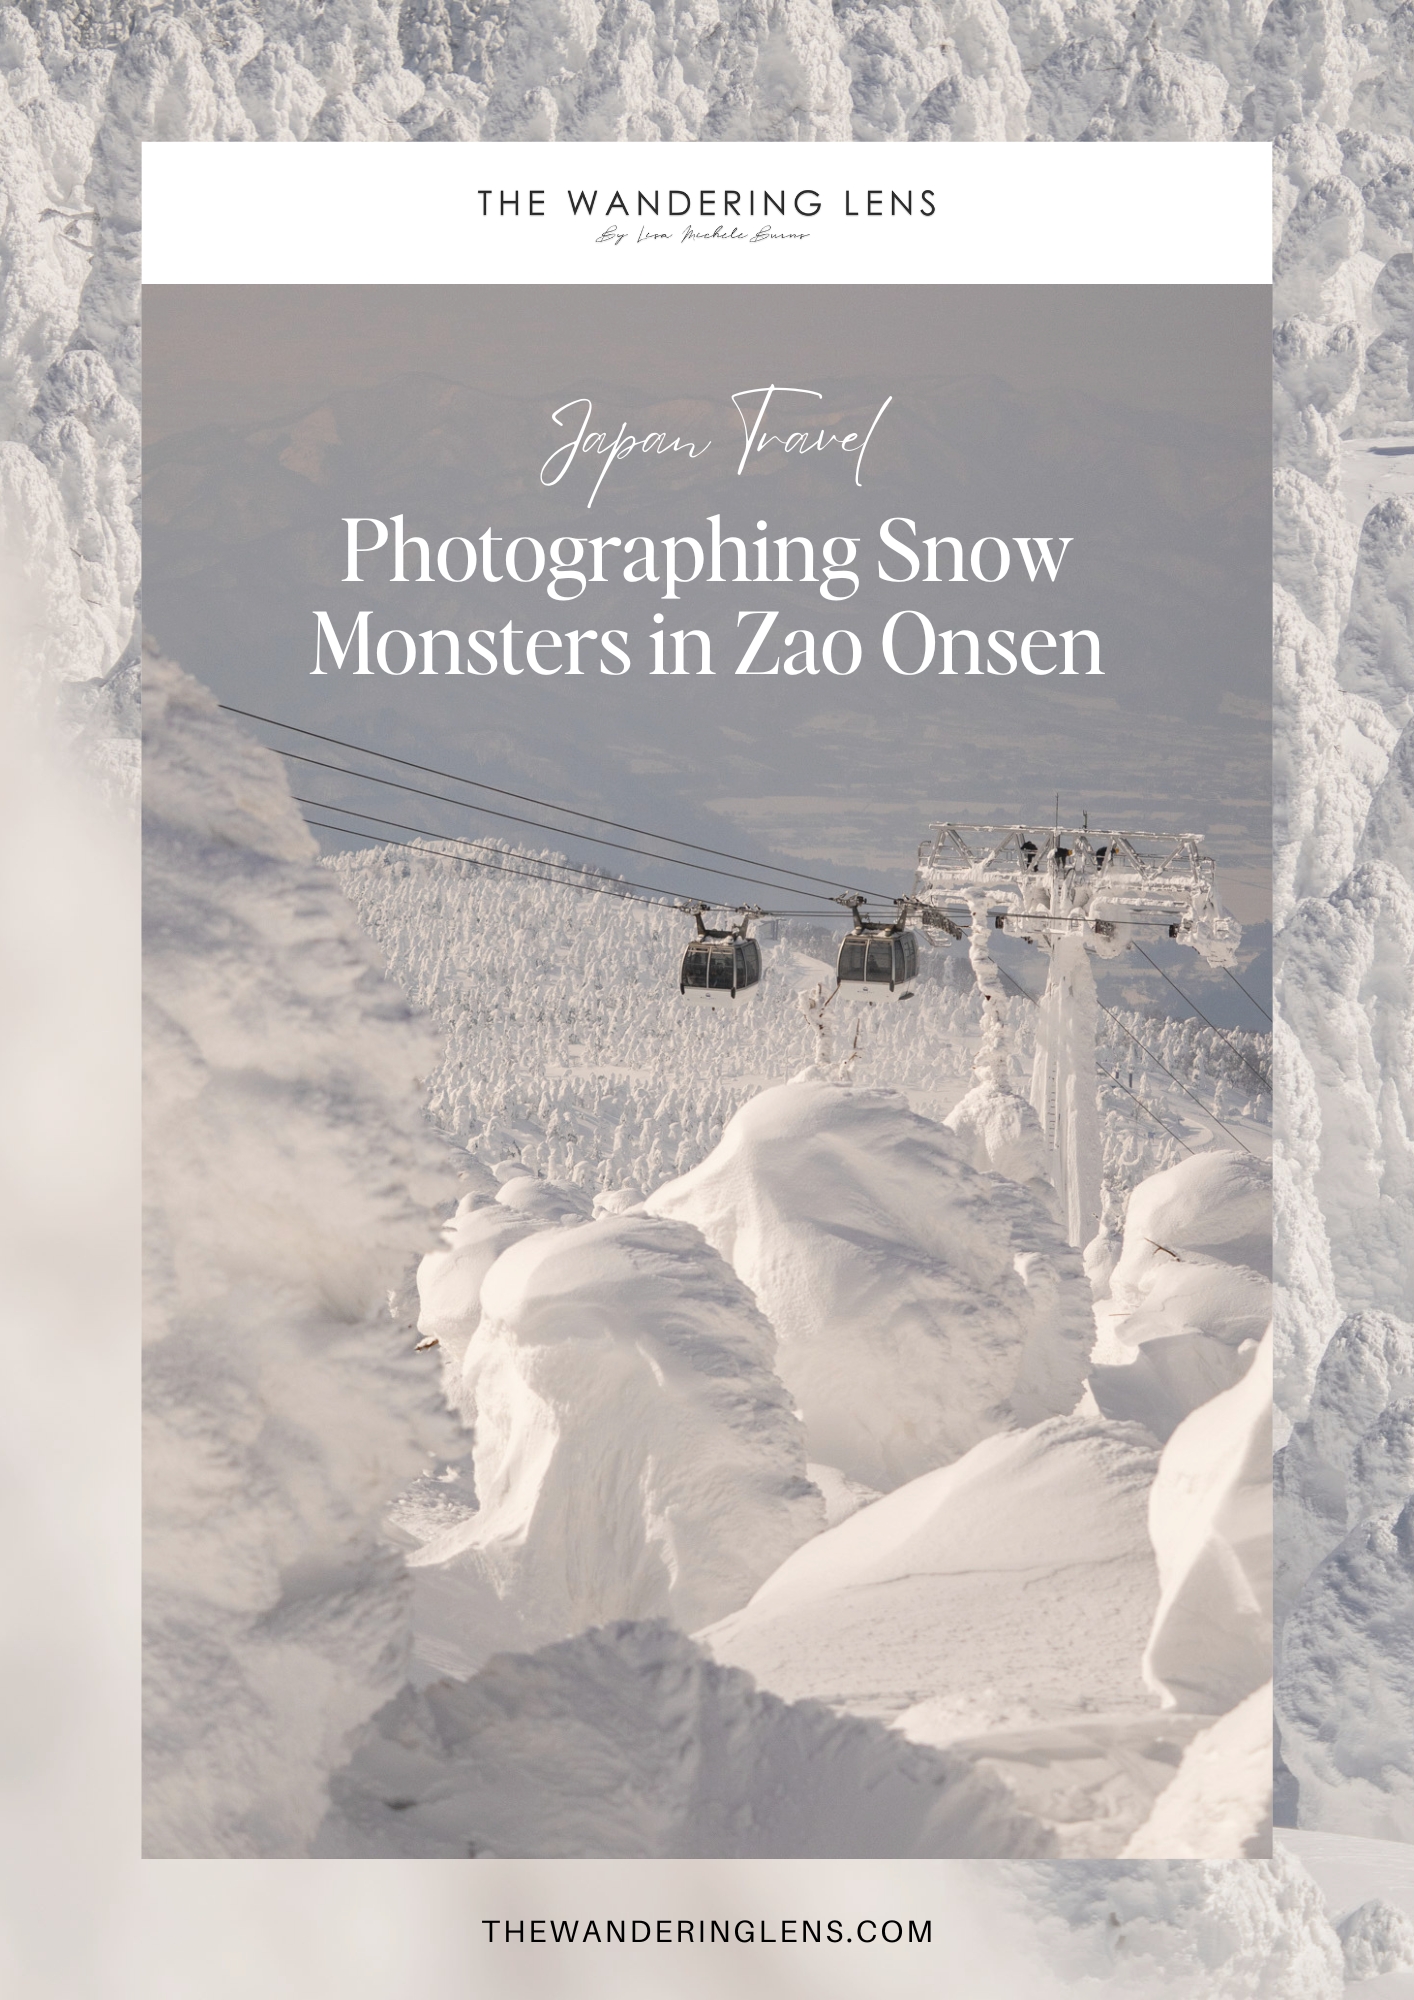
How to Photograph the Snow Monsters at Zao Onsen, Japan
When it comes to winter photography experiences, the Yamagata prefecture of Japan is hiding something pretty remarkable in the scenic village of Zao Onsen.
It’s a landscape and subject I’ve hoped to visit since I was a student visiting a host family in Japan at 15. I saw an image of this natural phenomenon and couldn’t get it out of my mind. Fast-forward 25 years…and I finally saw them. Now, I want to help you plan your visit, too.
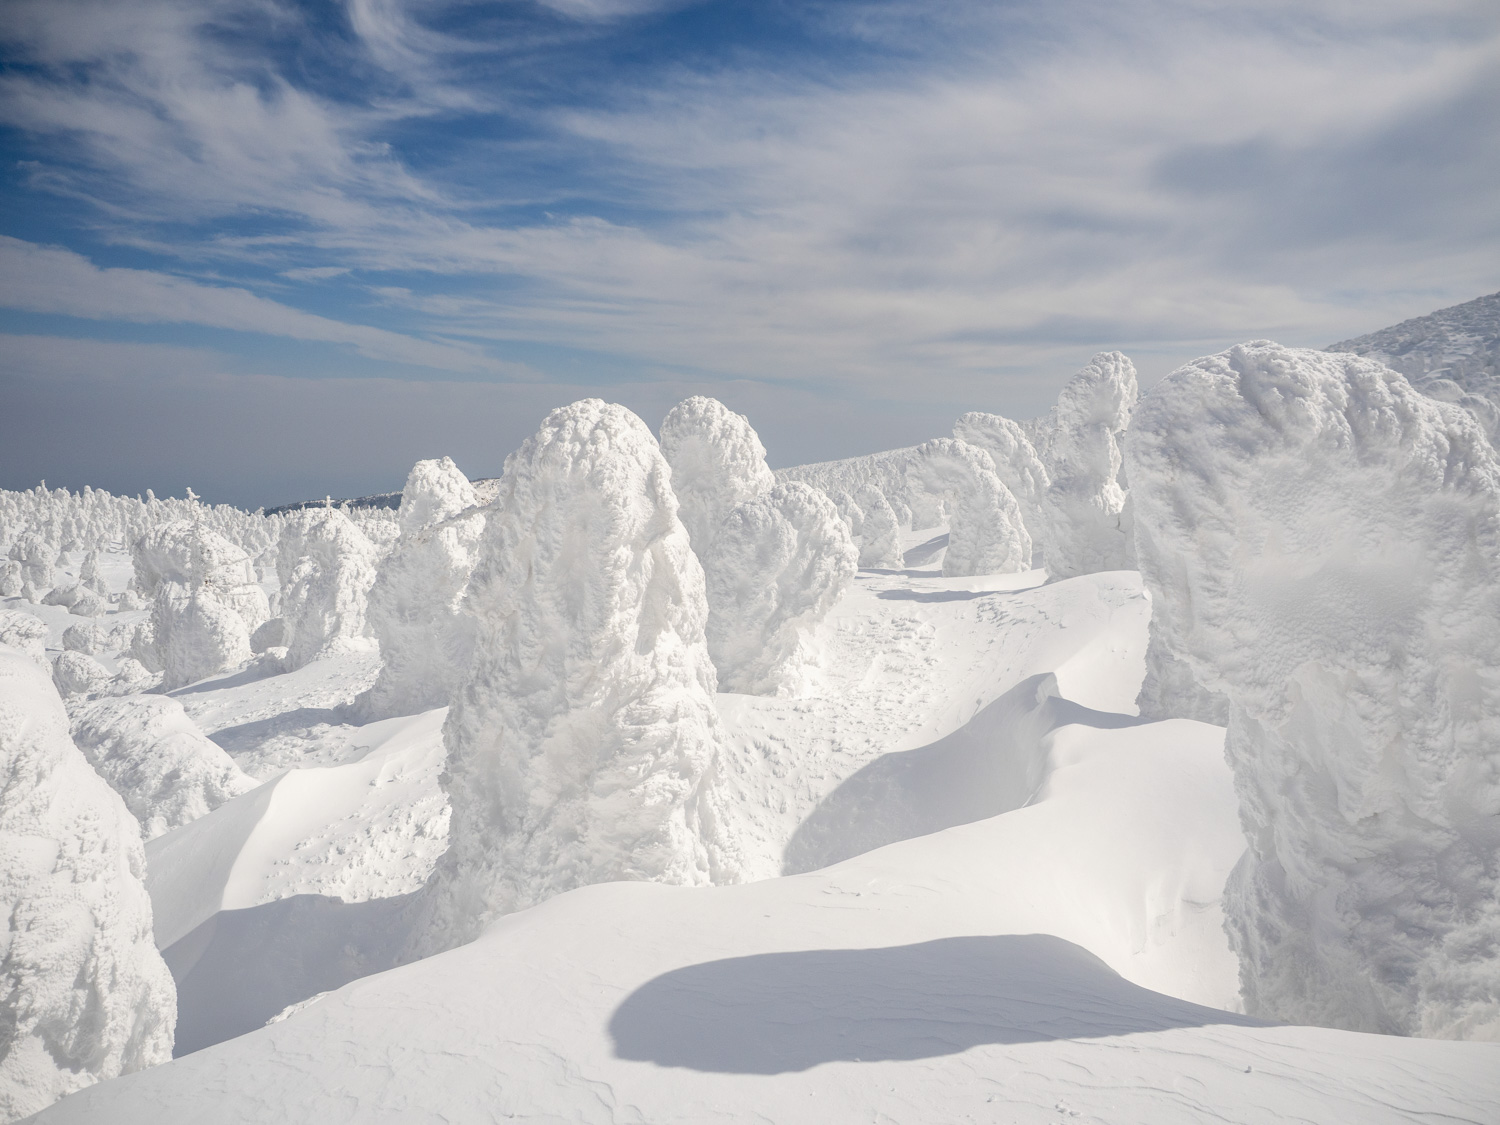
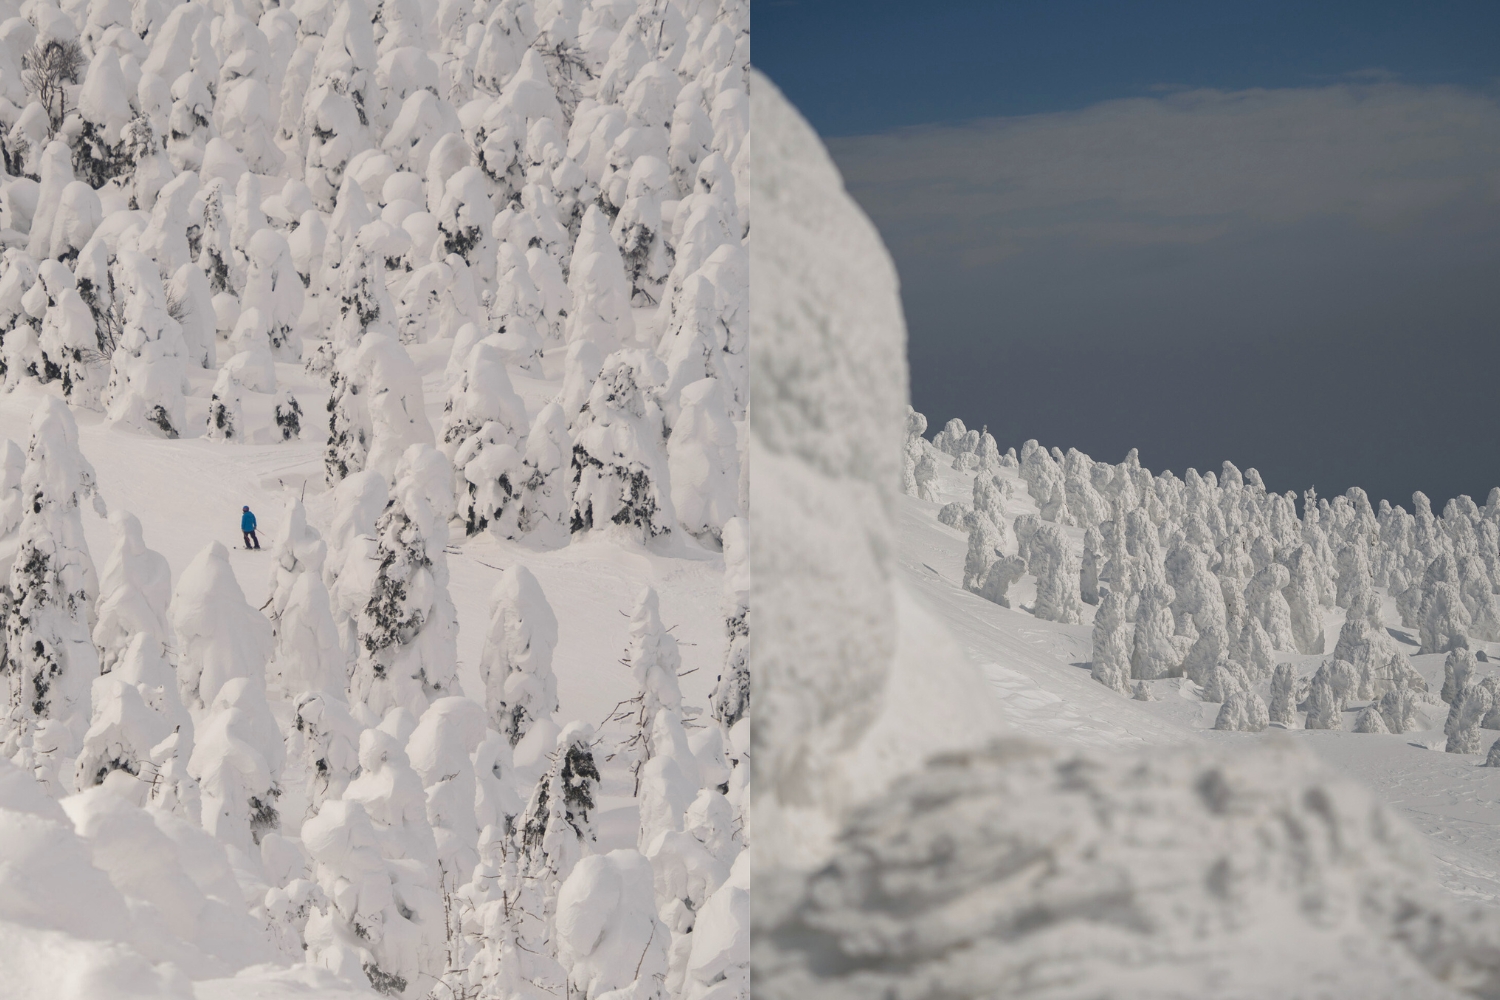
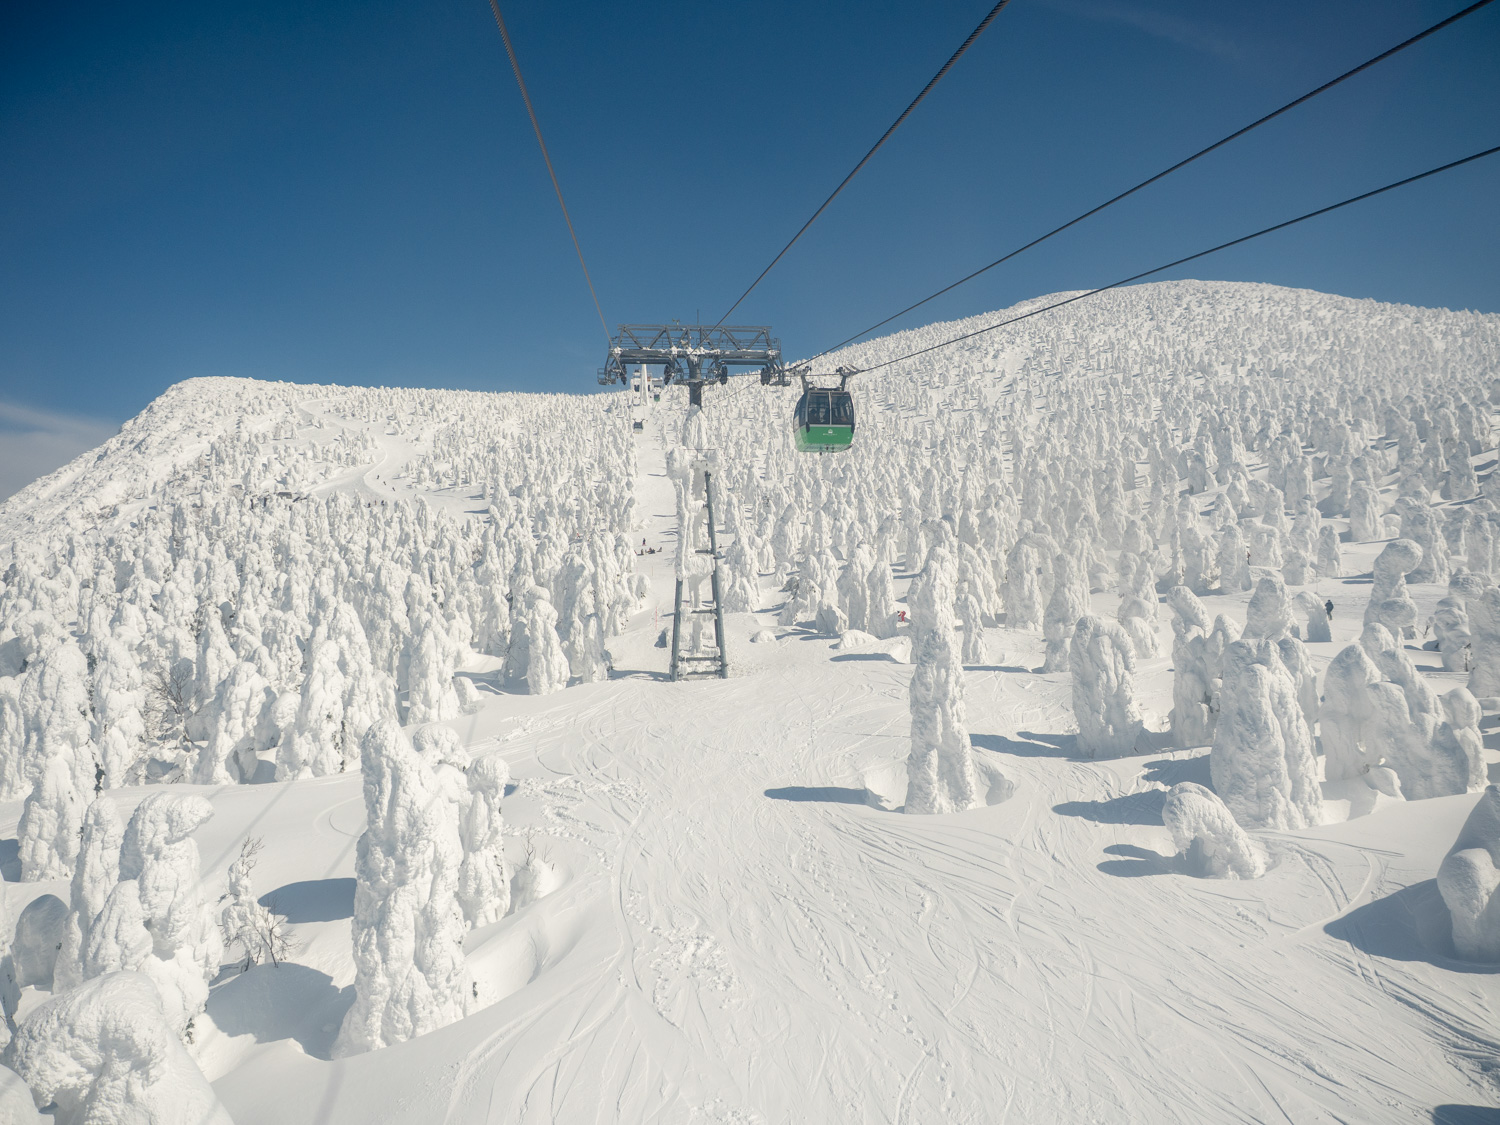
It’ll take two ropeway rides to reach the top, and halfway up, you’ll start to see them appear. First one, then the horizon will reveal thousands more, appearing to multiply across mountain peaks and into the distance.
I’m talking about Snow Monsters, also known as Juhyo. These frozen wonders are created as a result of strong Siberian winds, chilled water droplets and heavy snowfall across the winter months, formations that transform the landscape into a forest of monster-like trees.
The high altitude of Jizo Sancho Station, located just below the peak of Mt.Jizo which sits at 1,736m, helps these iced beauties remain solid, chunky and visible throughout winter.
Let’s take a look at how you can visit the snow monsters of Zao Onsen, when is the best time to see snow monsters, plus some photography tips on how to make the most of your visit to Zao.
The Best Time to Visit Zao Onsen?
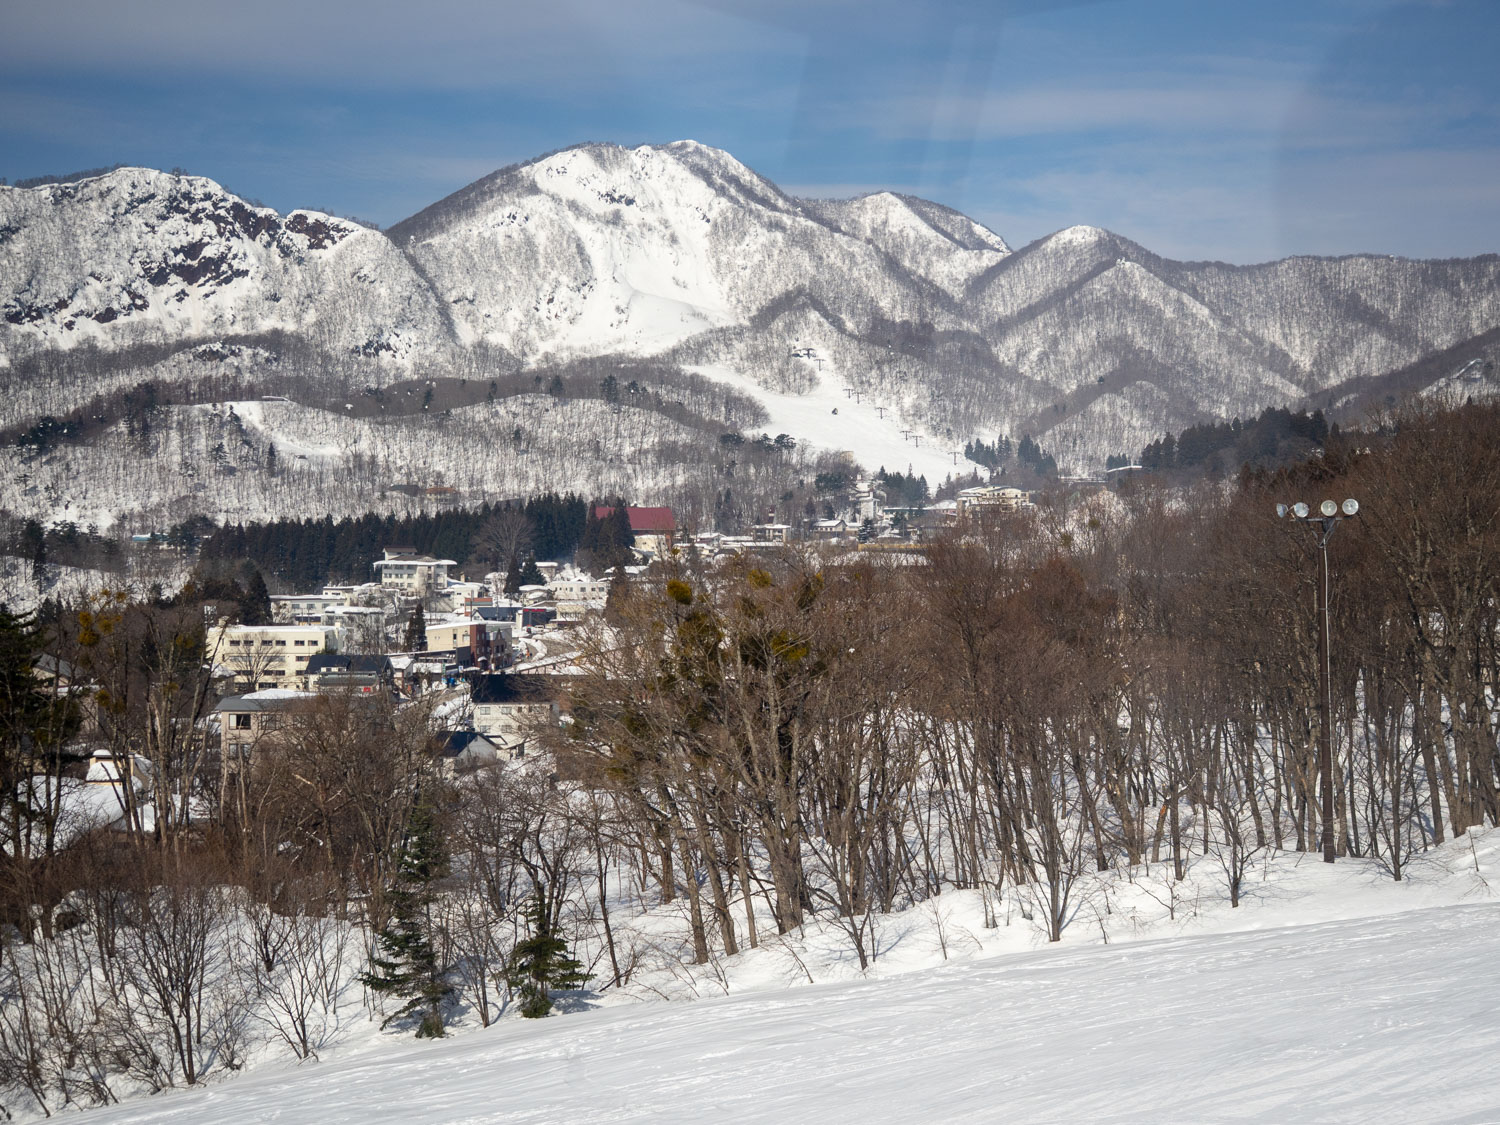
The village itself is photogenic and possible to visit throughout the year, with strong seasonal shifts meaning you can hike in the summer, see stunning autumn foliage in October, and wildflowers in May. If though, you’re planning a visit solely to photograph the snow monsters, you’ll want to time your visit well.
The Juhyo/Snow Monsters are formed as the conditions help to set the scene, meaning as the winter months progress, the formations will get bigger, and more obvious. It’s recommended to visit Zao in February for the best chances of seeing the snow monsters.
All images within this guide were captured on March 1st, after a blizzard hit the week before with consecutive -10 days. I’d recommend aiming for late February if possible, March could see early Spring conditions some years, so it’s best to aim for when winter conditions are more likely toward the tail end of the season.
*Keep scrolling to see how to get tickets and what to expect on the day as there can be very long queues!
Photography Opportunities amongst the Snow Monsters of Zao
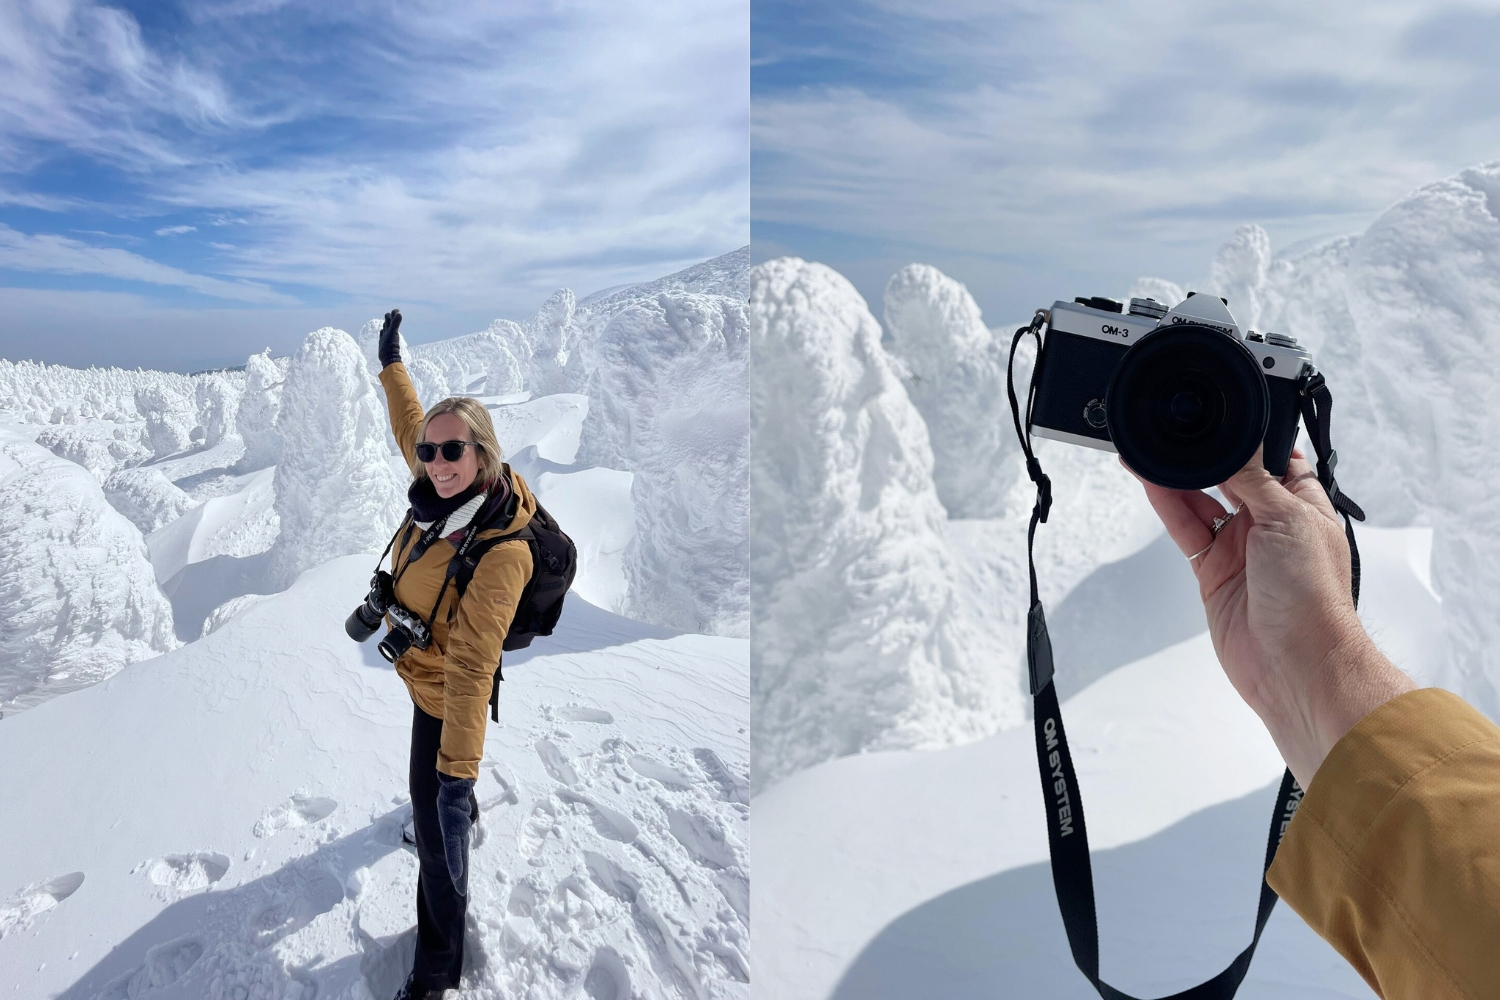
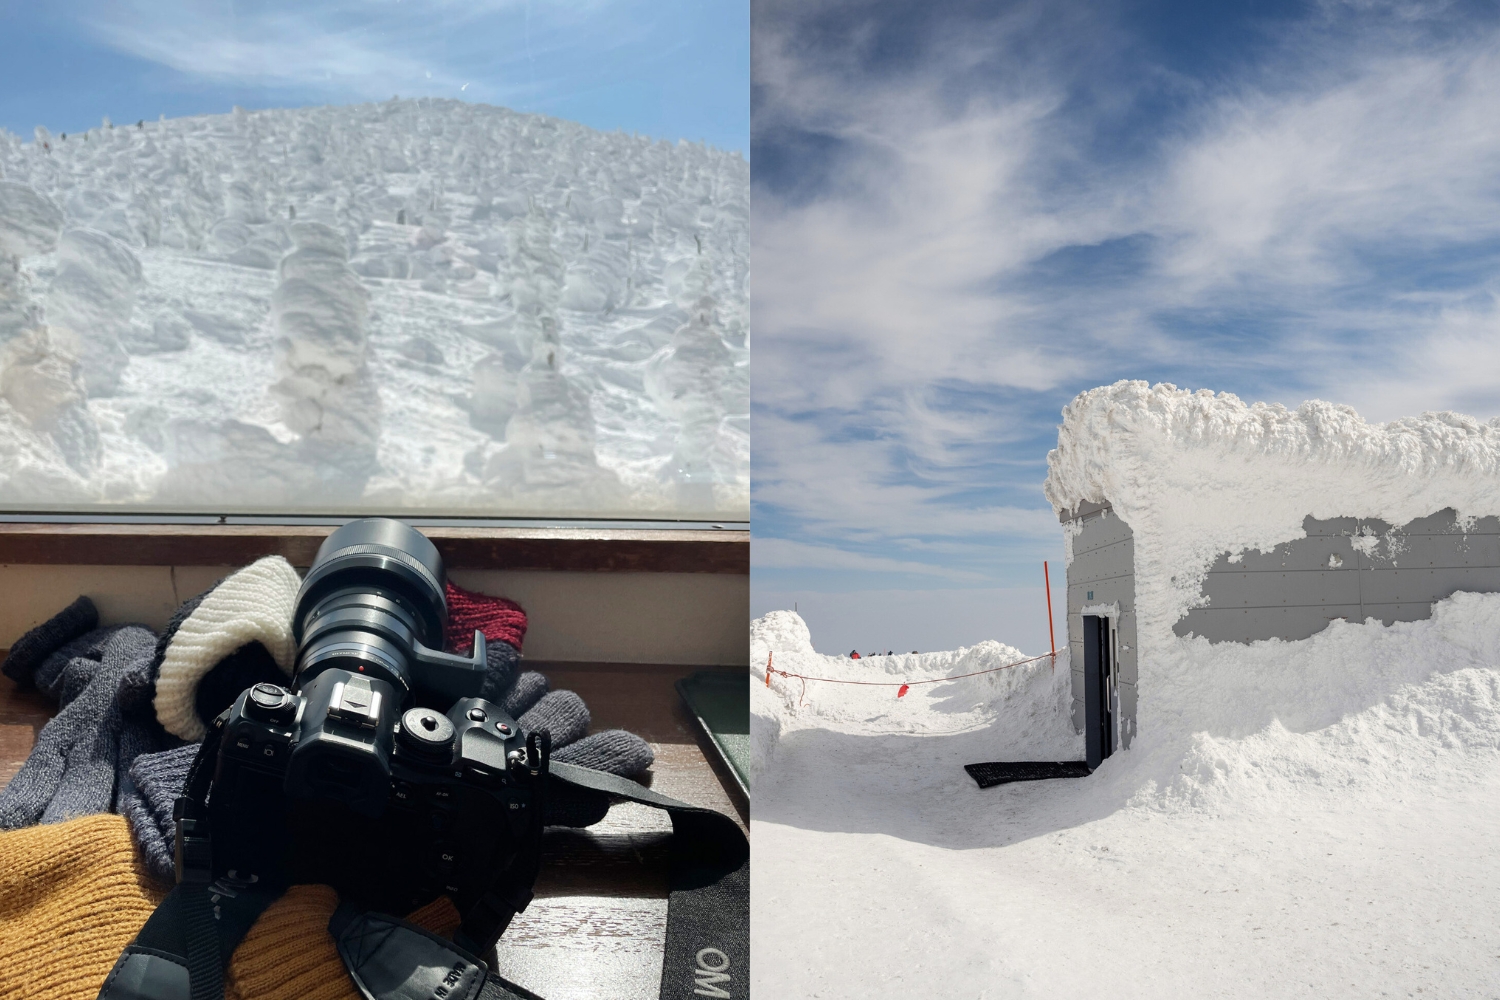
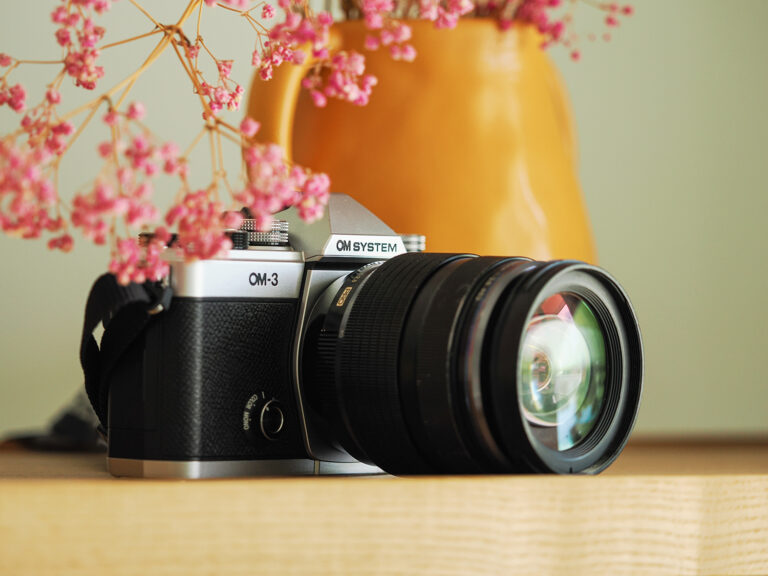
Before we get into the nitty gritty of what tickets to buy, and which bus to take, let’s look at the creative possibilities at the top! For landscape photographers, this place is a dream! I took two camera bodies and two lenses with me, the OM SYSTEM OM-3 and the OM-1 MKII, plus the M.Zuiko 12-40mm f2.8 pro lens, and the M.Zuiko 40-150mm f2.8 pro lens. In my camera bag I also had the MC-20 2 x teleconverter because I didn’t know how close the formations would actually be, and while I did use it, it’s not a necessity to have that extensive focal length as the scenery is all around you and quite close.
At the summit, you’ll find a network of trails that allow you to walk through the snow monsters themselves, some may be roped off for safety, but follow the set paths, or wander around the summit to scout composition possibilities.
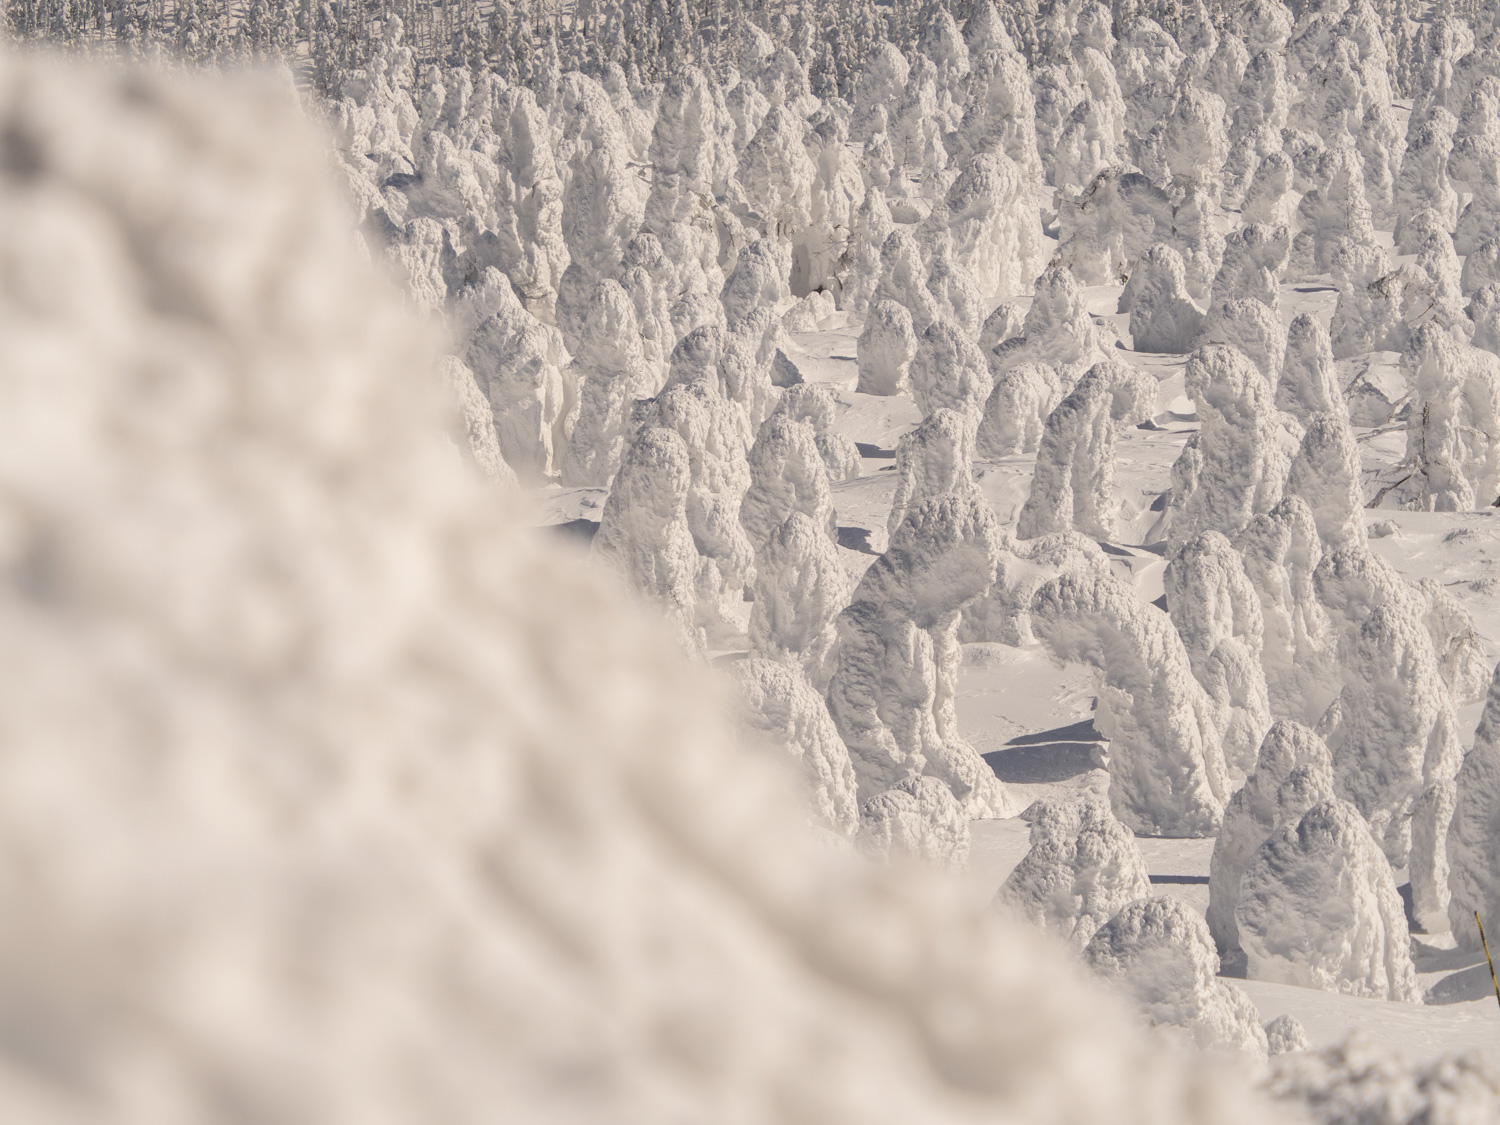
It is busy up there, but because the snow is so deep, there are plenty of chances to photograph the snow monsters and landscapes without any people in your shot. That was my main worry, but the scenery goes on and on across the peaks, and you’ll find people are mainly only on the ski runs.
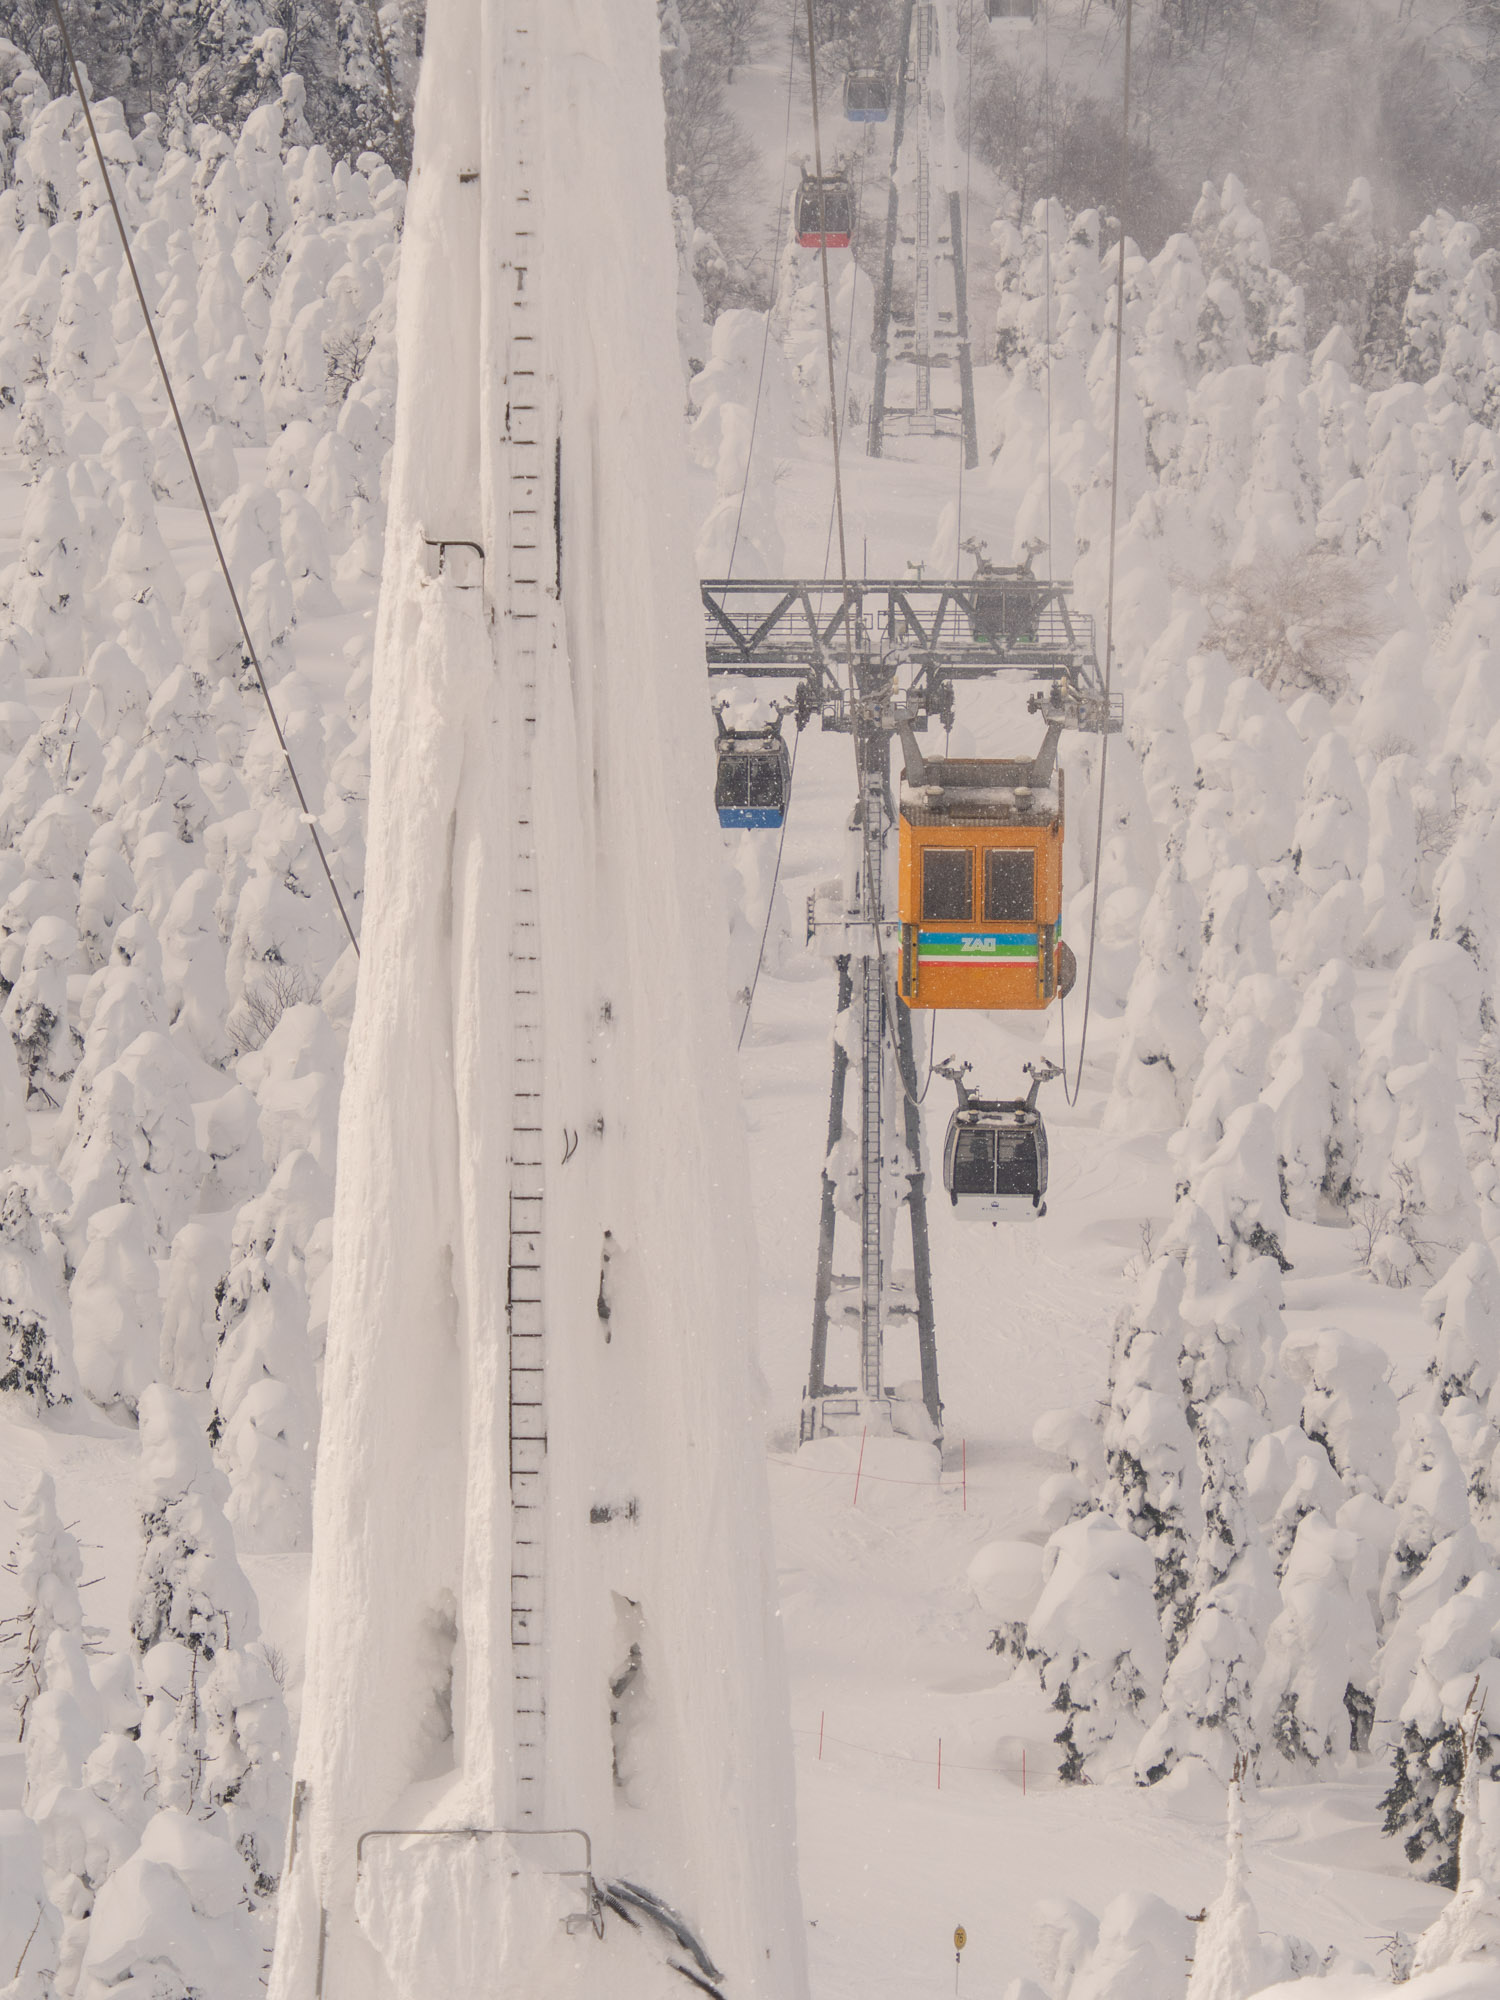
On the top level of the ropeway station, there’s actually a great viewing platform where you can photograph the colourful cable cars coming and going. Alternatively, another great vantage point for this is to the left once you exit the station.

Composition Tips for Snow Monsters:
- Look for the details and compose your shot to highlight the formations.
- Get low to the snow and ice to incorporate the frozen patterns and shimmer if it’s sunny.
- Attempt to find a snow monster that stands out in the distance, and assess how you can best frame it with the nearby foreground, or alternatively, how you can compose a minimal landscape image with little distraction.
- Move around, get low, shoot through other icy chunks, or get creative with your angle.
- Because the scene is quite stark and white, try to compose a shot that incorporates the sky to help provide a sense of place, or even take advantage of the colourful lifts as they glide through the landscape.
- Depending on the conditions you get during your visit, you may be able to work with shadows. The snow monsters are so tall, they cast shadows across the snow if the sunlight is strong enough, so move around and observe where this is happening.

A few tips for photographing at Zao
Cold weather affects batteries, so bring extras and keep them warm in your pockets. Moisture and condensation are also key concerns—let your gear acclimatise slowly when moving between warm indoor spaces and the freezing outdoors. A lens cloth or microfibre towel will help clear snow or fog from your lens during shoots.
Ensure you’re dressed for the conditions, it is freezing up there, and once the wind starts, the chill factor is no joke. If you’re planning on photographing all day, grab yourself some decent gloves and thermal layers, plus wind resistant and waterproof jackets and pants.
Oh and also, the cleats/snow spikes for your shoes are essential in winter. It made getting around, particularly in the slipper icy spots so much easier! We watched a lot of people struggle with the ice, but our shoes with the removable cleats had no issues.

How to Get to Zao Onsen
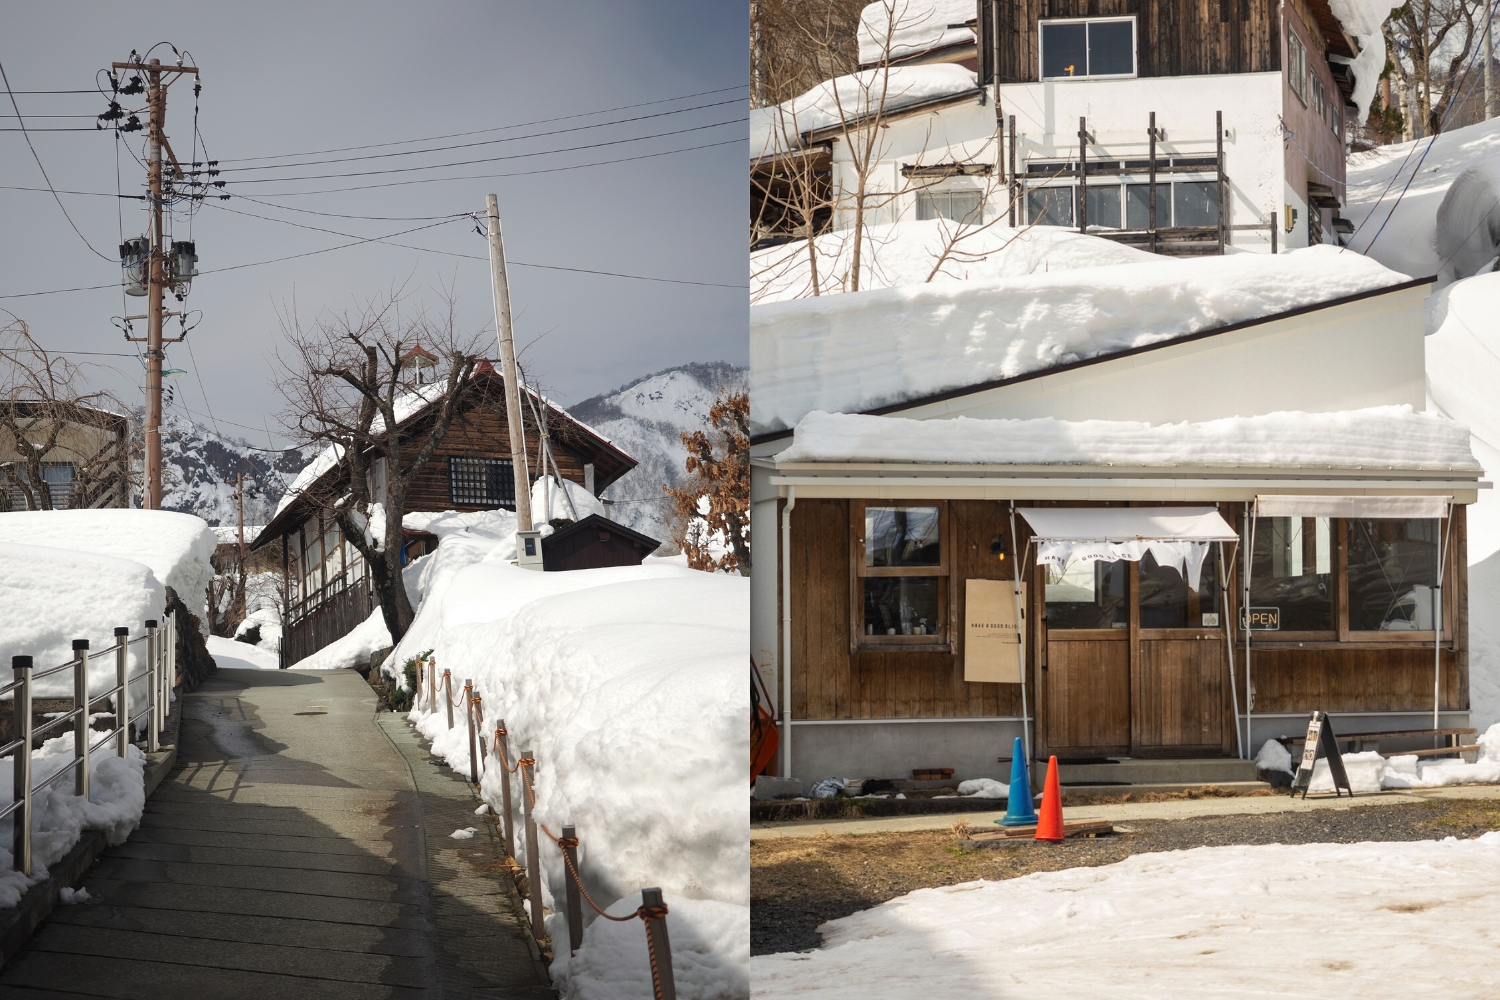
Reaching Zao Onsen feels like stepping off the well-trodden path and into a quieter rhythm of Japan, until you reach the ropeway that is, you’ll definitely find other people trying to get a glimpse of the snow monsters!
Located in Yamagata Prefecture, it’s accessible yet wonderfully removed, offering a peaceful mountain setting that’s particularly magical in the depths of winter.
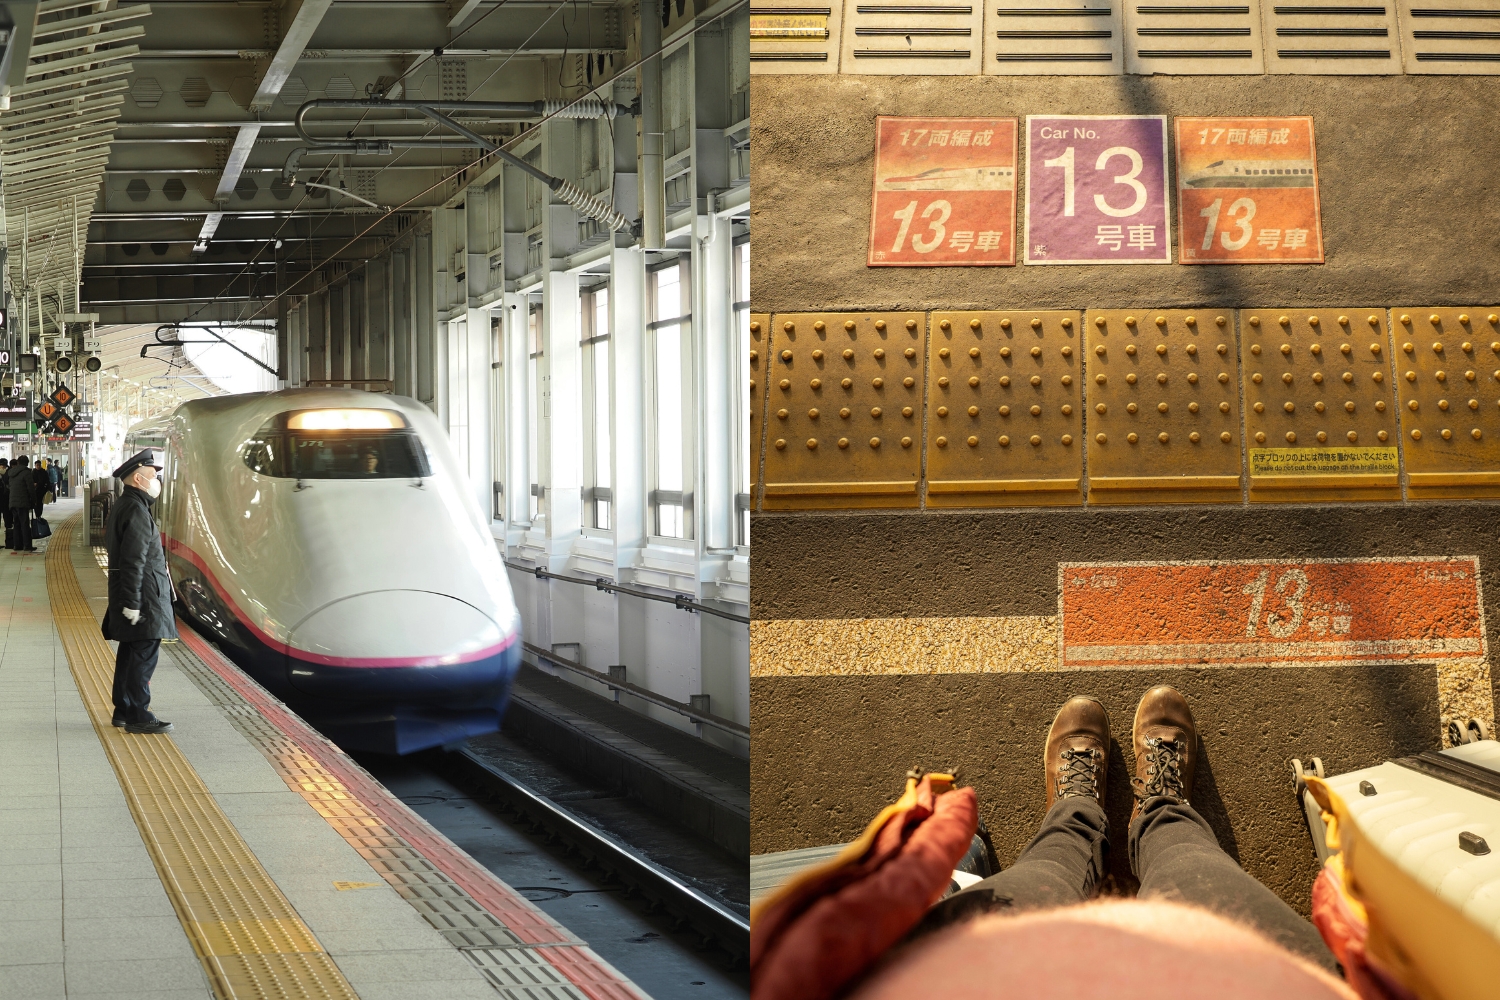
From Tokyo or Kyoto, the quickest route is via the Yamagata Shinkansen, which connects from Tokyo Station to Yamagata Station in approximately 2.5 to 3 hours. If you’re travelling from Kyoto, take the Tokaido Shinkansen to Tokyo first, then transfer to the Yamagata line. While the journey requires a connection, it flows smoothly, and watching the landscape shift from city sprawl to snowy countryside is part of the experience.
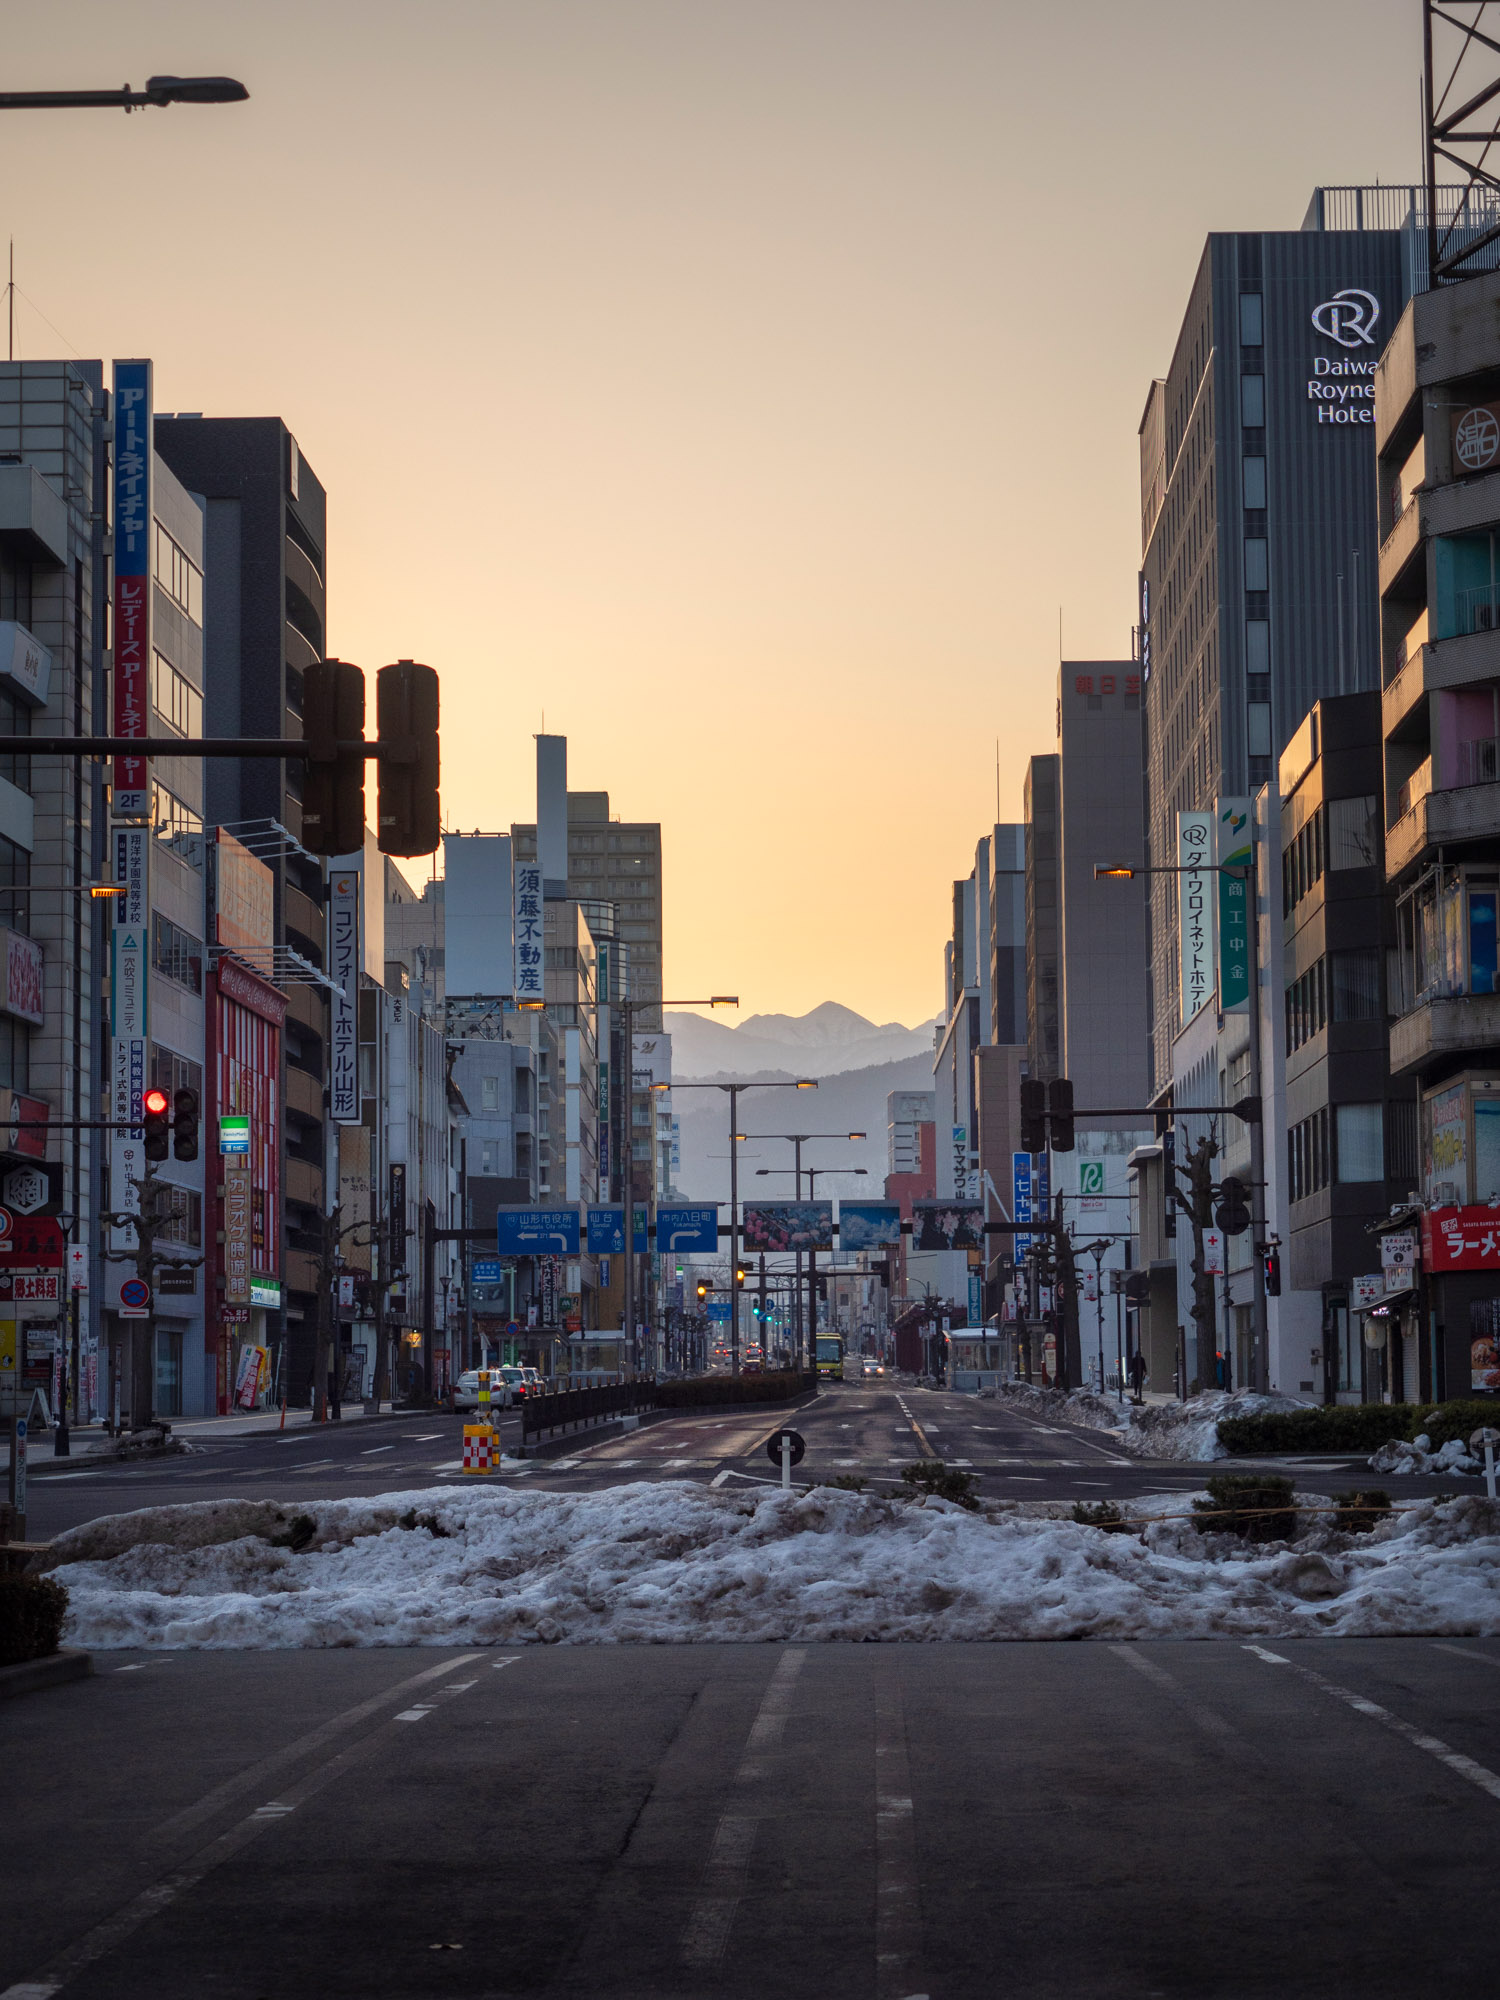
On my visit, I actually travelled south from Sapporo, on a 9hr train journey that required 4 transfers, but had spectacular scenery and very smooth connections in Shin-Hakodate-Hokuto, Sendai and Fukushima.
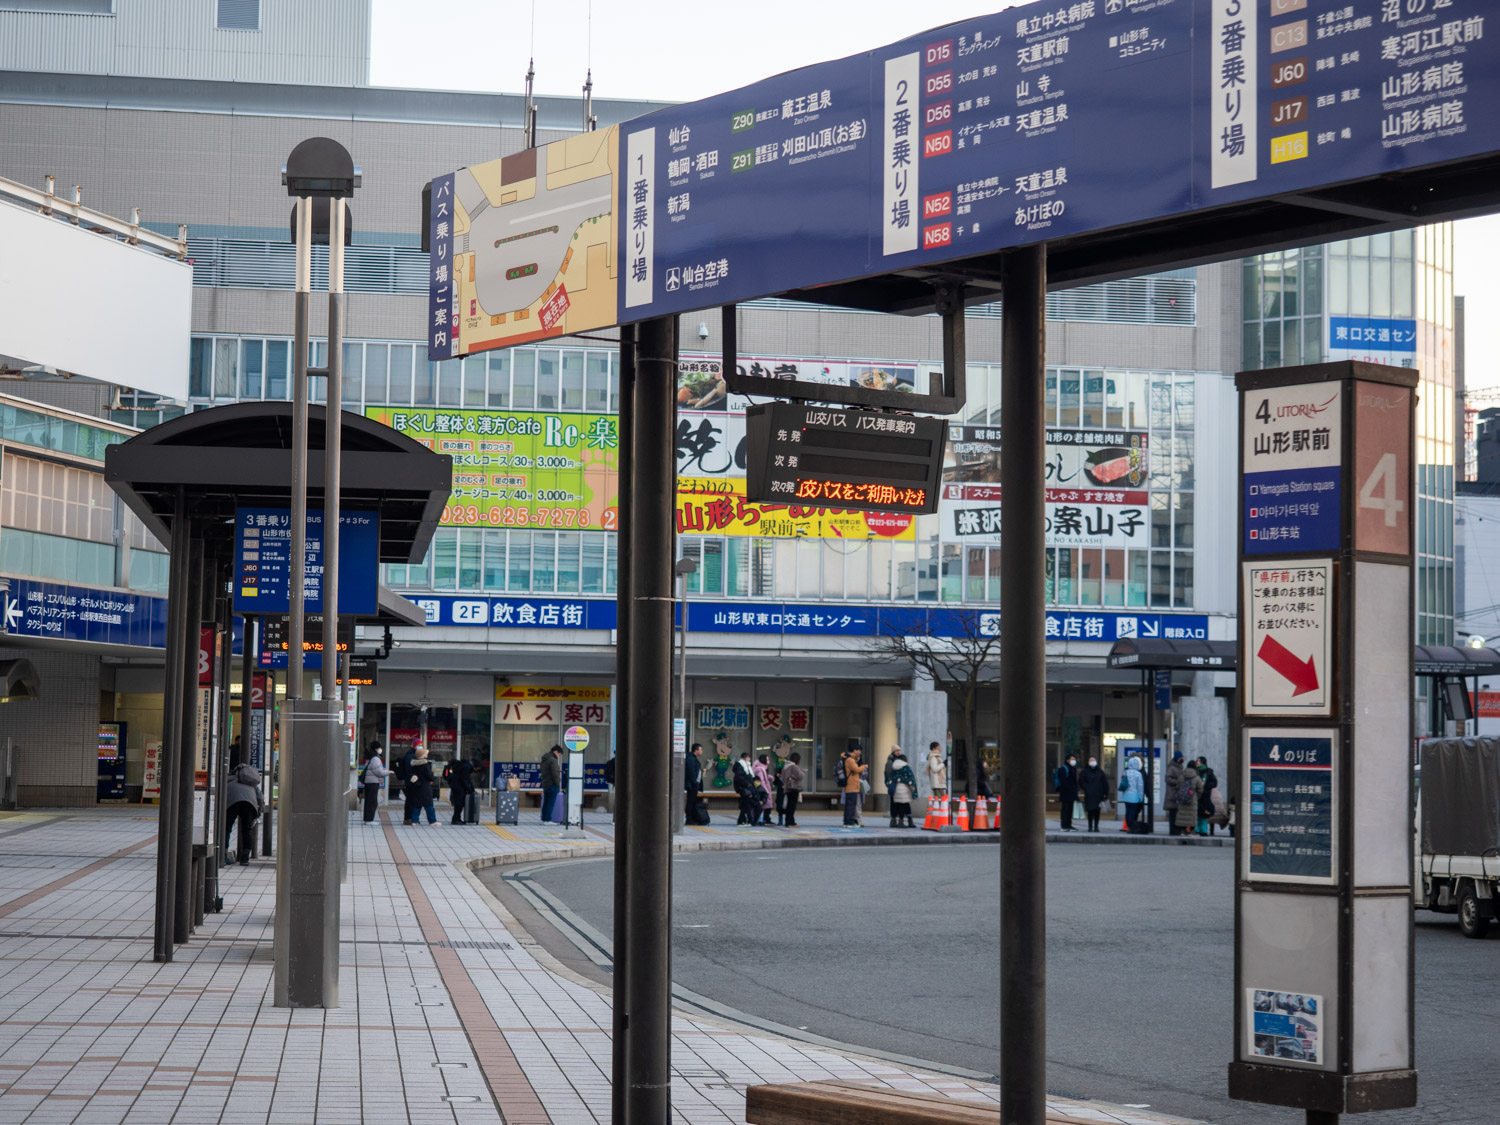
Once you arrive at Yamagata Station, you can either head straight to the bus terminal located just outside the East Exit, or, if you’re staying in Yamagata, I’d recommend booking a room at the Daiwa Roynet Hotel Yamagata Station , a 5-minute walk away, again via the East Exit of the station.
How to Take the bus to Zao Onsen:
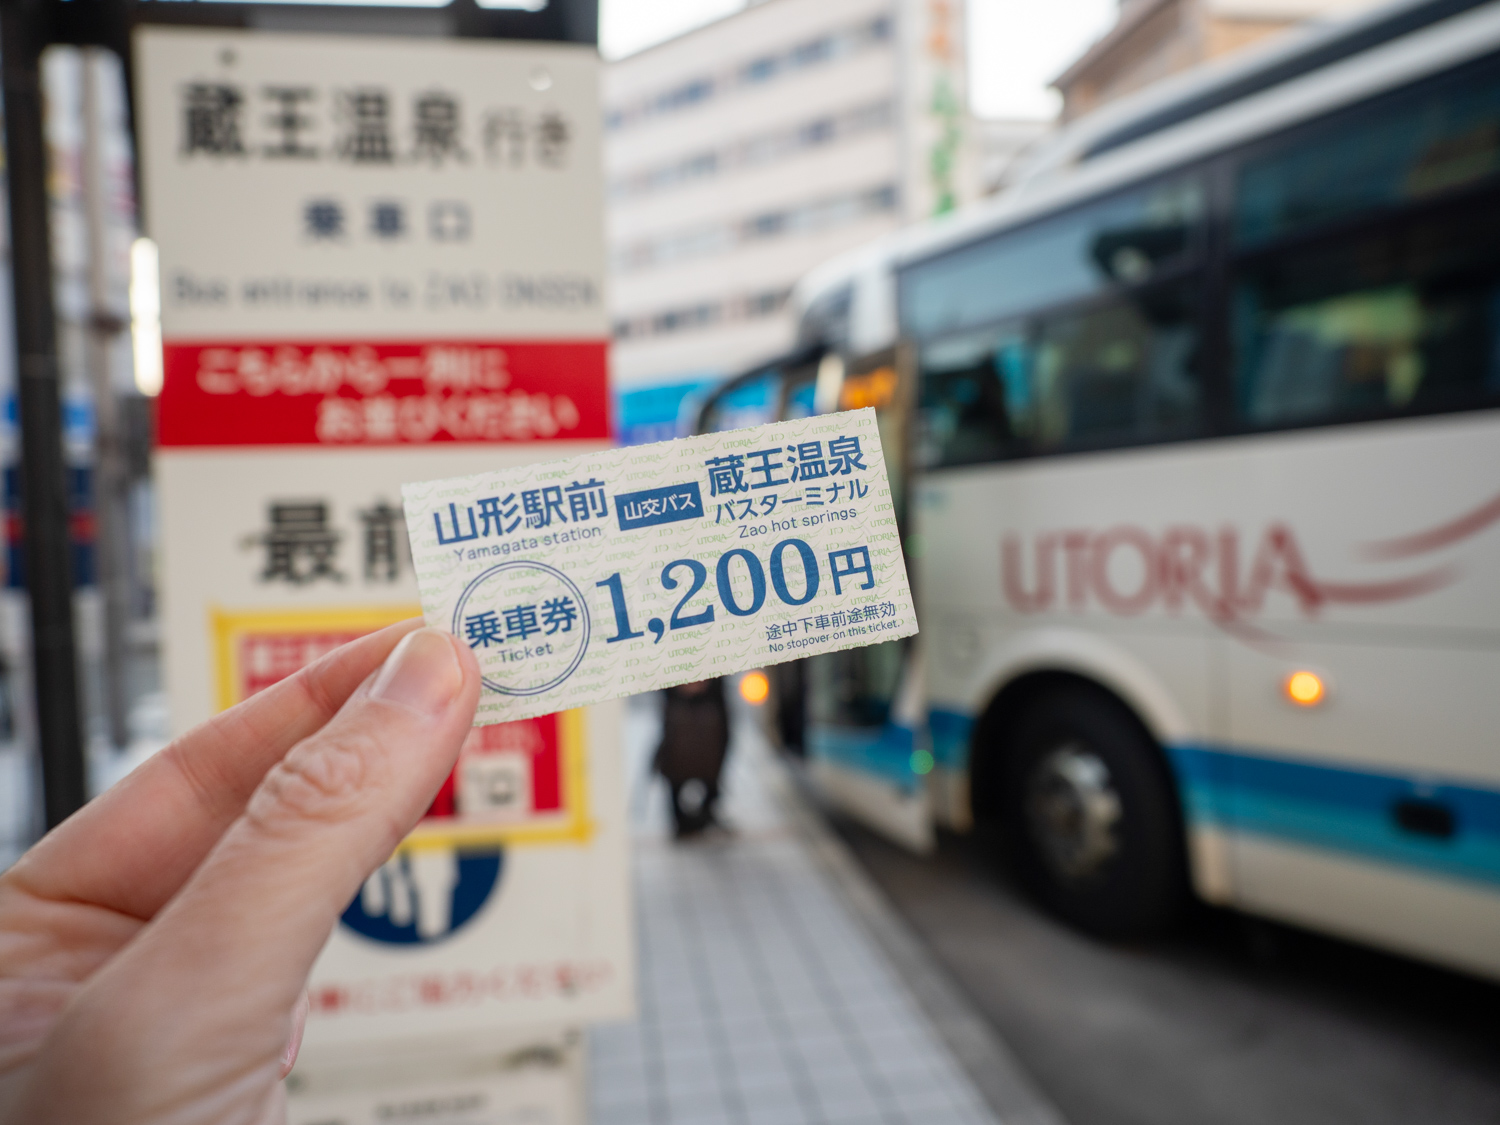
Local buses run frequently during winter to Zao Onsen Bus Terminal, taking around 40 minutes from BUS STOP 1 (Z90). If you’re carrying ski or camera gear, note that some buses have luggage space underneath. You can also purchase return bus tickets inside the station or on board, depending on the service. Note: You must purchase a ticket before boarding the bus and it can get crowded or booked out, so I’d advise purchasing these in advance, we managed to get tickets the day before from the bus station.
The bus station in Zao is about a 10-minute walk from the Ropeway Station, Zao Sanroku Station, in winter it can be a slippery walk so be sure to pack cleats/snow spikes for your shoes!
How to Buy Tickets for the Zao Ropeway:
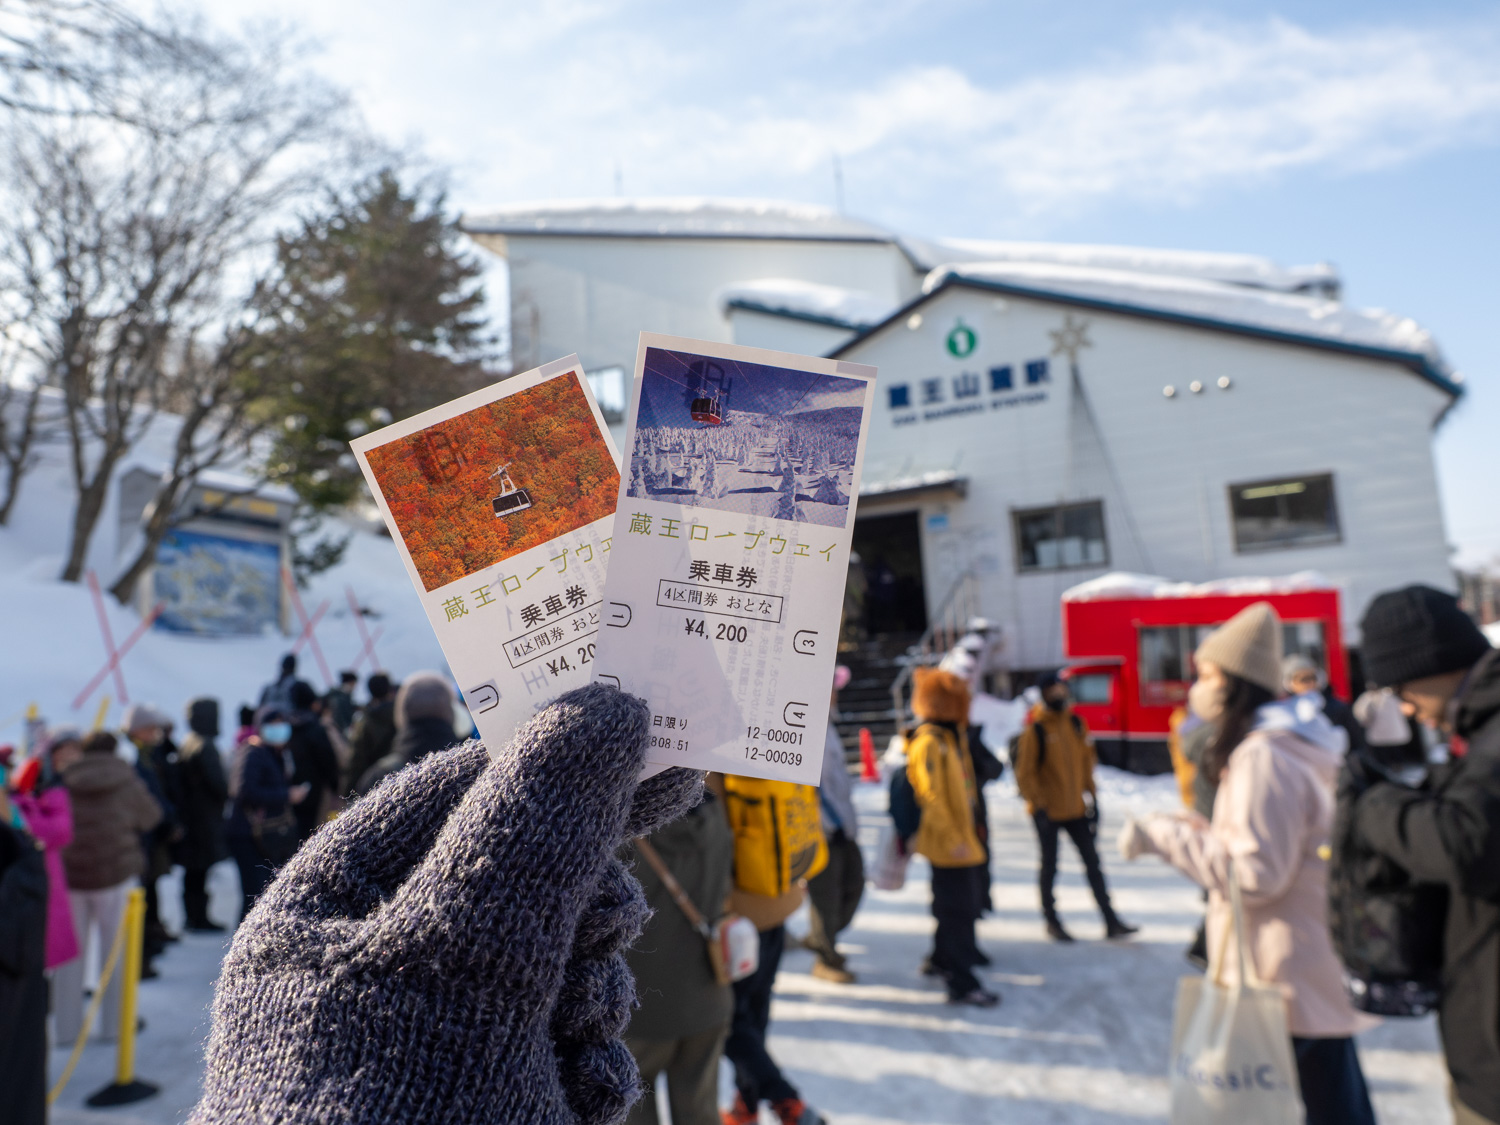
To photograph the snow monsters, take the Zao Ropeway which operates in two stages: from Zao Sanroku Station to Juhyo Kogen Station, and then up to Jizo Sancho Station. The second ropeway ride is where the true spectacle unfolds, endless white wonders dotting the high-altitude ridgelines.
For tickets, you’ll need the full return to Jizo Sancho Station. The price at the ticket machine in March 2025 was ¥4,200 per adult return.
There are a number of ways to purchase tickets, including at the ropeway building in Zao. However, tickets can sell out in winter due to the popularity, so I’d strongly recommend purchasing your tickets online here via Klook, so you can skip the queue and avoid waiting hours!
Slight warning – it can get extremely busy during winter, and the first stage in particular, gets a little squishy inside. If you’ve seen those videos of people being pushed into the trains during peak hour in Tokyo, it’s like that. I held my breath for the 7-minute ride and luckily, the second stage is much better in a more spacious gondola. Coming down didn’t have the same issue as people returned at different times, I think it was because we attempted to be first up the mountain, along with the other 800+ people 😊
If you’re purchasing tickets on the day, you’ll have to join the ticket queue first, use the ticket vending machines, and then re-join the other queue to ride the ropeway. We took the first bus from Yamagata, and still had to wait about 60 minutes for a ticket, then a further 60 minutes to finally get on the gondola. Absolutely worth the wait and I’d do it 100 times again because the snow monsters are so incredible, but if you can purchase online in advance, you save yourself that first hour in the cold!
There’s also the option of buying VIP tickets, so you can skip both queues and waltz past everyone else and straight onto the ropeway. There were several tours groups that did this, which is why the queue went so slowly. The Zao Ropeway website (https://zaoropeway.co.jp/winter/index.php) has further details in English + Japanese.
Where to Stay when visiting Zao Ropeway:
To make the most of photographing the snow monsters, it’s worth staying at least two nights in Yamagata or Zao Onsen, I stayed 3nights at the gorgeous (and surprisingly affordable) Daiwa Roynet Hotel Yamagata Station as it was close to the bus station for our chosen early departure and allowed time to have a full day at Zao, and a full day at Yamadera. This not only gives you time to explore the region and photograph in various light (eg sunrise/sunset), it also allows for some flexibility in case of snowfall or visibility changes. A fellow traveller we met in the queue for the ropeway, mentioned he came 10 days earlier and saw only 1 single snow monster because the visibility was so bad, it was only the tree beside the door he could see…luckily on March 1st, we could see for miles.
Staying in Yamagata City provides easy access to other photo-friendly sites like Yamadera and a wider selection of restaurants and accommodation options. Staying in Zao Onsen means you can be closer to the slopes (especially beneficial if you can ski or snowboard!) and the snow monsters or after dark for the night illuminations.
Just a quick note, the snow monsters are on the top station on the ropeway, even if you stay in Zao Onsen, you’ll still need to purchase tickets and take the ropeway to the top during operating hours. You can’t stay amongst the snow monsters.
If you end up visiting Zao and the snow monsters, I’d love to see your photos! Tag your photos #thetravelphotographyclub on Instagram and visit @thetravelphotographyclub or join our community of photographers here.
Photographing the snow monsters of Zao Onsen is like stepping into a scene from a winter fairytale. The frozen stillness, eerie tree forms, and soft snow underfoot make it one of Japan’s most magical winter landscapes. Whether you’re capturing wide snowy vistas or abstract close-ups, Zao offers a photography experience unlike anywhere else and I hope this guide has helped you planned your adventure.
Feel free to ask questions in the comments below and I’ll do my best to reply to them as they come in.
Travelling Japan? Read more guides!
The Best Photography Locations in Tokyo
Photographing Fushimi-Inari, The Red Torii Gates of Kyoto.
Perspectives: Arashiyama Bamboo Grove
Photographing a Sumo Tournament in Tokyo


Hello! I’m the founder and photographer behind The Wandering Lens.
With 19+yrs experience as a professional travel and landscape photographer, all advice found on this site is from my personal experience, or that of contributors, on the road. I hope it’s useful for your own travels and would love to hear in the comments about your trips and experiences around the world.
Leave a Comment